@clisdodo
2019-11-17T14:51:41.000000Z
字数 8172
阅读 5365
Oracle Enterprise Manager Cloud Control 13c Release 3 (13.3.0.0) 安装
OEL7.7 EMCC13 Oracle19c
AskScuti :搭建类 2级-EM EMCC 13.3 在 OEL 7.7 上的安装
你需要知道的
- 文章浏览时,你可点击右上角图标
 内容目录进行标题内容切换
 - 本次 EMCC 的文档资料库选择建立在 Oracle 19c (Non-CDB) 版本上,你也可以选择 12c / 18c 或其他版本
- 你需要熟悉如何去搭建 Linux 操作系统,可参考 0 级搭建类相关文档完成此操作
- 你需要熟悉在 Linux 操作系统上如何安装 Oracle 19c,可参考 1 级搭建类文档 105 或 106 来完成该操作
- 你可以在 Oracle Enterprise Manager Downloads 获取 EMCC 官方资源
- 你可以在 这里 或 公有云这里 获取 Oracle 19c 官方资源
- 服务端及客户端(代理)环境
| 环境 | 服务端 | 客户端 |
|---|---|---|
| 主机名 | emcc | askscuti |
| IP | 192.168.1.113 | 192.168.1.10 |
| OS | OEL 7.7 | CentOS 8 |
| 数据库 | 19.3.0.0.0 | 19.3.0.0.0 |
| Container | Non-CDB | CDB |
| PDB_NAME | / | ORDERS |
| ORACLE_SID | emcc13 | CDB19c |
- 服务端存储端环境如下,供参考
| 磁盘分区 | 大小 | 挂载目录 | 作用 |
|---|---|---|---|
| /dev/sdb1 | 50G | /u01 | 安装文档资料数据库 |
| /dev/sdc1 | 100G | /cloud | 安装EMCC |
| /dev/sdd1 | 50G | /soft | 单独存放软件 |
| /dev/sde1 | 20G | /tmp | At least 12289 MB of free space |
1 操作系统安装
- 参考 0 级搭建类 011 Oracle Linux 7.7 安装
2 环境配置
2.1 主机名及IP
编辑 /etc/hosts 文件,添加 IP 及对应主机名
echo "192.168.1.113 emcc" >> /etc/hosts
2.2 用户和组
/usr/sbin/groupadd -g 54321 oinstall/usr/sbin/groupadd -g 54322 dba/usr/sbin/groupadd -g 54323 oper/usr/sbin/groupadd -g 54324 backupdba/usr/sbin/groupadd -g 54325 dgdba/usr/sbin/groupadd -g 54327 asmdba/usr/sbin/groupadd -g 54328 asmoper/usr/sbin/groupadd -g 54329 asmadmin/usr/sbin/useradd -u 54330 -g oinstall -G dba,oper,backupdba,dgdba,asmadmin oracle# passwd oracle
2.3 文件夹及权限
mkdir -p /u01/app/oracle/product/19.3.0/dbhome_1mkdir -p /u01/app/oraInventorychown -R oracle:oinstall /u01chmod -R 775 /u01mkdir -p /cloud/app/oracle/product/13c/dbmkdir -p /cloud/app/oracle/middlewaremkdir -p /cloud/app/oracle/agentchown -R oracle:oinstall /cloud/appchmod -R 755 /cloud/app
2.4 RPM包
# 本地 YUM 源配置mount /dev/cdrom /mntmv /etc/yum.repos.d/* /tmpecho "[local_yum]" >> /etc/yum.repos.d/scuti.repoecho "name = scuti" >> /etc/yum.repos.d/scuti.repoecho "baseurl = file:///mnt/" >> /etc/yum.repos.d/scuti.repoecho "enabled = 1" >> /etc/yum.repos.d/scuti.repoecho "gpgcheck = 0" >> /etc/yum.repos.d/scuti.repoyum repolist all# 相关包yum -y install autoconfyum -y install automakeyum -y install binutilsyum -y install binutils-develyum -y install bisonyum -y install cppyum -y install dos2unixyum -y install ftpyum -y install gccyum -y install gcc-c++yum -y install lrzszyum -y install python-develyum -y install compat-libcap1yum -y install compat-libstdc++-33yum -y install compat-libstdc++-33.i686yum -y install glibc-*yum -y install glibc-*.i686yum -y install libXpm-*.i686yum -y install libXextyum -y install libXext.i686yum -y install libXtstyum -y install libXtst.i686yum -y install libX11yum -y install libX11.i686yum -y install libXauyum -y install libXau.i686yum -y install libxcbyum -y install libxcb.i686yum -y install libXiyum -y install libXi.i686yum -y install libstdc++.i686yum -y install libstdc++-develyum -y install libstdc++-devel.i686yum -y install libaioyum -y install libaio.i686yum -y install libaio-develyum -y install libaio-devel.i686yum -y install kshyum -y install libXpyum -y install libaio-develyum -y install numactlyum -y install numactl-develyum -y install make -yyum -y install sysstat -yyum -y install unixODBCyum -y install unixODBC-develyum -y install elfutils-libelf-develyum -y install redhat-lsb-coreyum -y install unzipyum install -y libXrenderyum install -y libXrender-develyum install -y nfs-utilsyum install -y smartmontools
2.5 资源限制
编辑 /etc/security/limits.conf 文件,添加以下内容,内存大于8G需配置大内存页,当前内存环境大小 16G
oracle soft nproc 16384oracle hard nproc 16384oracle soft nofile 16384oracle hard nofile 65536oracle soft stack 10240oracle hard stack 32768oracle hard memlock 8192000oracle soft memlock 8192000
2.6 SHELL限制
echo "session required pam_limits.so" >> /etc/pam.d/login
2.7 内核参数
编辑 /etc/sysctl.conf 文件,注意 shmmax 和 shmall 参数,修改建议请参考阿里云12cR2内核参数章节。
fs.aio-max-nr = 1048576fs.file-max = 6815744kernel.shmmax = 15461882265kernel.shmall = 3774873kernel.shmmni = 4096kernel.sem = 250 32000 100 128net.ipv4.ip_local_port_range = 9000 65500net.core.rmem_default = 262144net.core.rmem_max = 4194304net.core.wmem_default = 262144net.core.wmem_max = 1048586kernel.panic_on_oops = 1
使之生效
sysctl -p
2.8 关闭防火墙
systemctl status firewalld.servicesystemctl stop firewalld.servicesystemctl disable firewalld.service
2.9 关闭SELINUX
编辑 /etc/selinux/config 文件
SELINUX=disabled
2.10 用户变量
# 切换 oracle 用户# 编辑 .bash_profile 添加以下行PS1="[`whoami`@`hostname`:"'$PWD]$'export PS1export TMP=/tmpexport LANG=en_USexport TMPDIR=$TMPexport ORACLE_UNQNAME=emcc13ORACLE_SID=emcc13; export ORACLE_SIDORACLE_BASE=/u01/app/oracle; export ORACLE_BASEORACLE_HOME=$ORACLE_BASE/product/19.3.0/dbhome_1; export ORACLE_HOMEORACLE_TERM=xterm; export ORACLE_TERMNLS_DATE_FORMAT="yyyy-mm-dd HH24:MI:SS"; export NLS_DATE_FORMATNLS_LANG=AMERICAN_AMERICA.ZHS16GBK;export NLS_LANGPATH=.:$PATH:$HOME/.local/bin:$HOME/bin:$ORACLE_HOME/bin; export PATHTHREADS_FLAG=native; export THREADS_FLAGumask=022if [ $USER = "oracle" ]; thenif [ $SHELL = "/bin/ksh" ]; thenulimit -p 16384ulimit -n 65536elseulimit -u 16384 -n 65536fiumask 022fi
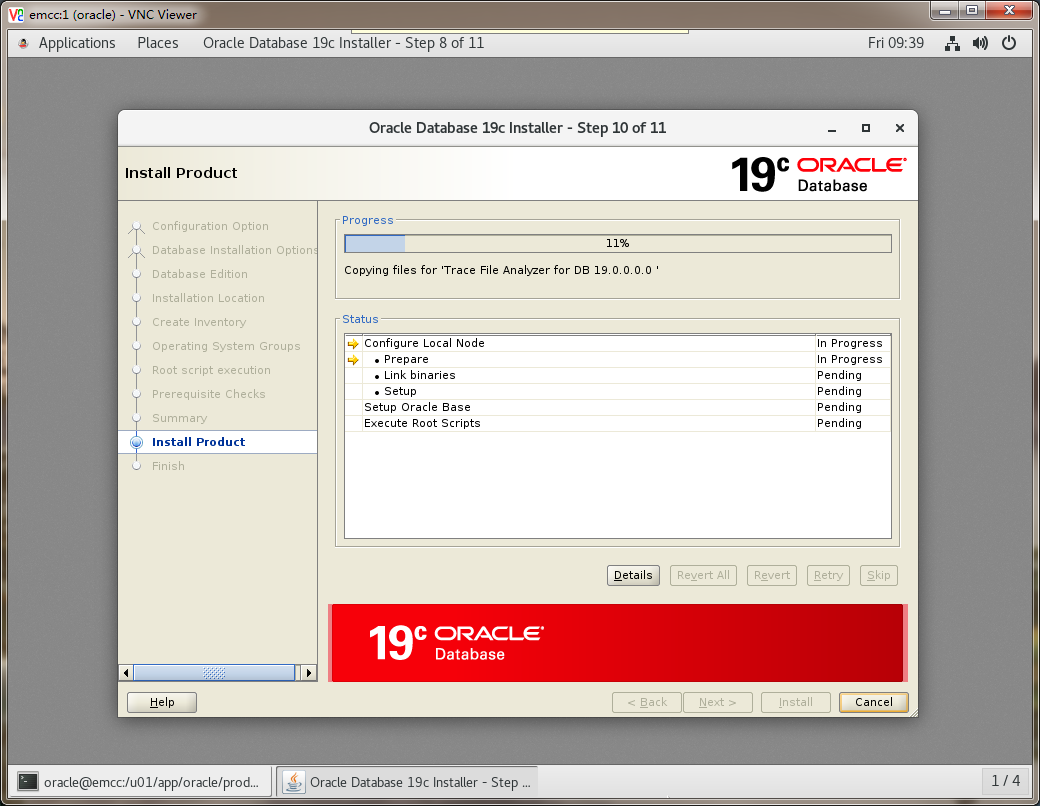
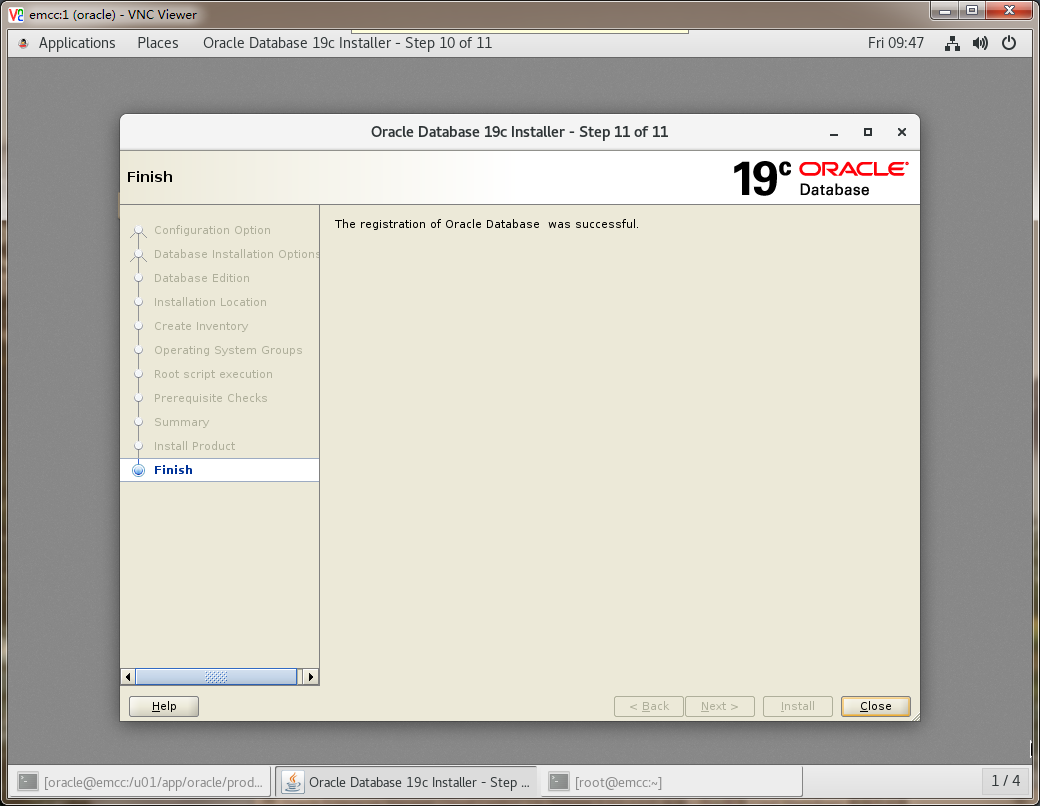
3 数据库安装
3.1 数据库软件安装
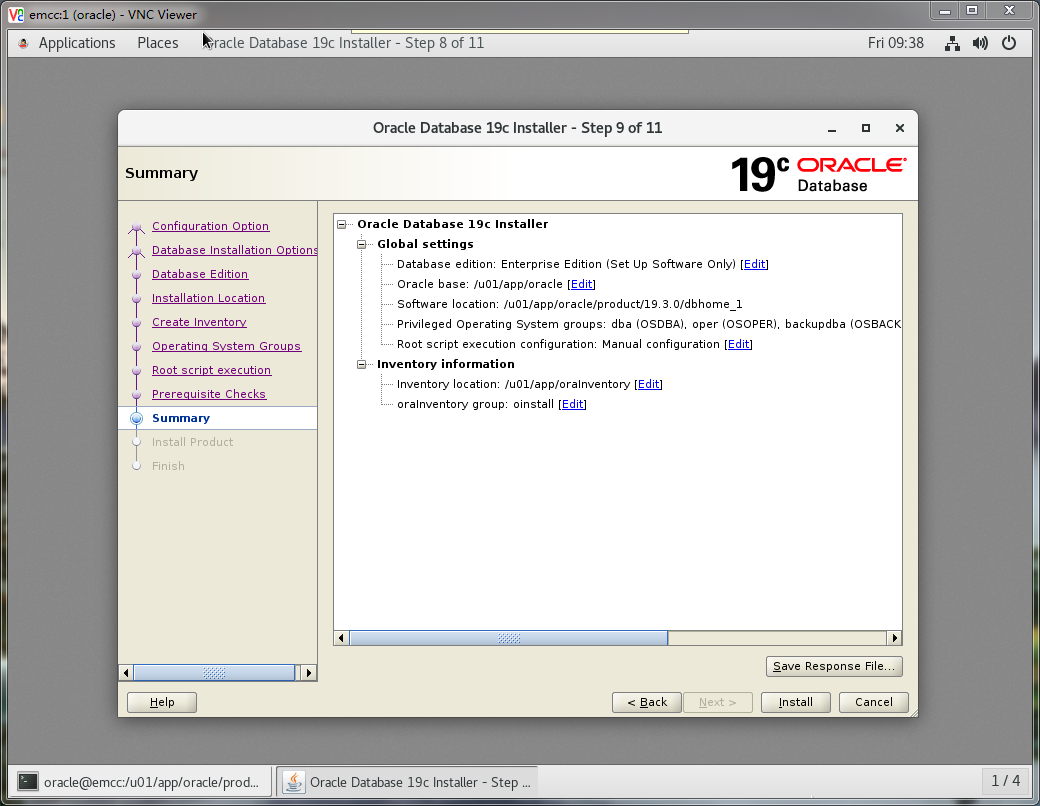
注意:从 oracle 18c 开始,必须把压缩文件解压到 $ORACLE_HOME 里面,点我查看官方文档
su - rootchown -R oracle:oinstall /softchmod -R 775 /softsu - oraclecd $ORACLE_HOMEunzip -q /soft/19c-V982063-01.zip
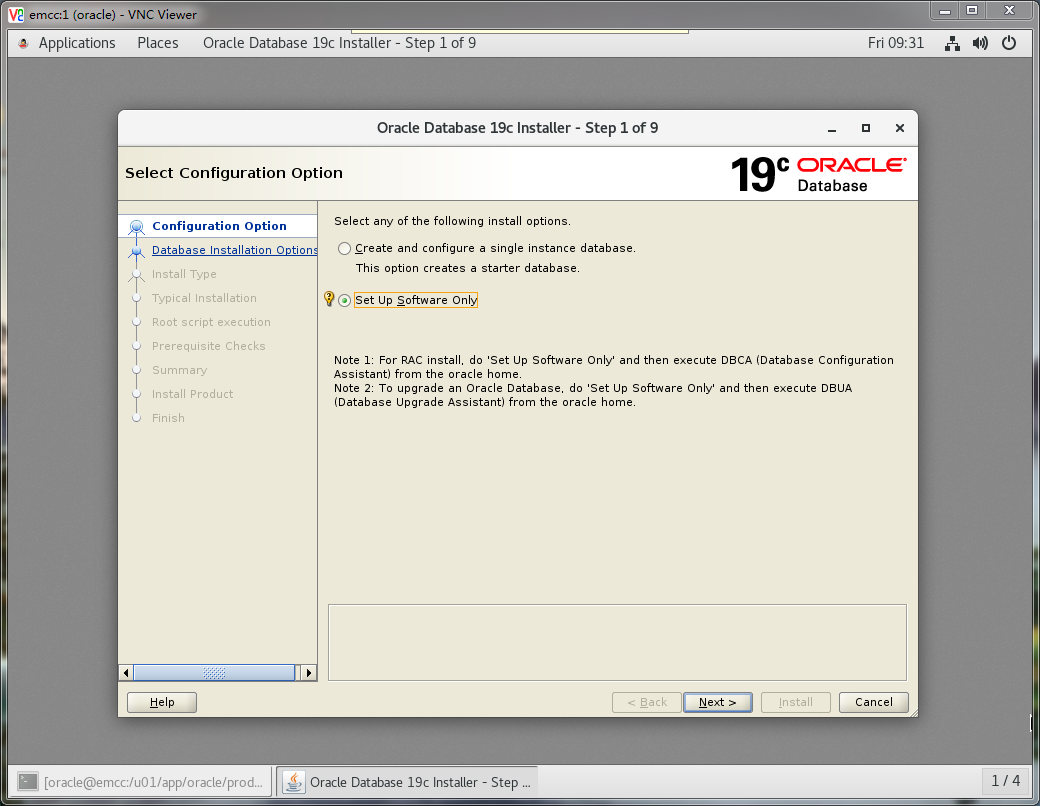
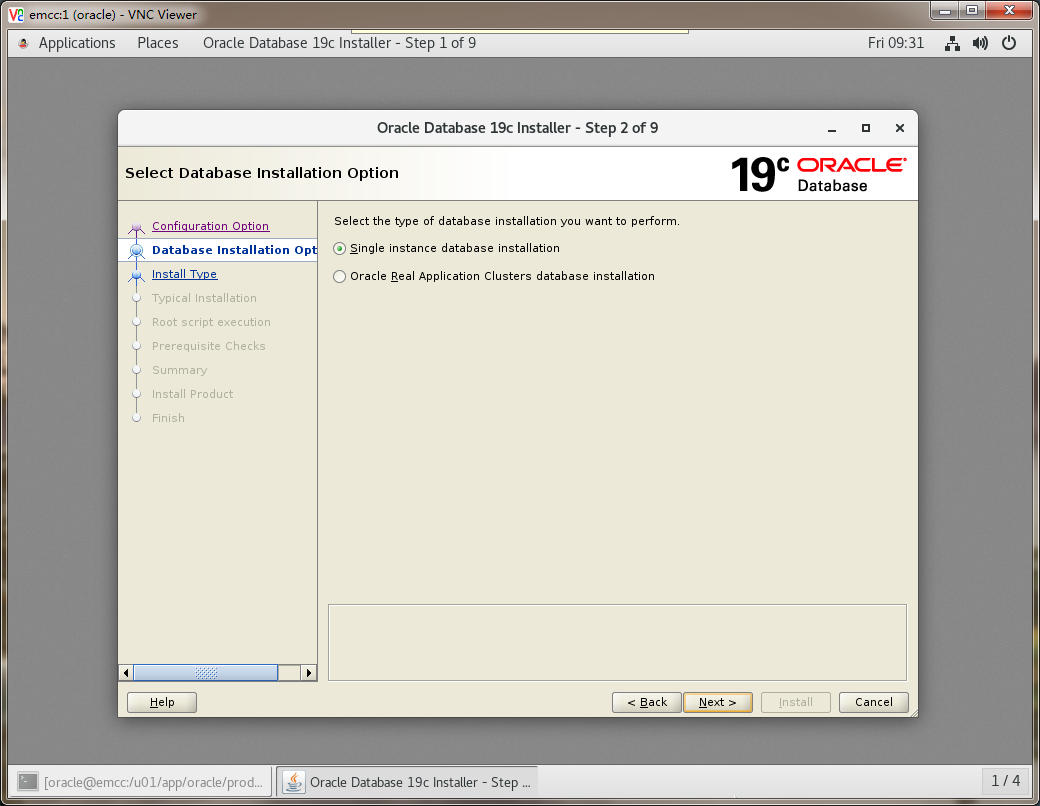
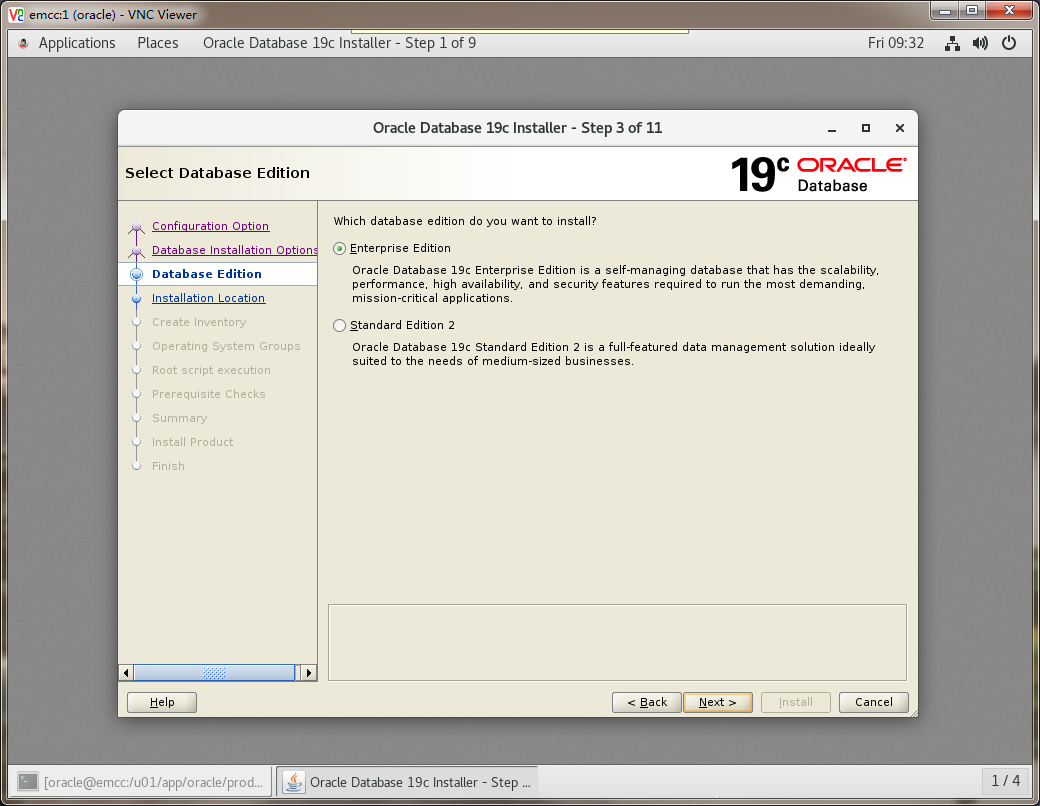
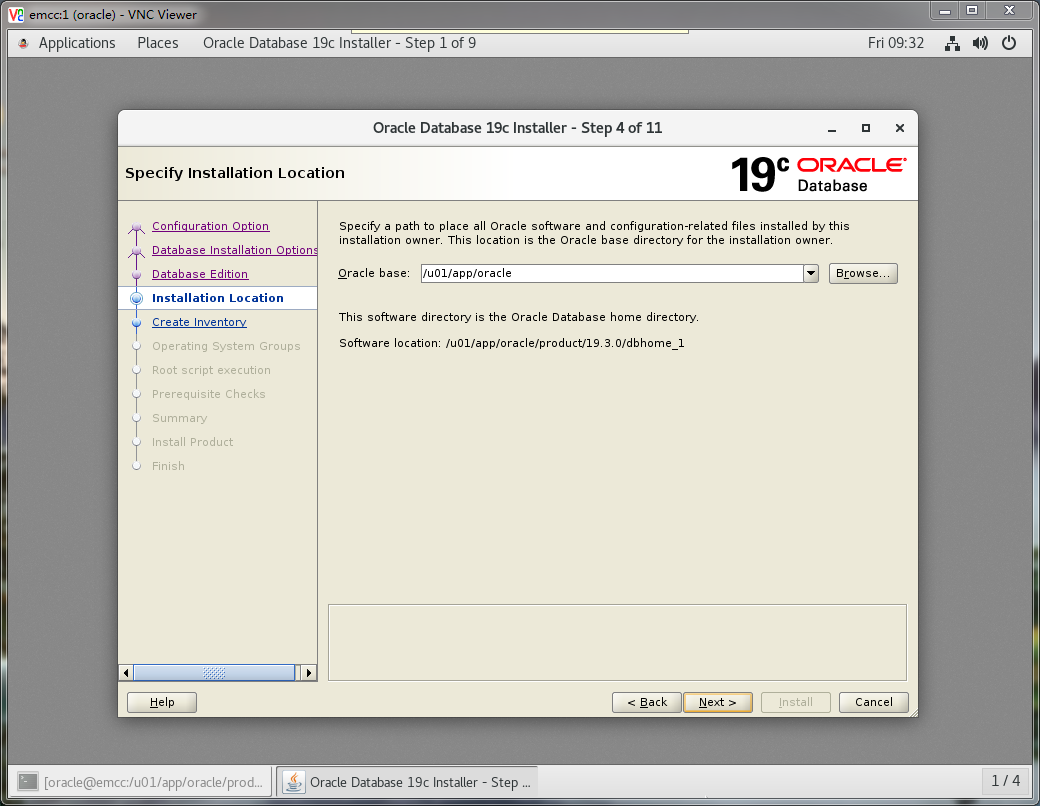
3.1.1 静默安装
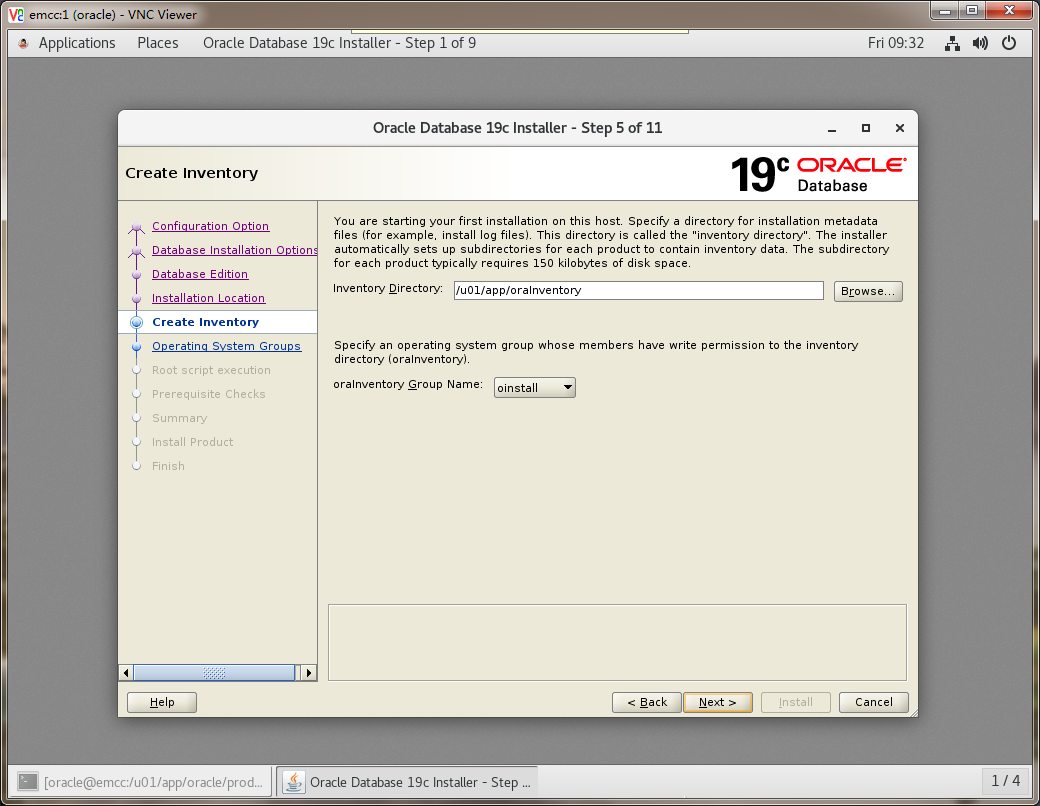
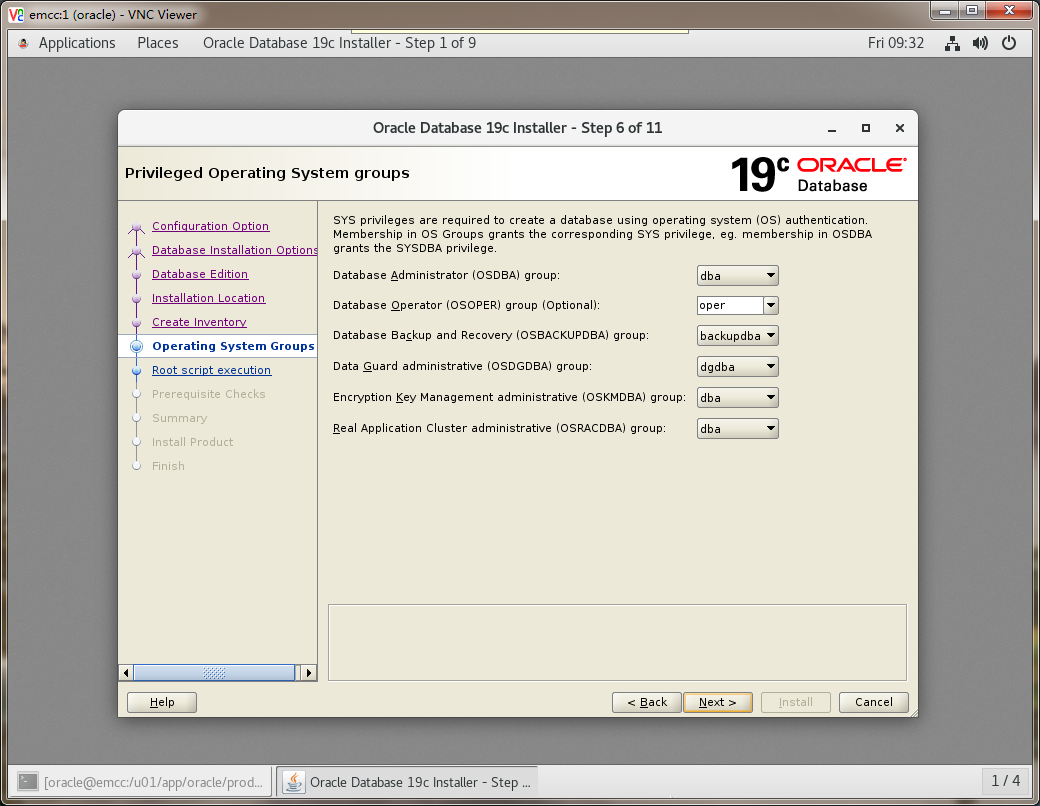
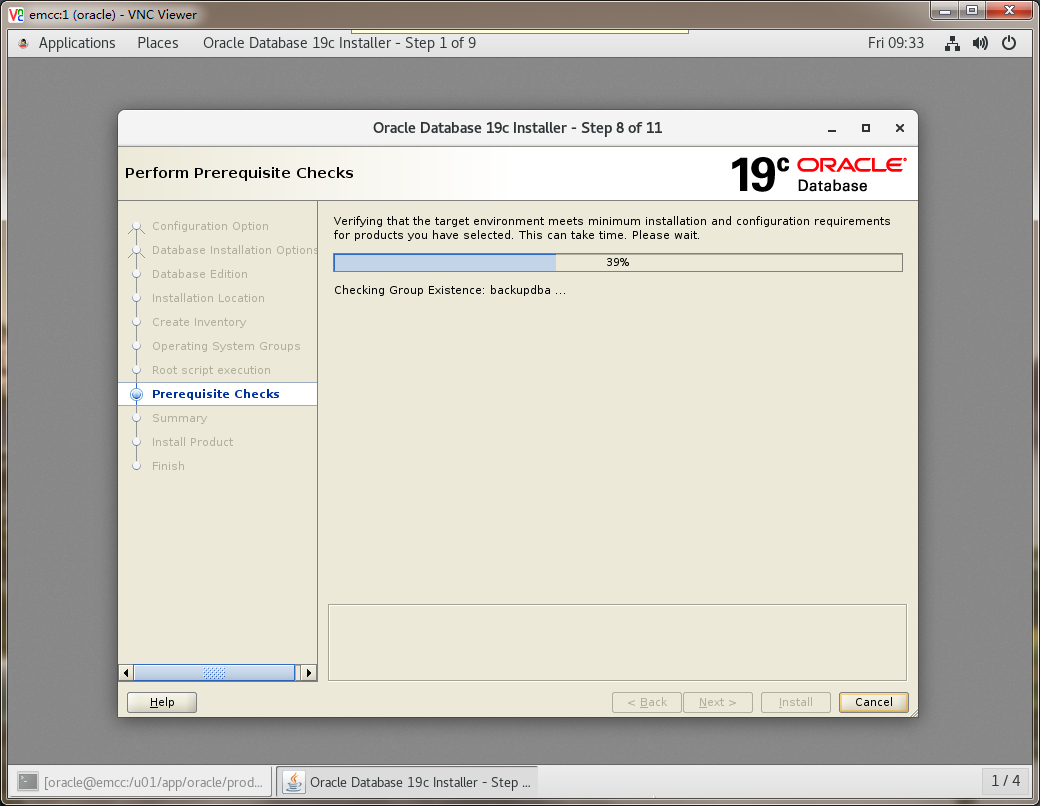
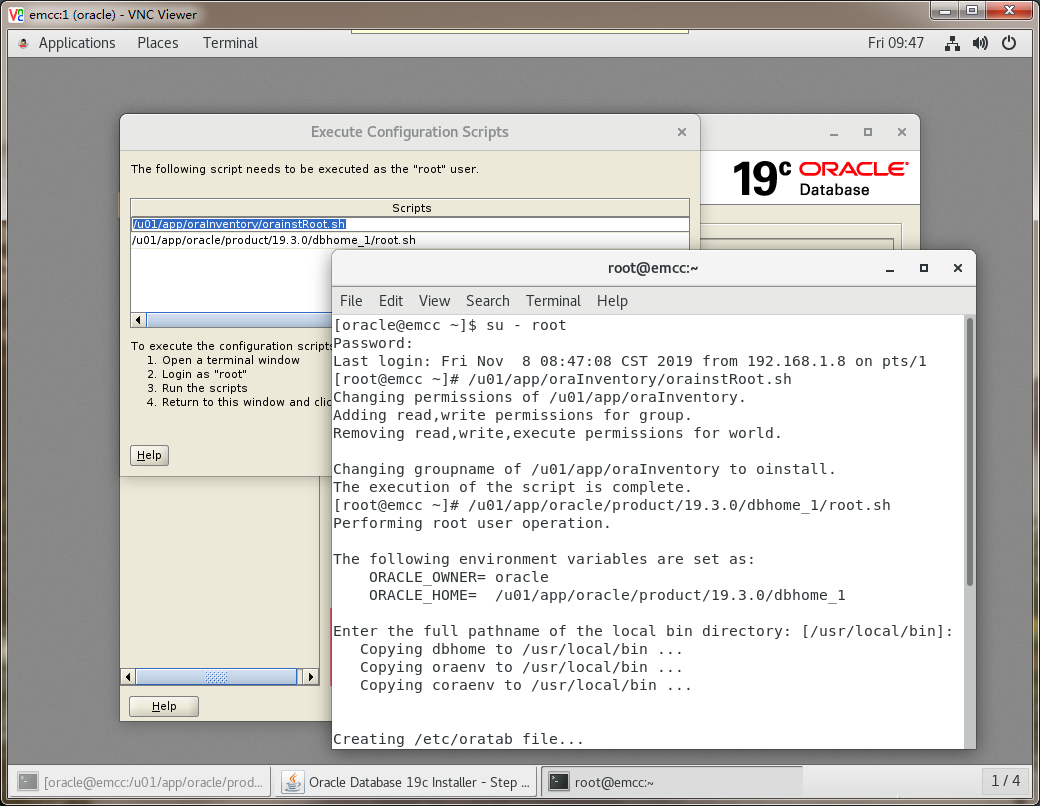
./runInstaller -ignorePrereq -waitforcompletion -silent \-responseFile /u01/app/oracle/product/19.3.0/dbhome_1/install/response/db_install.rsp \oracle.install.option=INSTALL_DB_SWONLY \UNIX_GROUP_NAME=oinstall \INVENTORY_LOCATION=/u01/app/oraInventory \SELECTED_LANGUAGES=en,en_GB \ORACLE_HOME=/u01/app/oracle/product/19.3.0/dbhome_1 \ORACLE_BASE=/u01/app/oracle \oracle.install.db.InstallEdition=EE \oracle.install.db.OSDBA_GROUP=dba \oracle.install.db.OSOPER_GROUP=oper \oracle.install.db.OSBACKUPDBA_GROUP=backupdba \oracle.install.db.OSDGDBA_GROUP=dgdba \oracle.install.db.OSKMDBA_GROUP=dba \oracle.install.db.OSRACDBA_GROUP=dba \SECURITY_UPDATES_VIA_MYORACLESUPPORT=false \DECLINE_SECURITY_UPDATES=true# 切换 root 用户执行脚本As a root user, execute the following script(s):1. /u01/app/oraInventory/orainstRoot.sh2. /u01/app/oracle/product/19.3.0/dbhome_1/root.sh
3.1.2 图形化安装


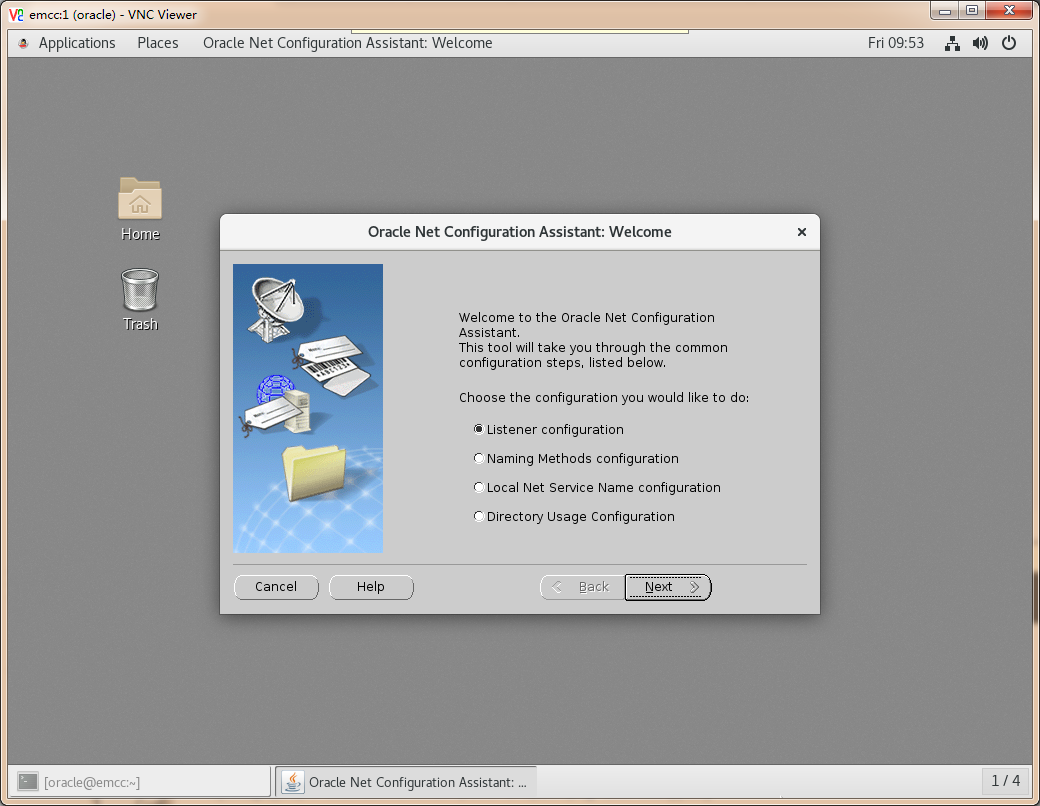
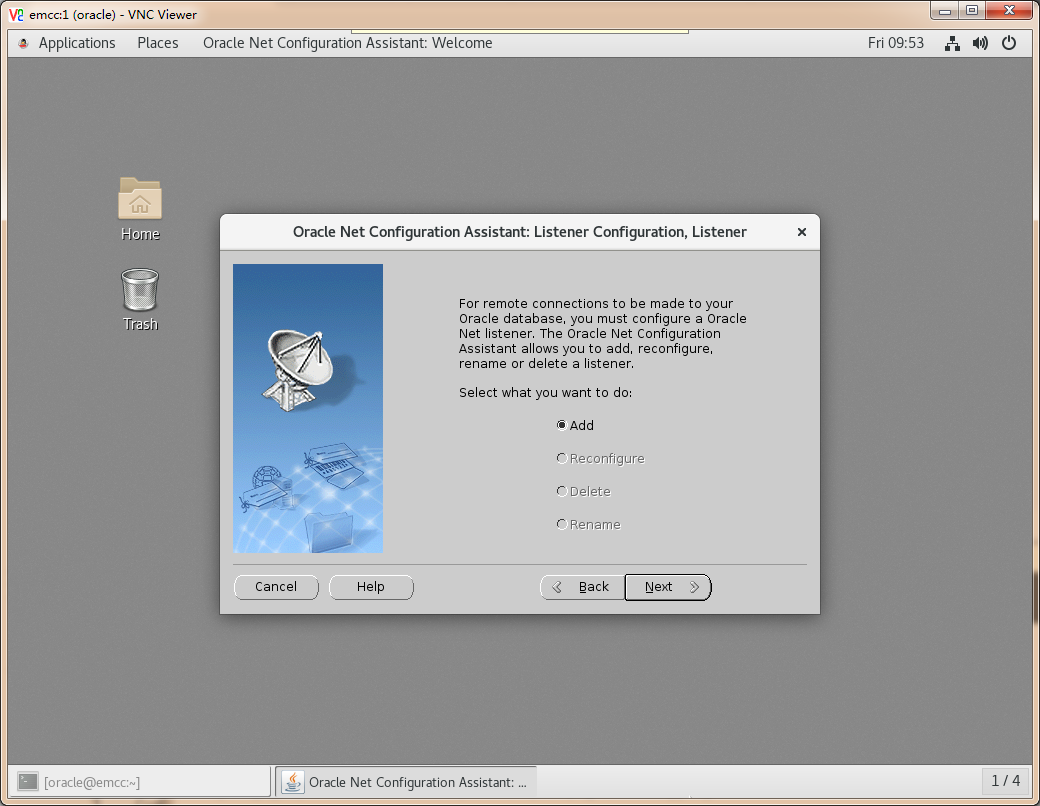
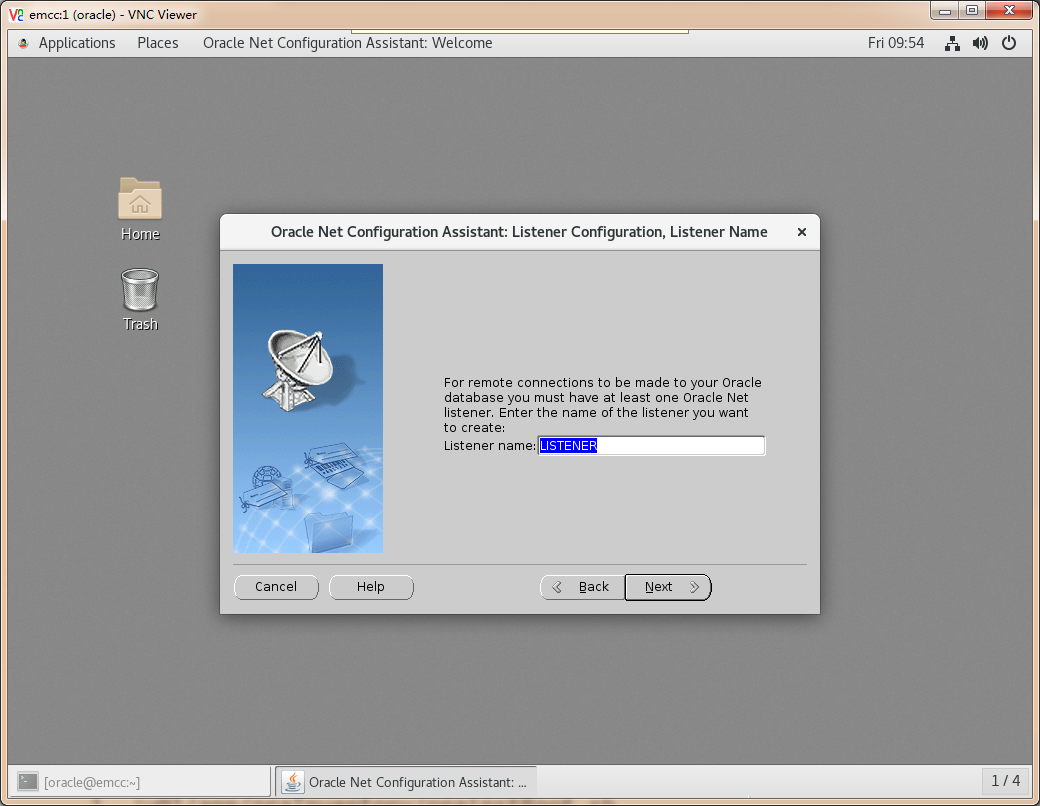
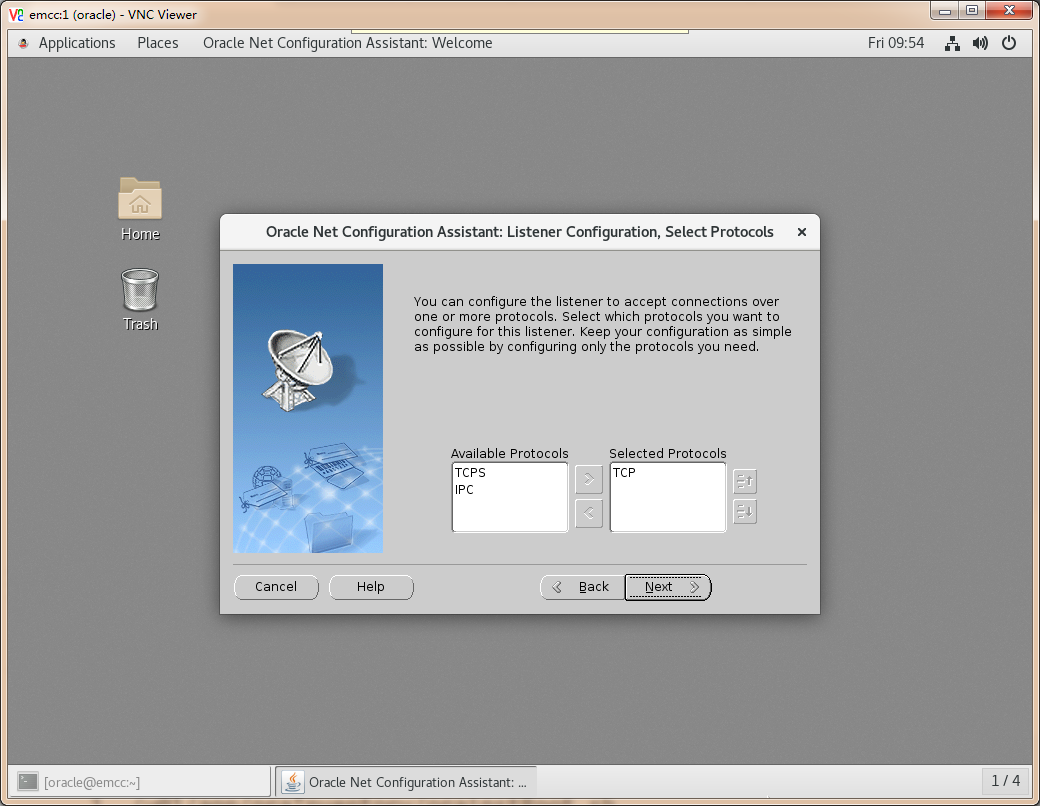
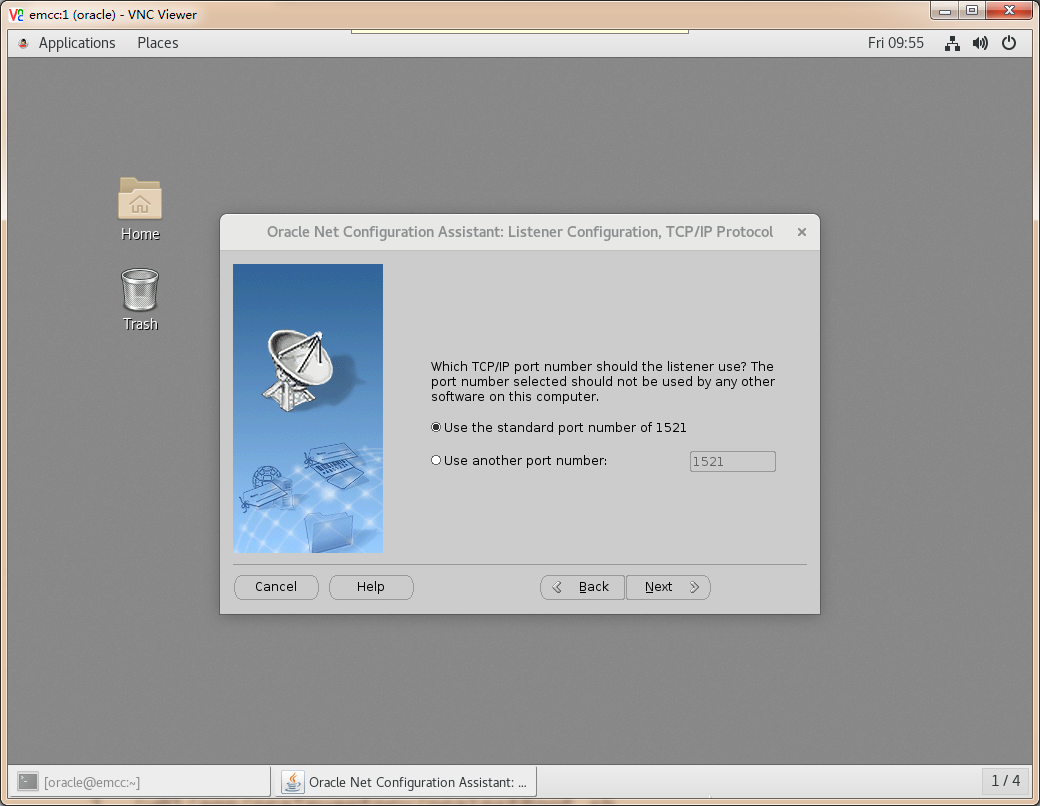
3.2 创建监听
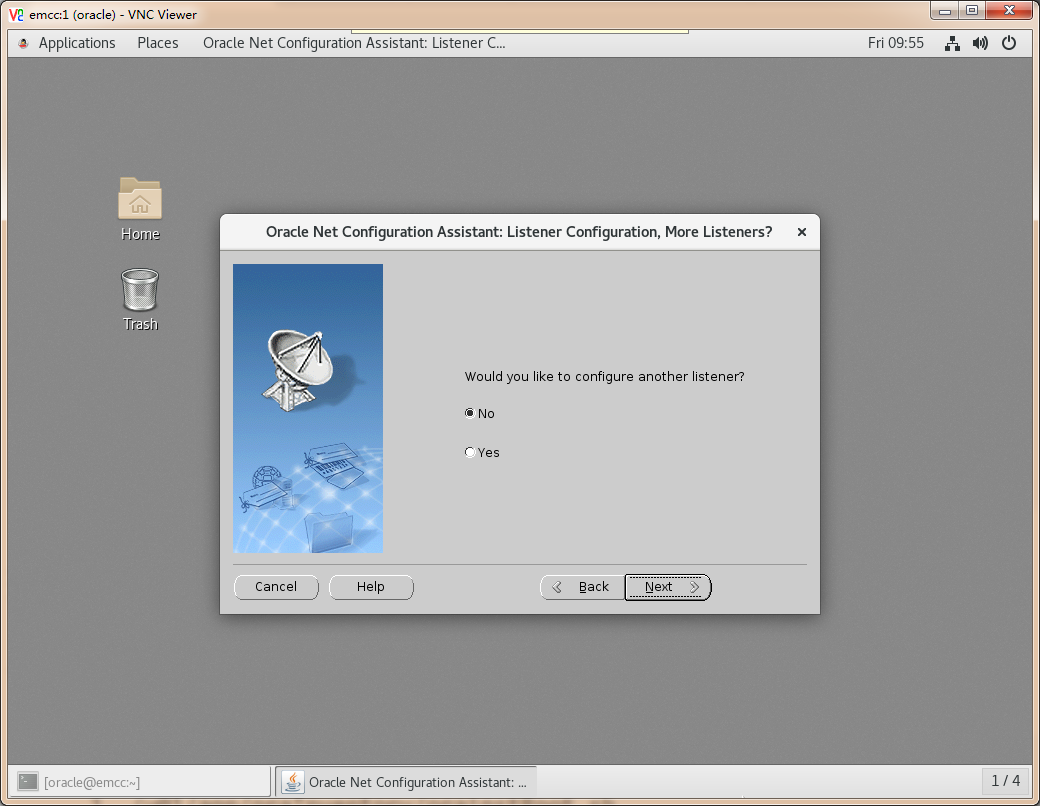
3.2.1 静默创建
netca -silent -responseFile /u01/app/oracle/product/19.3.0/dbhome_1/assistants/netca/netca.rsp
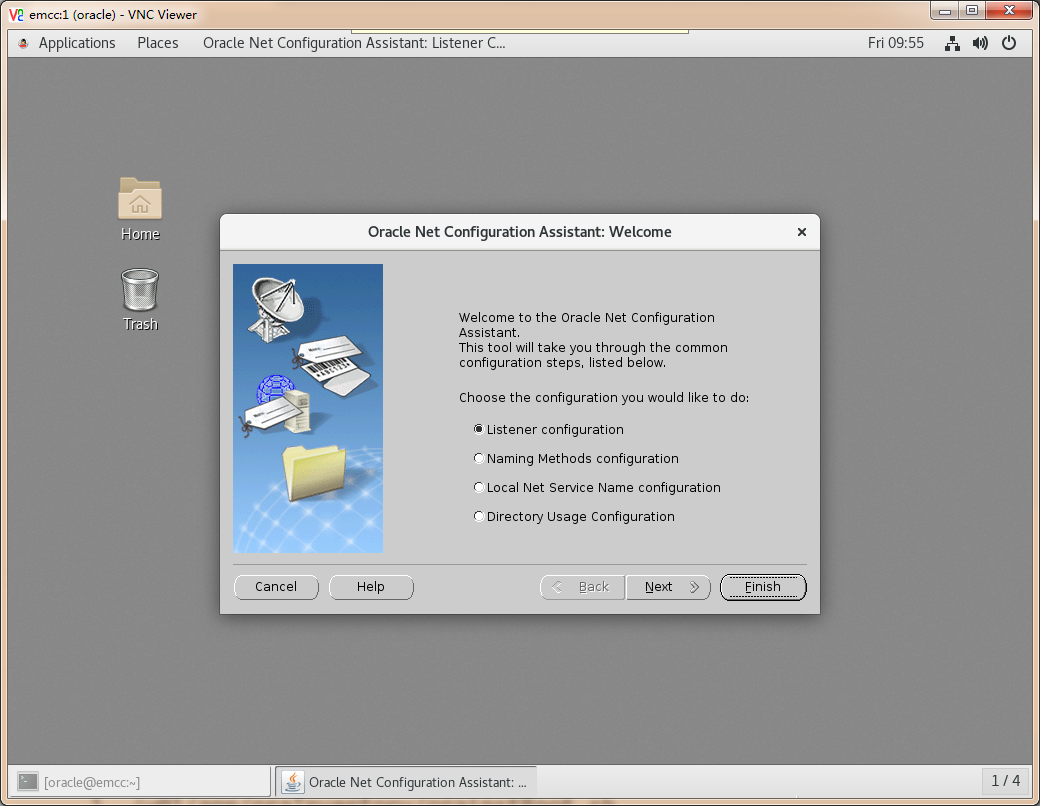
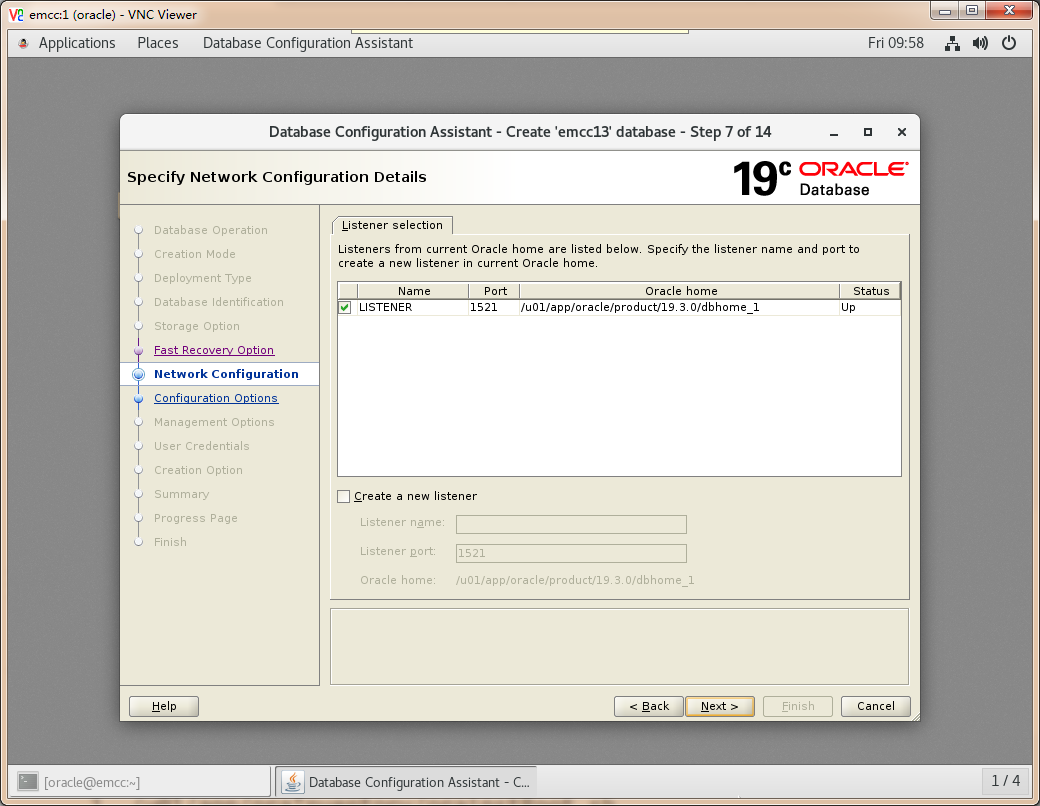
3.2.2 图形化创建
执行命令 netca

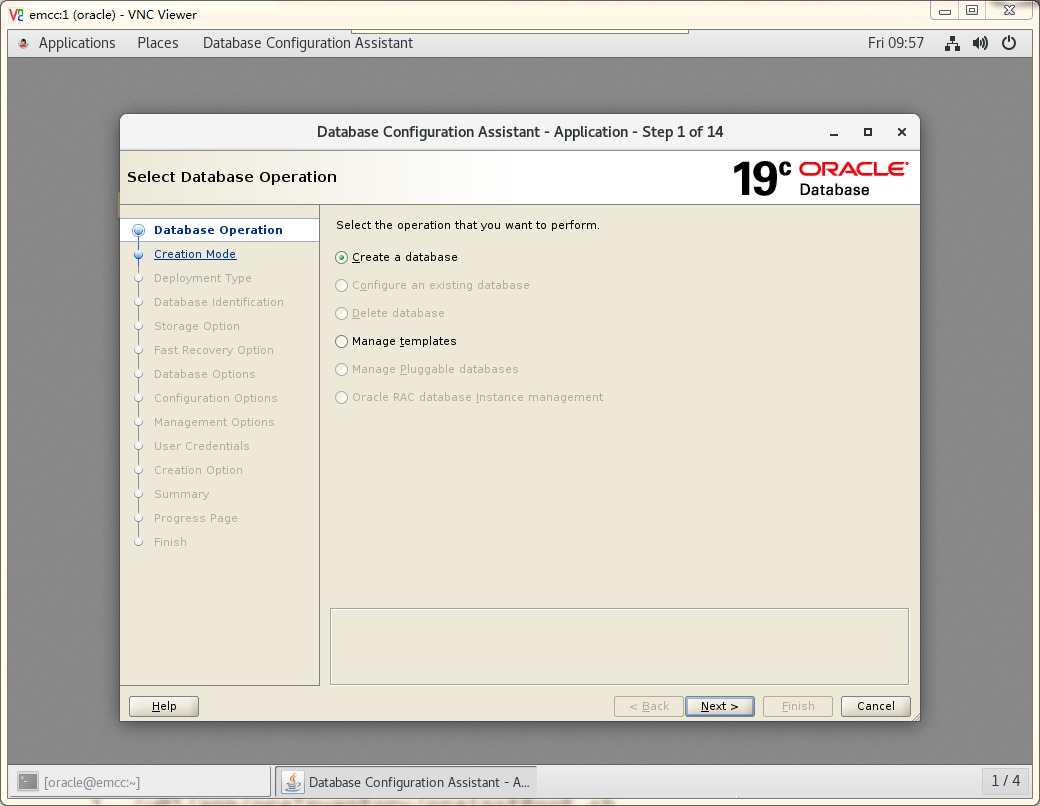
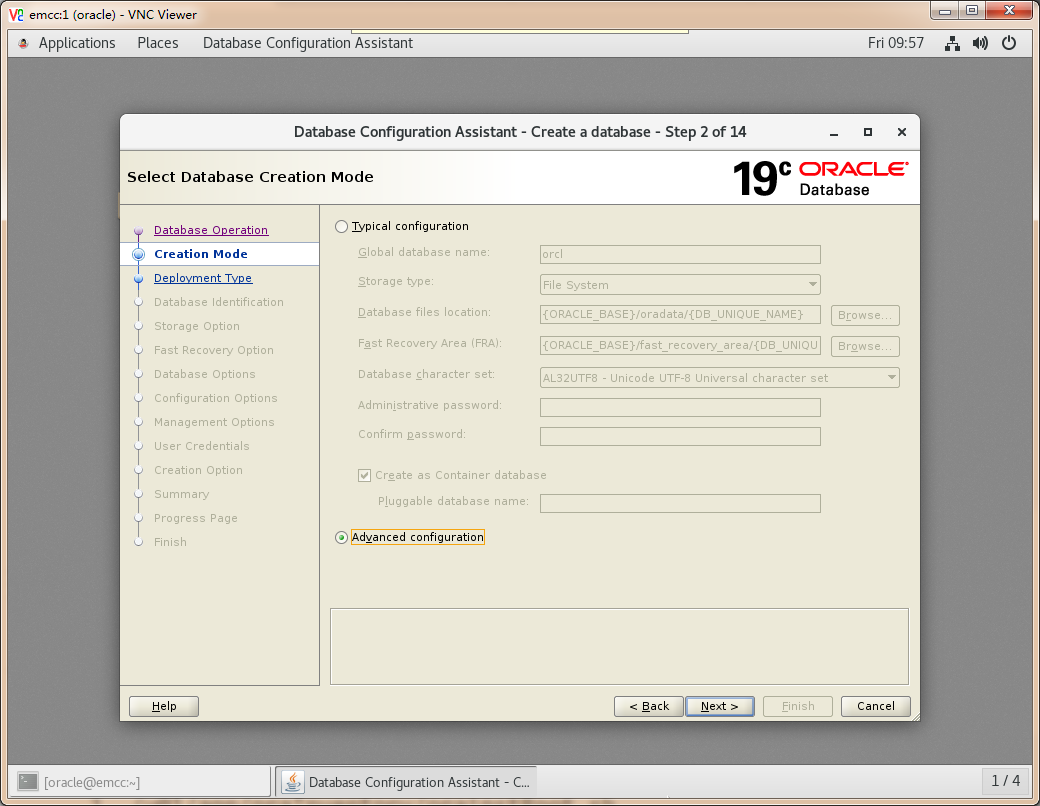
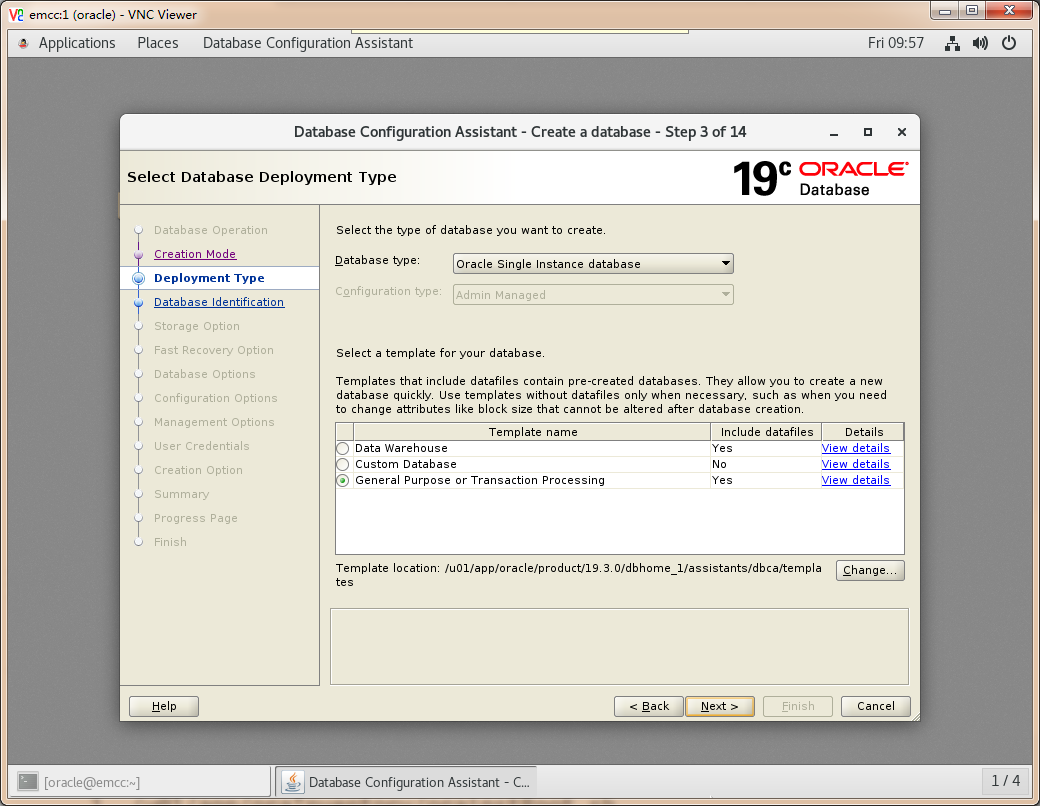
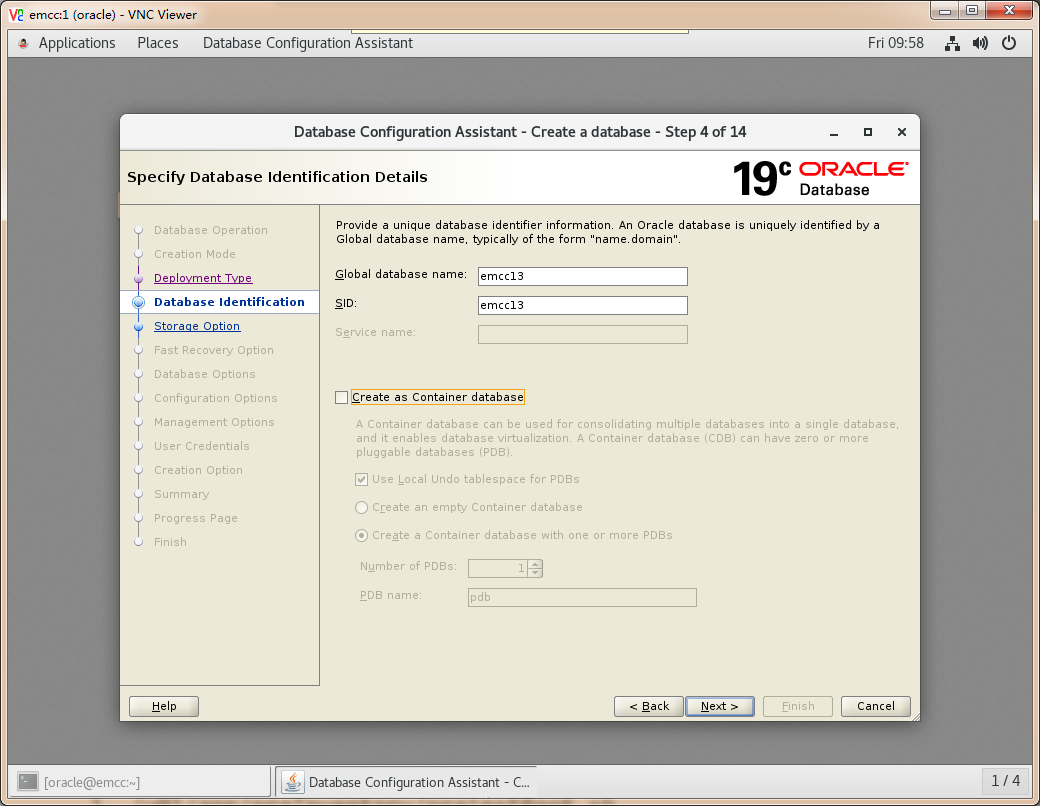
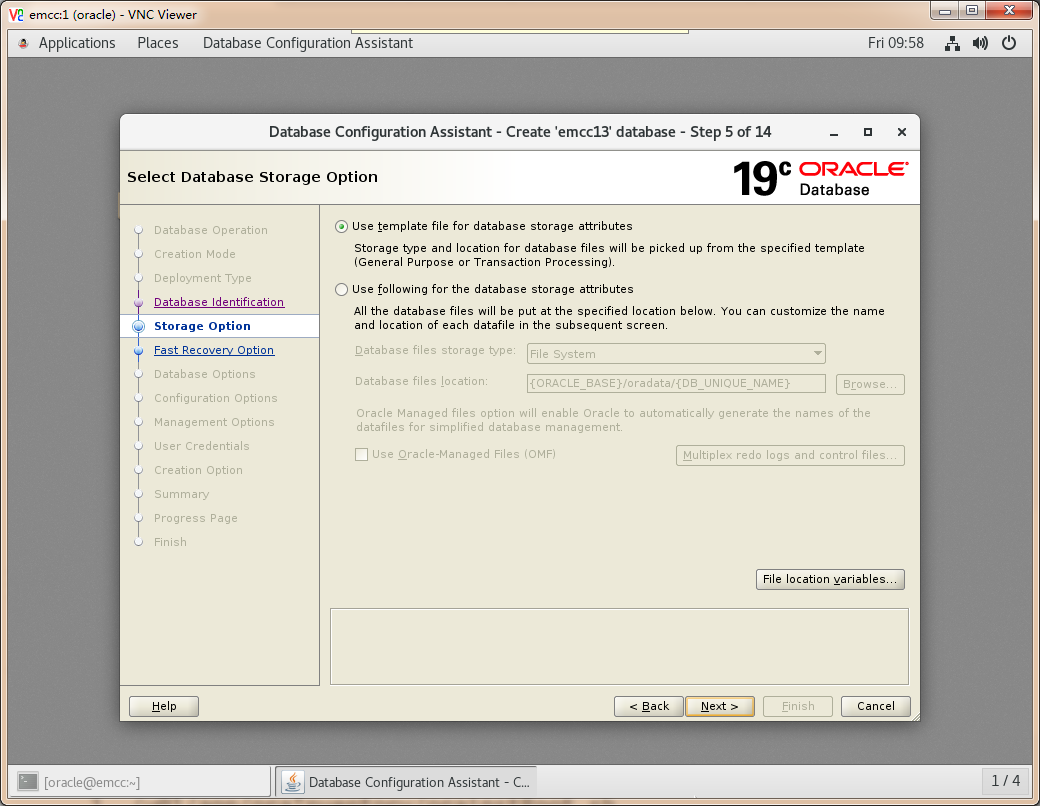
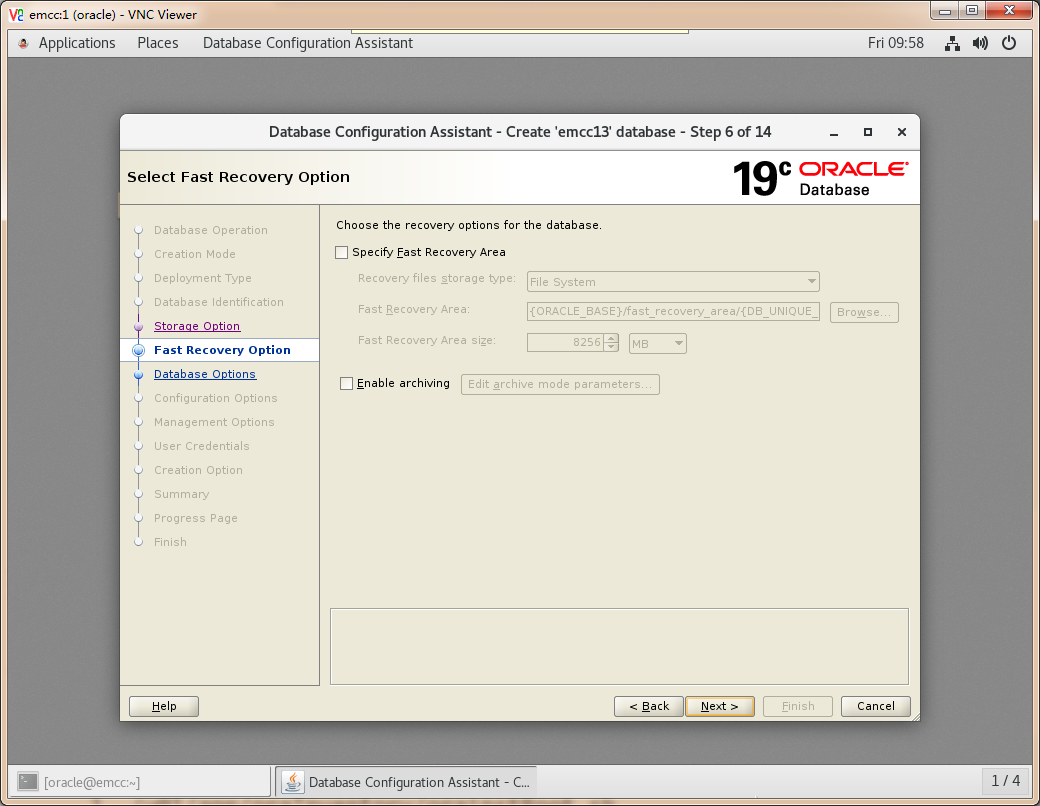
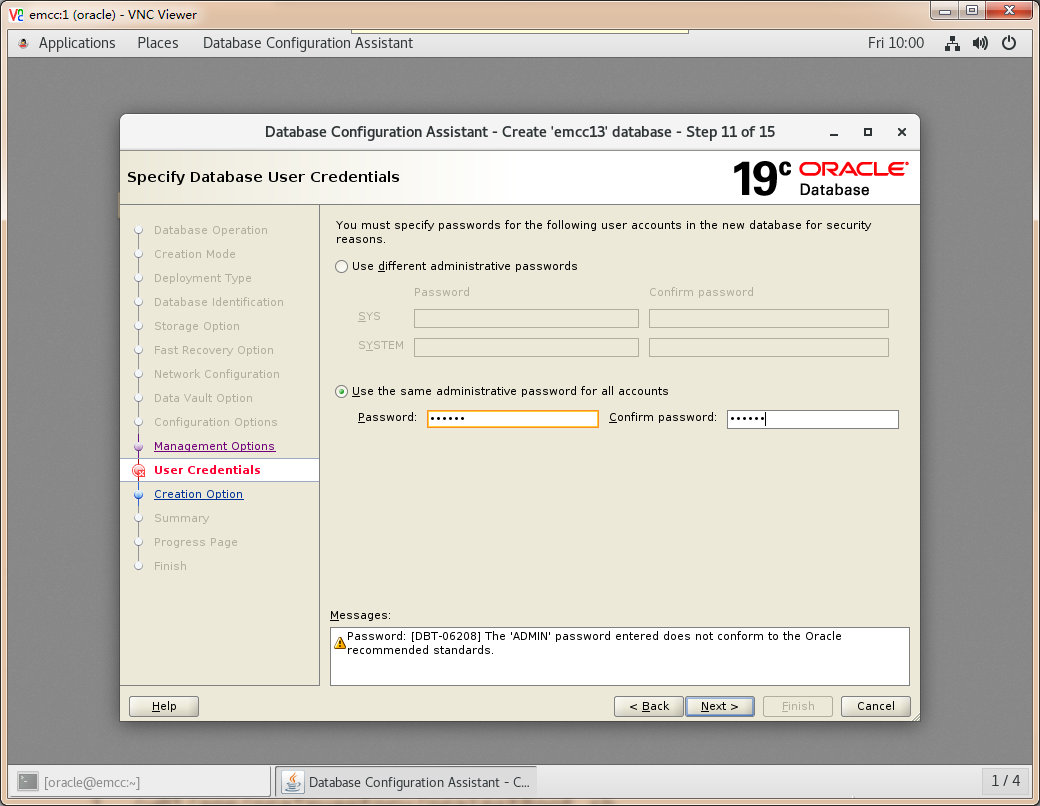
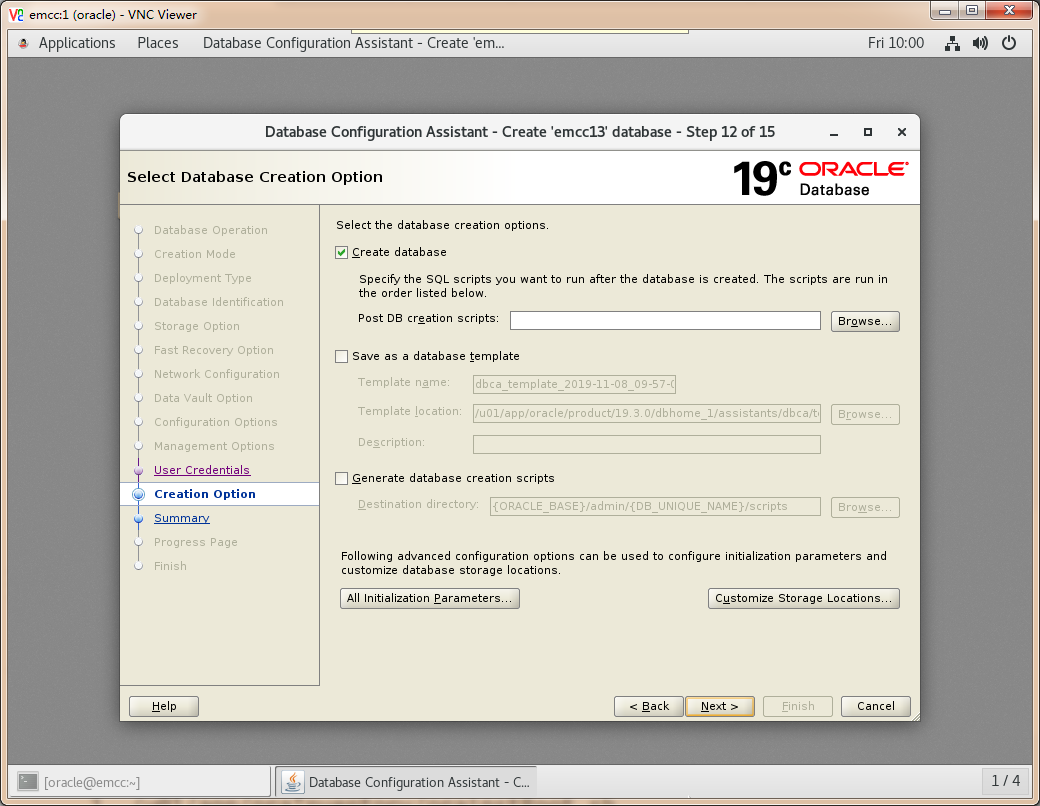
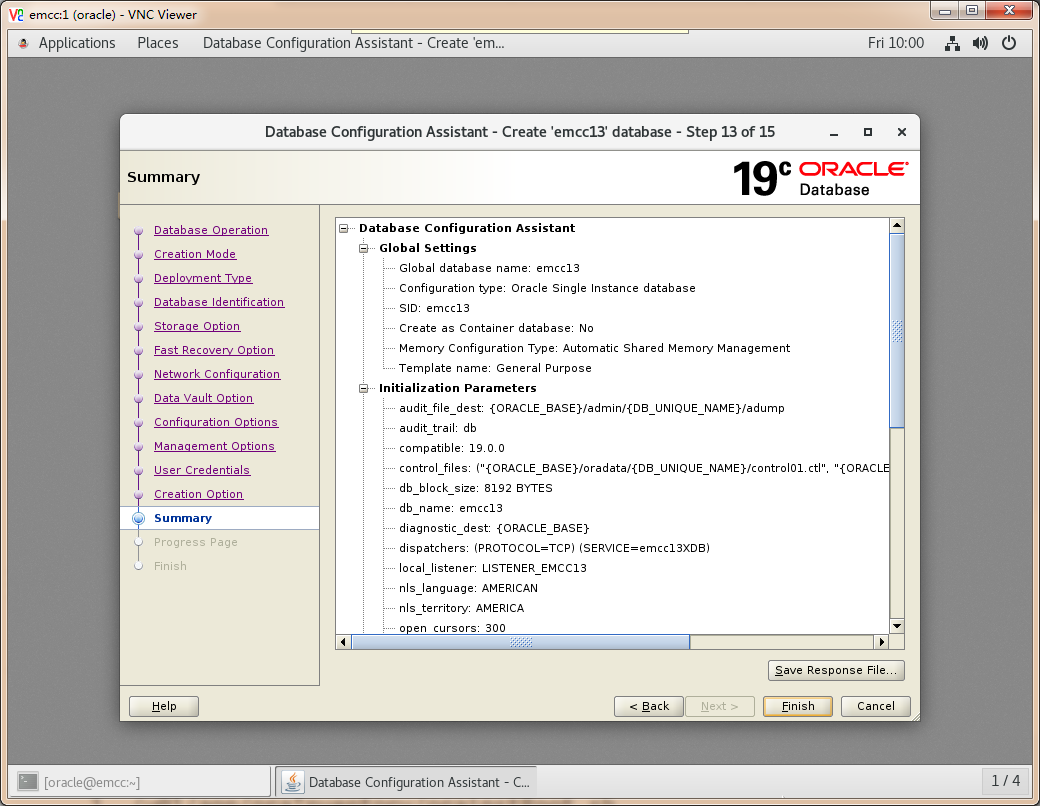
3.3 创建数据库
3.3.1 静默创建
dbca -silent -createDatabase -templateName General_Purpose.dbc \-gdbname emcc13 \-sid emcc13 \-databaseConfigType SI \-sysPassword oracle \-systemPassword oracle \-characterSet AL32UTF8 \-memoryPercentage 30
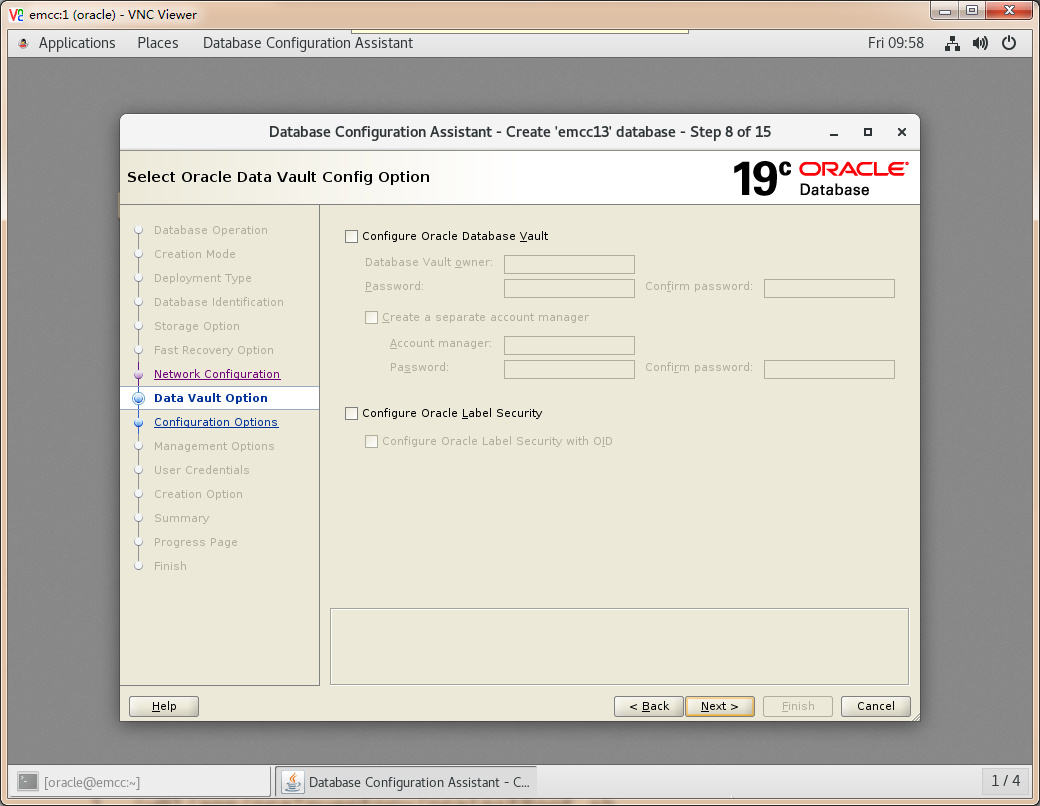
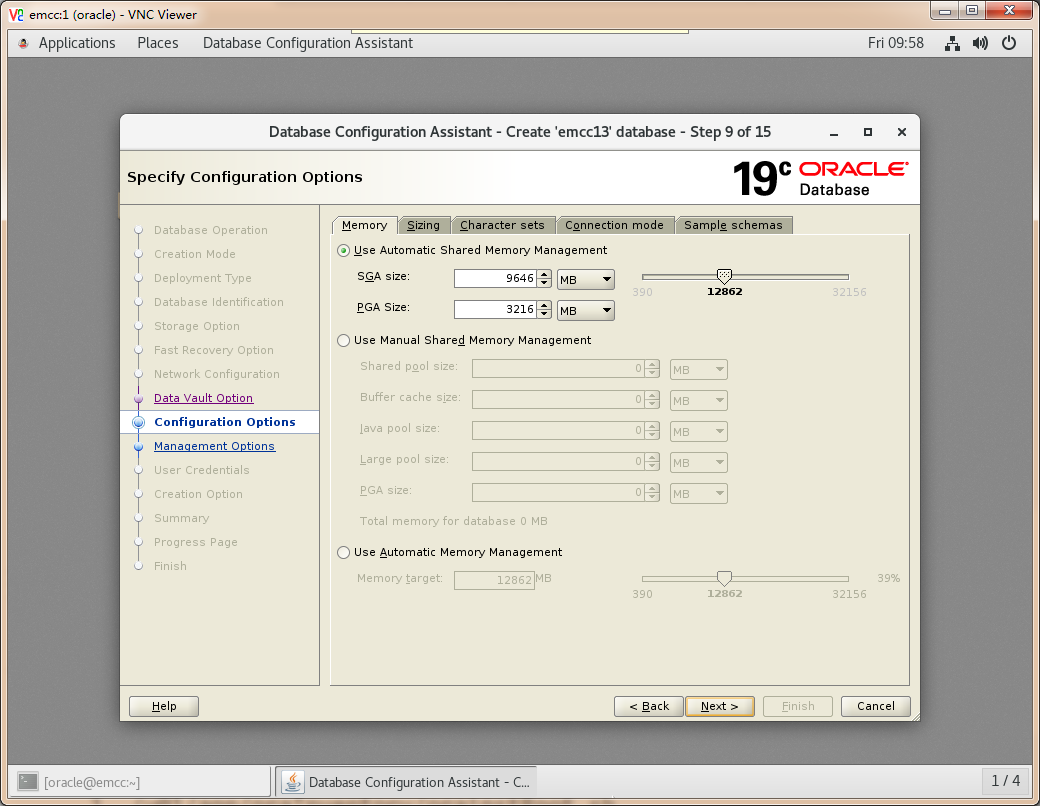
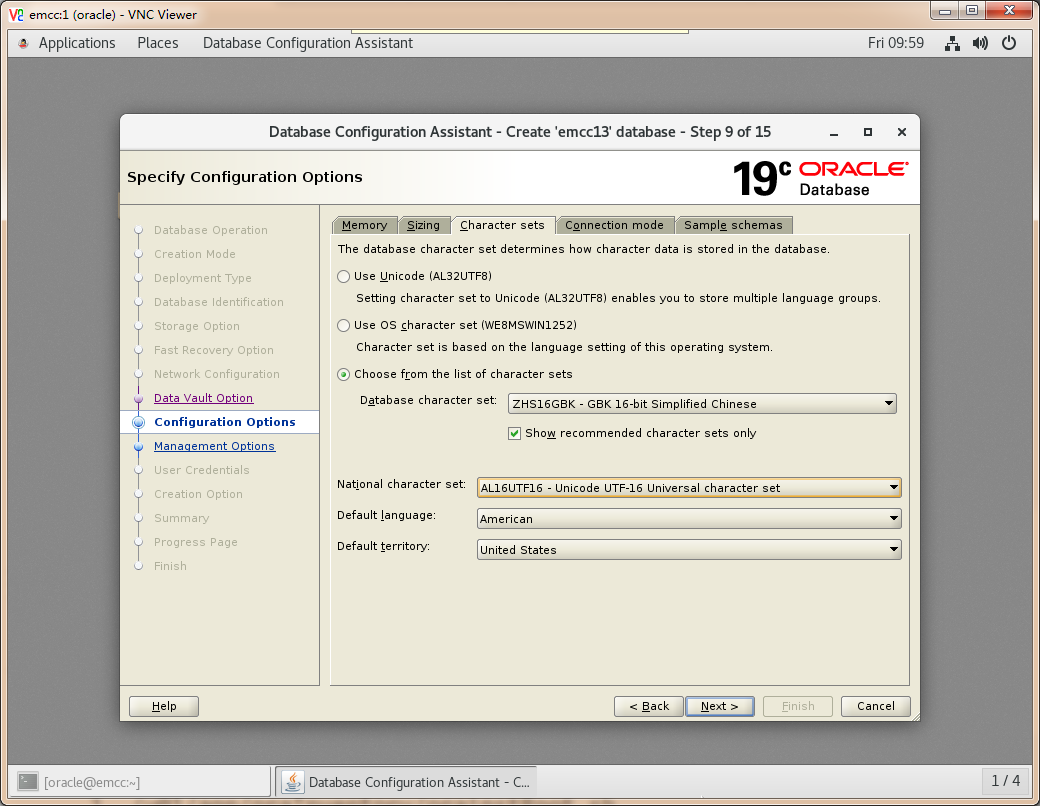
3.3.2 图形化创建
执行命令 dbca
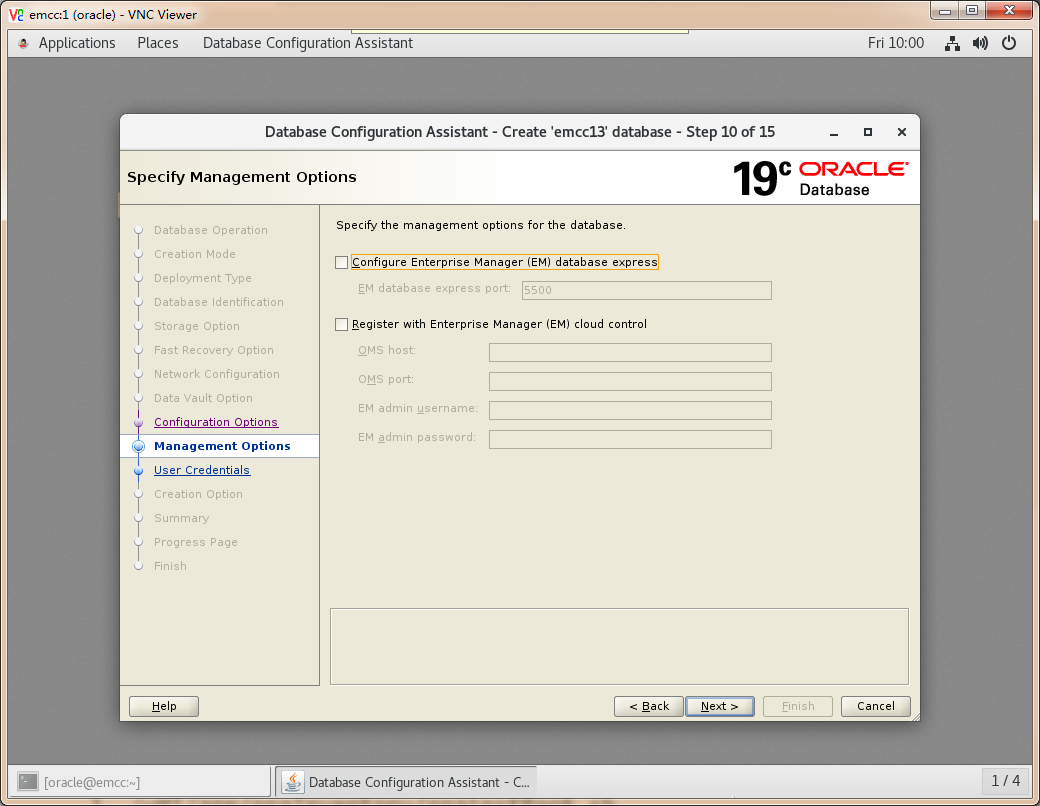

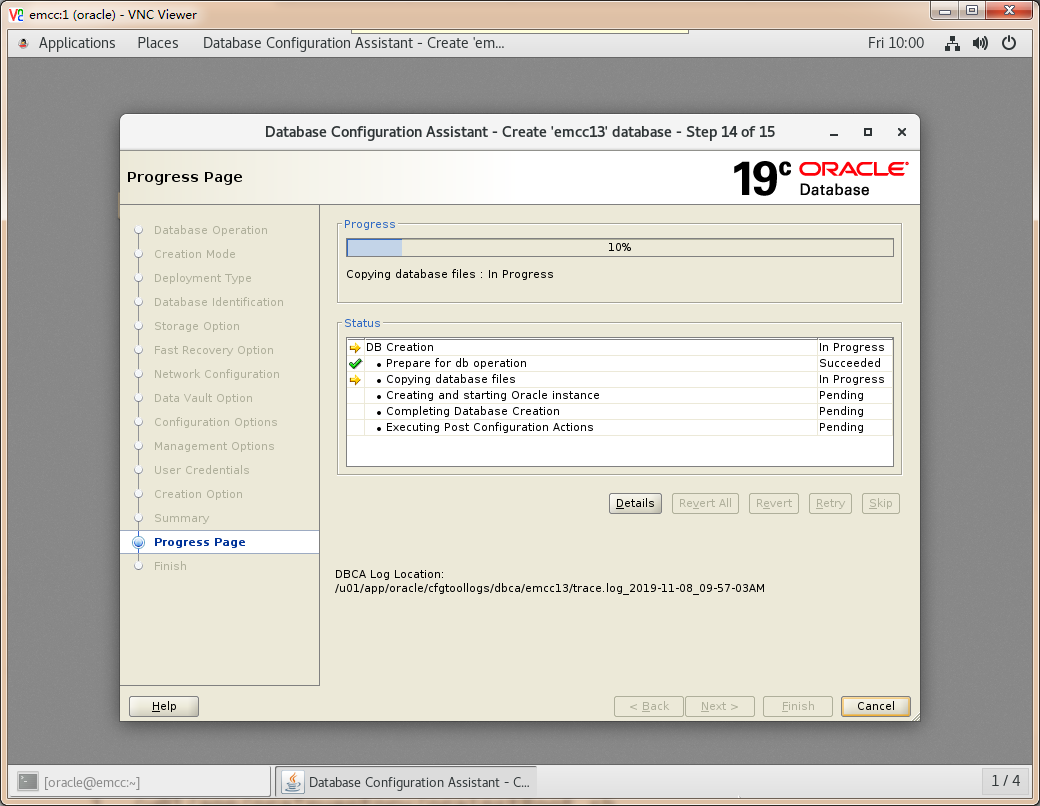

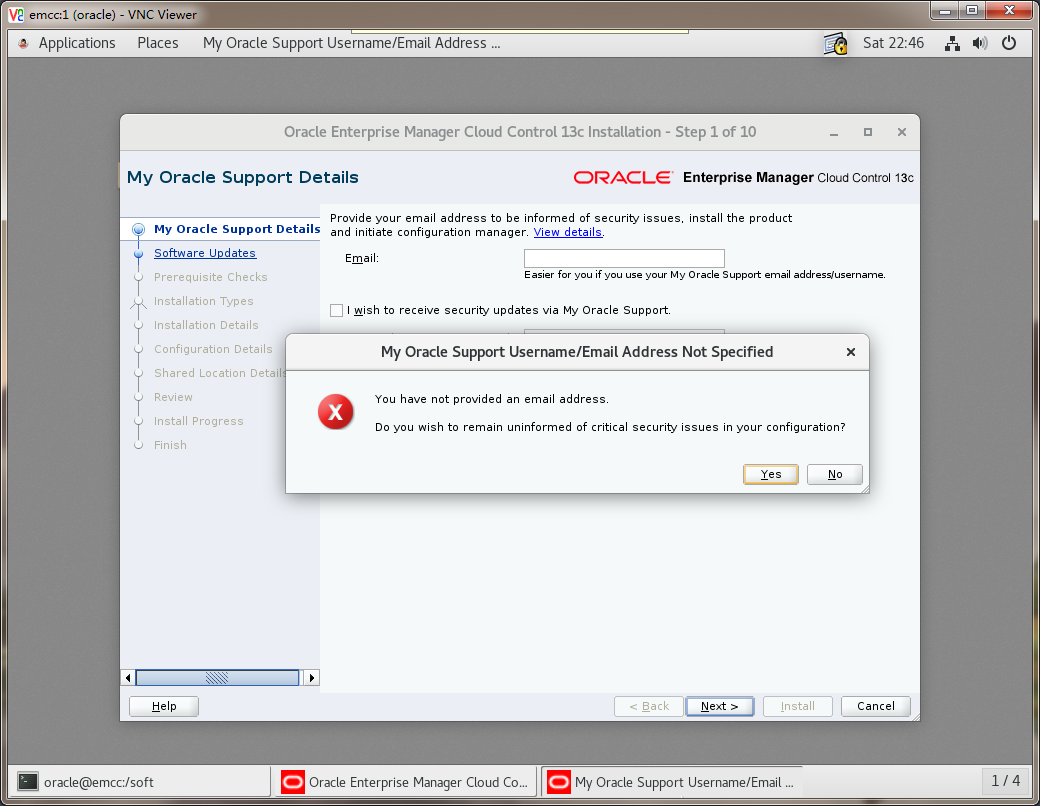
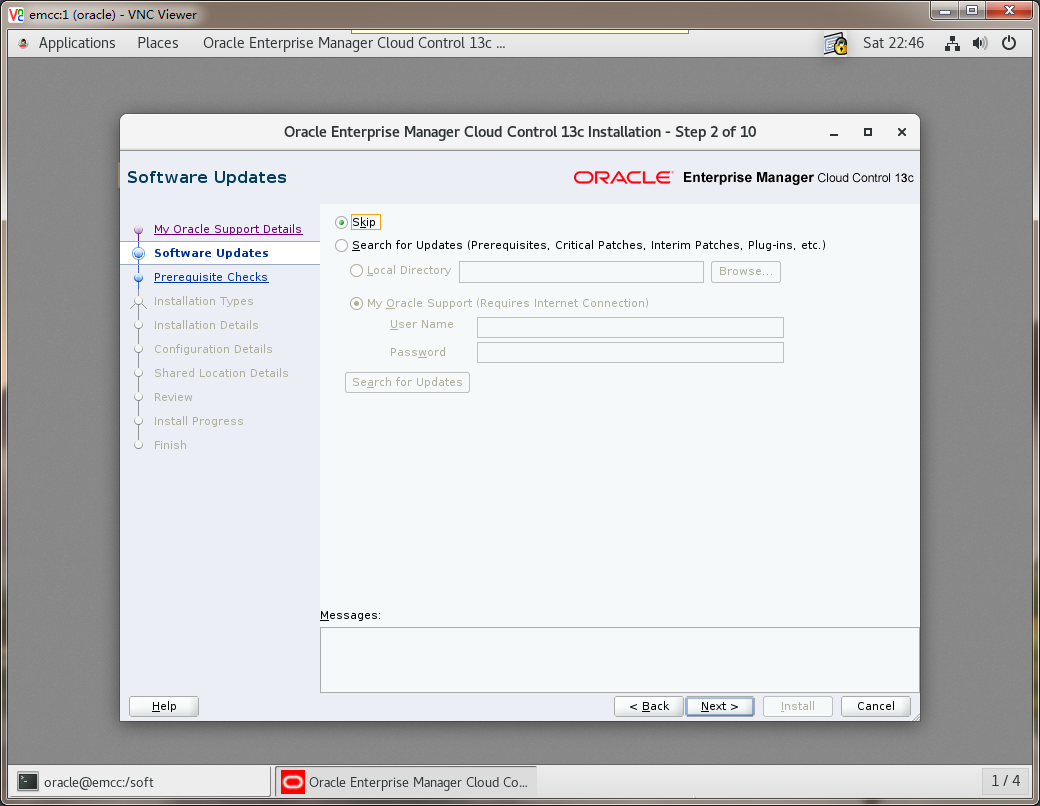
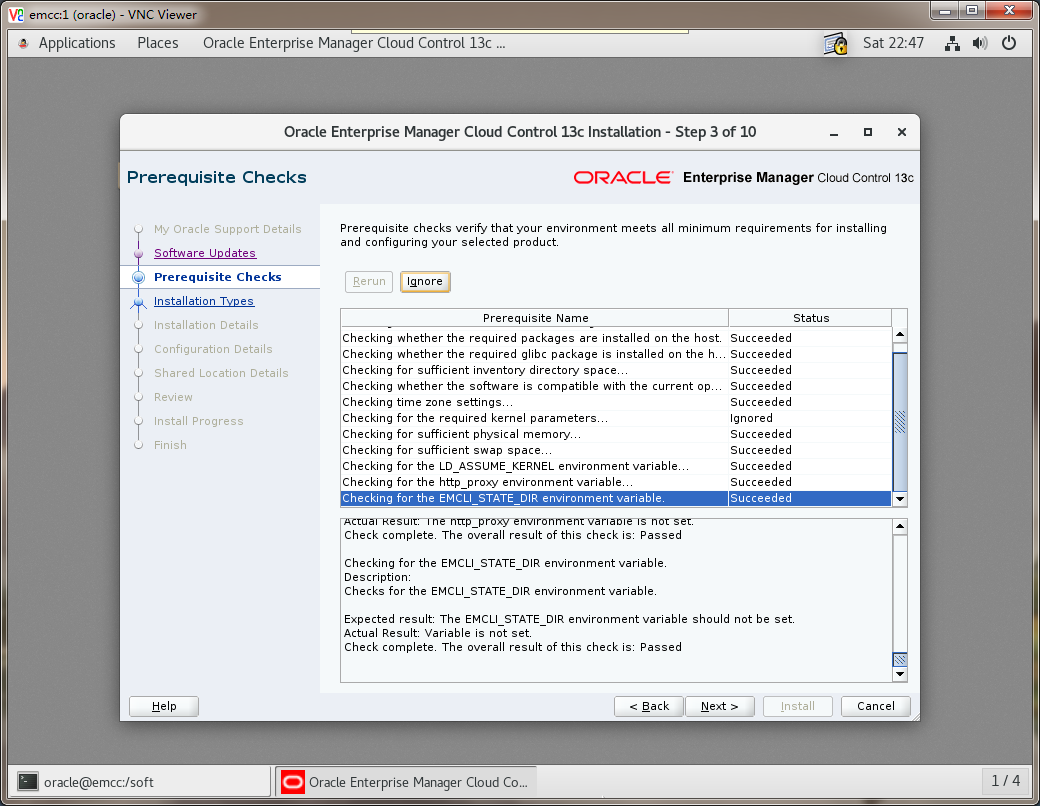
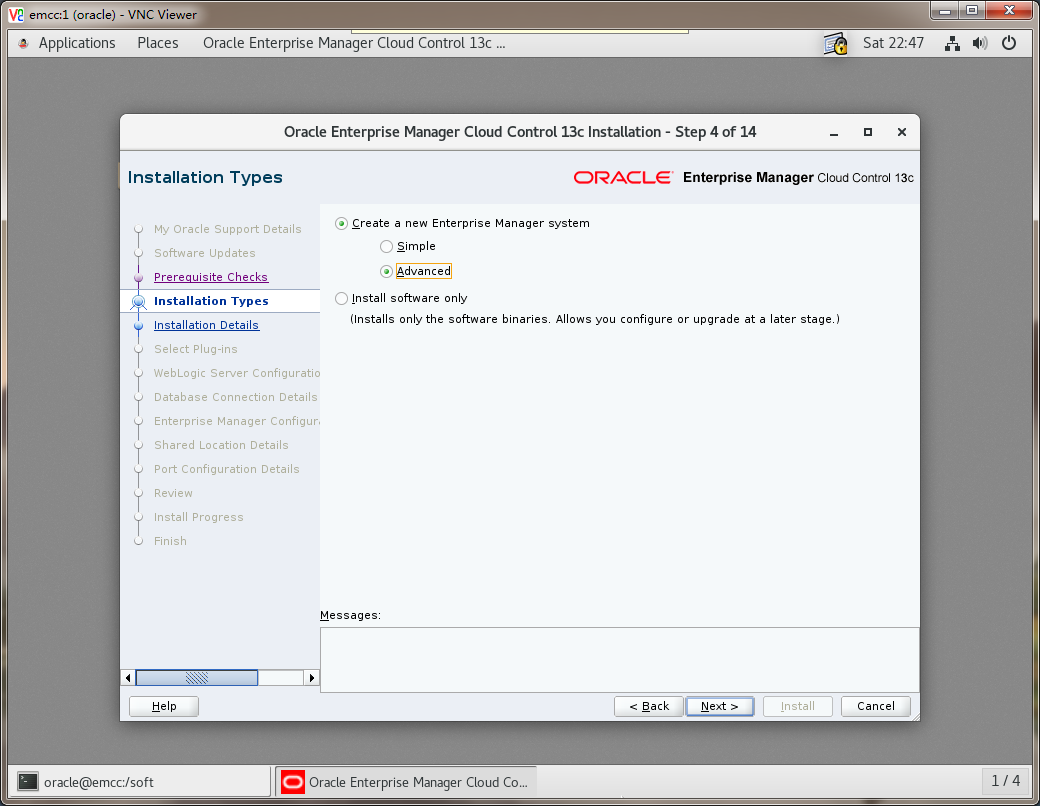
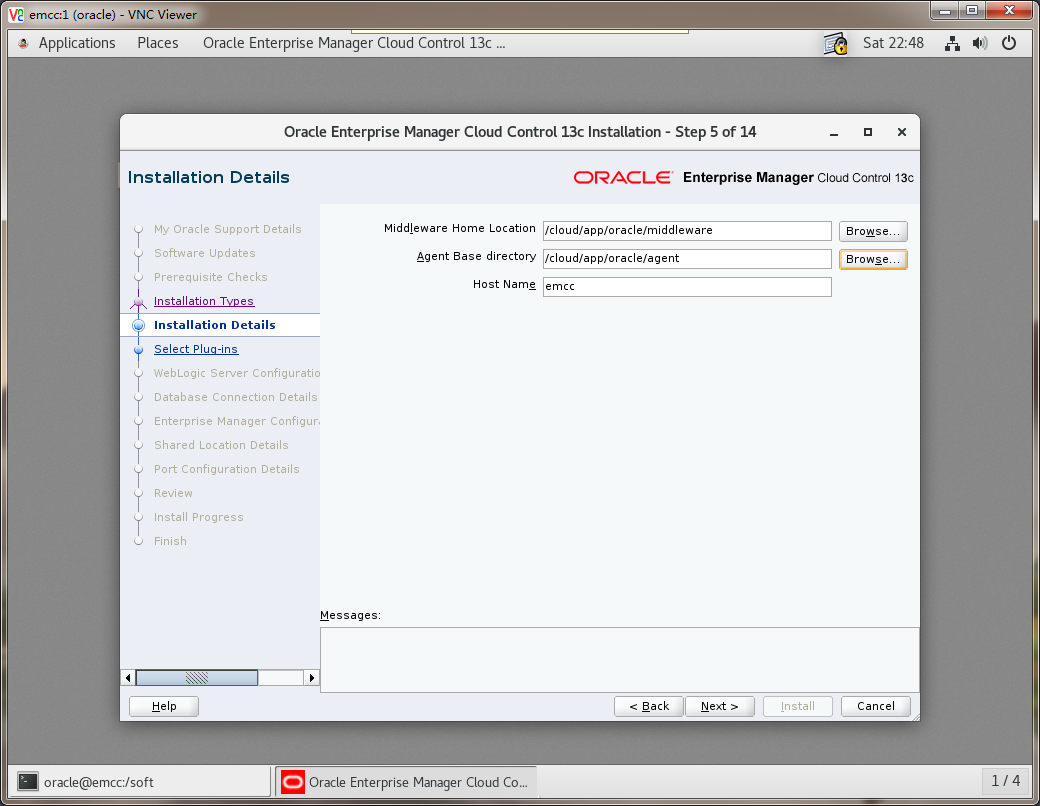
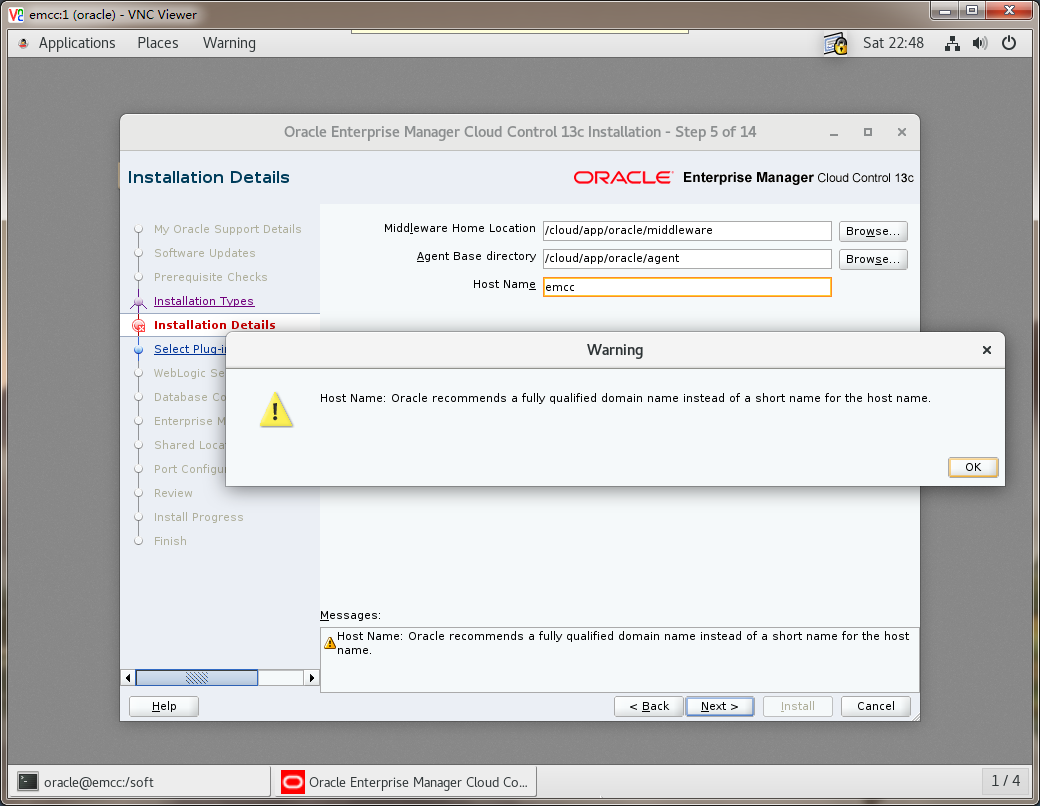
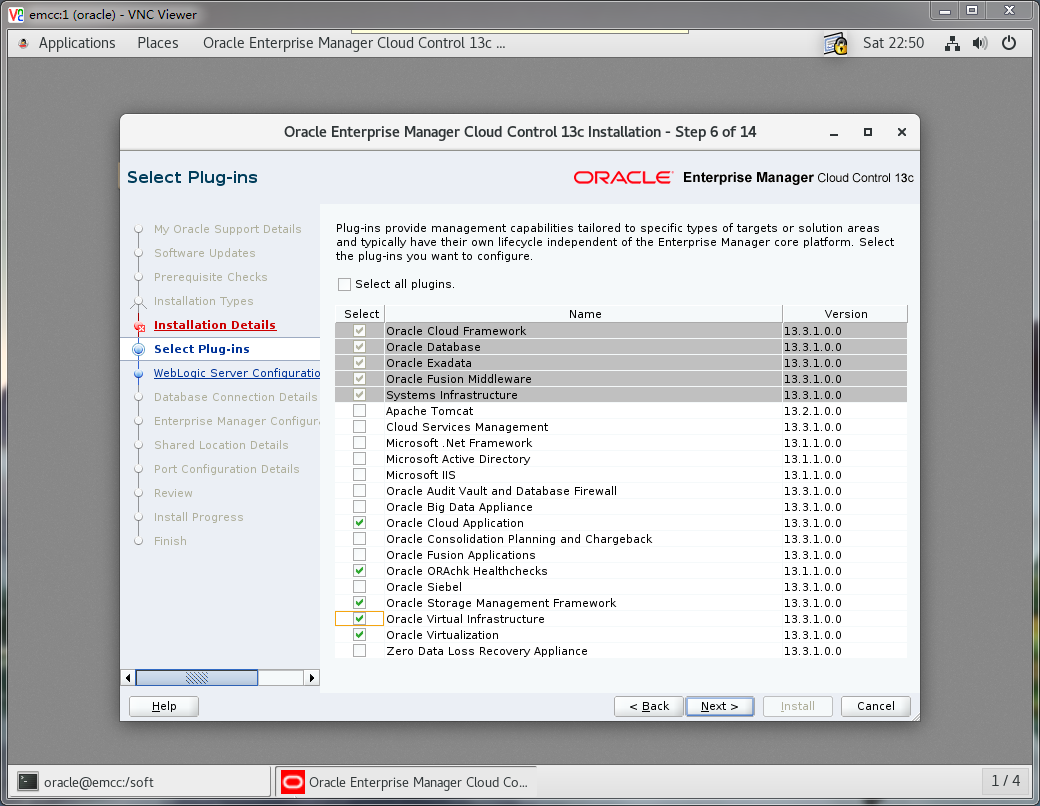
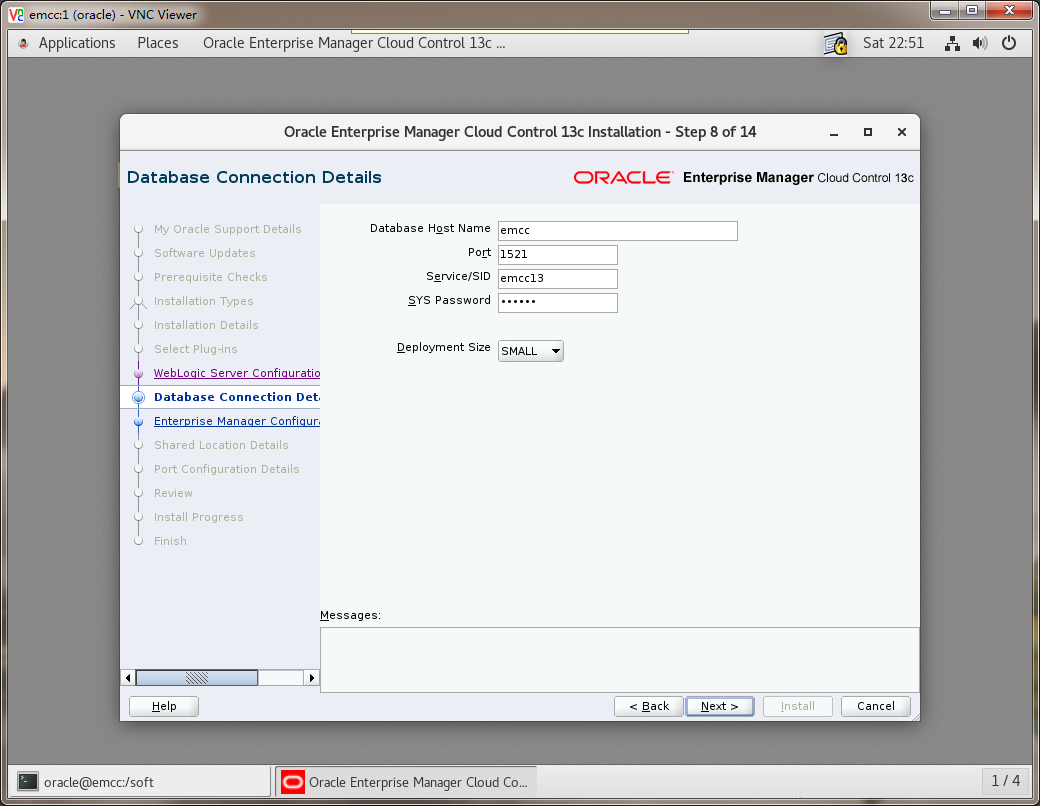
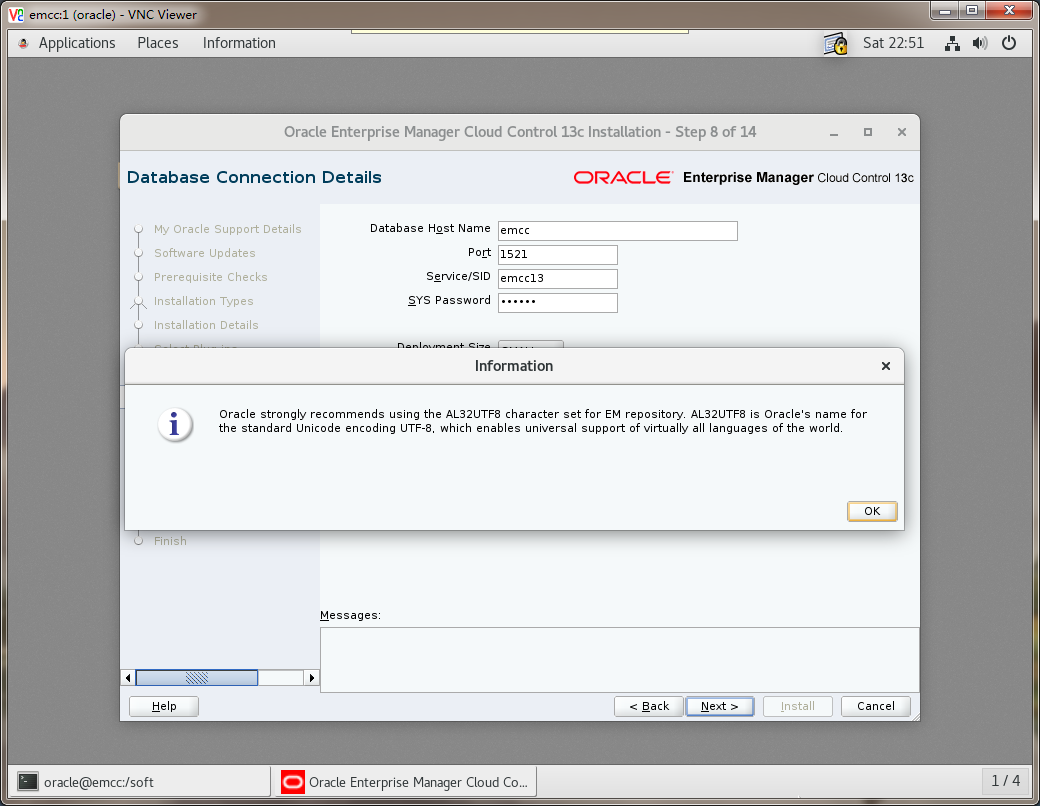
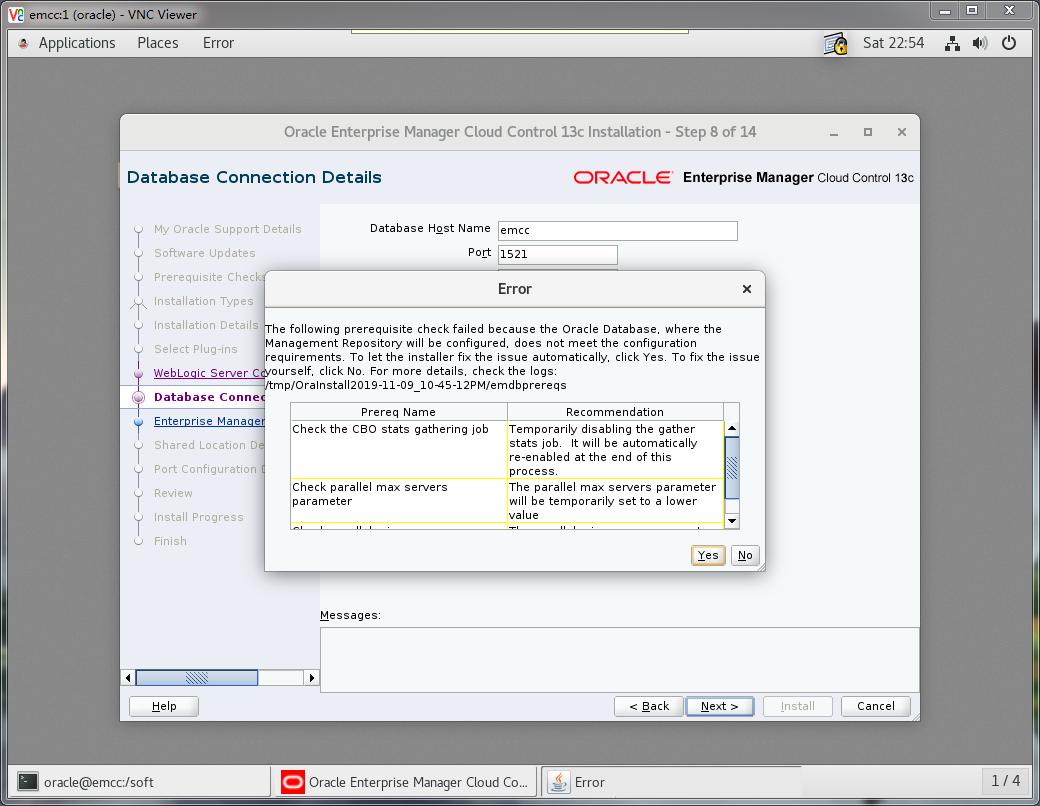
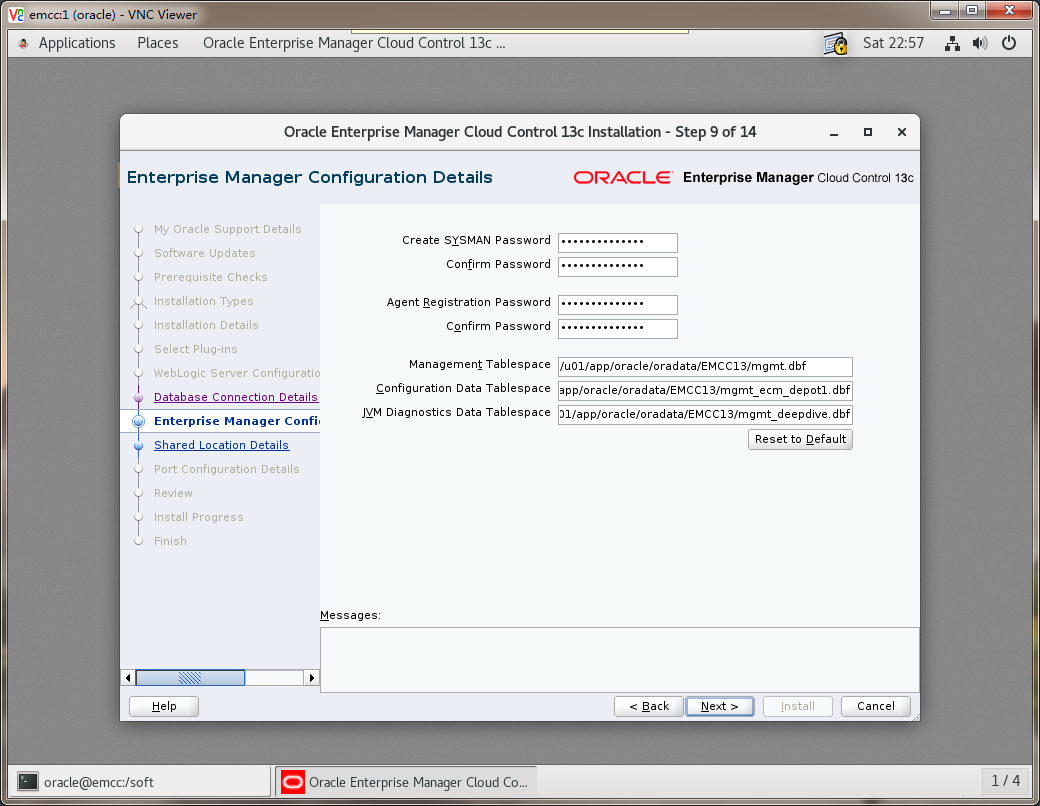
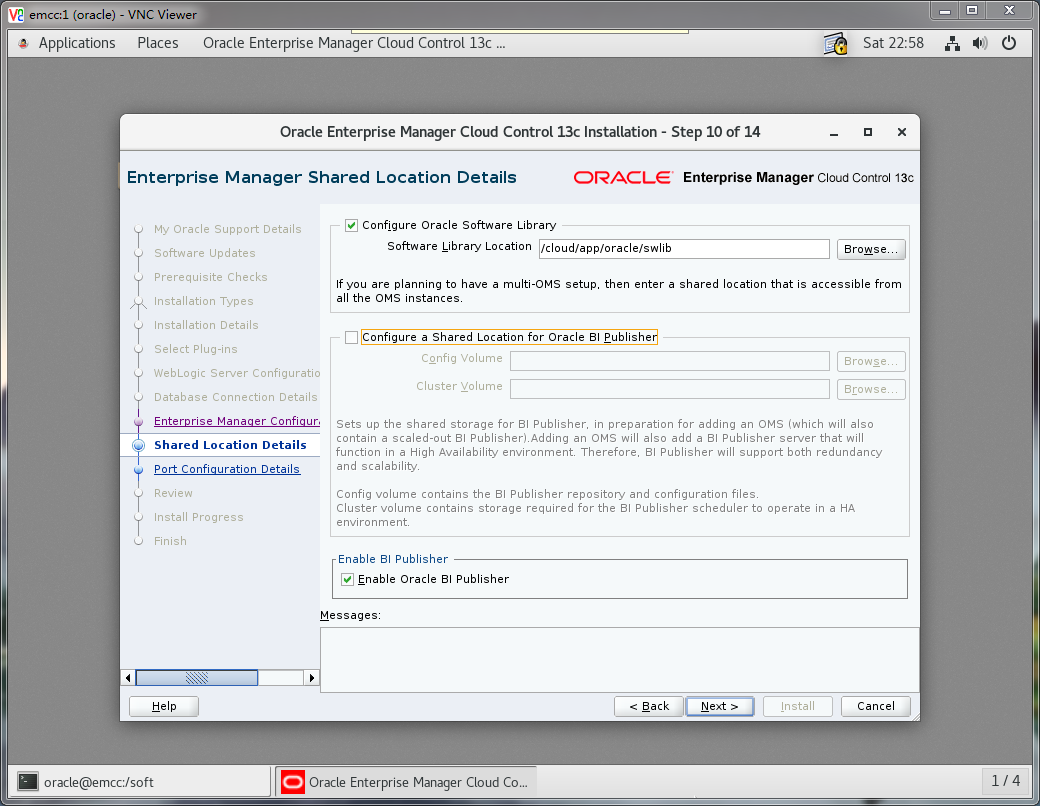
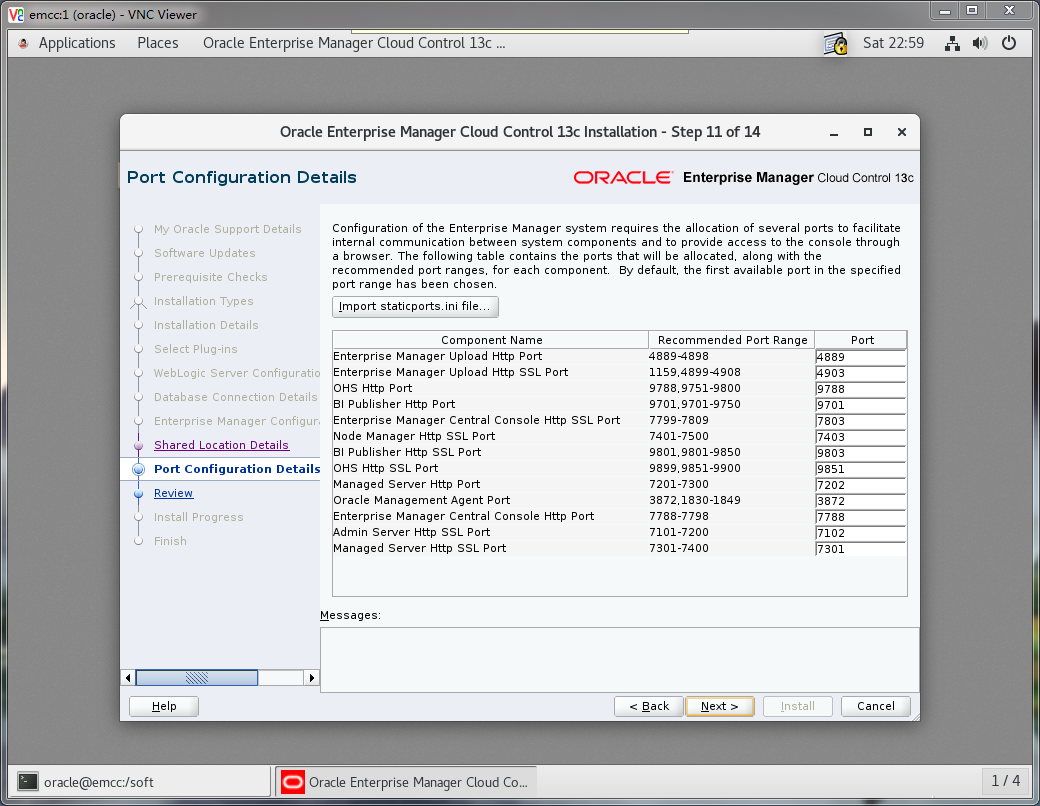
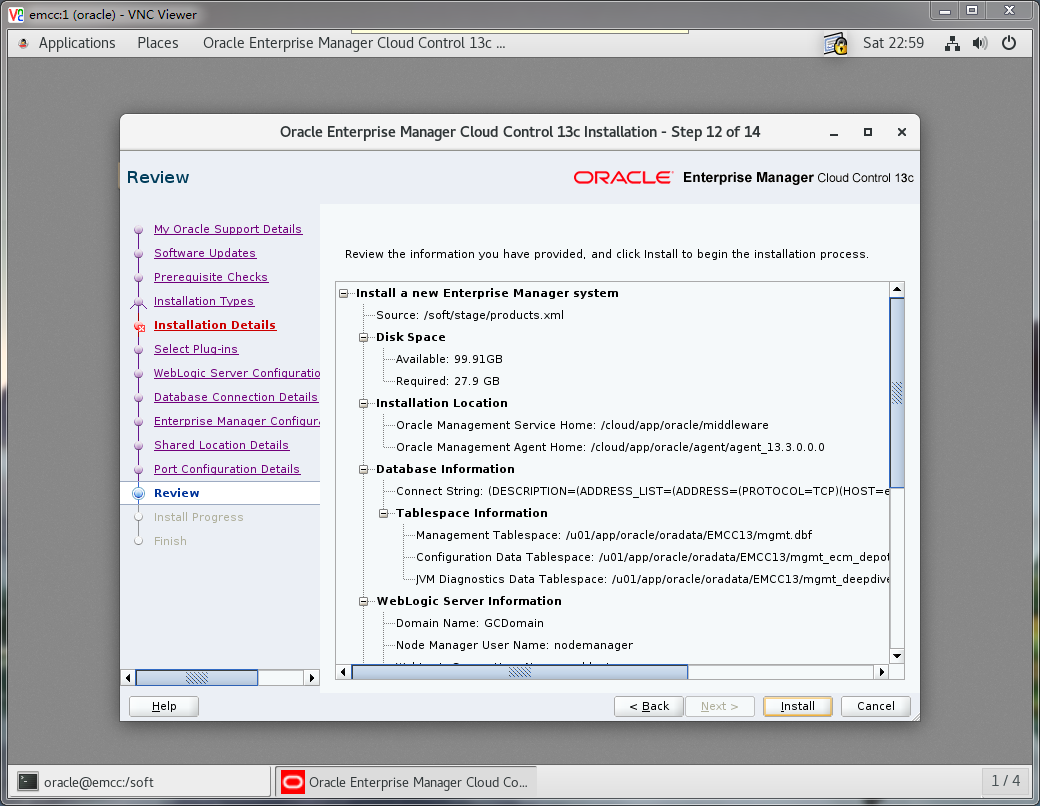
4 EMCC 安装
4.1 数据库设置
# 文档资料数据库参数设置alter user dbsnmp identified by oracle account unlock;alter system set shared_pool_size=800m;alter system set "_allow_insert_with_update_check"=true;alter system set session_cached_cursors=300 scope=spfile;alter system set open_cursors=350 scope=spfile;alter system set job_queue_processes=22 scope=spfile;# 更改日志组大小:添加 4/5/6select a.group#,a.status,b.member from v$log a,v$logfile b where a.group#=b.group#;alter database add logfile group 4('/u01/app/oracle/oradata/EMCC13/redo04a.log','/u01/app/oracle/oradata/EMCC13/redo04b.log') size 500M;alter database add logfile group 5('/u01/app/oracle/oradata/EMCC13/redo05a.log','/u01/app/oracle/oradata/EMCC13/redo05b.log') size 500M;alter database add logfile group 6('/u01/app/oracle/oradata/EMCC13/redo06a.log','/u01/app/oracle/oradata/EMCC13/redo06b.log') size 500M;# 将 CURRENT 切换至新日志组alter system switch logfile;# 执行完全检查点,刷缓存数据变更日志组状态为 INACTIVEalter system checkpoint;# 删除 1/2/3 日志组alter database drop logfile group 1;alter database drop logfile group 2;alter database drop logfile group 3;!rm -rf /u01/app/oracle/oradata/EMCC13/redo01.log!rm -rf /u01/app/oracle/oradata/EMCC13/redo02.log!rm -rf /u01/app/oracle/oradata/EMCC13/redo03.log
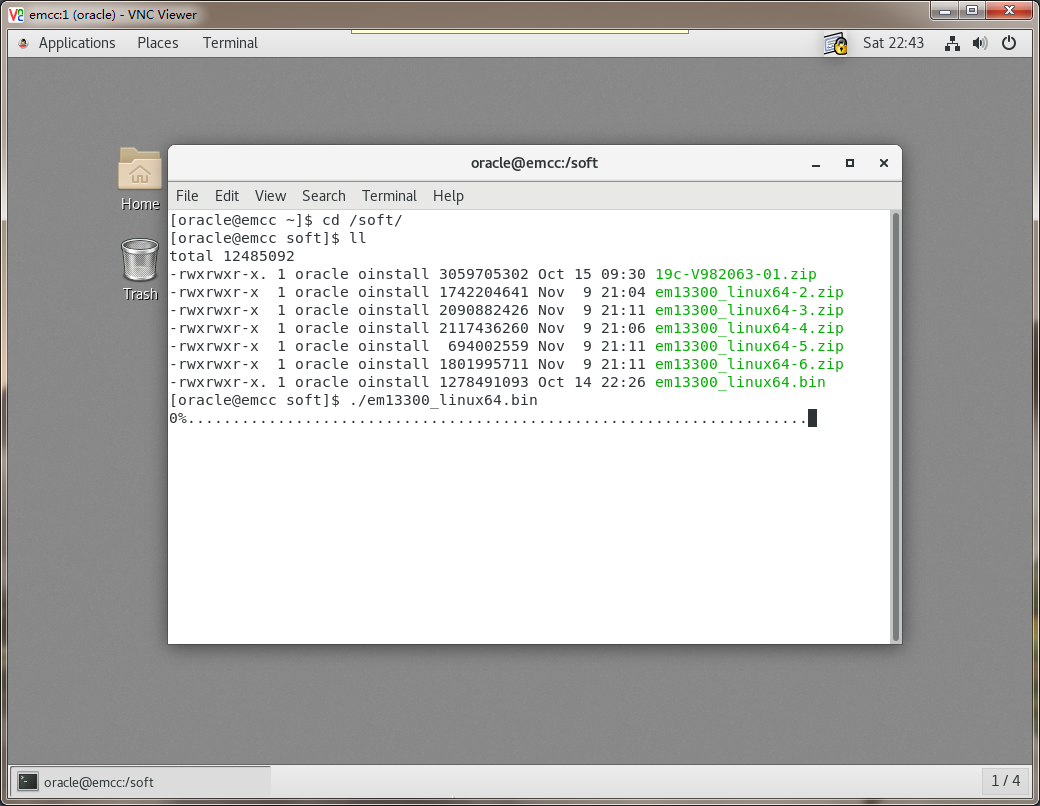
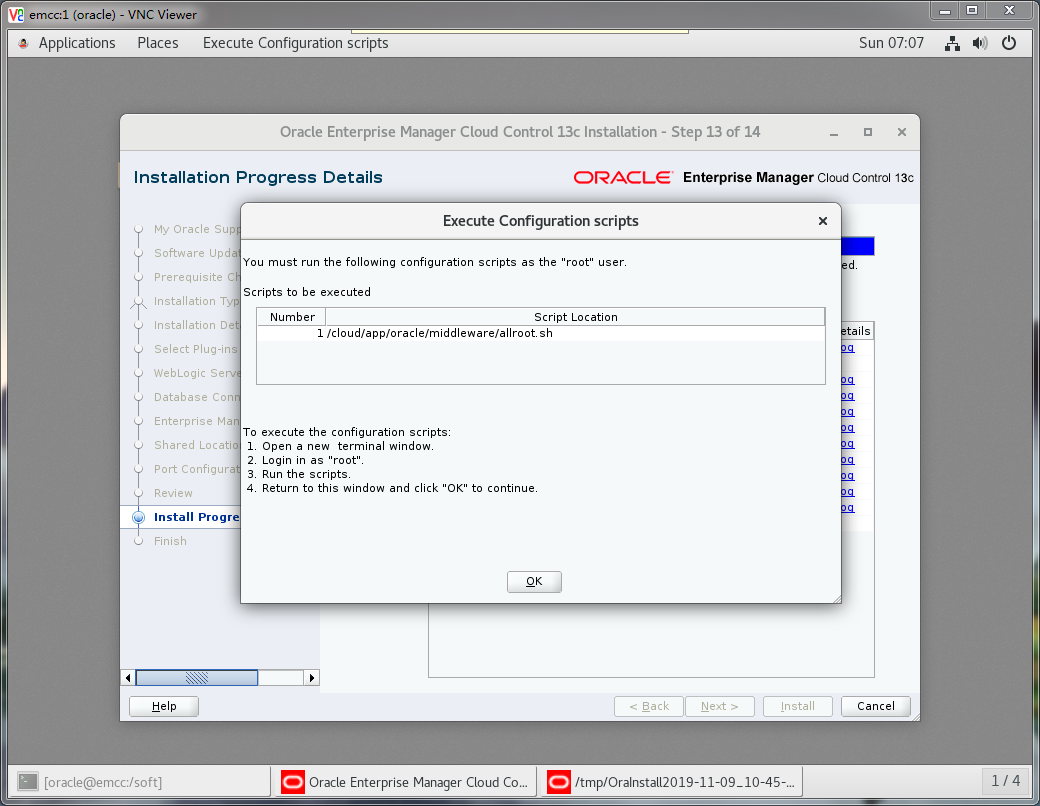
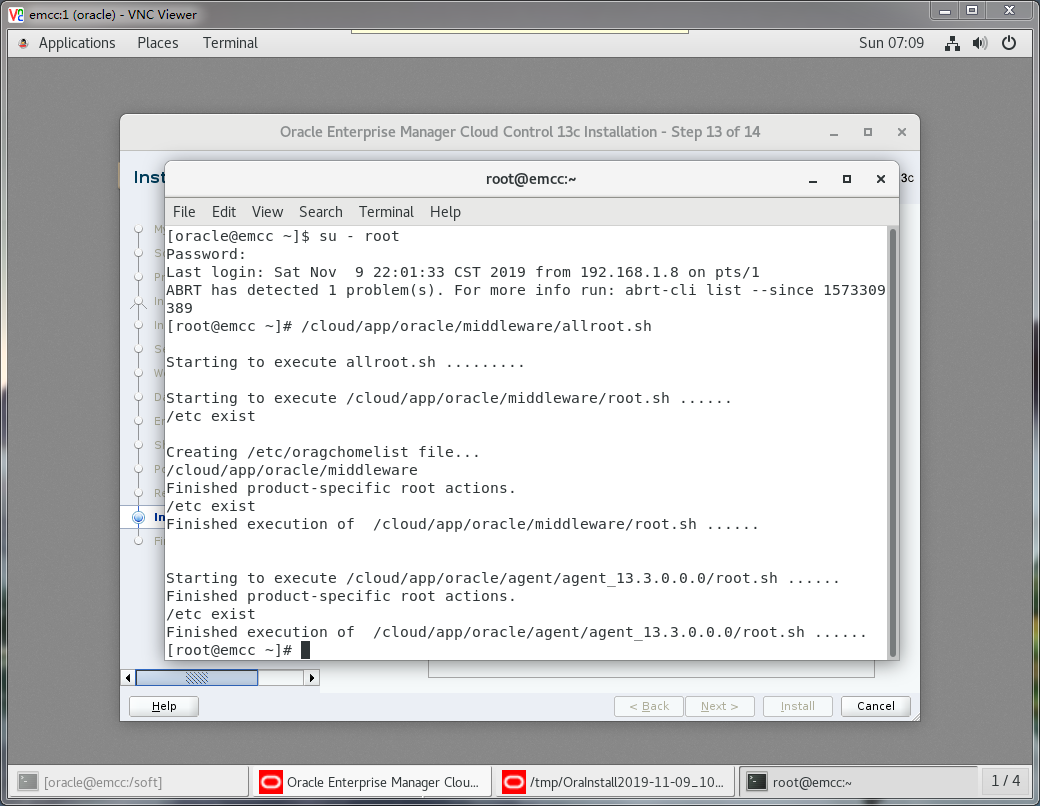
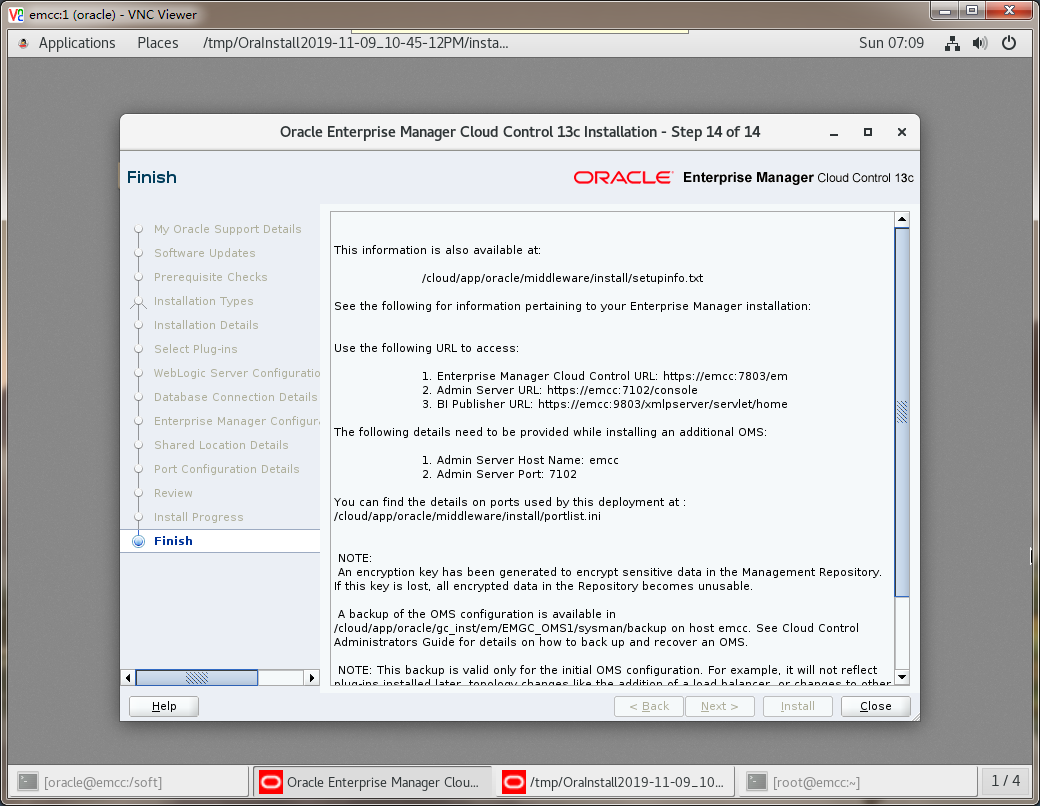
4.2 执行安装
su - rootchown -R oracle:oinstall /softchmod -R 775 /softsu - oraclecd /soft./em13300_linux64.bin


5 EMCC 配置
5.1 环境配置
服务端编辑
/etc/hosts添加客户端主机名及IP[root@emcc ~]# echo "192.168.1.10 askscuti" >> /etc/hosts客户端(代理)编辑
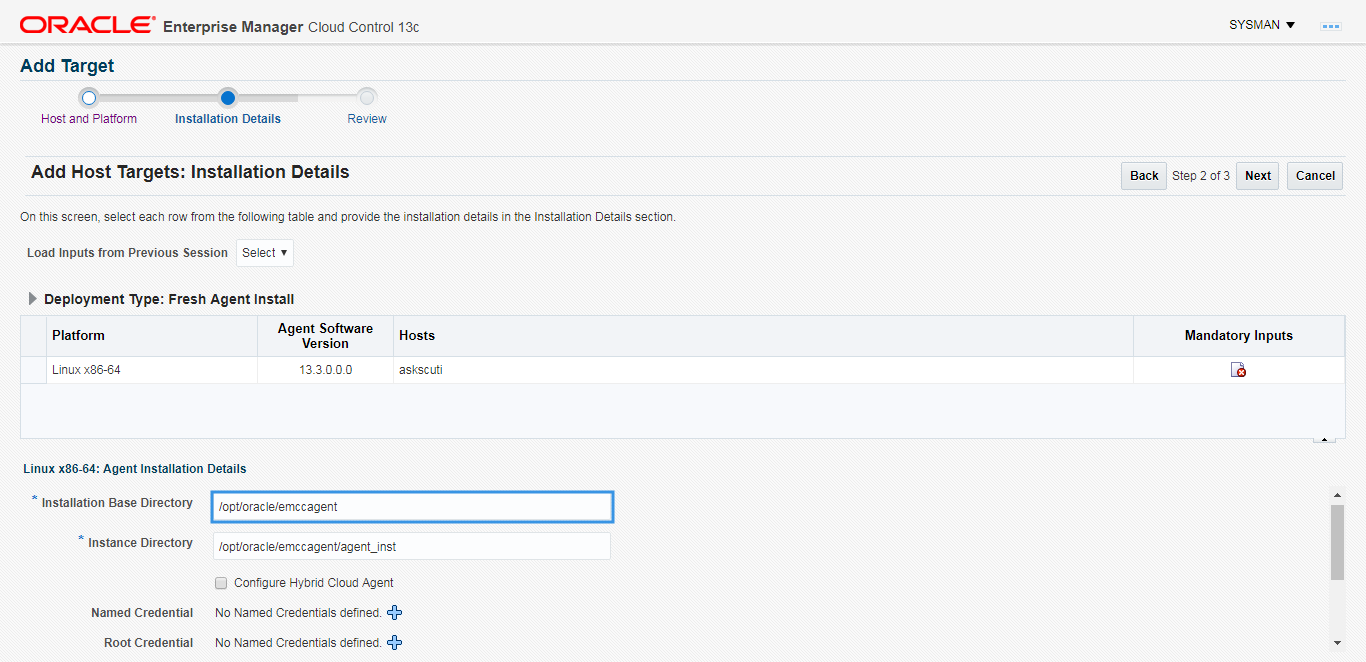
/etc/hosts添加服务端主机名及IP[root@askscuti ~]# echo "192.168.1.113 emcc" >> /etc/hosts客户端(代理)创建 Agent 目录
[root@askscuti ~]# mkdir -p /opt/oracle/emccagent
[root@askscuti ~]# chown -R oracle:oinstall /opt/oracle/emccagent
[root@askscuti ~]# chmod -R 755 /opt/oracle/emccagent
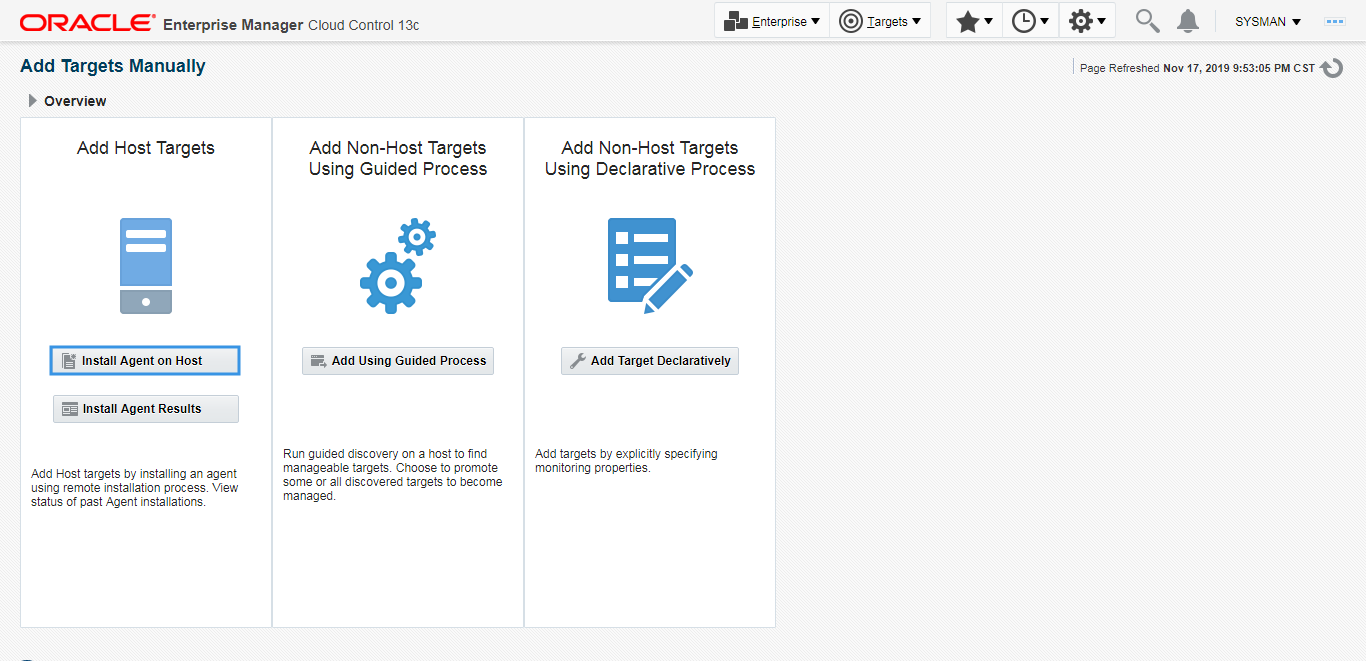
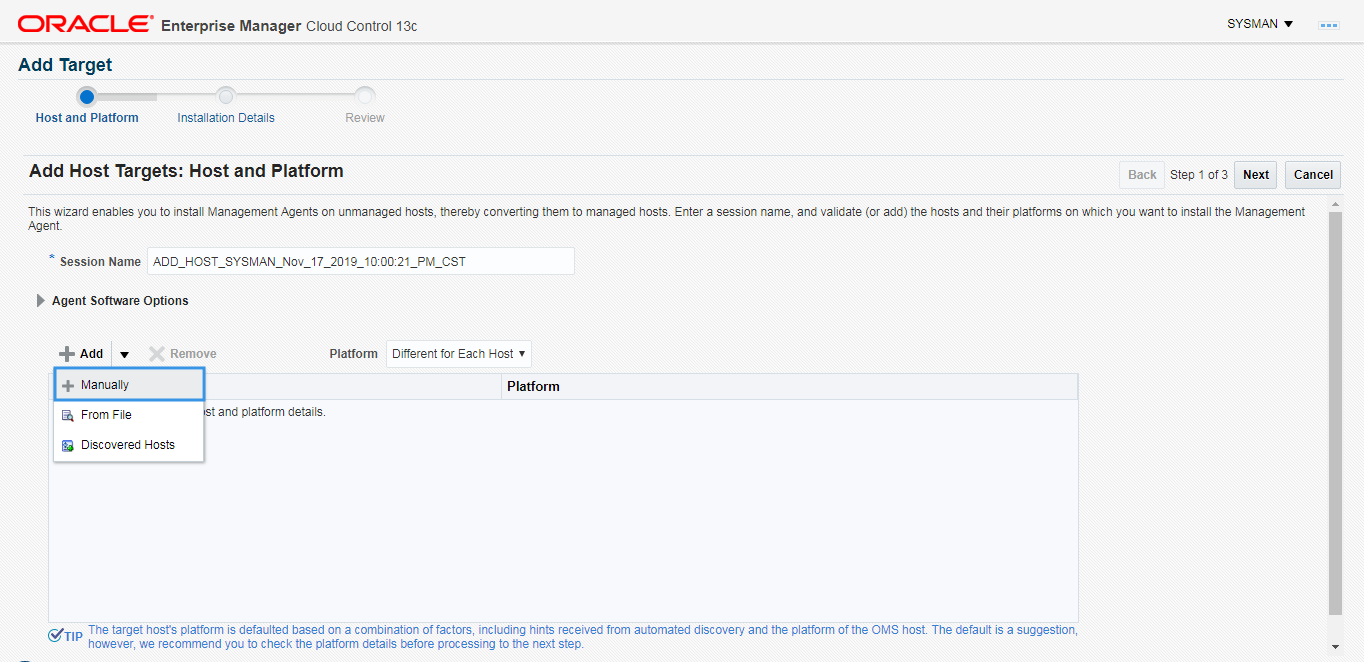
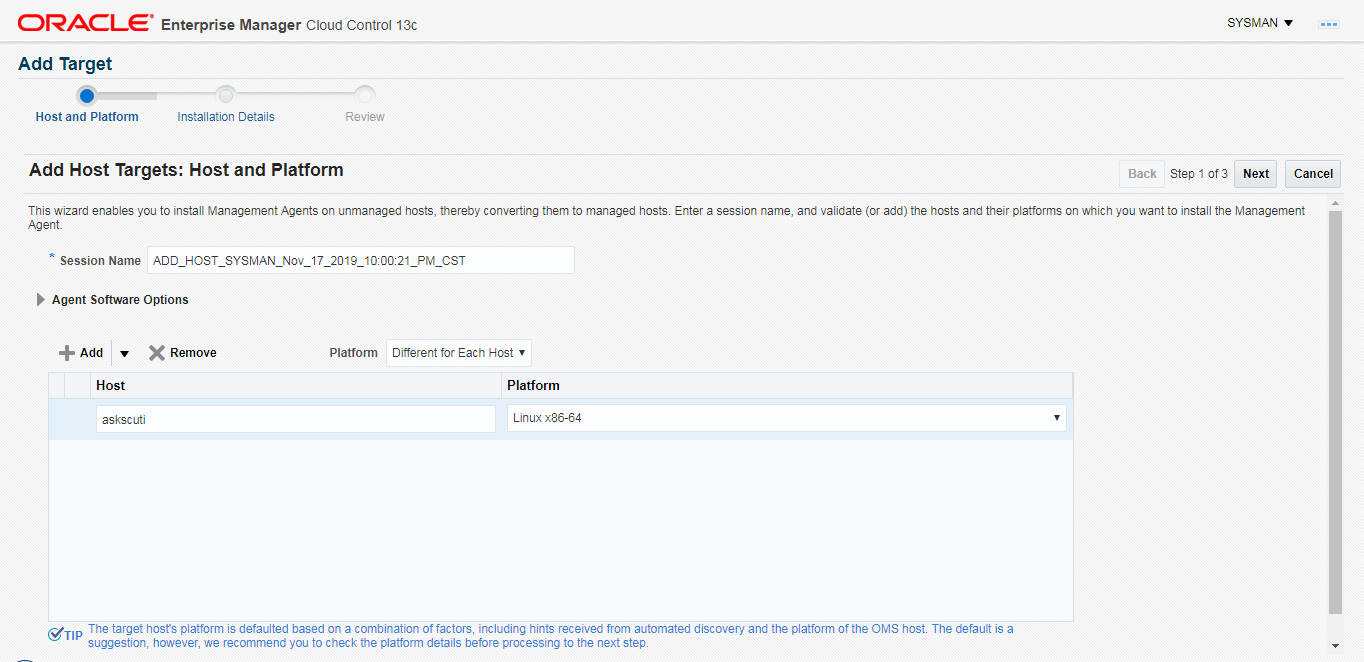
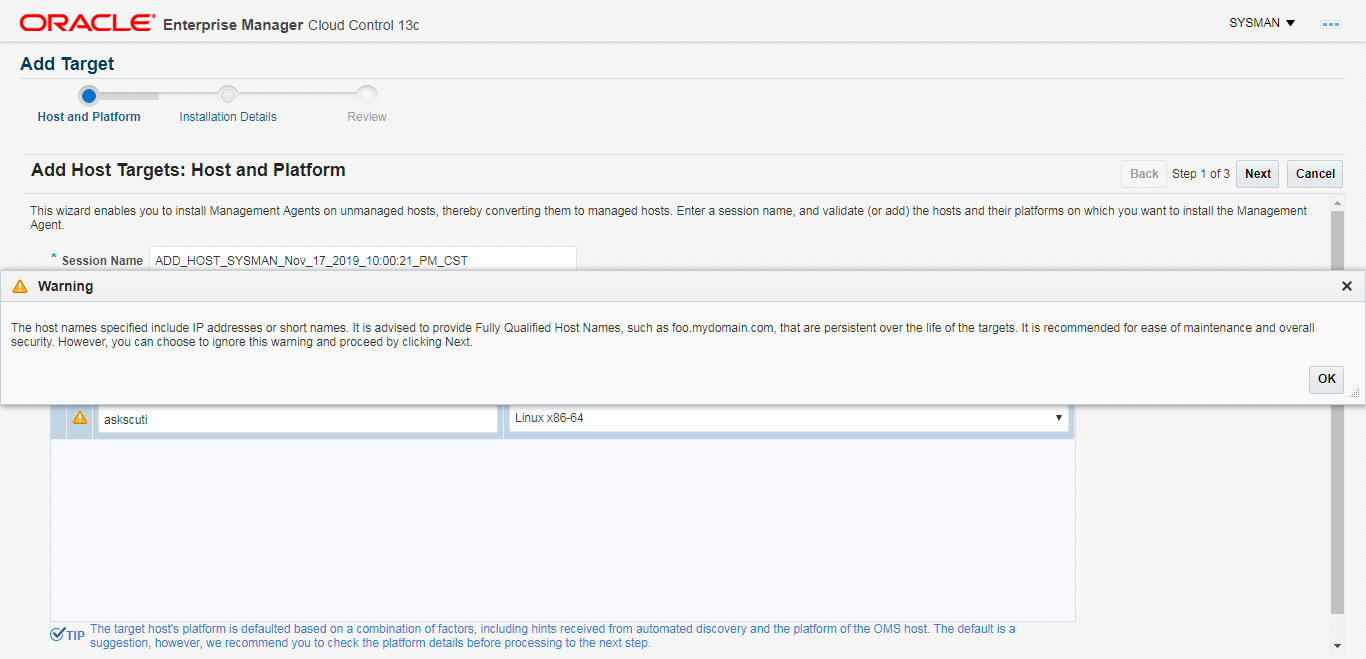
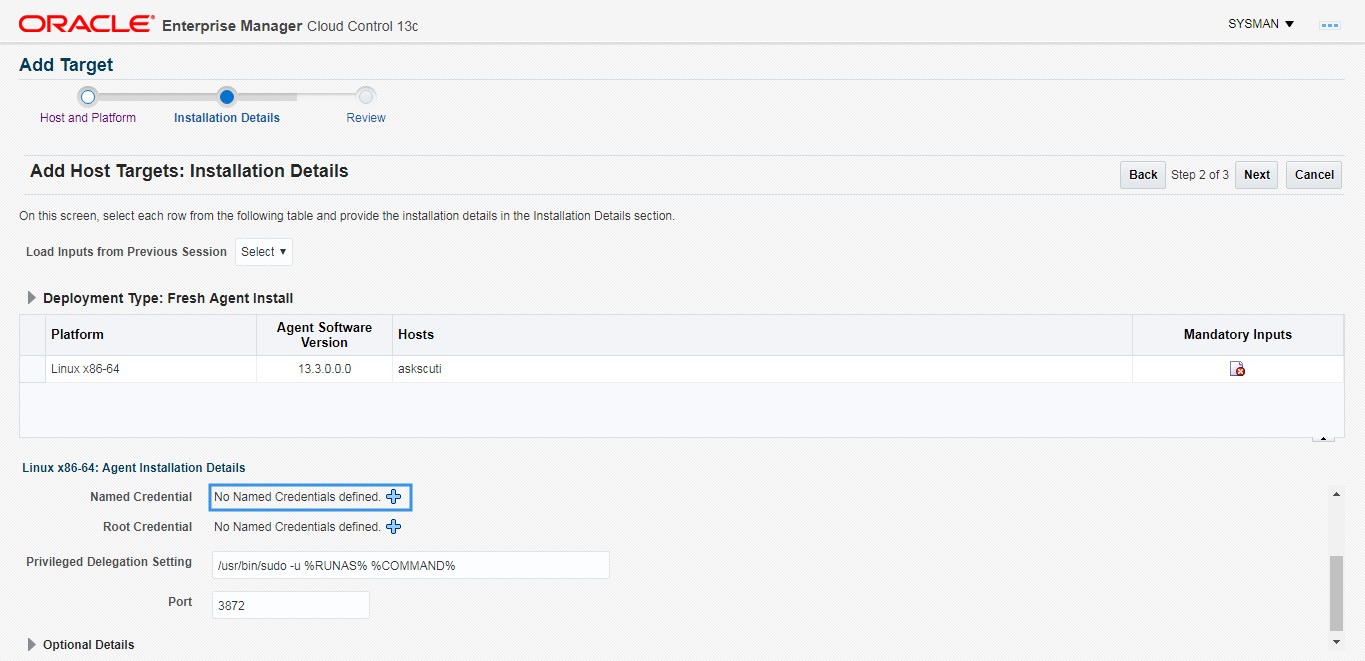
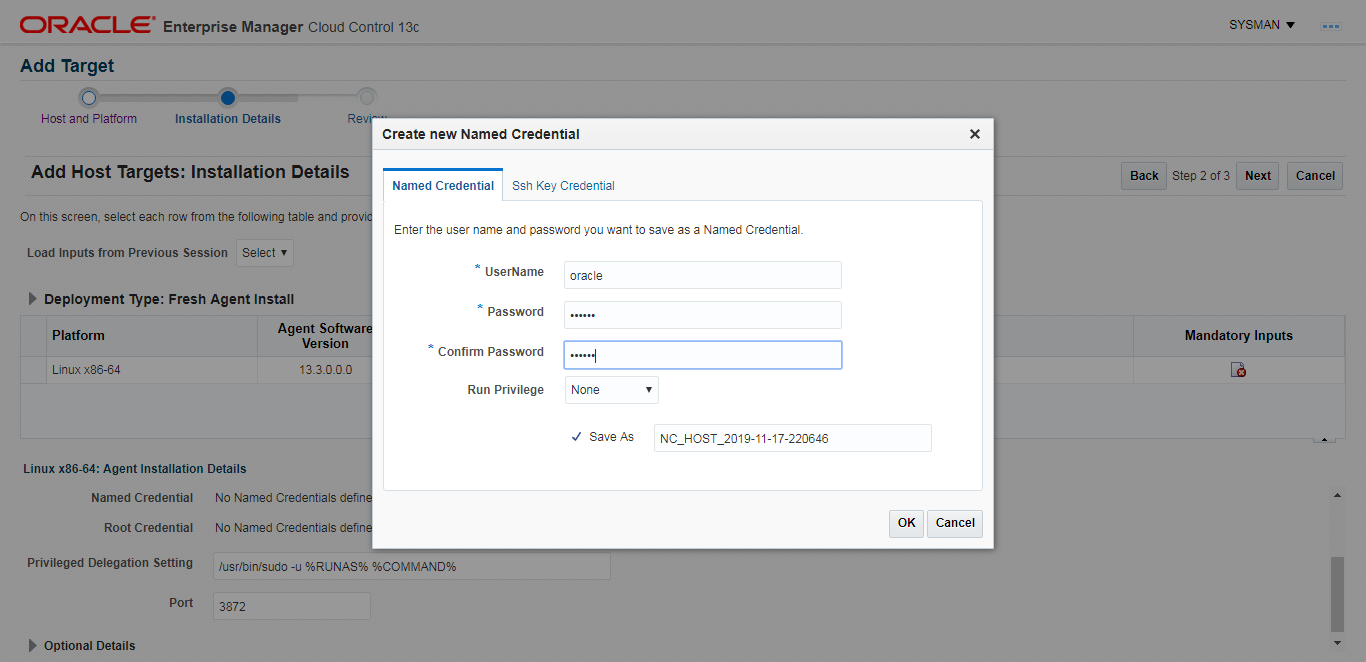
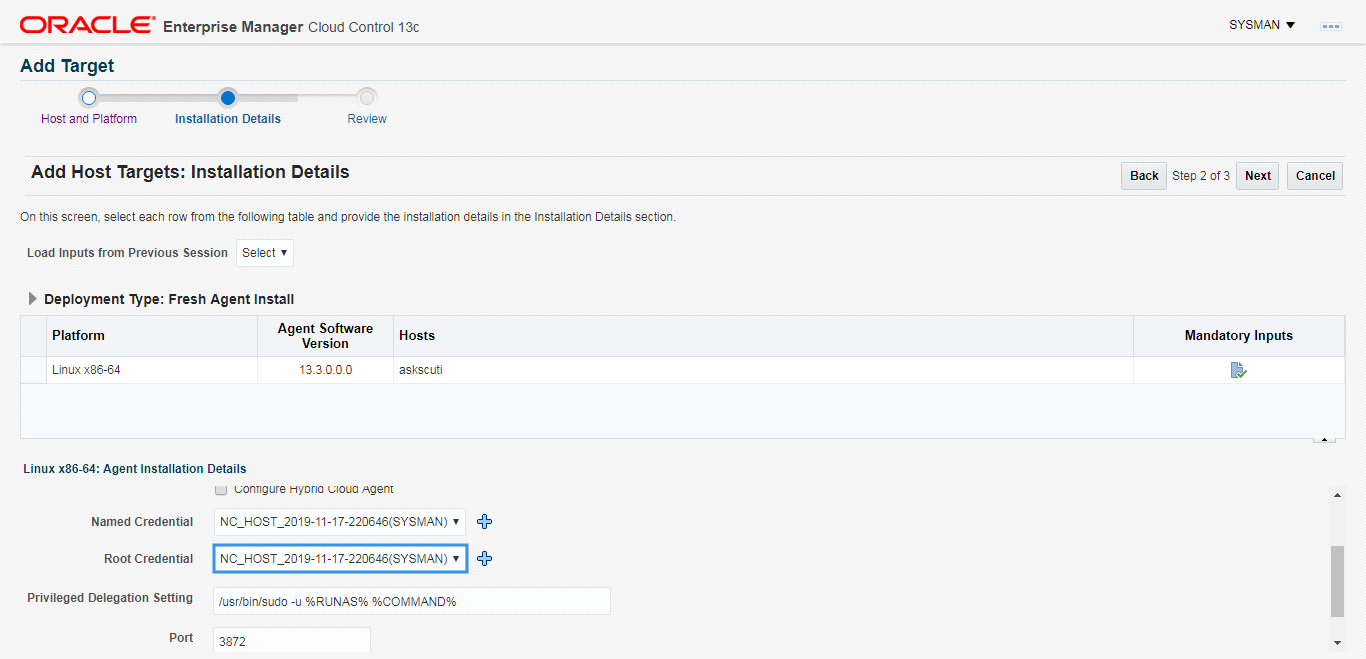
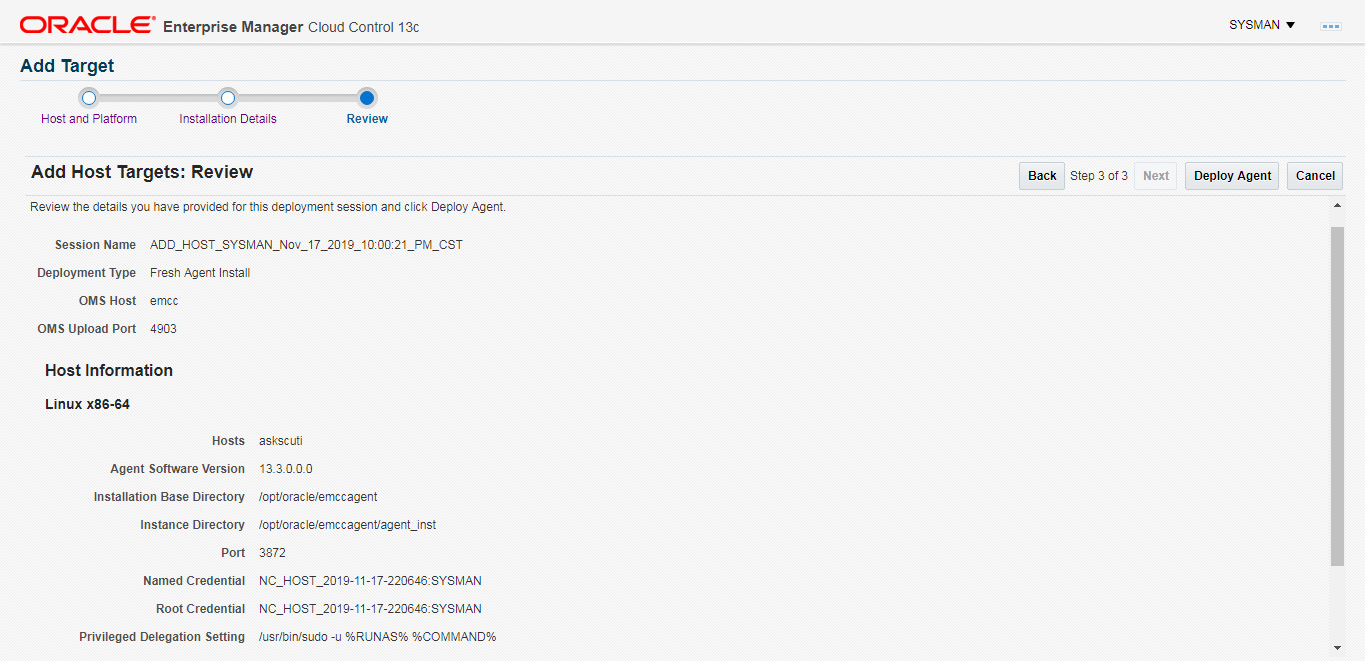
5.2 服务端添加主机及推送代理
客户端(代理)编辑
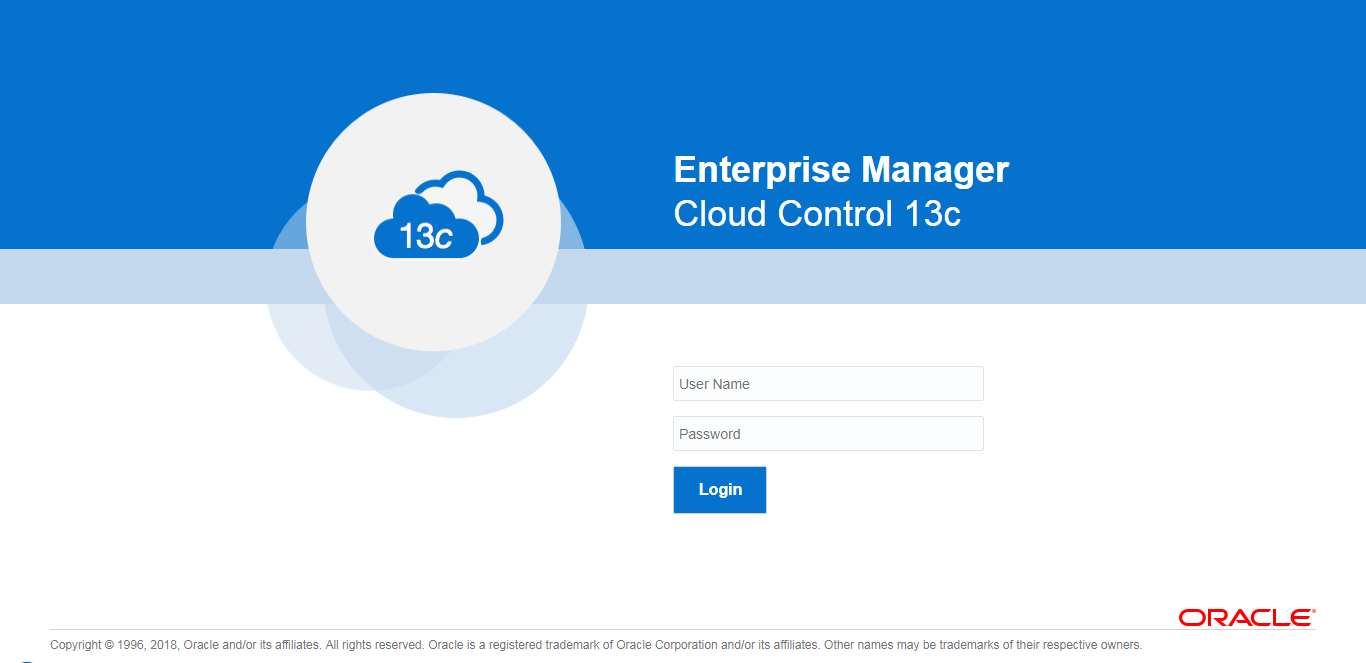
/etc/sudoers添加权限[root@askscuti ~]# cp /etc/sudoers /etc/sudoers.bak [root@askscuti ~]# vim /etc/sudoers 修改原 # Refuse to run if unable to disable echo on the tty. Defaults !visiblepw 为 Defaults visiblepw 修改原 ## Allow root to run any commands anywhere root ALL=(ALL) ALL 为 ## Allow root to run any commands anywhere root ALL=(ALL) ALL oracle ALL=(ALL) ALL登录 EMCC :
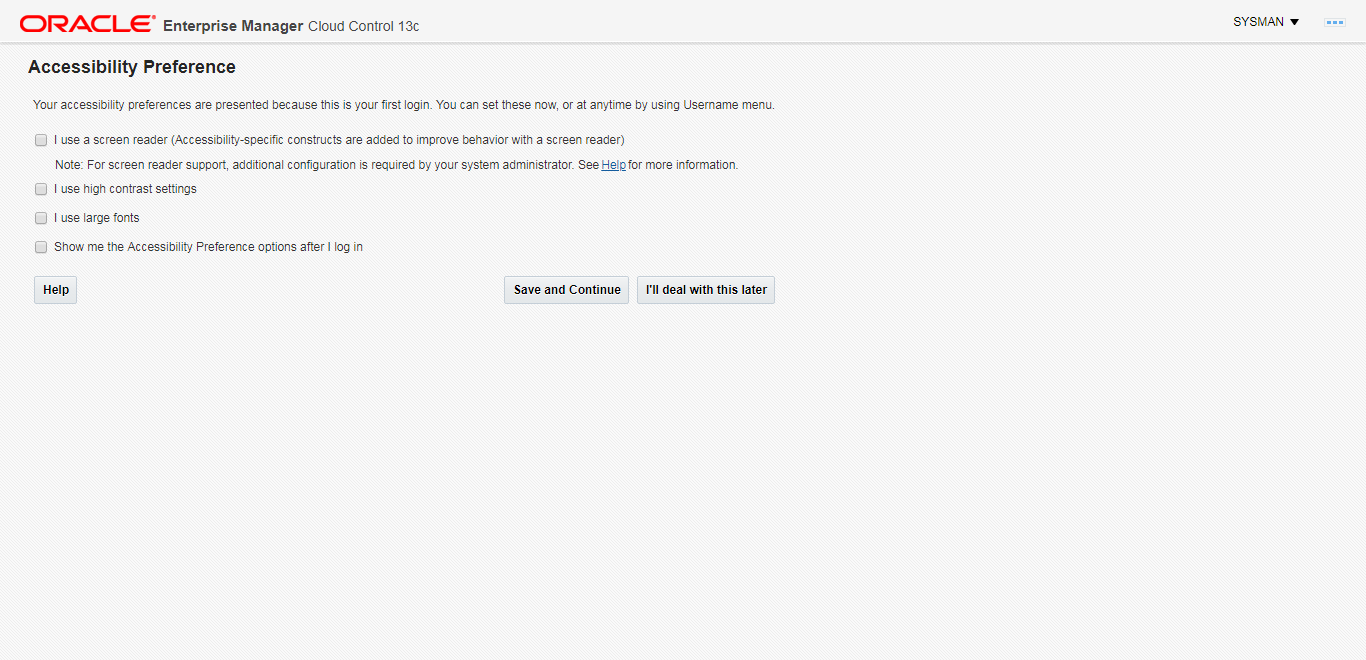
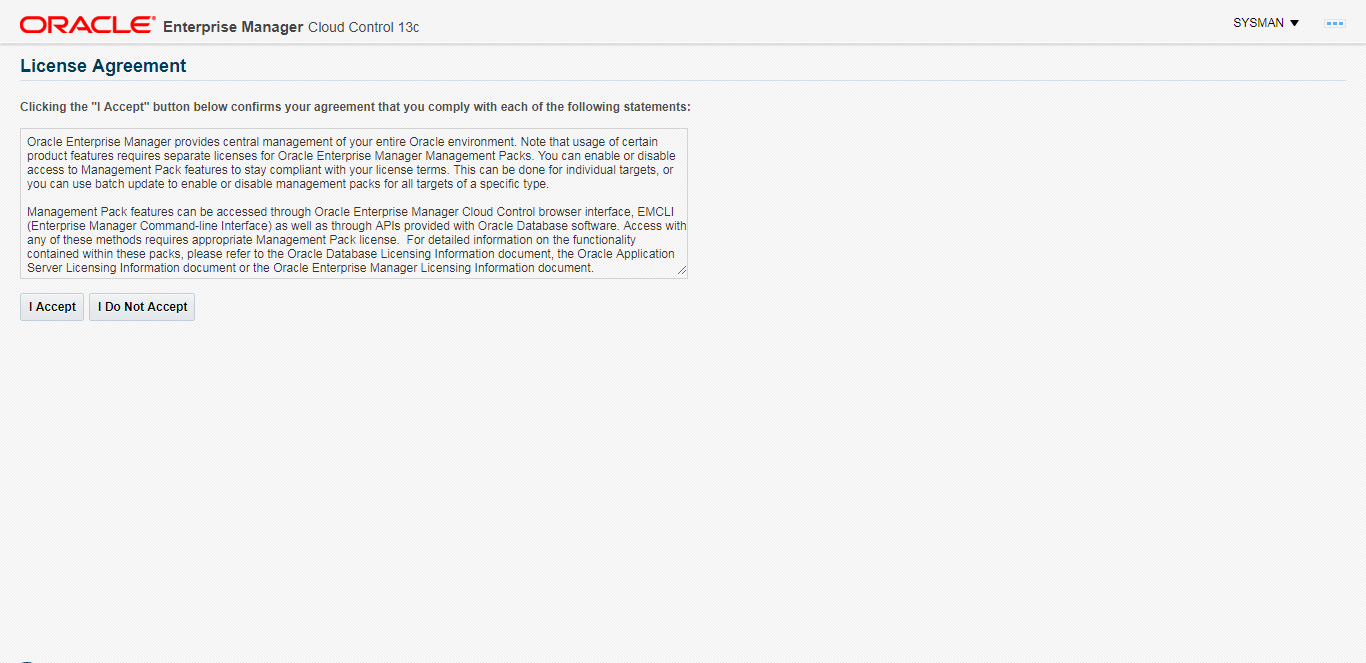
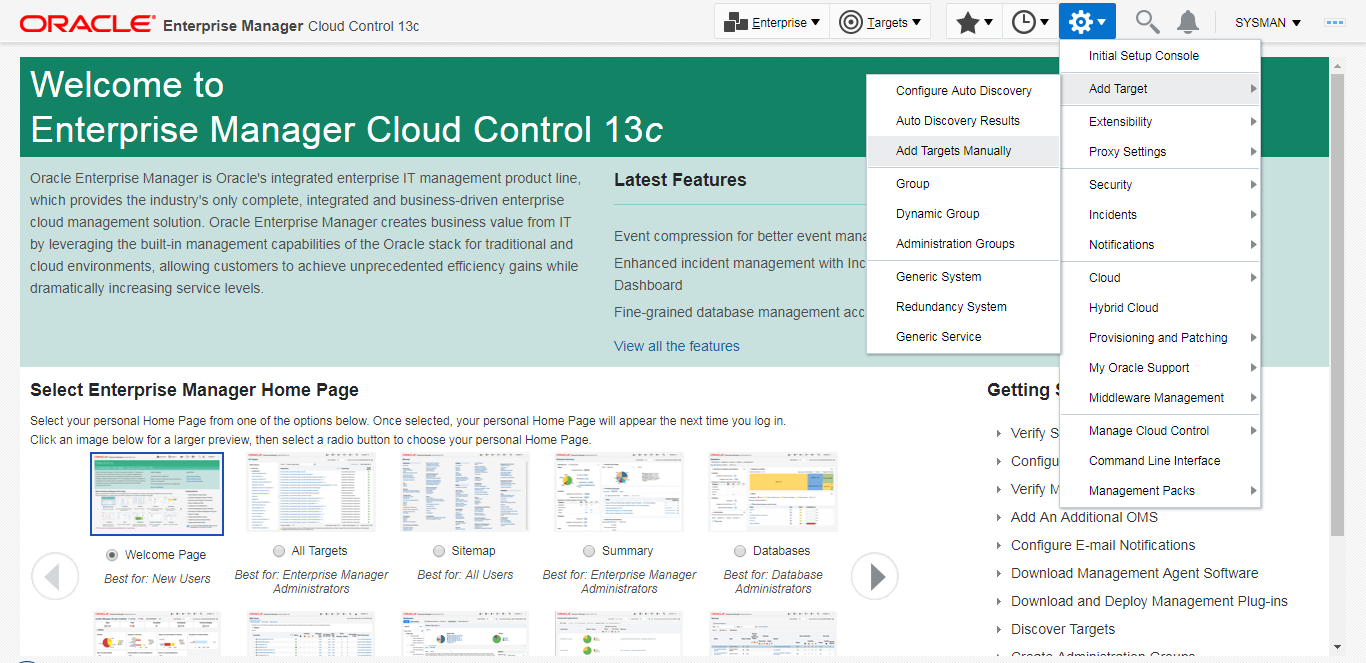
sysman/xxxxxx
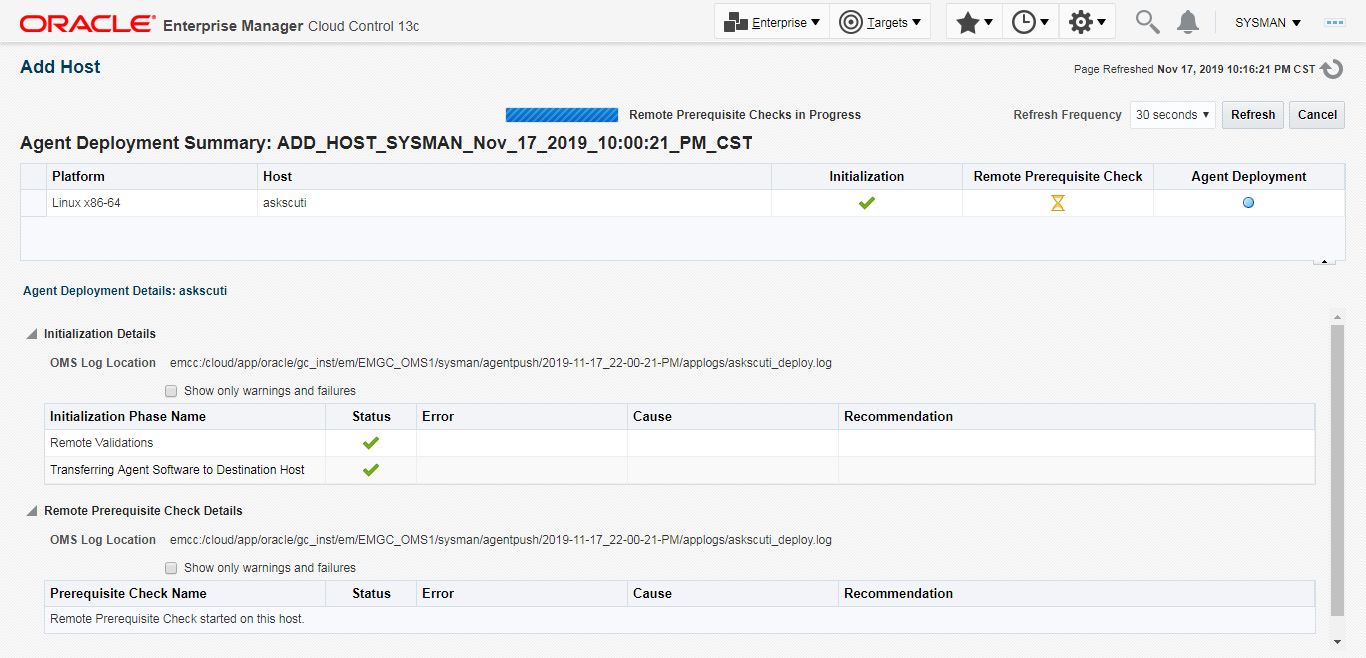
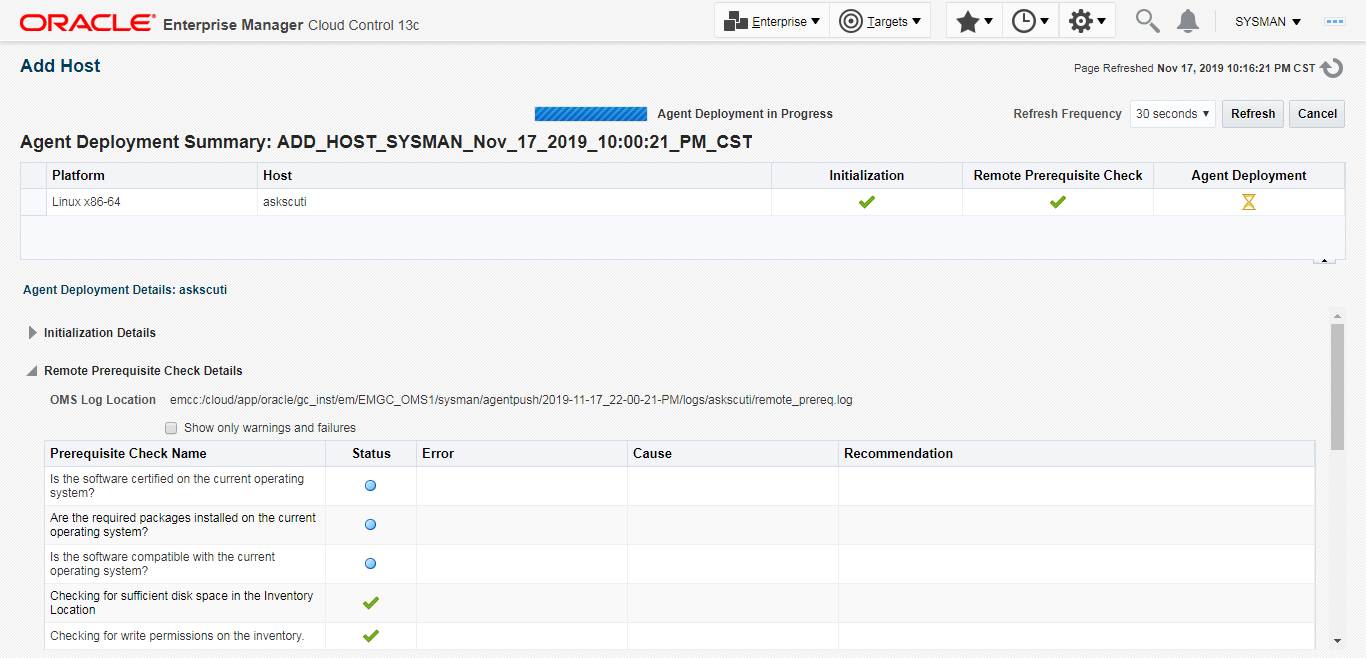
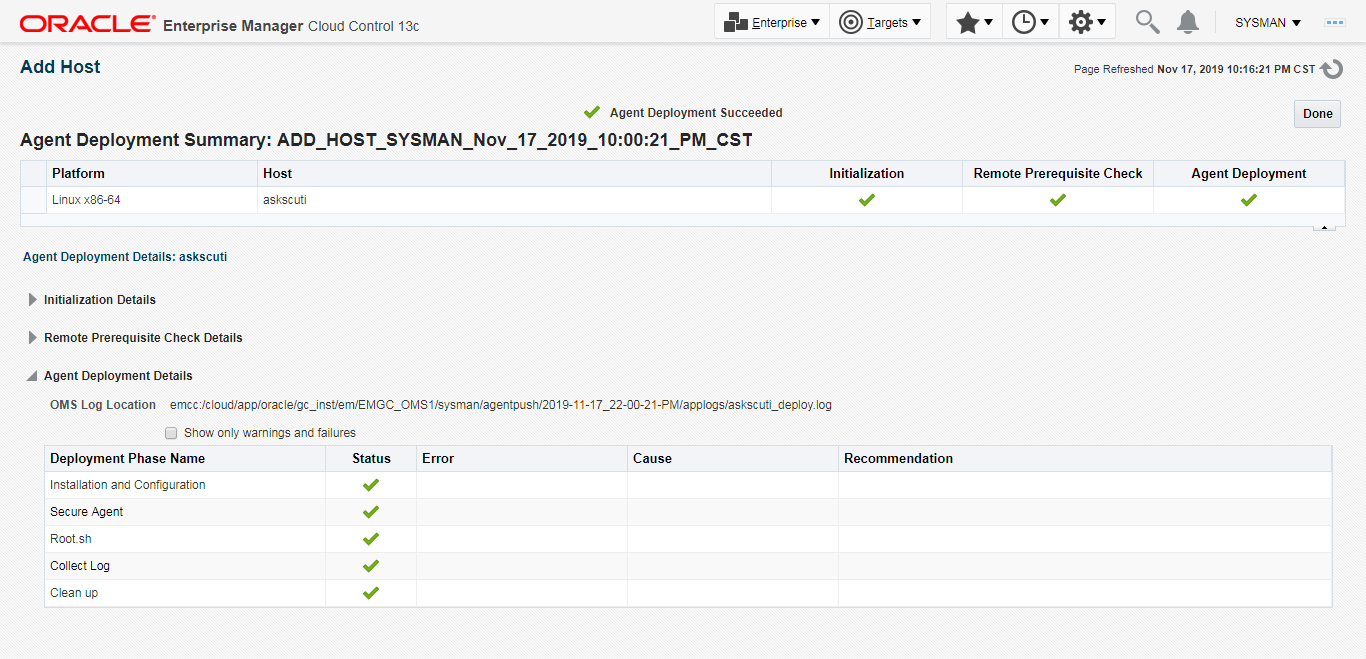
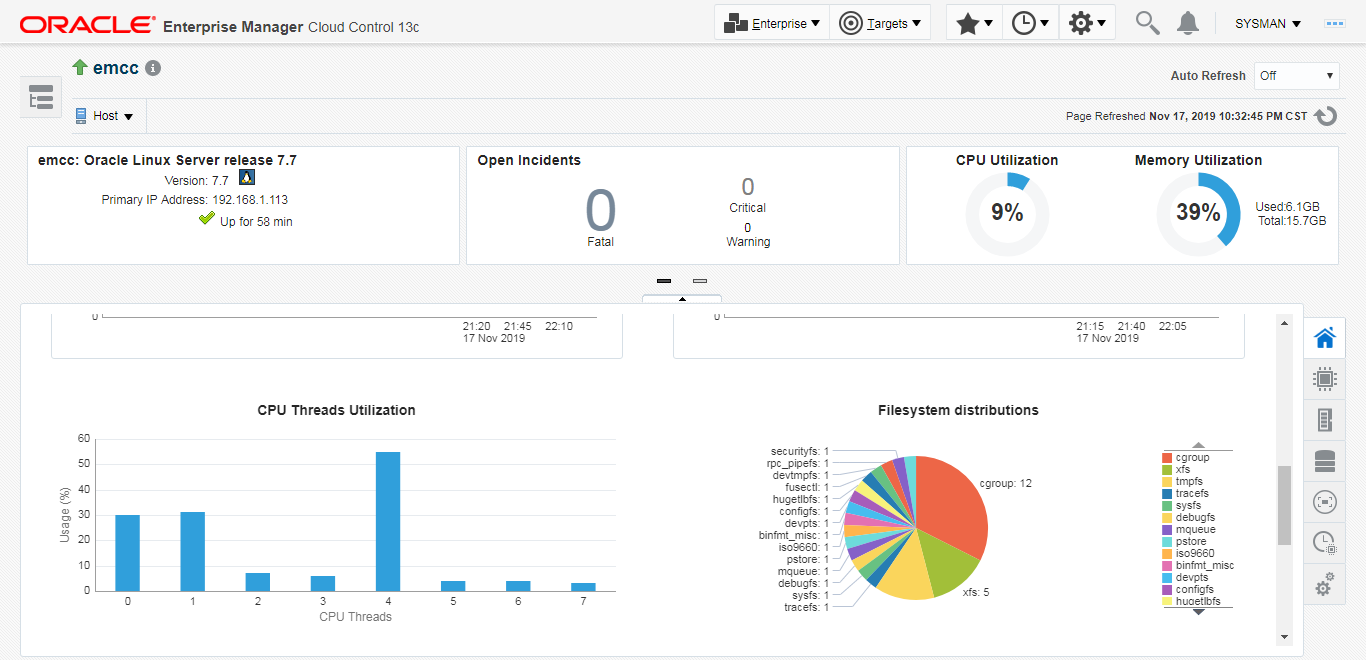
- 查询主机状态及监控
推送完成后,你可以点击Targets - Hosts进行查看主机状态
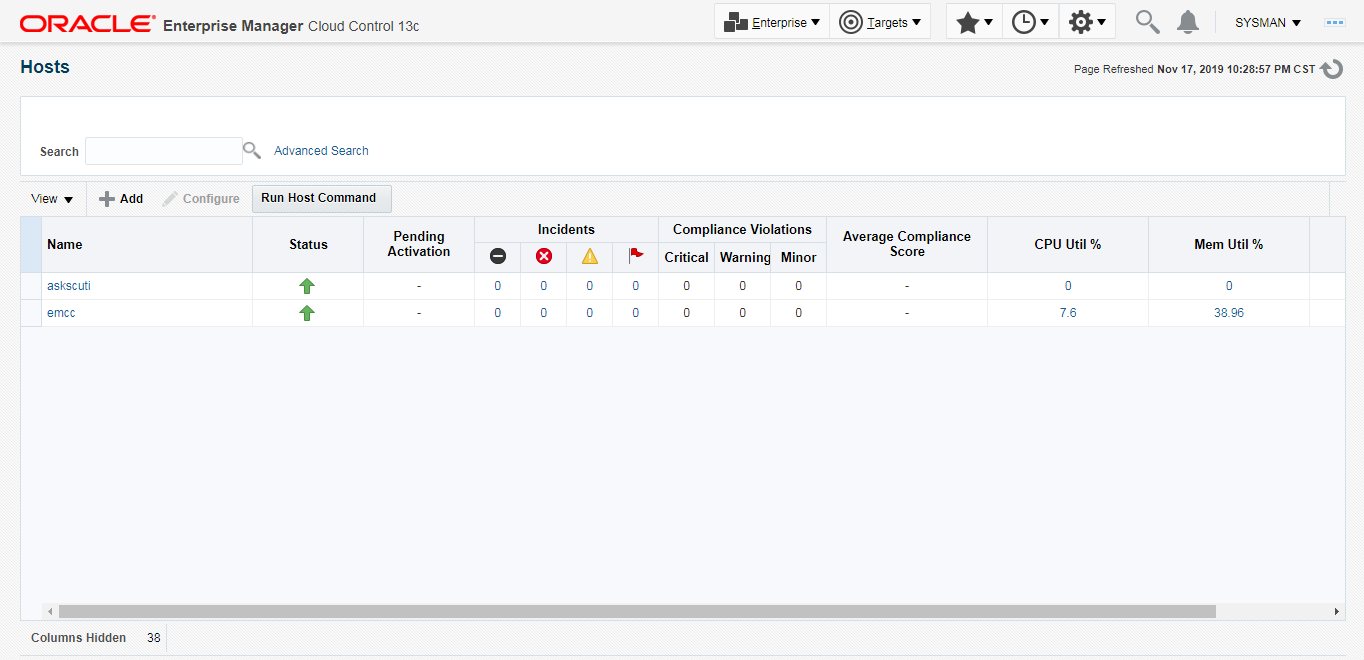
- 点击进入对应主机进行监控
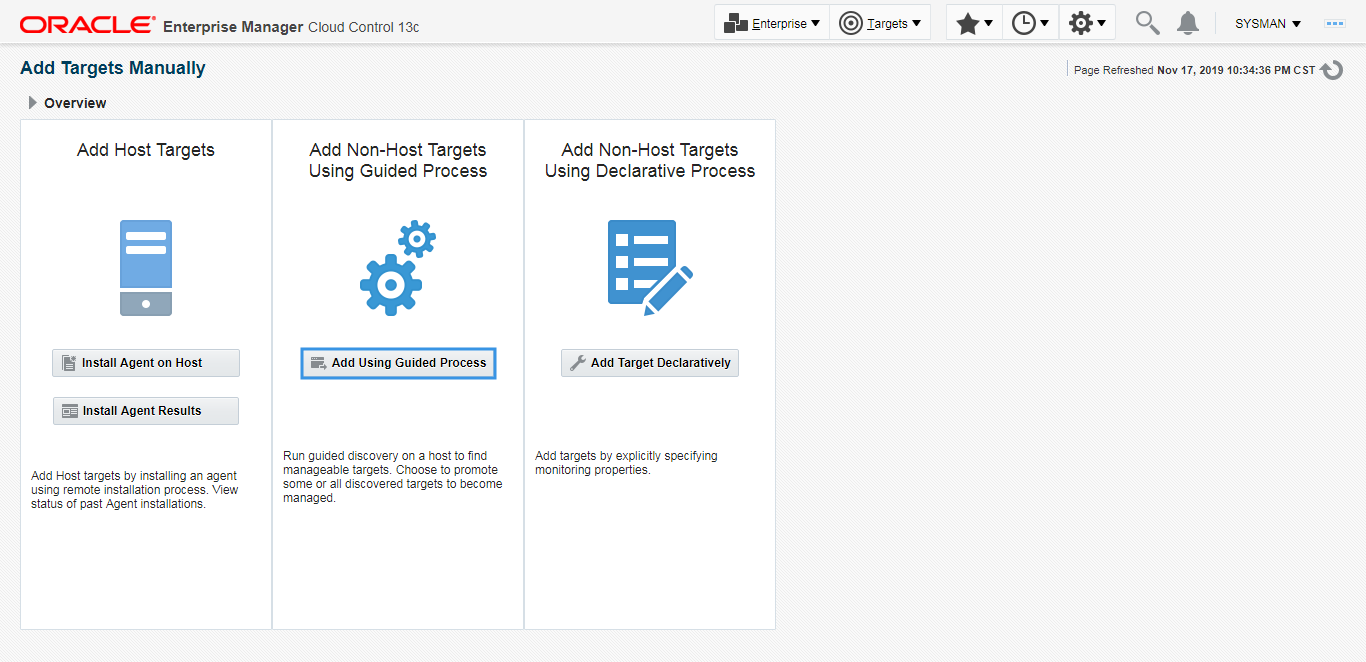
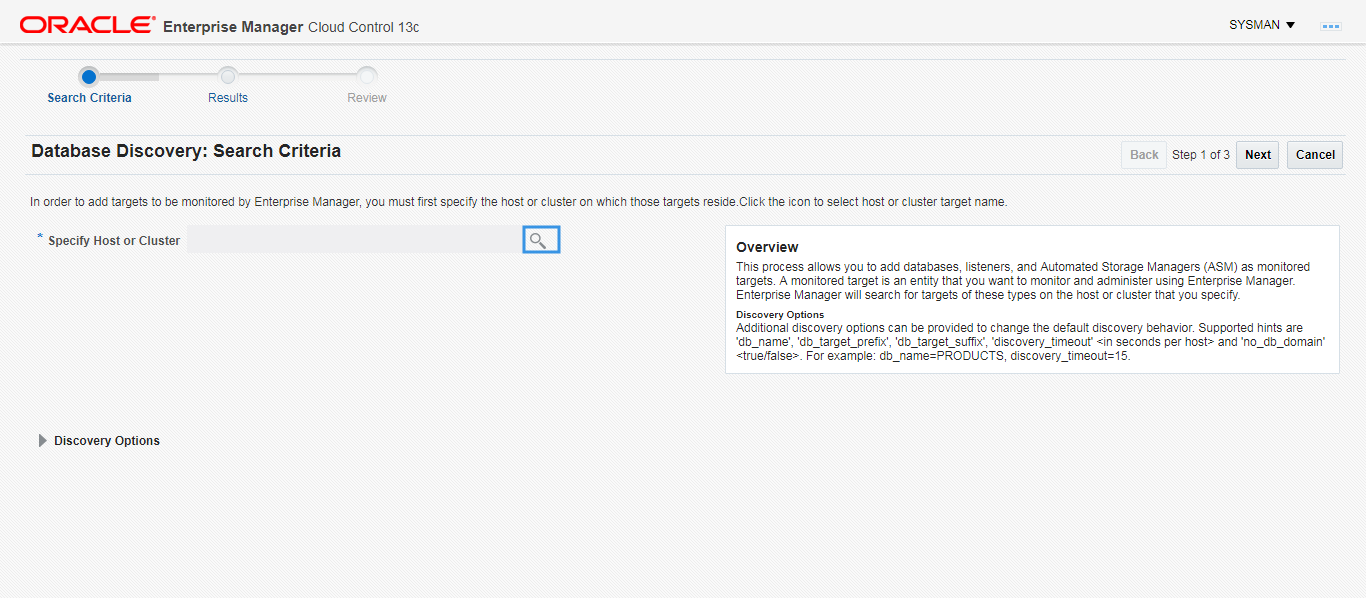
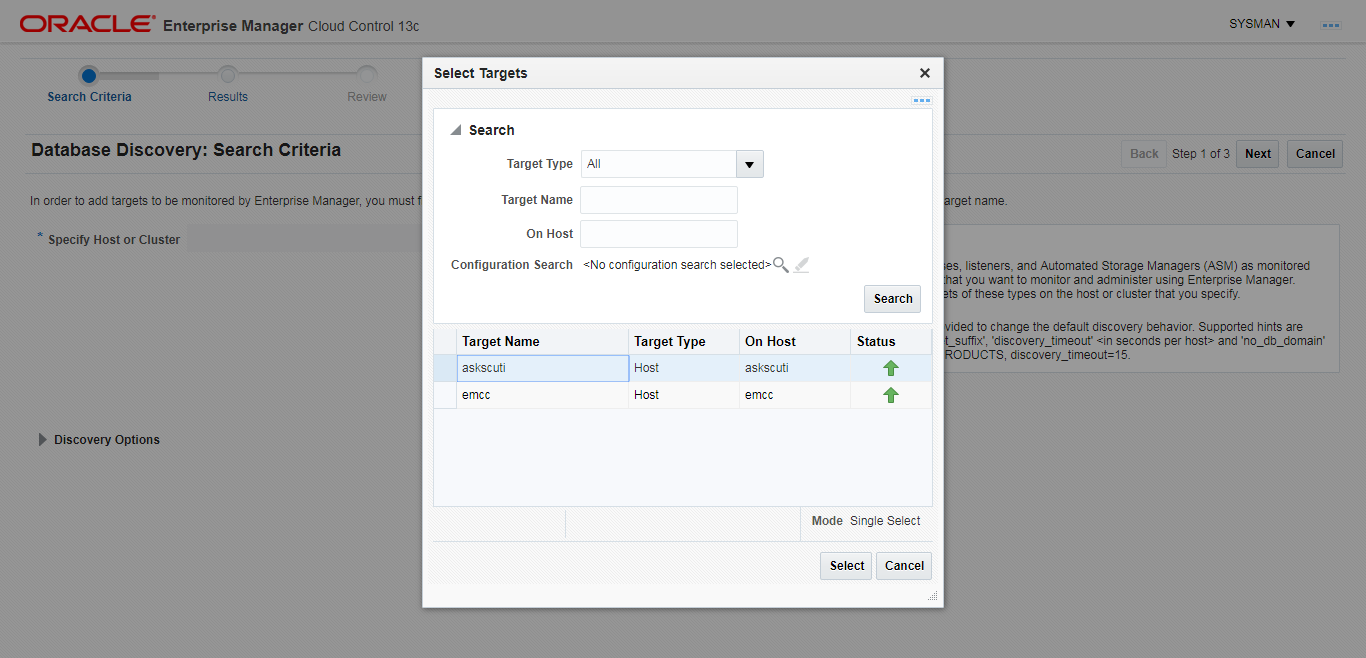
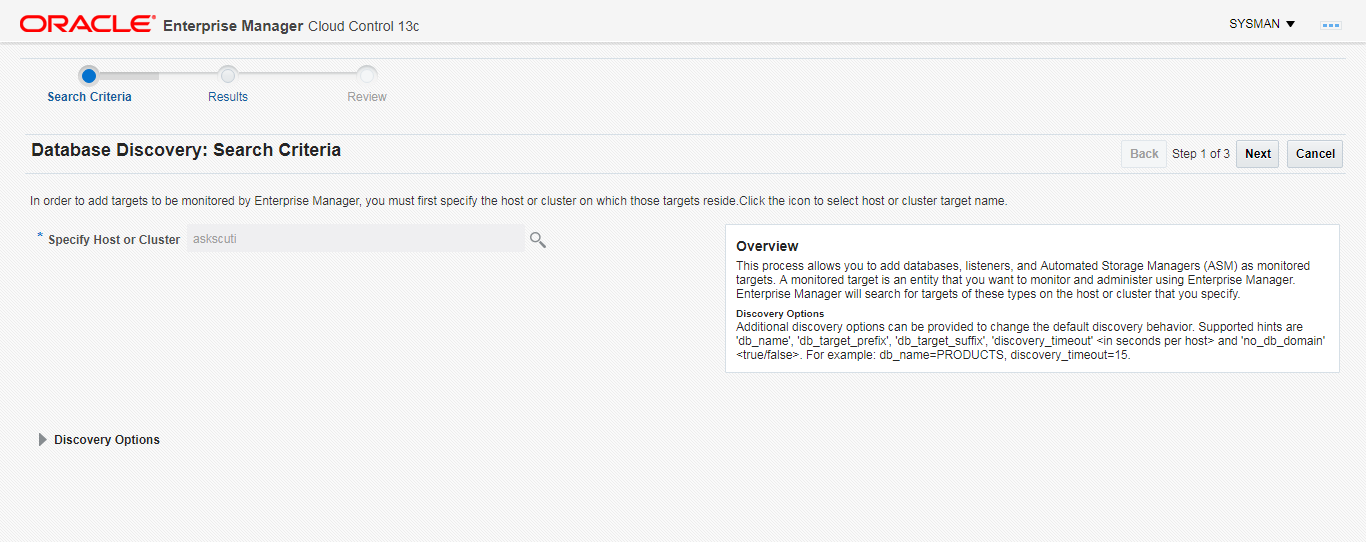
5.3 添加数据库
修改受控数据库用户 DBSNMP
SQL> alter user dbsnmp identified by oracle account unlock;

User altered.

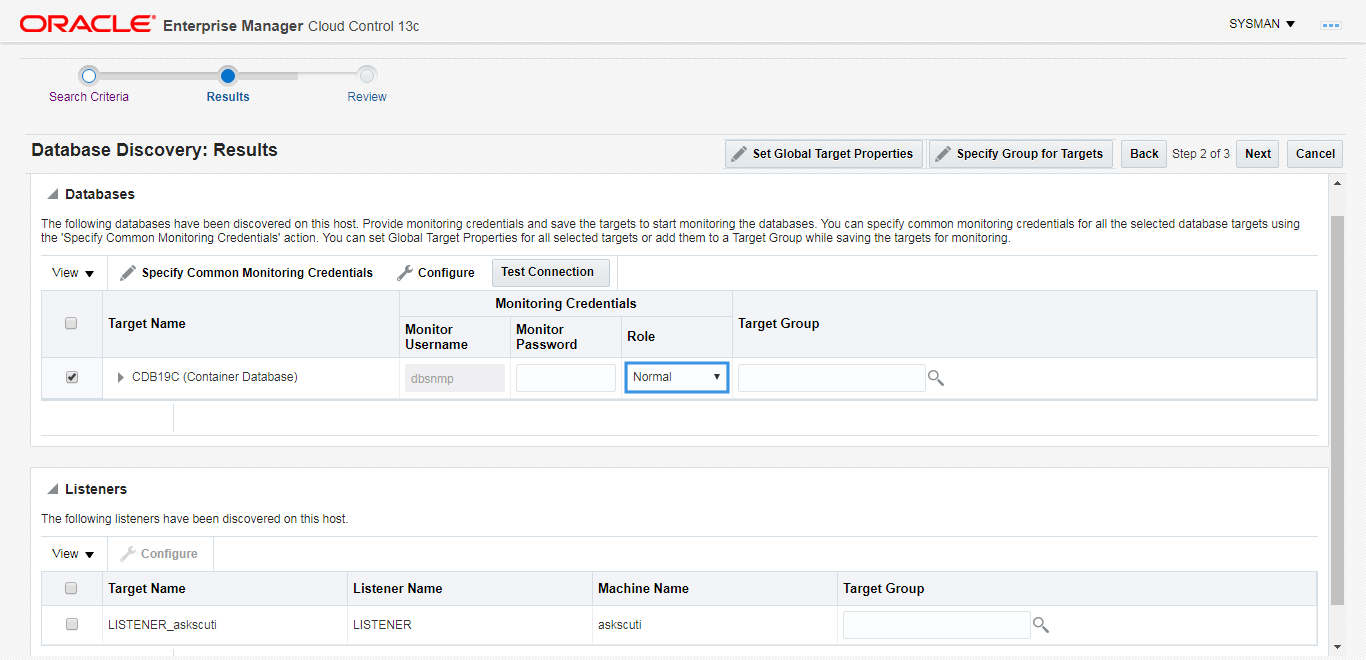
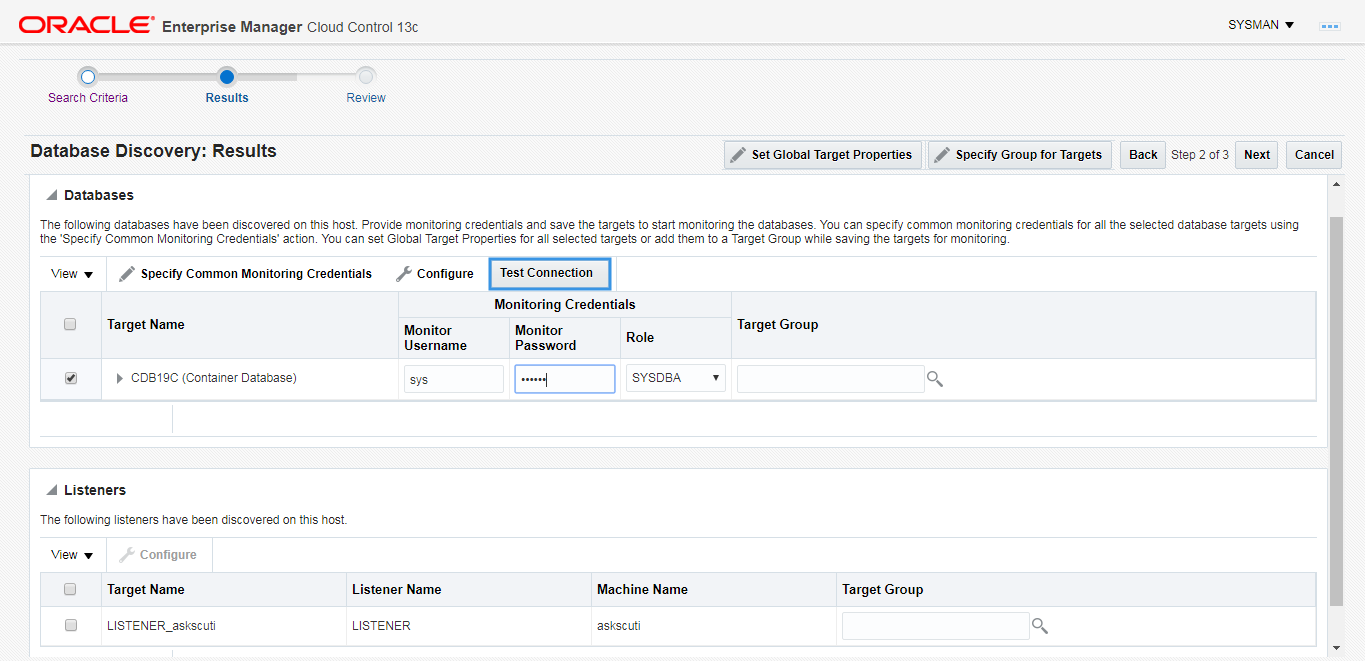
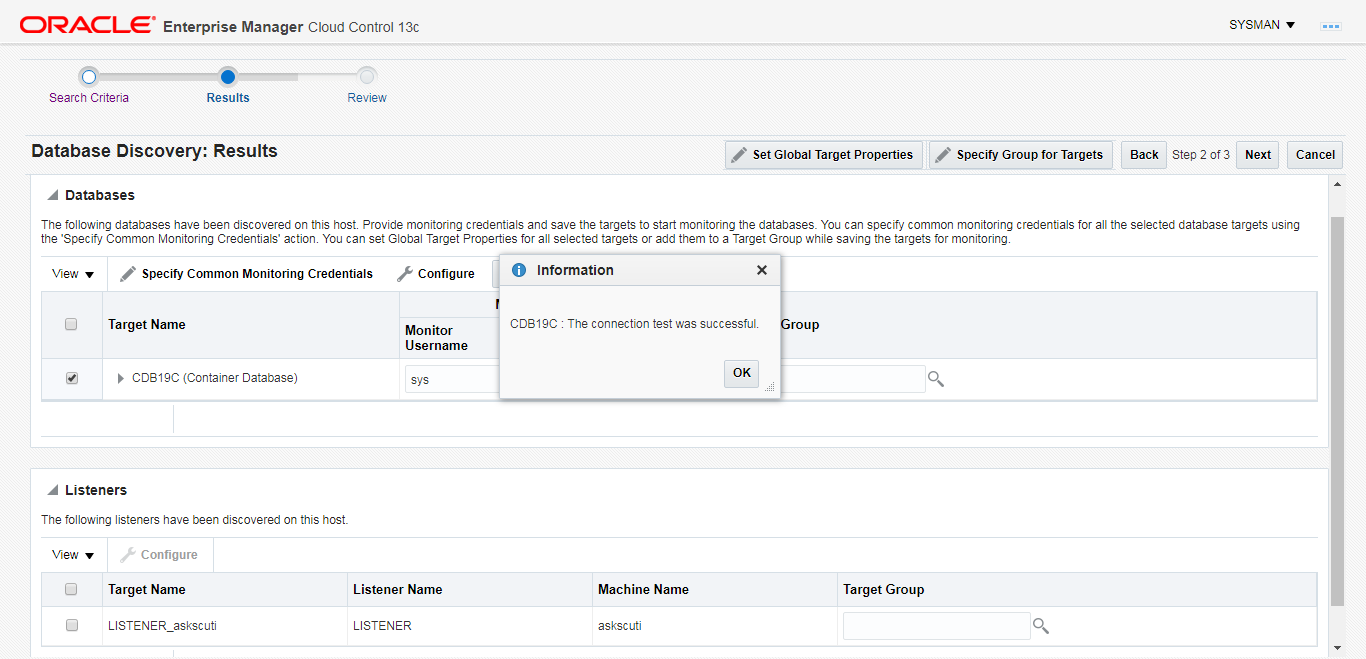
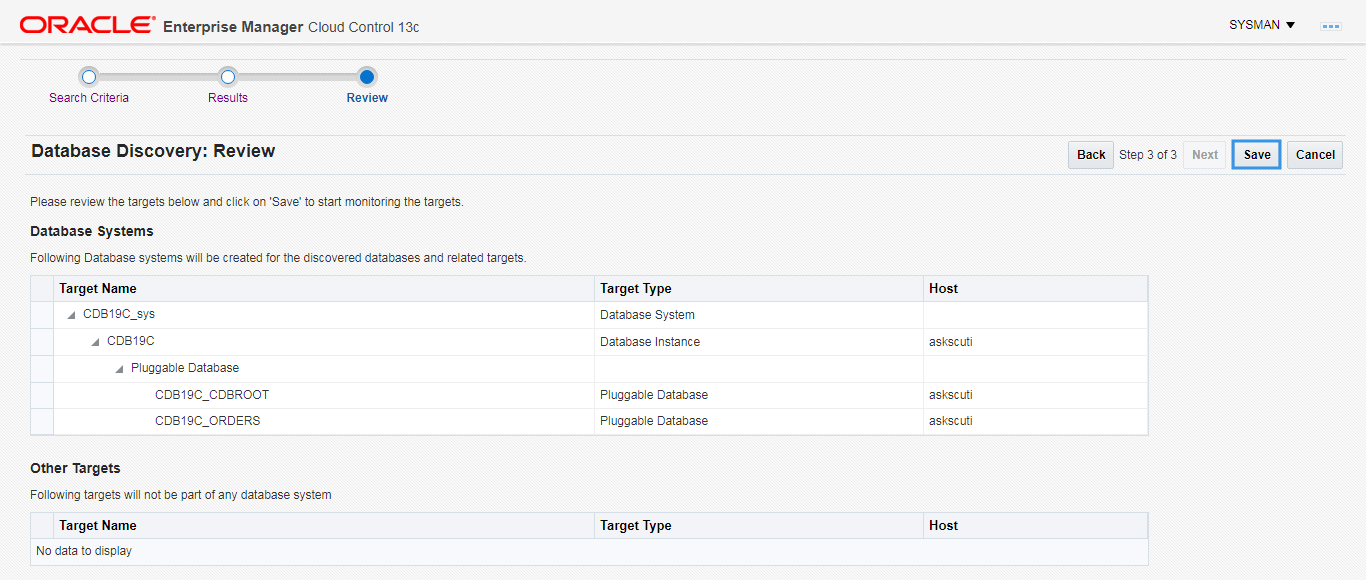
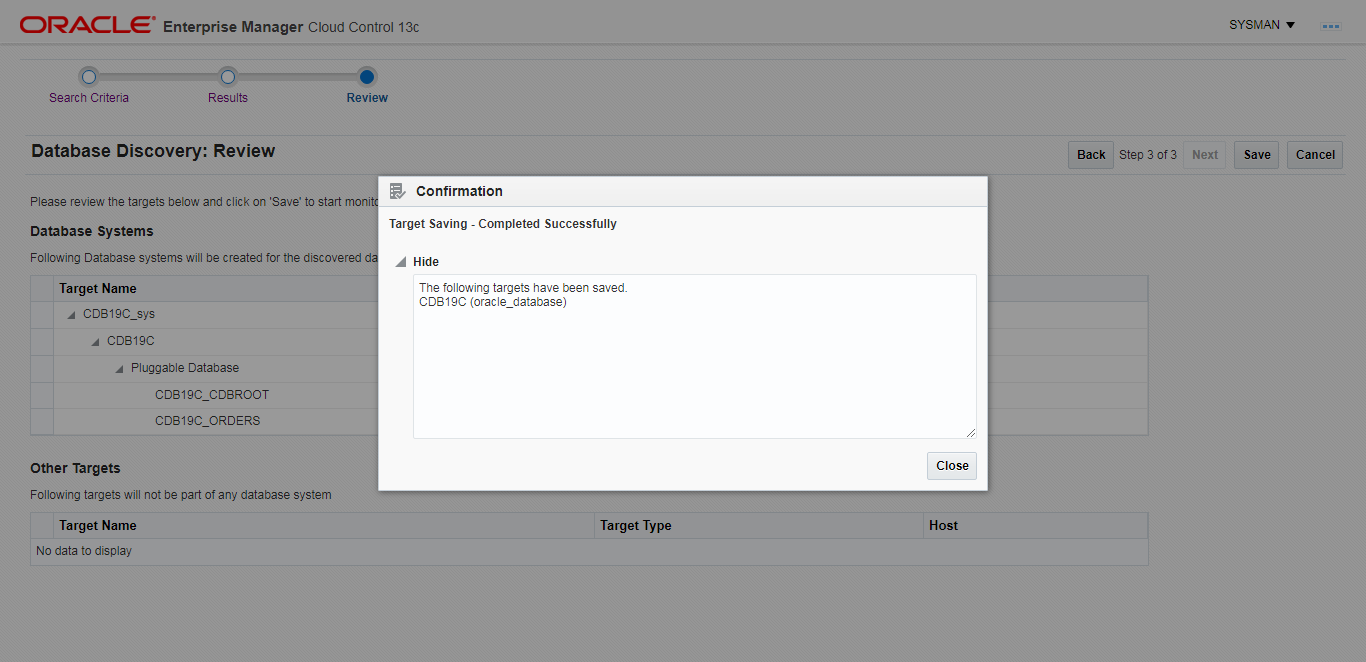
- 查询数据库状态
你可以点击Targets - Databases查看数据库状态
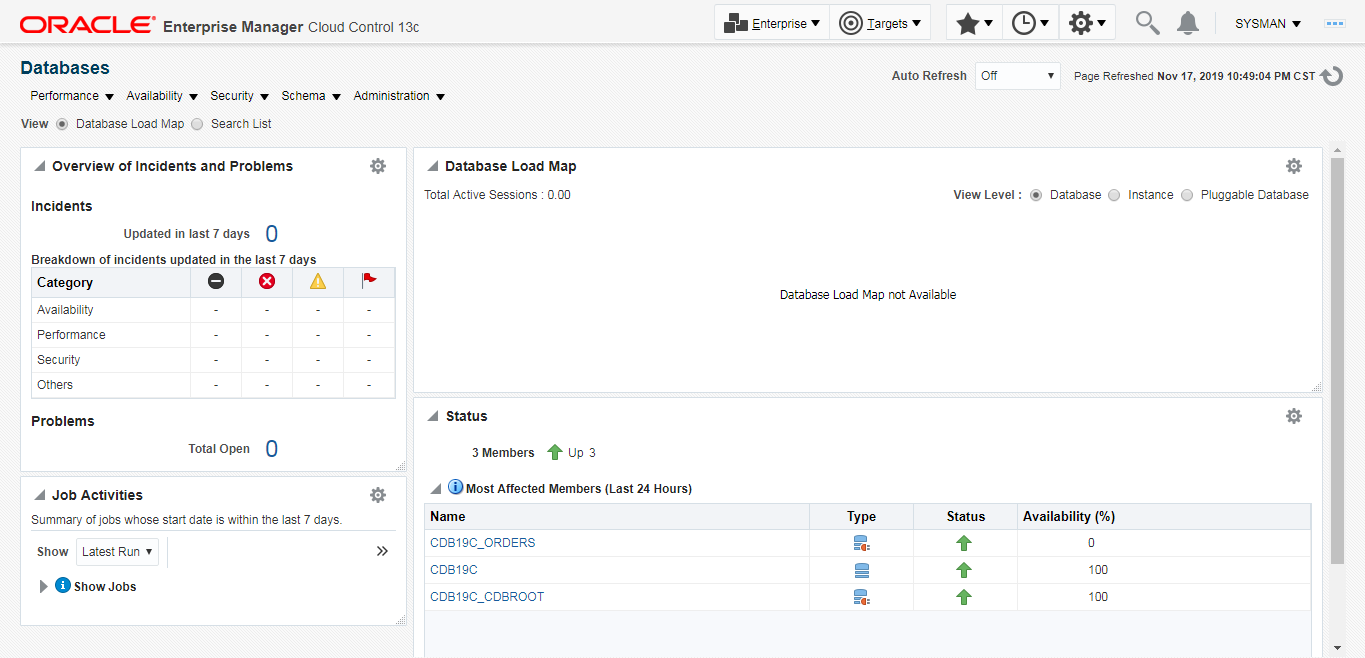
- 点击进入对应数据库进行监控

查看官方文档,去探索 EMCC 的强大之处 [End]
