@zChange
2017-11-10T10:04:15.000000Z
字数 6569
阅读 289
angular入门
架构模式
MVC -> MVP -> MVVM
angular/cli
angular/cli:angular脚手架,一键构建angular项目
常用指令:
ng help查看所有指令
1.ng new projectName-- 创建angular项目
2.ng g component my-new-component-- 创建组件component ……还有很多看文档
3.ng serve启动项目,--port 4201指定特定的端口号
4.ng build打包项目(webpack)--aotaot编辑
5.-- hmr热替换
安装流程
node安装不用说了- 全局安装
angular-clinpm install -g @angular/cli@latest;npm如果慢可用cnpmnpm install -g cnpm --registry=https://registry.npm.taobao.org;- 用cli新建angular项目 进入需要安装的文件夹后执行
ng new projectName,会自动用npm安装angular的依赖包,如果觉得慢可以ctrl + c退出,到项目文件夹执行cnpm install- 启动angular项目
ng serve打开localhost:4200 默认地址;
事项
采用Scss创建项目
ng new sassy-project --style=scss //创建scss的ng项目
Scss下引入`bootstrap
$icon-font-path: '~bootstrap-sass/assets/fonts/bootstrap/';@import '~bootstrap-sass/assets/stylesheets/_bootstrap';
规范
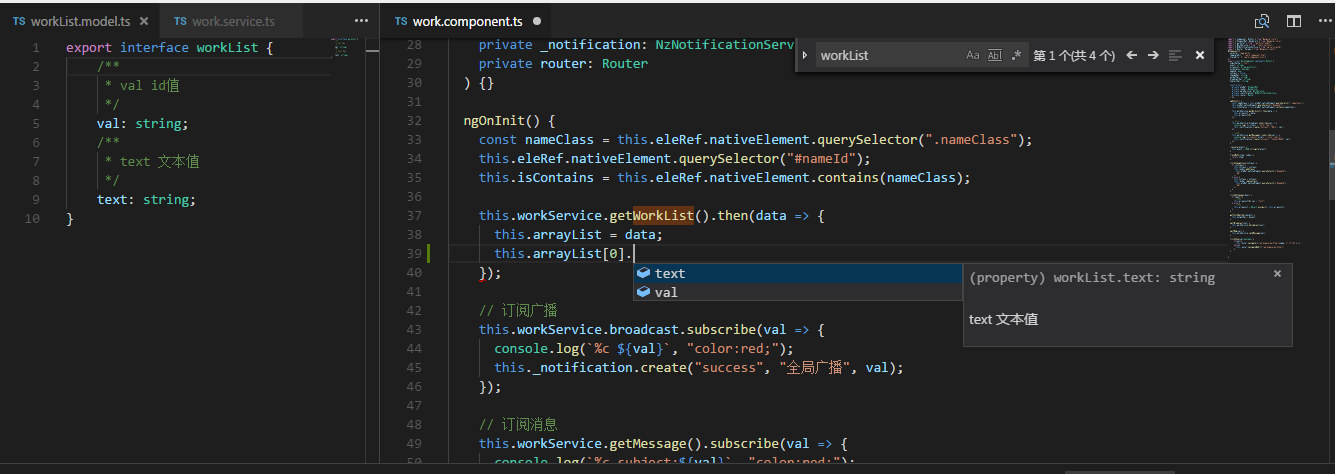
定义变量和函数请申明好类型或interface
// workList.model.tsexport interface workList {/*** val id值*/val: string;/*** text 文本值*/text: string;}
import { workList } from "./workList.model";getWorkList(): Promise<workList[]> {return Promise.resolve([{ val: "1", text: "aa" },{ val: "2", text: "bb" },{ val: "3", text: "cc" },{ val: "4", text: "dd" }]);}
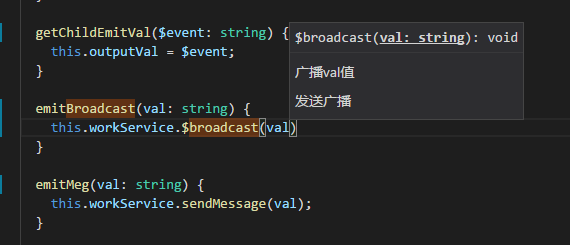
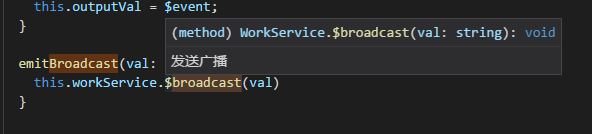
// 函数 定义申明及解释/*** 发送广播* @param val 广播val值*/$broadcast(val: string) {this.broadcast.emit(val);}/*** 发送全局消息* @param message 消息值*/sendMessage(message: string) {this.subject.next(message);}
文件目录
.├── README.md├── e2e // e2e测试│ ├── app.e2e-spec.ts│ ├── app.po.ts│ └── tsconfig.e2e.json├── karma.conf.js // karma配置文件├── package.json // 依赖包├── protractor.conf.js // 测试的配置环境├── src // 项目根目录│ ├── app│ │ ├── app.component.css│ │ ├── app.component.html│ │ ├── app.component.spec.ts│ │ ├── app.component.ts│ │ └── app.module.ts // 应用的根模块│ ├── assets // 放ico、图片,字体。构建后会copy到dist文件│ ├── environments // 配置开发环境还是生成环境│ │ ├── environment.prod.ts│ │ └── environment.ts│ ├── favicon.ico│ ├── index.html // 应用入口html文件│ ├── main.ts // 应用入口文件 (引导AppModule根模块启动引用)│ ├── polyfills.ts // 填充文件 兼容ie……│ ├── styles.css│ ├── test.ts // 单元测试入口文件│ ├── tsconfig.app.json│ ├── tsconfig.spec.json│ └── typings.d.ts├── tsconfig.json // ts配置文件└── tslint.json
@NgModule
import { BrowserModule } from '@angular/platform-browser';import { NgModule } from '@angular/core';import { AppComponent } from './app.component';@NgModule({declarations: [AppComponent],imports: [BrowserModule],providers: [],bootstrap: [AppComponent]})export class AppModule { }// import 引入访问公开对象// export 声明公开对象// declarations 申明组件(组件、指令、管道)// exports 声明其他模块,供其他Module使用// imports 引入需要的模块// providers 供应商 全局的服务 service// bootstrap 启动项 标识主视图(根组件)
路由or懒加载
基本
<li routerLink='/task/workOrder' routerLinkActive="active"><a>我的任务</a></li><router-outlet></router-outlet> // 占位符RouterModule.forRoot() // 根模块RouterModule.forChild() // 子模块redirectTo 重定向pathMatch 路由匹配 fullloadChildren 懒加载 module # moduleName #号前面模块地址 #后面模块名称RouterModule.forRoot(routes, { useHash: true });(前后台路由冲突出现404)`useHash=true` 会再路由前面加个#,const routes: Routes = [{ path: '', redirectTo: 'login', pathMatch: 'full' },{ path: 'task', loadChildren: './workspace/workspace.module#WorkspaceModule' },{ path: 'login', component: LoginComponent }];
路由传参
传递:import { Router} from '@angular/router';this.Router.navigate(["地址",{id:id,name:name}(多个)])
接收:import { ActivatedRoute } from '@angular/router';this.activatedRoute.params.subscribe( res => { console.log(res) });
html传递:<a *ngFor="let item of list" [routerLink]="['/detail', item.id]" ><a routerLink="/workspace/workone/id" >标签跳转传值</a>route设置:{ path: 'detail/:id', component: nameComponent }
指令及数据绑定
数据绑定
1.单向 数据 -> 视图


{{name}}插入值<input [value]='name' [attr.disabled]='isDisabled'/>[attr.disabled]="'true'"[value]="'name'"
2.单向 视图 -> 数据(事件)

<input(keyup)="clickMe($event,'keyup')"(keydown)="clickMe($event,'keyDown')"(change)="clickMe($event,'change')"(focus)="clickMe($event,'focus')"(blur)="clickMe($event,'blur')"/>
3.双向 视图 <--> 数据
<input [(ngModel)]="name"/>
内置指令
ngIf else
<div *ngIf="false; else elseBlock">111111111111111</div><ng-template #elseBlock>2222</ng-template>
ngIf then else
<div *ngIf="false; then thenBlock else elseBlock">11</div><ng-template #thenBlock>22...</ng-template><ng-template #elseBlock>33...</ng-template>
as
<div *ngIf="1111 as isShow; else elseBlock">{{isShow}}</div>//显示 1111<div *ngFor="let item of [9,8,7,6,5]; index as i; trackBy:item">{{i}} --- {{item}}</div>// 显示0 --- 91 --- 82 --- 7…………
ngFor trackBy
<div *ngFor="let item of list"></div><div *ngFor="let item of list; trackBy:item.id"></div>
style Class
<div [ngStyle]="{style: expression}"></div><div [ngClass]="{cssClass: expression}"></div>
ngSwitch
<div [ngSwitch]="conditionExpression"><div *ngSwitchCase="expression">output</div><div *ngSwitchDefault>output2</div></div>
dom操作
ElementRef: 获取dom
// html<div class="nameClass" id="nameId"></div>// tsimport { ElementRef } from '@angular/core';const nameClass = this.eleRef.nativeElement.querySelector('.nameClass');this.eleRef.nativeElement.querySelector('#nameId');this.elementRef.nativeElement.contains(nameClass)
Renderer2 渲染器
用来创建元素、文本、设置属性、添加样式和设置事件监听…………
changeHostState() {if (this.active) {this.renderer.addClass(this.elementRef.nativeElement, this.stateCss);return;}this.renderer.removeClass(this.elementRef.nativeElement, this.stateCss);}
拦截器及服务(httpClient)
查看taskInterceptor.service.ts
和app.module.ts
生命周期钩子
//8种ngOnChange();ngOninit()ngDoCheck();ngAfterContentInit()ngAfterContentChecked()ngAfterViewInit()ngAfterViewChecked();ngOnDestroy()
组件通讯
父->子: @input() 父组件添加子组件的引用@ViewChild()来获取子组件
子-> 父: @Output()
通过service
EventEmitter
订阅Subject next订阅
添加订阅后切记在ngOnDestroy生命周期中取消unsubscribe订阅
管道pipe
内置管道
<div>{{1507793573000 | date: 'y-MM-dd HH:mm:ss'}}</div><div>{{ '1507794154000000' | slice:0:13 | date:'y-MM-dd HH:mm:ss'}}</div><div>{{'zzz' | uppercase }}</div><div>{{'ZZZsS' | lowercase }}</div><div>{{ 3.14159265 | number: '1.4-4' }}</div><div>{{ { name: 'semlinker' } | json }}</div>
自定义管道
@NgModule({declarations: [DateAppendzeroPipe],…………)}
<div>{{ '1507794154' | dateAppendzero | date:'y-MM-dd HH:mm:ss' }}</div>
import { Pipe, PipeTransform } from '@angular/core';@Pipe({name: 'dateAppendzero'})export class DateAppendzeroPipe implements PipeTransform {transform(value: any): any {return value + '000';}}
依赖注入(DI)
AOT(预编译) or JIT(即时编辑)编译
JIT:先tsc编译成js文件,打包压缩,浏览器加载代码,启动angular,通过JIT编译处理代码,然后再渲染应用。
AOT: 在服务端预先编译好所有文件,浏览器直接加载代码运行,直接渲染应用,不同等编译后再运行渲染,打包文件中也不需要angular编译器,编译器都就占angular自身大小的一半。预先编译的话会预先检测模版绑定的一些错误。
JIT:


AOT:

HMR(热替换)
HMR:
ng serve --hmr;
安装HMR
npm install @angularclass/hmr -D// -D: --save-dev -S: --save
更改main.js
import { enableProdMode } from '@angular/core';import { platformBrowserDynamic } from '@angular/platform-browser-dynamic';import { AppModule } from './app/app.module';import { environment } from './environments/environment';if (environment.production) {enableProdMode();}else{if (module.hot) {module.hot.accept();module.hot.dispose(() => {let _styles = document.head.querySelectorAll('style');let styles = Array.prototype.slice.call(_styles);styles.filter((style: any) => style.innerText.indexOf('_ng') !== -1).map((el: any) => document.head.removeChild(el));})}}platformBrowserDynamic().bootstrapModule(AppModule).catch(err => console.log(err));
杂
删除node_modules包提示路径过长
npm install rimraf -grimraf node_modules
