@xxzhushou
2019-01-07T11:55:56.000000Z
字数 102631
阅读 36046
叉叉引擎XMod2.0 API手册
叉叉脚本 XMod
此页面已于2019-01-01起废弃,后续不再更新维护,敬请移步新文档库:叉叉脚本工具文档
目录索引
- 叉叉引擎XMod2.0 API手册
- Lua扩展
- 内置全局类型
- 综合模块 —— xmod
- ◆ 常量 xmod.PLATFORM_IOS
- ◆ 常量 xmod.PLATFORM_ANDROID
- ◆ 常量 xmod.PLATFORM
- ◆ 常量 xmod.PRODUCT_CODE
- ◆ 常量 xmod.PRODUCT_CODE_DEV
- ◆ 常量 xmod.PRODUCT_CODE_XXZS
- ◆ 常量 xmod.PRODUCT_CODE_IPA
- ◆ 常量 xmod.PRODUCT_CODE_KUWAN
- ◆ 常量 xmod.PRODUCT_CODE_SPIRIT
- ◆ 常量 xmod.PRODUCT_NAME
- ◆ 常量 xmod.VERSION_CODE
- ◆ 常量 xmod.VERSION_NAME
- ◆ 常量 xmod.HANDLER_ON_USER_EXIT
- ◆ 常量 xmod.HANDLER_ON_RUNTIME_ERROR
- ◆ 常量 xmod.SCREENCAP_POLICY_STANDARD
- ◆ 常量 xmod.SCREENCAP_POLICY_AGGRESSIVE
- ◆ 常量 xmod.SCREENCAP_POLICY
- ◆ 常量 xmod.SCREENCAP_KEEP
- ◆ 函数 xmod.setConfig : 设置引擎属性
- ◆ 函数 xmod.getConfig : 获取引擎属性
- ◆ 函数 xmod.getPublicPath : 获取引擎公共目录
- ◆ 函数 xmod.getPrivatePath : 获取脚本私有目录
- ◆ 函数 xmod.resolvePath : 目录转换
- ◆ 函数 xmod.setOnEventCallback : 设置事件回调
- ◆ 函数 xmod.exit : 脚本退出
- ◆ 函数 xmod.restart : 脚本重启
- 脚本控制模块 —— script
- 界面图像模块 —— screen
- 类Image 图像
- ◆ 常量 Image.ROTATION_CLOCKWISE_90
- ◆ 常量 Image.ROTATION_CLOCKWISE_180
- ◆ 常量 Image.ROTATION_CLOCKWISE_270
- ◆ 函数 Image.fromScreen : 从屏幕构造图像实例
- ◆ 函数 Image.fromFile : 从文件构造图像实例
- ◆ 函数 Image:release : 释放图像
- ◆ 函数 Image:getSize : 获取图像尺寸
- ◆ 函数 Image:getWidth : 获取图像尺寸-宽
- ◆ 函数 Image:getHeight : 获取图像尺寸-高
- ◆ 函数 Image:setRotation : 旋转图像
- ◆ 函数 Image:saveToFile : 把图像实例保存到本地
- ◆ 函数 Image:clip : 截取图像
- ◆ 函数 Image:getRGB : 获取图像颜色值(整型)
- ◆ 函数 Image:getColor : 获取图像颜色值
- ◆ 函数 Image:binarize : 图像二值化成table
- ◆ 常量 screen.LANDSCAPE_RIGHT
- ◆ 常量 screen.LANDSCAPE_LEFT
- ◆ 常量 screen.PORTRAIT
- ◆ 常量 screen.PRIORITY_DEFAULT
- ◆ 常量 screen.PRIORITY_LEFT_FIRST
- ◆ 常量 screen.PRIORITY_RIGHT_FIRST
- ◆ 常量 screen.PRIORITY_UP_FIRST
- ◆ 常量 screen.PRIORITY_DOWN_FIRST
- ◆ 常量 screen.PRIORITY_HORIZONTAL_FIRST
- ◆ 常量 screen.PRIORITY_VERTICAL_FIRST
- ◆ 常量 screen.MOCK_NONE
- ◆ 常量 screen.MOCK_INPUT
- ◆ 常量 screen.MOCK_INPUT_FIXED
- ◆ 常量 screen.MOCK_INPUT_RELATIVE
- ◆ 常量 screen.MOCK_OUTPUT
- ◆ 常量 screen.MOCK_BOTH
- ◆ 函数 screen.init : 初始化屏幕参数
- ◆ 函数 screen.getSize : 获取屏幕分辨率尺寸
- ◆ 函数 screen.getDPI : 获取屏幕DPI
- ◆ 函数 screen.capture : 截取屏幕
- ◆ 函数 screen.keep : 保持屏幕内容
- ◆ 函数 screen.getOrientation : 获取屏幕方向
- ◆ 函数 screen.snapshot : 截图并保存至本地
- ◆ 函数 screen.getRGB : 获取屏幕颜色值(RGB)
- ◆ 函数 screen.getColor : 获取屏幕颜色值
- ◆ 函数 screen.matchColor : 比较颜色值
- ◆ 函数 screen.matchColors : 比较颜色序列
- ◆ 函数 screen.findImage : 查找图像
- ◆ 函数 screen.findColor : 查找颜色值/序列坐标
- ◆ 函数 screen.findColors : 查找所有颜色值/序列坐标
- ◆ 函数 screen.setMockMode : 设置坐标转换模式
- ◆ 函数 screen.setMockTransform : 设置坐标转换回调函数
- 类Image 图像
- 点按模块 —— touch
- 简单存储模块 —— storage
- 任务执行模块 —— task
- 系统/运行时模块 —— runtime
- UI展示模块 —— UI
- 类UIContext
- 类UIView
- ◆ 函数 UIView:getID : 获取组件标识
- ◆ 函数 UIView:getType : 获取组件类型
- ◆ 函数 UIView:getAttr : 获取组件属性
- ◆ 函数 UIView:getAttrs : 获取组件所有属性
- ◆ 函数 UIView:getStyle : 获取组件样式
- ◆ 函数 UIView:getStyles : 获取组件所有样式
- ◆ 函数 UIView:setAttr : 设置组件属性
- ◆ 函数 UIView:setStyle : 设置组件样式
- ◆ 函数 UIView:subviewsCount : 获取组件的子组件数量
- ◆ 函数 UIView:getSubview : 获取子组件
- ◆ 函数 UIView:addSubview : 添加子组件
- ◆ 函数 UIView:removeSubview : 移除子组件
- ◆ 函数 UIView:removeFromParent : 将当前组件从父组件移除
- ◆ 函数 UIView:setActionCallback : 设置组件的回调函数
- ◆ 函数 UIView:toJson : 将组件导出为Json格式字符串
- ◆ 常量 UI.TYPE.UNKNOWN
- ◆ 常量 UI.TYPE.CONTAINER
- ◆ 常量 UI.TYPE.DIV
- ◆ 常量 UI.TYPE.TEXT
- ◆ 常量 UI.TYPE.IMAGE
- ◆ 常量 UI.TYPE.SCROLLER
- ◆ 常量 UI.TYPE.LIST
- ◆ 常量 UI.TYPE.SWITCH
- ◆ 常量 UI.TYPE.INPUT
- ◆ 常量 UI.TYPE.TEXTAREA
- ◆ 常量 UI.TYPE.VIDEO
- ◆ 常量 UI.TYPE.INDICATOR
- ◆ 常量 UI.TYPE.WEB
- ◆ 常量 UI.TYPE.LOADING
- ◆ 常量 UI.ACTION.APPEAR
- ◆ 常量 UI.ACTION.DISAPPER
- ◆ 常量 UI.ACTION.CLICK
- ◆ 常量 UI.ACTION.LONG_PRESS
- ◆ 常量 UI.ACTION.SWIPE
- ◆ 常量 UI.PSEUDO.ACTIVE
- ◆ 常量 UI.PSEUDO.FOCUS
- ◆ 常量 UI.PSEUDO.ENABLED
- ◆ 常量 UI.PSEUDO.DISABLED
- ◆ 常量 UI.TOAST.LENGTH_SHORT
- ◆ 常量 UI.TOAST.LENGTH_LONG
- ◆ 函数 UI.toast : Toast提示
- ◆ 函数 UI.createContext : 构建UI实例
- ◆ 函数 UI.register : 设置UI模板
- 内置C扩展模块
- 文件系统操作模块 —— lfs
- 正则表达匹配模块 —— lpeg
- JSON模块 —— cjson
- Socket模块 —— socket
- OpenSSL/Https模块 —— ssl
- 大漠文字识别模块 —— dmocr
- Tesseract文字识别模块 —— tessocr
- Http网络传输模块 —— chttp
- ◆ 函数 chttp.create : 构建chttp实例
- ◆ 函数 chttp:close : 释放chttp实例
- ◆ 函数 chttp:setHeader : 设置http请求头字段
- ◆ 函数 chttp:setUrl : 设置http请求地址
- ◆ 函数 chttp:setBody : 设置http请求内容
- ◆ 函数 chttp:setAuth : 设置http请求验证信息
- ◆ 函数 chttp:setCookies : 设置http请求的cookies
- ◆ 函数 chttp:post : 发送http POST请求
- ◆ 函数 chttp:get : 发送http GET请求
- ◆ 函数 chttp:delete : 发送http DELETE请求
- ◆ 函数 chttp:head : 发送http HEAD请求
- ◆ 函数 chttp:patch : 发送http PATCH请求
- ◆ 函数 chttp:put : 发送http PUT请求
- ◆ 函数 chttp:options : 发送http OPTIONS请求
- ◆ 函数 chttp:setTimeout : 设置http请求超时
- ◆ 函数 chttp:setParam : 设置http请求参数
- ◆ 函数 chttp:setPayload : 设置http请求内容
- ◆ 函数 chttp:setLowSpeed : 设置http请求最低速度和持续时间
- 通用加解密/哈希算法模块 —— crypto
- ◆ 函数 crypto.md5 : MD5摘要算法
- ◆ 函数 crypto.sha1 : SHA-1摘要算法
- ◆ 函数 crypto.base64Encode : base64编码
- ◆ 函数 crypto.base64Decode : base64解码
- ◆ 函数 crypto.hash : 32位哈希算法
- ◆ 函数 crypto.hash64 : 64位哈希算法
- ◆ 函数 crypto.rc4Encrypt : RC4加密
- ◆ 函数 crypto.rc4Decrypt : RC4解密
- ◆ 函数 crypto.xxteaEncrypt : XXTEA加密
- ◆ 函数 crypto.xxteaDecrypt : XXTEA解密
- 官方扩展UI库 —— wui
- XMod扩展
- 附录
Lua扩展
◆ 函数 log : 输出日志到控制台
函数语法
void log(string msg)
函数说明
输出msg日志到控制台(叉叉集成开发环境中)。
使用示例
local msg = string.format('测试输出: %d', 100)log(msg)
◆ 函数 printf : 格式化输出日志到控制台
函数语法
void printf(string foramt, ...)
函数说明
输出格式化后的日志内容到控制台(叉叉集成开发环境中)。
使用示例
local t = { 1, 2, 3 }local size = Size(100, 200)-- 输出结果: 'format: table: 0xHHHHHH, Size[100 x 200], 100'printf('format: %s, %s, %d', t, size, 100)
◆ 函数 sleep : 休眠、暂停运行
函数语法
void sleep(integer timeMs)
函数说明
调用后脚本会休眠timeMs毫秒再继续执行。
使用示例
log('开始sleep')sleep(300) -- 脚本休眠300毫秒log('结束sleep')
◆ 函数 os.netTime : 获取网络时间
函数语法
integer os.netTime(void)
函数说明
返回网络时间(local时间戳,单位秒),需要保证网络连接。
使用示例
local currentTime = os.netTime()-- 输出结果: '2018-08-30 15:42:41'print(os.date('%Y-%m-%d %H:%M:%S', currentTime))
◆ 函数 os.milliTime : 获取毫秒级别本地时间
函数语法
integer os.milliTime(void)
函数说明
返回设备时间,单位毫秒。
使用示例
local timeSec = os.time()local timeMilliSec = os.milliTime()-- 输出结果: 'true'print(math.floor(timeMilliSec / 1000) == timeSec)
特别说明
出于安全因素的考虑,以下Lua函数从2.0开始不再提供使用和支持:
loaddofileloadfiledostringloadstringstring.dumppackage.loadlib
内置全局类型
类Point 坐标
◆ 常量 Point.ZERO
常量值:
PointPoint(0, 0)
◆ 常量 Point.INVALID
常量值:
PointPoint(-1, -1)
◆ 变量 Point.x : x坐标值
变量类型:
integer
◆ 变量 Point.y : y坐标值
变量类型:
integer
◆ 函数 Point : 构建坐标实例
函数语法
PointPoint(void)PointPoint(integerx,integery)PointPoint(Pointpoint)
函数说明
- 构造一个x, y均为0的Point;
- 根据x和y坐标值,构造一个Point;
- 根据point拷贝构造Point。
使用示例
local point = Point(100, 200)-- 输出结果: 'point = Point(100, 200)'printf('point = %s', point)
◆ 基本运算
Point支持+、-、*、/、==和取反等基本运算。
使用示例
local a = Point(10, 20)local b = Point(100, 200)-- 输出结果: 'a + b = Point(110, 220)'printf('a + b = %s', a + b)-- 输出结果: 'b - a = Point(90, 180)'printf('b - a = %s', b - a)-- 输出结果: 'a * 10 = Point(100, 200)'printf('a * 10 = %s', a * 10)-- 输出结果: 'b / 10 = Point(10, 20)'printf('b / 10 = %s', b / 10)-- 输出结果: 'a * 10 == b ? true'printf('a * 10 == b ? %s', (a * 10 == b))-- 输出结果: '-a = Point(-10, -20)'printf('-a = %s', -a)
类Size 尺寸
◆ 常量 Size.ZERO
常量值:
SizeSize(0, 0)
◆ 常量 Size.INVALID
常量值:
SizeSize(-1, -1)
◆ 变量 Size.width : 尺寸的宽
变量类型:
integer
◆ 变量 Size.height : 尺寸的高
变量类型:
integer
◆ 函数 Size : 构建尺寸实例
函数语法
SizeSize(void)SizeSize(integerwidth,integerheight)SizeSize(Sizesize)SizeSize(Pointpoint)
函数说明
- 构造一个width和height均为0的Size;
- 根据width和height,构造一个Size;
- 根据size拷贝构造Size;
- 根据width = point.x, height = point.y构造Size。
使用示例
local size = Size(200, 200)-- 输出结果: 'size = Size[200 x 200]'printf('size = %s', size)
◆ 基本运算
和Point类似,Size支持+、-、*、/、==和取反等基本运算。
使用示例
local a = Size(10, 20)local b = Size(100, 200)-- 输出结果: 'a + b = Size[110 x 220]'printf('a + b = %s', a + b)-- 输出结果: 'b - a = Size[90 x 180]'printf('b - a = %s', b - a)-- 输出结果: 'a * 10 = Size[100 x 200]'printf('a * 10 = %s', a * 10)-- 输出结果: 'b / 10 = Size[10 x 20]'printf('b / 10 = %s', b / 10)-- 输出结果: 'a * 10 == b ? true'printf('a * 10 == b ? %s', (a * 10 == b))-- 输出结果: '-a = Size[-10 x -20]'printf('-a = %s', -a)
类Rect 矩形
◆ 常量 Rect.ZERO
常量值:
RectRect(0, 0, 0, 0)
◆ 变量 Rect.x : 左上角x坐标值
变量类型:
integer
◆ 变量 Rect.y : 左上角y坐标值
变量类型:
integer
◆ 变量 Rect.width : 矩形的宽
变量类型:
integer
◆ 变量 Rect.height : 矩形的高
变量类型:
integer
◆ 函数 Rect : 构建矩形实例
函数语法
RectRect(void)RectRect(integerx,integery,integerwidth,integerheight)RectRect(Pointorigin,Sizesize)RectRect(Rectrect)
函数说明
- 构造一个起点为Point(0, 0),大小为Size(0, 0)的Rect;
- 构造一个起点为Point(x, y),大小为Size(width, height)的Rect;
- 构造一个起点为origin,大小为size的Rect;
- 根据rect拷贝构造一个Rect。
使用示例
local rect = Rect(100, 100, 200, 200)-- 输出结果: 'rect = Rect<Point(100, 100), Size[200 x 200]>'printf('rect = %s', rect)
◆ 函数 Rect:tl : 获取矩形的左上角坐标
函数语法
Point Rect:tl(void)
函数说明
返回当前Rect的top-left(左上角)Point坐标。
使用示例
local rect = Rect(100, 100, 200, 200)-- 输出结果: 'rect:tl() = Point(100, 100)'printf('rect:tl() = %s', rect:tl())
◆ 函数 Rect:br : 获取矩形的右下角坐标
函数语法
Point Rect:br(void)
函数说明
返回当前Rect的bottom-right(右下角)Point坐标。
使用示例
local rect = Rect(100, 100, 200, 200)-- 输出结果: 'rect:br() = Point(300, 300)'printf('rect:br() = %s', rect:br())
◆ 函数 Rect:size : 获取矩形尺寸
函数语法
Size Rect:size(void)
函数说明
获取当前Rect的尺寸。
使用示例
local rect = Rect(100, 100, 200, 200)-- 输出结果: 'rect:size() = Size[200, 200]'printf('rect:size() = %s', rect:size())
◆ 函数 Rect:contains : 判断矩形是否包含坐标
函数语法
boolean Rect:contains(Point point)
函数说明
判断point坐标是否在当前Rect的范围内。
使用示例
local rect = Rect(100, 100, 200, 200)-- 输出结果: 'true'print(rect:contains(Point(150, 200)))
◆ 函数 Rect:union : 矩形合并操作
函数语法
Rect Rect:union(Rect other)
函数说明
返回同时能包含当前Rect和other的最小Rect。
使用示例
local a = Rect(100, 100, 200, 200)local b = Rect(150, 150, 300, 50)-- 输出结果: 'a:union(b) = Rect<Point(100, 100), Size[350 x 200]>'printf('a:union(b) = %s', a:union(b))
◆ 函数 Rect:intersect : 矩形相切操作
函数语法
Rect Rect:intersect(Rect other)
函数说明
返回当前Rect和other交集的最大Rect。
使用示例
local a = Rect(100, 100, 200, 200)local b = Rect(150, 150, 300, 50)-- 输出结果: 'a:intersect(b) = Rect<Point(150, 150), Size[150 x 50]>'printf('a:intersect(b) = %s', a:intersect(b))
类Color3B 颜色值(整型)
◆ 变量 Color3B.r : 红色色值
变量类型:
integer变量范围: 0 ~ 255
◆ 变量 Color3B.g : 绿色色值
变量类型:
integer变量范围: 0 ~ 255
◆ 变量 Color3B.b : 蓝色色值
变量类型:
integer变量范围: 0 ~ 255
◆ 函数 Color3B : 构造颜色值(整型)实例
函数语法
Color3BColor3B(void)Color3BColor3B(integerrgb)Color3BColor3B(integerr,integerg,integerb)Color3BColor3B(stringrgb)Color3BColor3B(Color3Fc3f)Color3BColor3B(Color3Bc3b)
函数说明
从整型/字符串/等格式表示的颜色值构建Color3B对象。
使用示例
local c3b = Color3B(0xaabbcc)local c3b2 = Color3B(c3b)-- 输出结果: 'rgb = (aa, bb, cc)'printf('rgb = (%x, %x, %x)', c3b2.r, c3b2.g, c3b2.b)
◆ 函数 Color3B:toInt : 转换成整型色值
函数语法
integer Color3B:toInt(void)
函数说明
将Color3B对象转换成integer表示。
◆ 函数 Color3B:toString : 转换成字符串色值
函数语法
string Color3B:toString(void)
函数说明
将Color3B对象转换成hex-string表示。
使用示例
local c3b = Color3B(0xaa, 0xbb, 0xcc)-- 输出结果: 'c3b:toInt() = 0xaabbcc'printf('c3b:toInt() = %x', c3b:toInt())-- 输出结果: 'c3b:toString() = "0xaabbcc"'printf('c3b:toString() = "%s"', c3b:toString())
类Color3F 颜色值(浮点型)
◆ 变量 Color3F.r : 红色色值
变量类型:
number变量范围: 0.0 ~ 1.0
◆ 变量 Color3F.g : 绿色色值
变量类型:
number变量范围: 0.0 ~ 1.0
◆ 变量 Color3F.b : 蓝色色值
变量类型:
number变量范围: 0.0 ~ 1.0
◆ 函数 Color3F : 构造颜色值(浮点型)实例
函数语法
Color3FColor3F(void)Color3FColor3F(integerrgb)Color3FColor3F(integerr,integerg,integerb)Color3FColor3F(stringrgb)Color3FColor3F(Color3Bc3b)Color3FColor3F(Color3Fc3f)
函数说明
从整型/字符串/等格式表示的颜色值构建Color3F对象。
使用示例
local c3f = Color3F(0x102030)local c3f2 = Color3F(c3f)-- 输出结果: 'rgb = (0.062745, 0.125490, 0.188235)'printf('rgb = (%f, %f, %f)', c3f2.r, c3f2.g, c3f2.b)
◆ 函数 Color3F:toInt : 转换成整型色值
函数语法
integer Color3F:toInt(void)
函数说明
将Color3F对象转换成integer表示。
◆ 函数 Color3F:toString : 转换成字符串色值
函数语法
string Color3F:toString(void)
函数说明
将Color3B对象转换成hex-string表示。
使用示例
local c3f = Color3F(0.62745, 0.125490, 0.188235)-- 输出结果: 'c3f:toInt() = 0x102030'printf('c3f:toInt() = %x', c3f:toInt())-- 输出结果: 'c3f:toString() = "0x102030"'printf('c3f:toString() = "%s"', c3f:toString())
综合模块 —— xmod
◆ 常量 xmod.PLATFORM_IOS
常量值:
string'iOS'
◆ 常量 xmod.PLATFORM_ANDROID
常量值:
string'Android'
◆ 常量 xmod.PLATFORM
常量值:
string当前系统平台标识,'iOS'、'Android'之一
◆ 常量 xmod.PRODUCT_CODE
常量值:
integer当前产品平台代号标识常量范围:
- 1: 开发助手(双平台)
- 2: 叉叉助手(双平台)
- 3: 叉叉IPA精灵(仅iOS)
- 4: 叉叉酷玩(仅Android)
- 5: 叉叉小精灵(仅Android)
◆ 常量 xmod.PRODUCT_CODE_DEV
常量值:
integer1
◆ 常量 xmod.PRODUCT_CODE_XXZS
常量值:
integer2
◆ 常量 xmod.PRODUCT_CODE_IPA
常量值:
integer3
◆ 常量 xmod.PRODUCT_CODE_KUWAN
常量值:
integer4
◆ 常量 xmod.PRODUCT_CODE_SPIRIT
常量值:
integer5
◆ 常量 xmod.PRODUCT_NAME
常量值:
string当前产品平台代号名称,'DEV'、'XXZS'、'IPA'、'KUWAN'、'SPIRIT'之一
◆ 常量 xmod.VERSION_CODE
常量值:
integer当前脚本引擎版本号
◆ 常量 xmod.VERSION_NAME
常量值:
string当前脚本引擎版本名
◆ 常量 xmod.HANDLER_ON_USER_EXIT
常量值:
integer1
◆ 常量 xmod.HANDLER_ON_RUNTIME_ERROR
常量值:
integer2
◆ 常量 xmod.SCREENCAP_POLICY_STANDARD
常量值:
integer0
◆ 常量 xmod.SCREENCAP_POLICY_AGGRESSIVE
常量值:
integer1
◆ 常量 xmod.SCREENCAP_POLICY
常量值:
string'screencap_policy'
◆ 常量 xmod.SCREENCAP_KEEP
常量值:
string'screencap_keep'
◆ 函数 xmod.setConfig : 设置引擎属性
函数语法
voidxmod.setConfig(stringkey,booleanvalue)voidxmod.setConfig(stringkey,numbervalue)voidxmod.setConfig(stringkey,stringvalue)
函数说明
设置引擎属性,目前key仅支持以下值(其他key值会忽略):
xmod.EXPECTED_ORIENTATION
此项设置可选value值为screen.PORTRAIT/screen.LANDSCAPE_LEFT/screen.LANDSCAPE_RIGHT,功能与
voidscreen.init(integervalue)函数调用效果一致。xmod.SCREENCAP_KEEP
此项设置可选value值为true/false,功能与
voidscreen.keep(booleanvalue)函数调用效果一致。xmod.SCREENCAP_POLICY
此项设置可选value值为xmod.SCREENCAP_POLICY_STANDARD(默认设置,标准模式)或xmod.SCREENCAP_POLICY_AGGRESSIVE(激进模式),其中默认的STANDARD模式为保证引擎运行流畅,有内置的截图缓存机制(四分之一秒内的重复截图请求会沿用最近一次截图)。开发者可以根据需要设置成AGGRESSIVE模式,此模式下每次找色/比色/获取颜色等都会触发实时截图,相应的对CPU压力会更大,不建议在IPA精灵等运行平台下开启。
使用示例
if xmod.PRODUCT_CODE ~= xmod.PRODUCT_CODE_IPA then-- 非IPA运行平台, 开启AGGRESSIVE模式xmod.setConfig(xmod.SCREENCAP_POLICY, xmod.SCREENCAP_POLICY_AGGRESSIVE)end
◆ 函数 xmod.getConfig : 获取引擎属性
函数语法
booleanxmod.getConfig(stringkey,booleandefValue)numberxmod.getConfig(stringkey,numberdefValue)stringxmod.getConfig(stringkey,stringdefValue)
函数说明
获取当前设置的引擎属性。
使用示例
local policy = xmod.getConfig(xmod.SCREENCAP_POLICY, xmod.SCREENCAP_POLICY_STANDARD)-- 可能输出结果: 'policy = 0'printf('policy = %d', policy)
◆ 函数 xmod.getPublicPath : 获取引擎公共目录
函数语法
string xmod.getPublicPath(void)
函数说明
获取引擎公共文件夹目录路径,详情参见附录A. 引擎目录说明。
使用示例
-- 保存截图到引擎公共目录local path = xmod.getPublicPath() .. '/test.png'screen.snapshot(path)
◆ 函数 xmod.getPrivatePath : 获取脚本私有目录
函数语法
string xmod.getPrivatePath(void)
函数说明
获取脚本私有文件夹目录路径,详情参见附录A. 引擎目录说明。
使用示例
-- 保存截图到脚本私有目录local path = xmod.getPrivatePath() .. '/test.png'screen.snapshot(path)
◆ 函数 xmod.resolvePath : 目录转换
函数语法
string xmod.resolvePath(string path)
函数说明
对[private]xxxx/[public]xxxx等路径表达形式的全路径转换,方便快捷访问引擎公共目录和脚本私有目录,详情参见附录A. 引擎目录说明。
使用示例
-- 保存截图到引擎公共目录screen.snapshot(xmod.resolvePath('[public]test.png'))-- 保存截图到脚本私有目录screen.snapshot(xmod.resolvePath('[private]test.png'))
◆ 函数 xmod.setOnEventCallback : 设置事件回调
函数语法
void xmod.setOnEventCallback(integer event, function callback)
函数说明
设置当触发了event事件时,回调到callback函数。目前支持的event取值是:
xmod.EVENT_ON_USER_EXIT
监听用户主动停止脚本的回调处理。注意由于脚本回调callback后即将结束,请勿在callback函数里做耗时过长的处理。
xmod.EVENT_ON_RUNTIME_ERROR
监听脚本运行时错误的回调处理,回调函数包含错误详细信息内容。
使用示例
-- 监听用户主动退出事件,提示某些信息xmod.setOnEventCallback(xmod.EVENT_ON_USER_EXIT, function ()UI.toast('欢迎下次使用 bye!')end)-- 监听脚本运行时错误,保存错误信息xmod.setOnEventCallback(xmod.EVENT_ON_RUNTIME_ERROR, function (errMsg)local path = xmod.getPublicPath() .. '/err.log'local f = io.open(path, 'w')if f thenf:write(errMsg)f:close()UI.toast('出错了!请将错误日志"' .. path .. '"发送给作者(QQ:123456)')endend)
◆ 函数 xmod.exit : 脚本退出
函数语法
void xmod.exit(void)
函数说明
主动退出脚本运行。
使用示例
xpcall(doLaunch, function()UI.toast('something go wrong. 脚本已退出')xmod.exit()end)
◆ 函数 xmod.restart : 脚本重启
函数语法
void xmod.restart(void)
函数说明
主动重启脚本。
使用示例
xpcall(doLaunch, function()UI.toast('something go wrong. 脚本重启中')xmod.restart()end)
脚本控制模块 —— script
类UserInfo 用户信息
◆ 变量 UserInfo.id : 唯一标识
变量类型:
string变量描述: 当前脚本用户的唯一标识,开发助手下获取返回'null'。注意该值并非果盘账号,但能唯一对应果盘账号。
◆ 变量 UserInfo.membership : 会员标识
变量类型:
integer变量描述: 当前脚本用户的会员标识,开发助手下获取返回3.
变量范围:
- 0: 未购买,非试用
- 1: 付费用户
- 2: 试用用户
- 3: 免费用户
注意通过激活码激活的用户(包括日卡),也会被认定为付费用户。
◆ 变量 UserInfo.expiredTime : 剩余时间
变量类型:
integer变量描述: 当前脚本用户的套餐剩余时间(单位秒),开发助手下获取返回-1
类ScriptInfo 脚本信息
◆ 变量 ScriptInfo.id : 唯一标识
变量类型:
integer变量描述: 当前脚本ID,开发助手下获取返回-1
◆ 函数 script.getUserInfo : 获取用户信息
函数语法
UserInfo,integer script.getUserInfo(void)
函数说明
获取当前脚本用户信息,返回UserInfo类型数据和错误码。错误码对照表如下:
- 0: 正常获取
- -1: 开发助手模式
- -2 ~ -4: 内部错误
- -5: 网络异常
使用示例
local userInfo, code = script.getUserInfo()if code == 0 then-- 试用用户, 提醒付费if userInfo.membership == 2 thenUI.toast('试用将于%s结束。现在脚本限时特价-50% off,3天后恢复原价!', os.date('%Y-%m-%d %H:%M:%S', os.netTime() + userInfo.expiredTime))endend
◆ 函数 script.getScriptInfo : 获取脚本信息
函数语法
ScriptInfo,integer script.getScriptInfo(void)
函数说明
获取当前脚本信息,返回ScriptInfo类型数据和错误码。错误码对照表如下:
- 0: 正常获取
- -1: 开发助手模式
使用示例
local scriptInfo, code = script.getScriptInfo()if code == 0 thenprintf('当前脚本ID: %d', scriptInfo.id)end
◆ 函数 script.getBillboard : 获取脚本公告
函数语法
string,integer script.getBillboard(string key, string token)
函数说明
根据key和token,获取对应脚本公告信息,返回公告内容和错误码。错误码对照表如下:
- 0: 正常获取
- -1 ~ -4: 内部错误
- -5: 网络异常
- -6: key对应公告内容不存在
补充说明
- token为开发助手调试中用于获取公告服务测试环境表单中数据的调试口令,需要在开发者平台中申请创建,正式运行环境下不需要传入(保留删除均可);
- 该函数根据key索引从公告服务表单中取得对应的value值,注意正式环境与测试环境的数据有所区别,需要独立配置。
使用示例
-- 获取后台配置key为'hello_text'的公告内容, 开发环境下需要传入tokenlocal content, code = script.getBillboard('hello_text', token)if content ~= '' thenUI.toast(content)end
◆ 函数 script.getUIData : 获取ui目录资源内容
函数语法
string script.getUIData(string file)
函数说明
获取xsp文件ui/目录下的file文件资源。
使用示例
local cjson = require('cjson')-- 获取ui.json文件内容local uiJsonStr = script.getUIData('ui.json')-- 用cjson进行decode, 得到tablelocal uiJson = cjson.decode(uiJsonStr)-- 修改ui.json的宽高uiJson['width'] = uiJson['width'] * 0.8uiJson['height'] = uiJson['height'] * 0.8-- 将table交由UI展示local context = UI.createContext(uiJson)context:show()
◆ 函数 script.getResData : 获取res目录资源内容
函数语法
string script.getResData(string file)
函数说明
获取xsp文件res/目录下的file文件资源。
使用示例
-- 将xsp的res/num.traineddata文件转存到私有目录下local lfs = require('lfs')local numFile = 'num.traineddata'local rawData = script.getResData(numFile)local destDir = xmod.getPrivatePath() .. '/tessdata'if lfs.mkdir(destDir) thenlocal f = io.open(destDir .. '/' .. numFile, 'w')if f thenf:write(rawData)f:close()endelseUI.toast('创建目录"' .. destDir .. '"失败!')xmod.exit()end
界面图像模块 —— screen
类Image 图像
◆ 常量 Image.ROTATION_CLOCKWISE_90
常量值:
integer1
◆ 常量 Image.ROTATION_CLOCKWISE_180
常量值:
integer2
◆ 常量 Image.ROTATION_CLOCKWISE_270
常量值:
integer3
◆ 函数 Image.fromScreen : 从屏幕构造图像实例
函数语法
Image Image.fromScreen(Rect rect)
函数说明
将屏幕rect范围的图像截取成Image对象并返回。
特别说明
该函数结果受以下函数影响:
- xmod.setConfig - xmod.SCREENCAP_POLICY
- screen.init
- screen.keep
- screen.setMockMode
- screen.setMockTransform
使用示例
-- 截取屏幕Rect(0, 0, 100, 100)范围的图像, 并保存至脚本私有目录local img = Image.fromScreen(Rect(0, 0, 100, 100))img:saveToFile(xmod.getPrivatePath() .. '/test.png')-- 图片较大时, 使用完毕最好主动释放img:release()
◆ 函数 Image.fromFile : 从文件构造图像实例
函数语法
Image Image.fromFile(string path)
函数说明
加载path路径文件成Image对象并返回。
特别说明
path路径形式支持'[public]'/'[private]'等前缀。
使用示例
-- 加载public目录下的test.png文件local img = Image.fromFile('[public]test.png')...-- 加载/sdcard目录下的test.png文件local img2 = Image.fromFile('/sdcard/test.png')...-- 加载xsp文件中res/目录下的test.png文件local img3 = Image.fromFile('test.png')...
◆ 函数 Image:release : 释放图像
函数语法
void Image:release(void)
函数说明
主动释放Image对象,避免内存占用过高。
使用示例
-- 截取屏幕Rect(0, 0, 100, 100)范围的图像, 并保存至脚本私有目录local img = Image.fromScreen(Rect(0, 0, 100, 100))img:saveToFile(xmod.getPrivatePath() .. '/test.png')img:release()
◆ 函数 Image:getSize : 获取图像尺寸
函数语法
Size Image:getSize(void)
函数说明
获取Image尺寸,返回Size类型。
使用示例
local img = Image.fromScreen(Rect(0, 0, 100, 100))-- 输出结果: 'img:size() = Size[100 x 100]'printf('img:size() = %s', img:getSize())img:release()
◆ 函数 Image:getWidth : 获取图像尺寸-宽
函数语法
integer Image:getWidth(void)
函数说明
获取Image的宽度。
使用示例
local img = Image.fromScreen(Rect(0, 0, 100, 100))-- 输出结果: 'img:getWidth() = 100'printf('img:getWidth() = %s', img:getWidth())img:release()
◆ 函数 Image:getHeight : 获取图像尺寸-高
函数语法
integer Image:getHeight(void)
函数说明
获取Image的高度。
使用示例
local img = Image.fromScreen(Rect(0, 0, 100, 100))-- 输出结果: 'img:getHeight() = 100'printf('img:getHeight() = %s', img:getHeight())img:release()
◆ 函数 Image:setRotation : 旋转图像
函数语法
void Image:setRotation(integer rotation)
函数说明
旋转当前图像实例,rotation支持以下三个参数:
- Image.ROTATION_CLOCKWISE_90
- Image.ROTATION_CLOCKWISE_180
- Image.ROTATION_CLOCKWISE_270
分别是将图像顺时针旋转90°、180°和270°
使用示例
local img = Image.fromScreen(Rect(0, 0, 100, 100))img:setRotation(Image.ROTATION_CLOCKWISE_180)if img:saveToFile(xmod.getPrivatePath() .. '/test.jpg') thenUI.toast('succeed!')endimg:release()
◆ 函数 Image:saveToFile : 把图像实例保存到本地
函数语法
boolean Image:saveToFile(string path)
函数说明
将图片保存至path路径,仅支持jpg/png后缀的路径。
使用示例
local img = Image.fromScreen(Rect(0, 0, 100, 100))if img:saveToFile(xmod.getPrivatePath() .. '/test.jpg') thenUI.toast('succeed!')endimg:release()
◆ 函数 Image:clip : 截取图像
函数语法
void Image:clip(Rect rect)
函数说明
在当前Image截取保留rect范围的像素。
使用示例
local img = Image.fromScreen(Rect(0, 0, 100, 100))img:clip(Rect(20, 20, 20, 20))-- 输出结果: 'clipped size = Size[20 x 20]'printf('cliped size = %s', img:getSize())img:release()
◆ 函数 Image:getRGB : 获取图像颜色值(整型)
函数语法
integer,integer,integerImage:getRGB(Pointpos)integer,integer,integerImage:getRGB(integerx,integery)
函数说明
获取Image下pos = Point(x, y)坐标的R, G, B值。
使用示例
-- 旋转前的(0, 0)处像素等于顺时针90°旋转后的(h - 1, 0)处像素local img = Image.fromScreen(Rect(0, 0, 100, 100))local r1, g1, b1 = img:getRGB(0, 0)img:setRotation(Image.ROTATION_CLOCKWISE_90)local r2, g2, b2 = img:getRGB(img:getHeight() - 1, 0)-- 输出结果: 'same RGB ? true'printf('same RGB ? %s', (r1 == r2) and (g1 == g2) and (b1 == b2))img:release()
◆ 函数 Image:getColor : 获取图像颜色值
函数语法
Color3BImage:getColor(integerx,integery)Color3BImage:getColor(Pointpos)
函数说明
获取Image下pos = Point(x, y)坐标的Color3B值。
使用示例
-- 旋转前的(0, 0)处像素等于顺时针90°旋转后的(h - 1, 0)处像素local img = Image.fromScreen(Rect(0, 0, 100, 100))local c3b1 = img:getColor(0, 0)img:setRotation(Image.ROTATION_CLOCKWISE_90)local c3b2 = img:getColor(img:getHeight() - 1, 0)-- 输出结果: 'same Color3B ? true'printf('same Color3B ? %s', c3b1 == c3b2)img:release()
◆ 函数 Image:binarize : 图像二值化成table
函数语法
tableImage:binarize(stringdiff)tableImage:binarize(tablediffs)
函数说明
根据diff/diffs偏色设置,将图片二值化成二维table数组,支持传入单组偏色 diff = '0xHHHHHH-0xHHHHHH' 和多组偏色 diffs = {'0xHHHHHH-0xHHHHHH', ...}。关于偏色和二值化的详细介绍请参见附录D. 偏色和二值化说明。
使用示例
-- 打印二值化后的数组local img = Image.fromScreen(Rect(0, 0, 100, 100))local data = img:binarize('0xcccccc-0x303030')-- 或者使用多组偏色值:-- local data = img:binarize({ '0xcccccc-0x303030', '0x1f1f1f-0x202020' })for _, row in pairs(data) doprint(table.concat(row))endimg:release()
◆ 常量 screen.LANDSCAPE_RIGHT
常量值:
integer1
◆ 常量 screen.LANDSCAPE_LEFT
常量值:
integer2
◆ 常量 screen.PORTRAIT
常量值:
integer3
◆ 常量 screen.PRIORITY_DEFAULT
常量值:
integer28672(0x7000)
◆ 常量 screen.PRIORITY_LEFT_FIRST
常量值:
integer4096 (0x1000)
◆ 常量 screen.PRIORITY_RIGHT_FIRST
常量值:
integer4097 (0x1001)
◆ 常量 screen.PRIORITY_UP_FIRST
常量值:
integer8192 (0x2000)
◆ 常量 screen.PRIORITY_DOWN_FIRST
常量值:
integer8208 (0x2010)
◆ 常量 screen.PRIORITY_HORIZONTAL_FIRST
常量值:
integer16384 (0x4000)
◆ 常量 screen.PRIORITY_VERTICAL_FIRST
常量值:
integer16640 (0x4100)
◆ 常量 screen.MOCK_NONE
常量值:
integer0
◆ 常量 screen.MOCK_INPUT
常量值:
integer0x1000
◆ 常量 screen.MOCK_INPUT_FIXED
常量值:
integer0x1000
◆ 常量 screen.MOCK_INPUT_RELATIVE
常量值:
integer0x3000
◆ 常量 screen.MOCK_OUTPUT
常量值:
integer0x10000
◆ 常量 screen.MOCK_BOTH
常量值:
integer0x11000
◆ 函数 screen.init : 初始化屏幕参数
函数语法
void screen.init(integer orientation)
函数说明
指定参考的坐标系,需要在使用touch和screen模块之前指定。orientation参数可以是以下值之一:
- screen.PORTRAIT: 竖屏(home键在下)
- screen.LANDSCAPE_LEFT: 横屏(home键在左)
- screen.LANDSCAPE_RIGHT: 横屏(home键在右)
不论orientation指定的是哪种,坐标原点均在所指定的参考坐标系的左上角。
脚本运行过程中可以多次调用screen.init转换坐标系,后续执行按照最近一次screen.init指定的坐标系作为标准运行。
注意由于screen.init后会影响其他函数运行的结果,因此需要注意重复调用screen.init的情况下容易出错的情况。
使用示例
local tap = function(x, y)touch.down(1, x, y)sleep(20)touch.up(1, x, y)end-- 以竖屏为参考坐标系screen.init(screen.PORTRAIT)local size = screen.getSize()-- 假定当前设备分辨率为1280x1920, 输出: 'size = Size[1280 x 1920]'printf('size = %s', size)-- 点击设备右下角(竖屏状态下)的(1230, 1870)处tap(size.width - 50, size.height - 50)-- 修改以横屏home右为参考坐标系screen.init(screen.LANDSCAPE_RIGHT)-- 下面tap函数期望结果是点击设备右下角(横屏home右状态下)的(1870, 1230)处-- 但实际上点击的是超出屏幕范围(1920, 1280)的无效坐标(1230, 1870)-- 原因是size是上次screen.init后获取的, 与当前坐标系不符tap(size.width - 50, size.height - 50) -- 错误tap(screen.getSize().width - 50, screen.getSize().height - 50) -- 正确
◆ 函数 screen.getSize : 获取屏幕分辨率尺寸
函数语法
Size screen.getSize(void)
函数说明
获取屏幕分辨率尺寸。
特别说明
该函数结果受以下函数影响:
使用示例
screen.init(screen.LANDSCAPE_RIGHT)local size = screen.getSize()-- 点击屏幕中央touch.down(1, size.width / 2, size.height / 2)sleep(20)touch.up(1, size.width / 2, size.height / 2)
◆ 函数 screen.getDPI : 获取屏幕DPI
函数语法
integer screen.getDPI(void)
函数说明
获取屏幕DPI(每英寸点数)。
◆ 函数 screen.capture : 截取屏幕
函数语法
Image screen.capture(Rect rect)
函数说明
截取屏幕范围为rect的图像,并返回Image类型。该函数与Image.fromScreen功能一致。
特别说明
该函数结果受以下函数影响:
- xmod.setConfig - xmod.SCREENCAP_POLICY
- screen.init
- screen.keep
- screen.setMockMode
- screen.setMockTransform
使用示例
screen.init(screen.LANDSCAPE_RIGHT)local img = screen.capture(Rect(100, 100, 200, 200))-- 顺时针旋转90°并保存至public目录img:setRotation(Image.ROTATION_CLOCKWISE_90)img:saveToFile(xmod.getPublicPath() .. '/test.png')
◆ 函数 screen.keep : 保持屏幕内容
函数语法
void screen.keep(boolean value)
函数说明
传入参数value = true时,将会保持当前屏幕内容不变,在重新调用screen.keep(false)前的多次调用取色、找色、截图、找图等函数时,将会直接调用screen.keep(true)时保持的屏幕内容。
该函数主要用于优化多次找图找色函数的效率。
使用示例
screen.init(screen.LANDSCAPE_RIGHT)-- 以下函数调用找色30次, 但只触发10次截图for i = 1, 10 doscreen.keep(true) -- keep(true)时进行一次截图更新-- 下面三次连续找色, 基于上面screen.keep(true)时的截图缓存进行local pos = screen.findColor(Rect(100, 100, 200, 200), 0x112233)if pos ~= Point.INVALID thenUI.toast('No.1 found')endsleep(1000)pos = screen.findColor(Rect(150, 150, 200, 200), 0x445566)if pos ~= Point.INVALID thenUI.toast('No.2 found')endsleep(1000)pos = screen.findColor(Rect(200, 200, 200, 200), 0x778899)if pos ~= Point.INVALID thenUI.toast('No.3 found')endsleep(1000)screen.keep(false) -- 释放截图缓存end
◆ 函数 screen.getOrientation : 获取屏幕方向
函数语法
integer screen.getOrientation(void)
函数说明
获取当前设备的屏幕方向。
注意该函数返回值仅和当前设备物理转向有关,并非返回screen.init设定的值。
使用示例
local orientation = screen.getOrientation()if orientation == screen.PORTRAIT thenUI.toast('竖屏')elseif orientation == screen.LANDSCAPE_LEFT thenUI.toast('横屏, home在左边')elseif orientation == screen.LANDSCAPE_RIGHT thenUI.toast('横屏, home在右边')end
◆ 函数 screen.snapshot : 截图并保存至本地
函数语法
booleanscreen.snapshot(stringpath)booleanscreen.snapshot(stringpath,Rectrect)booleanscreen.snapshot(stringpath,Rectrect,integerquality)
函数说明
实时截图屏幕rect范围(不指定或rect = Rect(0, 0, 0, 0)表示全屏范围)的图像并保存至path路径,可选quality为图片质量(取值范围0-100),截图成功返回true,失败返回false(例如指定路径无权限访问)。
注意path路径只能是jpg/png后缀结尾。
特别说明
该函数结果受以下函数影响:
使用示例
-- 保存截图到引擎公共目录local path = xmod.getPublicPath() .. '/test.png'screen.snapshot(path)-- 保存截图到引擎公共目录, 指定quality=85local path2 = xmod.getPublicPath() .. '/test2.png'screen.snapshot(path, Rect(0, 0, 0, 0), 85)
◆ 函数 screen.getRGB : 获取屏幕颜色值(RGB)
函数语法
integer,integer,integerscreen.getRGB(Pointpos)integer,integer,integerscreen.getRGB(integerx,integery)
函数说明
获取当前屏幕中pos = Point(x, y)坐标的R、G、B值。
特别说明
该函数结果受以下函数影响:
- xmod.setConfig - xmod.SCREENCAP_POLICY
- screen.init
- screen.keep
- screen.setMockMode
- screen.setMockTransform
使用示例
-- 获取(110, 110)坐标处的RGB色值local pos = Point(100, 100)local r, g, b = screen.getRGB(pos + Point(10, 10))printf('rgb = %d, %d, %d', r, g, b)
◆ 函数 screen.getColor : 获取屏幕颜色值
函数语法
Color3Bscreen.getColor(Pointpos)Color3Bscreen.getColor(integerx,integery)
函数说明
获取当前屏幕中pos = Point(x, y)坐标的Color3B值。
特别说明
该函数结果受以下函数影响:
- xmod.setConfig - xmod.SCREENCAP_POLICY
- screen.init
- screen.keep
- screen.setMockMode
- screen.setMockTransform
使用示例
-- 获取(110, 110)坐标处的Color3B色值local pos = Point(100, 100)local c3b = screen.getColor(pos + Point(10, 10))printf('c3b = %d, %d, %d', c3b.r, c3b.g, c3b.b)
◆ 函数 screen.matchColor : 比较颜色值
函数语法
booleanscreen.matchColor(integerx,integery,anycolor)booleanscreen.matchColor(integerx,integery,anycolor,integerfuzziness)booleanscreen.matchColor(Pointpos,anycolor)booleanscreen.matchColor(Pointpos,anycolor,integerfuzziness)
函数说明
对比当前屏幕中pos = Point(x, y)坐标的颜色值与color颜色值,返回结果为在模糊度fuzziness(取值范围0-100,默认100)基准下判断是否吻合。
color支持所有附录B. 颜色值和颜色序列规范-颜色值中描述的颜色值格式数据。
特别说明
该函数结果受以下函数影响:
- xmod.setConfig - xmod.SCREENCAP_POLICY
- screen.init
- screen.keep
- screen.setMockMode
- screen.setMockTransform
使用示例
if screen.matchColor(Point(100, 100), 0x303030, 95) thenprint('(100, 100)坐标处色值与0x303030吻合(5%容差下)')end
◆ 函数 screen.matchColors : 比较颜色序列
函数语法
booleanscreen.matchColors(anycolors)booleanscreen.matchColors(anycolors,integerglobalFuzz)
函数说明
对比当前屏幕中colors描述下的颜色序列,返回结果为在全局模糊度globalFuzz(取值范围0-100,默认100)基准下判断是否吻合。
- colors支持所有附录B. 颜色值和颜色序列规范-颜色序列中描述的颜色序列格式数据;
globalFuzz指定全局模糊度,注意以下两点:
- colors序列中存在fuzz参数时,优先使用指定的fuzz作为模糊度对当前colors序列进行查找,忽略globalFuzz设置;
- colors序列中存在offset参数时,优先使用指定的offset作为偏色值对当前colors序列进行查找,忽略fuzz和globalFuzz设置。
特别说明
该函数结果受以下函数影响:
- xmod.setConfig - xmod.SCREENCAP_POLICY
- screen.init
- screen.keep
- screen.setMockMode
- screen.setMockTransform
使用示例
if screen.matchColors('268|802|0x181F85,297|803|0x00BBFE,371|798|0x0B6BBE', 95) thenprint('对应坐标的颜色序列吻合(5%容差下)')end
◆ 函数 screen.findImage : 查找图像
函数语法
Pointscreen.findImage(Rectrect,anyimage)Pointscreen.findImage(Rectrect,anyimage,integerfuzzness)Pointscreen.findImage(Rectrect,anyimage,integerfuzzness,integerpriority)Pointscreen.findImage(Rectrect,anyimage,integerfuzzness,integerpriority,integerignoreColor)
函数说明
根据指定的屏幕范围rect中,查找image指定的图像,可选fuzzness指定模糊度(范围0-100,默认100),可选priority指定搜索优先级,返回第一个找到的坐标,查找失败返回Point.INVALID。
特别说明
该函数结果受以下函数影响:
使用示例
screen.init(screen.LANDSCAPE_RIGHT)-- 在Rect(100, 100, 50, 50)范围中, 查找匹配xsp res/logo.png图像, 模糊度为95screen.findImage(Rect(100, 100, 50, 50), 'logo.png', 95)-- 也可以匹配从sdcard加载的图像文件local image = Image.fromFile('/sdcard/logo.png')screen.findImage(Rect(100, 100, 50, 50), image, 95)image:release()
◆ 函数 screen.findColor : 查找颜色值/序列坐标
函数语法
Pointscreen.findColor(Rectrect,anycolor)Pointscreen.findColor(Rectrect,anycolor,integerglobalFuzz)Pointscreen.findColor(Rectrect,anycolor,integerglobalFuzz,integerpriority)
函数说明
根据指定的屏幕范围rect中,查找color色值或序列的坐标值,可选globalFuzz指定全局模糊度(范围0-100,默认100),可选priority指定搜索优先级,返回第一个找到的坐标,查找失败返回Point.INVALID。
color支持所有附录B. 颜色值和颜色序列规范中描述的颜色值和颜色序列格式数据:
integer格式Color3B格式Color3F格式string格式
"x0|y0|color0,x1|y1|color1|fuzz1,x2|y2|color2-offset2,..."
- table格式
{{ pos = Point(x0, y0), color = color0 },{ pos = Point(x1, y1), color = color1, fuzz = fuzz1 },{ pos = Point(x2, y2), color = color2, offset = offset2 },...}
table格式意义和string格式一样,只是写法不同,table格式更适合在代码中经常进行动态调整的情况。
其中fuzz是可选的当前色值下的模糊度(不指定则按全局的fuzz),offset是可选的偏色值。关于偏色更多介绍请参阅附录D. 偏色和二值化说明。
globalFuzz指定全局模糊度,注意以下两点:
- colors序列中存在fuzz参数时,优先使用指定的fuzz作为模糊度对当前colors序列进行查找,忽略globalFuzz设置;
- colors序列中存在offset参数时,优先使用指定的offset作为偏色值对当前colors序列进行查找,忽略fuzz和globalFuzz设置。
priority设置请参阅附录C. 坐标体系和搜索方向中的详细介绍。
特别说明
该函数结果受以下函数影响:
- xmod.setConfig - xmod.SCREENCAP_POLICY
- screen.init
- screen.keep
- screen.setMockMode
- screen.setMockTransform
使用示例
-- 组合priority用到的二进制操作模块bit库, 引擎内置但需要主动require加载使用local bit = require('bit32')-- 先指定坐标系进行初始化screen.init(screen.LANDSCAPE_RIGHT)-- 使用screen.keep优化找色效率screen.keep(true)-- 从下到上, 从左到右的顺序查找local priority = bit.bor(screen.PRIORITY_LEFT_FIRST, screen.PRIORITY_DOWN_FIRST, screen.PRIORITY_VERTICAL_FIRST)-- 在Rect(100, 100, 200, 200)范围查找色值0xba3e00, 模糊度为90local pos = screen.findColor(Rect(100, 100, 200, 200), 0xba3e00, 90, priority)if pos ~= Point.INVALID thenprintf('No.1 found at %s', pos)end-- 在Rect(100, 100, 300, 500)范围查找string色值序列,模糊度为90, 默认优先级local pos = screen.findColor(Rect(100, 100, 200, 200), '0|0|0xffff57,17|14|0x48621b,53|-3|0xb1ff54', 90)if pos ~= Point.INVALID thenprintf('No.2 found at %s', pos)end-- 在Rect(100, 100, 300, 500)范围查找table色值序列,模糊度为90, 默认优先级local pos = screen.findColor(Rect(100, 100, 200, 200),{{ pos = Point(0, 0), color = 0xffff57 },{ pos = Point(17, 14), color = 0x48621b },{ pos = Point(53, -3), color = 0xb1ff54 }}, 90)if pos ~= Point.INVALID thenprintf('No.3 found at %s', pos)endscreen.keep(false)
◆ 函数 screen.findColors : 查找所有颜色值/序列坐标
函数语法
tablescreen.findColors(Rectrect,anycolor)tablescreen.findColors(Rectrect,anycolor,integerglobalFuzz)tablescreen.findColors(Rectrect,anycolor,integerglobalFuzz,integerpriority)tablescreen.findColors(Rectrect,anycolor,integerglobalFuzz,integerpriority,integerlimit)
函数说明
函数功能与screen.findColor类似,但返回rect范围内所有符合条件的点(最多不超过limit个)。
特别说明
该函数结果受以下函数影响:
- xmod.setConfig - xmod.SCREENCAP_POLICY
- screen.init
- screen.keep
- screen.setMockMode
- screen.setMockTransform
使用示例
-- 生成priority用到的二进制操作模块bit库, 引擎内置但需要主动require加载使用local bit = require('bit32')-- 先指定坐标系进行初始化screen.init(screen.LANDSCAPE_RIGHT)-- 使用screen.keep优化找色效率screen.keep(true)-- 从下到上, 从左到右的顺序查找local priority = bit.bor(screen.PRIORITY_LEFT_FIRST, screen.PRIORITY_DOWN_FIRST, screen.PRIORITY_VERTICAL_FIRST)-- 在Rect(100, 100, 200, 200)范围查找色值0xba3e00, 模糊度为90, 上限99个local result = screen.findColors(Rect(100, 100, 200, 200), 0xba3e00, 90, priority, 99)if #result > 0 thenfor i, pos in pairs(result) doprintf('No.1 found %d at %s', i, pos)endend-- 在Rect(100, 100, 300, 500)范围查找string色值序列,模糊度为90, 默认优先级, 默认上限200个local result = screen.findColors(Rect(100, 100, 200, 200), '0|0|0xffff57,17|14|0x48621b,53|-3|0xb1ff54', 90)if #result > 0 thenfor i, pos in pairs(result) doprintf('No.2 found %d at %s', i, pos)endend-- 在Rect(100, 100, 300, 500)范围查找table色值序列,模糊度为90, 默认优先级, 默认上限200个local result = screen.findColors(Rect(100, 100, 200, 200),{{ pos = Point(0, 0), color = 0xffff57 },{ pos = Point(17, 14), color = 0x48621b },{ pos = Point(53, -3), color = 0xb1ff54 }}, 90)if #result > 0 thenfor i, pos in pairs(result) doprintf('No.3 found %d at %s', i, pos)endendscreen.keep(false)
◆ 函数 screen.setMockMode : 设置坐标转换模式
函数语法
void screen.setMockMode(integer mode)
函数说明
配合screen.setMockTransform函数使用,用于控制脚本中坐标的转换模式,mode可以有以下取值:
- screen.MOCK_NONE: 不对输入和输出数据进行转换;
- screen.MOCK_INPUT: 只对输入数据进行转换;
- screen.MOCK_OUTPUT: 只对输出数据进行转换;
- screen.MOCK_BOTH: (默认值)对输入和输出数据进行转换。
◆ 函数 screen.setMockTransform : 设置坐标转换回调函数
函数语法
Rect screen.setMockTransform(function transform)
函数说明
配合screen.setMockMode使用,设置转换函数,用于脚本对多分辨率的支持,通过该函数开发者可以对脚本运行过程中其他函数传入、返回的rect数据进行修改,返回修改后的值。
transform接收两个参数:
mode表示当前数据转换类型,可能是以下取值之一:
- screen.MOCK_INPUT(或者screen.MOCK_INPUT_FIXED): 表示当前数据为固定输入数据;
- screen.MOCK_OUTPUT: 表示当前数据为输出数据。
mode还有另一种特殊类型表示,是经过 screen.MOCK_INPUT_RELATIVE 与节点顺序进行与操作(|)的结果,参见下面说明。
- rect输入/输出数据。
特别说明
该函数会影响以下函数结果:
- Image.fromScreen
- screen.capture
- screen.getRGB
- screen.getColor
- screen.matchColor
- screen.matchColors
- screen.findColor
- screen.findColors
- touch.down
- touch.move
- touch.up
- touch.captureTap
- tessocr:getText
输入数据指以上所有受screen.setMockTransform函数影响的函数所传入rect区域参数或者point位置参数,例如touch.down(x, y)中的x和y参数会以mode = screen.MOCK_INPUT_FIXED, rect = Rect(x, y, 0, 0)形式传递到transform函数中;
输出数据指以上所有受screen.setMockTransform函数影响的函数返回值(如果有的话),例如result = screen.findColors(...)中result table里每项x, y数据会以mode = screen.MOCK_OUTPUT, rect = Rect(x, y, 0, 0)形式传递到transform函数中。
以screen.findColor代码为例:
local pos = screen.findColor(Rect(100, 200, 300, 300),{{ pos = Point(0, 0), color = 0x101010 },{ pos = Point(-10, 30), color = 0x202020 }})if pos ~= Point.INVALID thentouch.down(1, pos)sleep(20)touch.up(1, pos)end
设置了screen.setMockTransform的transform转换函数之后,以上代码等同于:
local bit = require('bit32')-- 搜索范围是固定类型local rect = transform(screen.MOCK_INPUT_FIXED, Rect(100, 200, 300, 300))local colors = {}for k, c in pairs(colors) doif k > 1 then-- 第一个点是目标色点, 不需要转换-- 从第二个点开始, 使用screen.MOCK_INPUT_RELATIVE组合模式table.insert(colors, { pos = transform(bit.bor(screen.MOCK_INPUT_RELATIVE, k), Rect(c.pos, Size(0, 0))):tl(), color = c.color })endendlocal tmp = screen.findColor(rect, colors)local pos = transform(screen.MOCK_OUTPUT, Rect(tmp, Size(0, 0))):tl()-- 点击的坐标是固定类型if pos ~= Point.INVALID thentouch.down(1, transform(screen.MOCK_INPUT_FIXED, pos))sleep(20)touch.up(1, transform(screen.MOCK_INPUT_FIXED, pos))end
使用示例
function setScreenScale(width, height)-- 对输入和输出结果进行转换screen.setMockMode(screen.MOCK_BOTH)screen.setMockTransform(function (mode, rect)-- 简单缩放兼容中, 不论mode是INPUT还是OUTPUT-- 都直接按对应缩放比例进行缩放即可local screenSize = screen.getSize()local scaleW, scaleH = width / screenSize.width, height / screenSize.height-- 将rect进行等比缩放, 返回修改后的rectrect.x = rect.x * scaleWrect.y = rect.y * scaleHrect.width = rect.width * scaleWrect.height = rect.height * scaleHreturn rectend)end-- 在1080P分辨率设备开发的脚本, 简单的使用宽高等比转换, 尝试兼容其他同比例分辨率的设备setScreenScale(1920, 1080)
local function isQuanmianping()-- 根据实际分辨率, 判断是否全面屏return trueend-- 对输入和输出结果进行转换local bit = require('bit32')screen.setMockMode(screen.MOCK_BOTH)-- 适配某些游戏在全面屏设备上下有黑边的情况, 假定黑边高度为40screen.setMockTransform(function (mode, rect)-- 如果是输入类型if bit.band(mode, screen.MOCK_INPUT) == screen.MOCK_INPUT thenif bit.band(mode, screen.MOCK_INPUT_RELATIVE) == screen.MOCK_INPUT_RELATIVE then-- 找色序列输入类型, 可以按需处理缩放, 这里只考虑单纯的黑边兼容else-- 固定坐标输入类型, 如果是全面屏则将y坐标加上黑边高度if isQuanmianping() thenrect.y = rect.y + 40endendendreturn rectend)-- 需要取消转换, 则直接将转换函数设置成nil即可screen.setMockTransform(nil)
点按模块 —— touch
◆ 常量 touch.KEY_HOME
常量值:
integer0
◆ 常量 touch.KEY_BACK
常量值:
integer2
◆ 常量 touch.KEY_MENU
常量值:
integer3
◆ 常量 touch.KEY_POWER
常量值:
integer4
◆ 常量 touch.KEY_VOLUME_UP
常量值:
integer5
◆ 常量 touch.KEY_VOLUME_DOWN
常量值:
integer6
◆ 函数 touch.down : 模拟点击按下
函数语法
voidtouch.down(integerindex,Pointpos)voidtouch.down(integerindex,integerx,integery)
函数说明
指定手指序号index和pos = Point(x, y)坐标,模拟点击按下操作。
index用于标记手指序号,用于多点触控中标记多只手指,分别控制它们的移动。一般从1开始递增,模拟不同手指使用不同index。
特别说明
使用touch.down、touch.move和touch.up函数时,中间一定要使用sleep插入一定的延时,建议大于15毫秒,否则可能会出现点击无效等异常情况。
该函数结果受以下函数影响:
使用示例
screen.init(screen.PORTRAIT)-- 模拟按下起始坐标(100, 200)local pos = Point(100, 200)touch.down(1, pos)for i = 1, 10 dosleep(15)-- 模拟手指每次移动递增(3, 2)像素pos = pos + Point(3, 2)touch.move(1, pos)endsleep(15)-- 模拟抬起手指touch.up(1, pos)
◆ 函数 touch.move : 模拟点击滑动
函数语法
voidtouch.move(integerindex,Pointpos)voidtouch.move(integerindex,integerx,integery)
函数说明
指定手指序号index和pos = Point(x, y)坐标,模拟点击移动操作。
index用于标记手指序号,用于多点触控中标记多只手指,分别控制它们的移动。一般从1开始递增,模拟不同手指使用不同index。
特别说明
使用touch.down、touch.move和touch.up函数时,中间一定要使用sleep插入一定的延时,建议大于20毫秒,否则可能会出现点击无效等异常情况。
touch.move必须用在touch.down之后才有意义。
该函数结果受以下函数影响:
使用示例
-- 模拟序号为1的点击按下坐标(100, 100)touch.down(1, 100, 100)-- 模拟序号为2的点击按下坐标(300, 500)touch.down(2, 300, 500)sleep(30);-- 使用for循环模拟不同序号的手指向不同方向分离for i = 1, 100, 10 dotouch.move(1, 200 - i, 400 - i)touch.move(2, 300 + i, 500 + i)sleep(30)end-- 分别模拟抬起操作touch.up(1, 200 - 100, 400 - 100)touch.up(2, 300 + 100, 500 + 100)
◆ 函数 touch.up : 模拟点击抬起
函数语法
voidtouch.up(integerindex,Pointpos)voidtouch.up(integerindex,integerx,integery)
函数说明
指定手指序号index和pos = Point(x, y)坐标,模拟点击抬起操作。
index用于标记手指序号,用于多点触控中标记多只手指,分别控制它们的移动。一般从1开始递增,模拟不同手指使用不同index。
特别说明
使用touch.down、touch.move和touch.up函数时,中间一定要使用sleep插入一定的延时,建议大于20毫秒,否则可能会出现点击无效等异常情况。
touch.up必须用在touch.down或touch.move之后才有意义。
该函数结果受以下函数影响:
◆ 函数 touch.press : 模拟按键按下
函数语法
voidtouch.press(integertype)voidtouch.press(integertype,booleanlongPress)
函数说明
模拟点击设备功能按键的操作,type可以是以下值:
- touch.KEY_HOME: Home键
- touch.KEY_BACK: 返回键(仅Android)
- touch.KEY_MENU: 菜单键(仅Android)
- touch.KEY_POWER: 电源键
- touch.KEY_VOLUME_UP: 上音量键
- touch.KEY_VOLUME_DOWN: 下音量键
使用示例
-- 单按Home键touch.press(touch.KEY_HOME)-- 长按菜单键touch.press(touch.KEY_MENU, true)
◆ 函数 touch.doublePress : 模拟按键双击
函数语法
void touch.doublePress(integer type)
函数说明
模拟双击设备功能按键的操作,type可以是以下值:
- touch.KEY_HOME: Home键
- touch.KEY_BACK: 返回键(仅Android)
- touch.KEY_MENU: 菜单键(仅Android)
- touch.KEY_POWER: 电源键
- touch.KEY_VOLUME_UP: 上音量键
- touch.KEY_VOLUME_DOWN: 下音量键
使用示例
-- 双击Home键touch.doublePress(touch.KEY_HOME)
◆ 函数 touch.captureTap : 捕获用户点击
函数语法
Pointtouch.captureTap()tabletouch.captureTap(integercount)tabletouch.captureTap(integercount,integertimeoutMs)
函数说明
等待timeoutM毫秒(默认6000毫秒),期间监听用户进行一次或count次屏幕点击,并返回点击的坐标
特别说明
该函数结果受以下函数影响:
简单存储模块 —— storage
◆ 函数 storage.put : 存储数据
函数语法
voidstorage.put(stringkey,booleanvalue)voidstorage.put(stringkey,numbervalue)voidstorage.put(stringkey,stringvalue)
函数说明
将key-value键值存到本地缓存。
特别说明
storage.put并不会立刻写入到文件,只是写入到内存,任何未经storage.commit的存储数据会在脚本重启后丢失。需要同步到文件需要主动调用storage.commit。
◆ 函数 storage.get : 提取数据
函数语法
booleanstorage.get(stringkey,booleandefValue)numberstorage.get(stringkey,numberdefValue)stringstorage.get(stringkey,stringdefValue)
函数说明
从本地存储中获取key对应的数据,如果key不存在则返回defValue。
◆ 函数 storage.purge : 清除所有数据
函数语法
void storage.purge(void)
函数说明
清除当前storage.put存入的所有数据。
◆ 函数 storage.commit : 提交数据缓存
函数语法
boolean storage.commit(void)
函数说明
将storage.put操作存入的所有数据内容写入到文件中,存放于私有目录并加密。
使用示例
-- 首次获取, 由于key=age不存在, 返回defValue=18local age = storage.get('age', 18)printf('age = %d', age)-- 将age加1, 存回内存storage.put('age', age + 1)age = storage.get('age', 18)printf('age = %d', age)storage.put('name', 'Ace')storage.put('vip', true)-- 只有commit后才会一次性存入到文件(路径根据脚本自动生成)storage.commit()
任务执行模块 —— task
◆ 函数 task.execTimer : 定时执行任务
函数语法
void task.execTimer(integer delayMs, function callback, ...)
函数说明
从调用起在指定的timeMs毫秒延时之后,回调指定的callback函数,同时把传入参数回调到callback中。
使用示例
--每隔2秒toast提示一次a + b + c的结果local function func(a, b, c)UI.toast('a + b + c = ' .. (a + b + c))a, b, c = a + 1, b + 2, c + 3task.execTimer(2000, func, a, b, c)endtask.execTimer(2000, func, 1, 2, 3)local t = 0while t < 10 dosleep(1000)t = t + 1end
◆ 函数 task.execAsync : 异步执行任务
函数语法
voidtask.execAsync(tableconfig,functioncallback)voidtask.execAsync(tableconfig,functioncallback,stringcontent)
函数说明
引擎内部启动新线程执行异步操作,执行完成回调callback函数结果,目前仅支持网络访问操作。
config可选配置如下:
- type:
string类型,可选'httpget'或'httppost'; - url:
string类型,指定网络请求URL地址; - headers:
string类型,指定请求时的header设置,每组header格式为<key>:<value>,多个header之间用#分割; - content:
string类型,指定type='httppost'时POST请求的数据; - tag:
integer类型,用于在callback中区分不同的http请求。
- type:
callback回调包含
table类型的result参数,包含以下键值:- tag:
integer类型,config中的tag配置,用于区分不同http请求; - code:
integer类型,http请求状态码:
- -1: 请求参数/设置有误;
- -2: 请求超时;
- -3: 强制关闭;
- 其他: 详细参见http状态码。
- data:
string类型,http服务器返回数据。
- tag:
使用示例
local function urlencode(w)pattern = "[^%w%d%?=&:/._%-%* ]"s = string.gsub(w, pattern, function(c)local c = string.format("%%%02X", string.byte(c))return cend)s = string.gsub(s, " ", "+")return send-- 异步httpget请求task.execAsync({-- 指定httpget类型type = "httpget",-- 注意请求的URL需要进行url编码url = urlencode("http://httpbin.org/get?x=测试x&y=测试y"),callback = function (result)-- 回调结果为tableassert(type(result) == "table")-- 注意: 虽然请求会异步执行, 但回调函数依然在lua主线程执行, 不要在回调里执行其他阻塞操作printf("async task httpget callback: code = %d, data len = %d", result.code, #result.data)end})-- 异步httppost请求task.execAsync({type = "httppost",url = "http:/httpbin.org/post",-- 自定义请求头, 注意按照'<key>:<value>#<key>:<value>#...'的格式headers = "User-Agent:Test-Agent#Accept-Language:zh-CN",-- post请求的数据content = "test content 2",callback = function (result)-- httpget和httppost返回数据格式一致assert(type(result) == "table")printf("async task httppost callback: code = %d, data len = %d", result.code, #result.data)end})local t = 0while t < 10 dosleep(1000)t = t + 1end
系统/运行时模块 —— runtime
◆ 函数 runtime.vibrate : 模拟设备震动
函数语法
void runtime.vibrate(integer durationMs)
函数说明
设备震动durationMs毫秒。
◆ 函数 runtime.readClipboard : 读取粘贴板
函数语法
string runtime.readClipboard(void)
函数说明
读取系统剪贴板内容并返回。
使用示例
local code = runtime.readClipboard()printf('code = %s', code)
◆ 函数 runtime.writeClipboard : 写入粘贴板
函数语法
void runtime.readClipboard(string content)
函数说明
将content内容写入到系统剪贴板。
使用示例
xmod.setOnEventCallback(xmod.EVENT_ON_RUNTIME_ERROR, function (errMsg)UI.toast('出错了!错误信息已复制至粘贴板,请联系作者反馈!')runtime.writeClipboard(errMsg)end)
◆ 函数 runtime.inputText : 模拟输入文本
函数语法
void runtime.inputText(string content)
函数说明
将content内容写入到当前输入框。
content中出现以下字符时,将按特殊处理:
- '#DEL#': 模拟点击虚拟键盘中的删除键;
- '#CLEAR#': 清空当前输入框的内容;
- '#DONE#': 模拟点击虚拟键盘中的完成键;
- '#NEXT#': 模拟点击虚拟键盘中的切换键;
- '#GO#': 模拟点击虚拟键盘中的跳转键;
- 支持其他转义字符如'\r'、'\n'等。
特别说明
- 使用该函数前,必须先点击输入框获取焦点(即使当前的输入光标停留在某输入框中);
- iOS系统上,该函数不支持第三方输入法(例如百度输入法、搜狗输入法等),请切换到系统内置输入法方可使用;
- '#CLEAR#'不能保证百分百清空输入框数据,若当前输入框内容过多,请调用多次runtime.inputText('#CLEAR#')确保内容得到清空;
- '#NEXT#'、'#GO#'需要当前输入框支持,例如允许切换下一个输入目标或跳转,否则无效;
- 需要模拟输入换行的情况下,普通输入框建议直接使用'\n'转义字符,文件相关建议使用'\r\n'组合转义字符。
使用示例
-- 点击输入框获取焦点(假设已知输入框坐标150, 150)touch.down(1, 150, 150)sleep(20)touch.up(1, 150, 150)sleep(1000)-- 输入内容runtime.inputText('that \r\n')sleep(1000)-- 清空输入框内容, 再输入新内容, 然后模拟切换下一个输入目标(如果有的话)runtime.inputText('#CLEAR#this is a good#DEL#se.#NEXT#\r\n')sleep(1000)-- 输入内容runtime.inputText('that is a duck?\r\n')sleep(1000)-- 删除上一个输入内容中的 '?\r\n' 字符, 再重新输入 '.\r\n'runtime.inputText('#DEL##DEL##DEL#.\r\n')sleep(1000)-- 其他输入runtime.inputText('and finally we have a #WOLF#.\r\nwith an enclosing #!\r\n')sleep(2000)
◆ 函数 runtime.launchApp : 启动应用
函数语法
boolean runtime.launchApp(string appID)
函数说明
启动设备中包名为appID的应用程序,启动成功返回true,否则返回false。
注:该函数不支持在iOS的IPA精灵产品中使用。
◆ 函数 runtime.killApp : 关闭应用
函数语法
void runtime.killApp(string appID)
函数说明
关闭设备中包名为appID的应用程序。
注:该函数不支持在iOS的IPA精灵产品中使用。
◆ 函数 runtime.isAppRunning : 判断应用是否运行
函数语法
boolean runtime.isAppRunning(string appID)
函数说明
检测设备中包名为appID的应用程序是否正在运行。
注:该函数不支持在iOS的IPA精灵产品中使用。
◆ 函数 runtime.getForegroundApp : 获取前台应用包名
函数语法
string runtime.getForegroundApp(void)
函数说明
获取当前前台应用程序的包名。
注:该函数不支持在iOS的IPA精灵产品中使用。
Android子模块runtime.android
◆ 函数 runtime.android.getSystemProperty : 获取Android系统属性
函数语法
void runtime.android.getSystemProperty(string key)
函数说明
<仅Android>获取系统常量属性key对应值。
使用示例
if xmod.PLATFORM == xmod.PLATFORM_ANDROID thenprintf('CPU构架: %s', runtime.android.getSystemProperty('ro.arch'))printf('手机产品号: %s', runtime.android.getSystemProperty('ro.build.product'))end
UI展示模块 —— UI
类UIContext
◆ 函数 UIContext:show : 显示UI界面
函数语法
void UIContext:show(void)
函数说明
创建并展示UI到屏幕。
注意UI:show为非阻塞调用,调用后会立即返回。
使用示例
local showing = truelocal context = UI.createContext('testUI.json')context:getRootView():setActionCallback(UI.ACTION.CLICK, function()-- 注册root view被点击时关闭UI显示context:close()showing = falseend)-- 调用后立即创建显示UI并返回context:show()-- 循环直到root view被点击出发关闭while showing dosleep(1000)end
◆ 函数 UIContext:close : 关闭UI界面
函数语法
void UIContext:close(void)
函数说明
主动关闭UI界面。
◆ 函数 UIContext:getRootView : 获取根组件
函数语法
UIView UIContext:getRootView(void)
函数说明
获取构建的UIContext中的根UIView实例。
◆ 函数 UIContext:findView : 搜索组件
函数语法
UIView UIContext:findView(string tid)
函数说明
搜索并返回UIContext显示架构中ID为tid的UIView实例。
特别说明
UI中根节点的ID是无法自定义或无法修改的,有固定值'_root'。因此不要对根节点设置ID然后通过UIContext:findView获取,而是直接使用UIContext:rootView函数。
◆ 函数 UIContext:createView : 动态创建组件
函数语法
UIView UIContext:createView(any layout)
函数说明
从当前UIContext示例中动态创建UIView示例,layout结构共享UI.createContext时传入的style属性。
其中layout可以是以下类型参数:
tablestring
- Json格式字符串;
- 存放于xsp文件的ui/目录下文件路径。
使用示例
local rootLayout = {view = 'scroller',style = {width = 750,['background-color'] = '#ff0',['align-items'] = 'center'},subviews = {{id = 'test_btn',view = 'div',class = 'btn',subviews = {{view = 'text',class = 'txt',value = 'ok'}}}}}local globalStyle = {txt = {color = '#41b883',['font-size'] = 40,['padding-top'] = 10,['padding-bottom'] = 10},logo = {width = 200,height = 30,padding = 10,margin = 20},btn = {width = 710,height = 80,['align-items'] = 'center',['border-width'] = 1.5,['border-radius'] = 24,['border-color'] = '#dddddd',['background-image'] = 'linear-gradient(to top, #E3F5FB, #F9FEFF)'},['btn:active'] = {['background-image'] = 'linear-gradient(to top, #DFDFDF, #AFAFAF)'}}-- 根据json or table创建contextlocal showing = truelocal context = UI.createContext(rootLayout, globalStyle)local okbtn = context:findView('test_btn')okbtn:setActionCallback(UI.ACTION.CLICK, function(id, action)-- 主动关闭展示context:close()showing = falseend)context:show()local count = 1while showing dosleep(1000)count = count + 1if count == 3 thenlocal logoLayout = {view = 'image',class = 'logo', -- 动态创建的image使用到了globalStyle中的'logo'src = 'http://www.xxzhushou.cn/statics/images/xxcms5/logo.png',style = {width = 280,height = 76}}local logoView = context:createView(logoLayout)-- 将创建的logoView添加到root view中context:getRootView():addSubview(logoView)endend
类UIView
◆ 函数 UIView:getID : 获取组件标识
函数语法
string UIView:getID(void)
函数说明
返回当前UIView实例的ID。
特别说明
UI中根节点的ID是无法自定义或无法修改的,有固定值'_root'。
◆ 函数 UIView:getType : 获取组件类型
函数语法
integer UIView:getType(void)
函数说明
返回当前UIView实例的类型,可能是以下取值之一:
- UI.TYPE.UNKNOWN: 未知类型
- UI.TYPE.CONTAINER: 容器类型
- UI.TYPE.DIV: 普通根组件
- UI.TYPE.TEXT: 文本
- UI.TYPE.IMAGE: 图像
- UI.TYPE.SCROLLER: 滑动栏
- UI.TYPE.LIST: 列表
- UI.TYPE.SWITCH: 开关
- UI.TYPE.INPUT: 输入框(小)
- UI.TYPE.TEXTAREA: 输入框(大)
- UI.TYPE.VIDEO: 视频
- UI.TYPE.INDICATOR: 指示器
- UI.TYPE.WEB: 网页
- UI.TYPE.LOADING: 加载栏
关于不同UIView类型属性和作用,请参阅附录F. UI内置基础组件库
◆ 函数 UIView:getAttr : 获取组件属性
函数语法
booleanUIView:getAttr(stringkey)numberUIView:getAttr(stringkey)stringUIView:getAttr(stringkey)
函数说明
返回当前UIView实例的属性对中键值为key的属性,返回类型可能是boolean、number和string之一。
要了解详细的属性设置列表,请参阅附录F. UI内置基础组件库中各组件的特有属性。
◆ 函数 UIView:getAttrs : 获取组件所有属性
函数语法
table UIView:getAttrs(void)
函数说明
返回当前UIView实例的所有属性对。
要了解详细的属性设置列表,请参阅附录F. UI内置基础组件库中各组件的特有属性。
◆ 函数 UIView:getStyle : 获取组件样式
函数语法
booleanUIView:getStyle(stringkey)numberUIView:getStyle(stringkey)stringUIView:getStyle(stringkey)
函数说明
返回当前UIView实例样式表中键值为key的样式,返回类型可能是boolean、number和string之一。
要了解详细的样式设置列表,请参阅附录E. UI模块设计和样式。
◆ 函数 UIView:getStyles : 获取组件所有样式
函数语法
table UIView:getStyles(void)
函数说明
返回当前UIView实例的所有样式表。
要了解详细的样式设置列表,请参阅附录E. UI模块设计和样式。
◆ 函数 UIView:setAttr : 设置组件属性
函数语法
voidUIView:setAttr(stringkey,booleanvalue)voidUIView:setAttr(stringkey,numbervalue)voidUIView:setAttr(stringkey,stringvalue)voidUIView:setAttr(tableattrs)
函数说明
设置当前UIView实例的key-value属性对,也可以设置attrs多组属性对。
要了解详细的属性设置列表,请参阅附录F. UI内置基础组件库中各组件的特有属性。
使用示例
local context = UI.createContext('testUI.json')local root = context:getRootView()-- key-value形式root:setAttr('checked', false)-- table形式root:setAttr({checked = false,visibility = false})
◆ 函数 UIView:setStyle : 设置组件样式
函数语法
voidUIView:setStyle(stringkey,booleanvalue)voidUIView:setStyle(stringkey,numbervalue)voidUIView:setStyle(stringkey,stringvalue)voidUIView:setStyle(tablestyles)
函数说明
设置当前UIView实例的key-value样式对,也可以设置styles多组样式对。
要了解详细的样式设置列表,请参阅附录E. UI模块设计和样式。
使用示例
local context = UI.createContext('testUI.json')local root = context:getRootView()-- key-value形式root:setStyle('color', 'red')-- key-value形式的Pseudo伪类样式root:setStyle('color:active', 'blue')-- table形式root:setStyle({color = '#ff0',['background-color'] = 'blue'})
◆ 函数 UIView:subviewsCount : 获取组件的子组件数量
函数语法
integer UIView:subviewsCount(void)
函数说明
返回当前UIView实例的子组件数量。
◆ 函数 UIView:getSubview : 获取子组件
函数语法
UIView UIView:getSubview(integer index)
函数说明
返回当前UIView实例下第index个子组件(注意index从1开始计数)。
使用示例
local context = UI.createContext('testUI.json')local root = context:getRootView()for i = 1, root:subviewsCount() dolocal subview = root:getSubview(i)-- 将所有文本颜色改成红色if view:getType() == UI.TYPE.TEXT thenview:setStyle('color', 'red')endend
◆ 函数 UIView:addSubview : 添加子组件
函数语法
voidUIView:addSubview(UIViewsubview)voidUIView:addSubview(UIViewsubview,integerindex)
函数说明
将subview添加到当前UIView子组件列表的第index处(注意index从1开始计数,默认添加到末尾)。
使用示例
local context = UI.createContext('testUI.json')local root = context:getRootView()local logoLayout = {view = 'image',src = 'http://www.xxzhushou.cn/statics/images/xxcms5/logo.png',style = {width = 280,height = 76}}local logoView = context:createView(logoLayout)-- 添加图片到root view末尾root:addSubview(logoView)
◆ 函数 UIView:removeSubview : 移除子组件
函数语法
void UIView:removeSubview(integer index)
函数说明
将当前UIView子组件列表的第index处子组件移除(注意index从1开始计数)。
使用示例
local context = UI.createContext('testUI.json')local root = context:getRootView()-- 移除第一项子组件root:removeSubview(1)
◆ 函数 UIView:removeFromParent : 将当前组件从父组件移除
函数语法
void UIView:removeFromParent(void)
函数说明
将当前UIView从父组件中移除。
使用示例
local context = UI.createContext('testUI.json')local root = context:getRootView()for i = 1, root:subviewsCount() dolocal subview = root:getSubview(i)if subview:getID() == 'test_btn' thensubview:removeFromParent()breakendend
◆ 函数 UIView:setActionCallback : 设置组件的回调函数
函数语法
void UIView:setActionCallback(integer action, function callback)
函数说明
监听指定action事件,当事件发生时触发callback回调函数,当callback为nil时取消对应action事件监听。
- action可以是以下取值之一:
- UI.ACTION.APPEAR: 监听UI出现;
- UI.ACTION.DISAPPER: 监听UI消失;
- UI.ACTION.CLICK: 监听UI点击;
- UI.ACTION.LONG_PRESS: 监听UI长按;
- UI.ACTION.SWIPE: 监听UI滑动。
- callback函数接收两个参数:
- id: 触发事件的UIView的ID;
- action: 触发的事件类型。
要了解详细的回调事件,请参阅附录E. UI模块设计和样式中关于伪类和事件响应的介绍。
特别说明
对UIView的回调监听设置,必须在UIContext:show之前设置,否则无效。
◆ 函数 UIView:toJson : 将组件导出为Json格式字符串
函数语法
string UIView:toJson(void)
函数说明
将组件的当前设置导出为Json格式字符串。
使用示例
-- 加载testUI.jsonlocal context = UI.createContext('testUI.json')-- 修改根节点的背景颜色local root = context:getRootView()root:setStyle('background-color', 0xffffff)-- 导出当前的根节点配置,写入到公共目录的rootView.json文件中local jsonStr = root:toJson()local f = io.open('[public]rootView.json', 'w')f:write(jsonStr)f:close()
◆ 常量 UI.TYPE.UNKNOWN
常量值:
integer-1
◆ 常量 UI.TYPE.CONTAINER
常量值:
integer0
◆ 常量 UI.TYPE.DIV
常量值:
integer1
◆ 常量 UI.TYPE.TEXT
常量值:
integer2
◆ 常量 UI.TYPE.IMAGE
常量值:
integer3
◆ 常量 UI.TYPE.SCROLLER
常量值:
integer4
◆ 常量 UI.TYPE.LIST
常量值:
integer5
◆ 常量 UI.TYPE.SWITCH
常量值:
integer10
◆ 常量 UI.TYPE.INPUT
常量值:
integer11
◆ 常量 UI.TYPE.TEXTAREA
常量值:
integer12
◆ 常量 UI.TYPE.VIDEO
常量值:
integer13
◆ 常量 UI.TYPE.INDICATOR
常量值:
integer14
◆ 常量 UI.TYPE.WEB
常量值:
integer17
◆ 常量 UI.TYPE.LOADING
常量值:
integer18
◆ 常量 UI.ACTION.APPEAR
常量值:
integer0
◆ 常量 UI.ACTION.DISAPPER
常量值:
integer1
◆ 常量 UI.ACTION.CLICK
常量值:
integer2
◆ 常量 UI.ACTION.LONG_PRESS
常量值:
integer3
◆ 常量 UI.ACTION.SWIPE
常量值:
integer4
◆ 常量 UI.PSEUDO.ACTIVE
常量值:
string'active'
◆ 常量 UI.PSEUDO.FOCUS
常量值:
string'focus'
◆ 常量 UI.PSEUDO.ENABLED
常量值:
string'enabled'
◆ 常量 UI.PSEUDO.DISABLED
常量值:
string'disabled'
◆ 常量 UI.TOAST.LENGTH_SHORT
常量值:
integer0
◆ 常量 UI.TOAST.LENGTH_LONG
常量值:
integer1
◆ 函数 UI.toast : Toast提示
函数语法
voidUI.toast(stringmsg)voidUI.toast(stringmsg,integerlength)
函数说明
以HUD方式显示提示信息,length可选参数:
- UI.TOAST.LENGTH_SHORT: 短暂提示;
- UI.TOAST.LENGTH_LONG: 延长提示。
◆ 函数 UI.createContext : 构建UI实例
函数语法
UIContextUI.createContext(anylayout)UIContextUI.createContext(anylayout,anystyle)
函数说明
根据layout和style,创建UIContext实例。
其中layout和style可以是以下类型参数:
tablestring
- Json格式字符串;
- 存放于xsp文件的ui/目录下文件路径。
使用示例
-- table格式local rootLayout = {view = 'scroller',style = {width = 750,['background-color'] = '#ff0',['align-items'] = 'center'},subviews = {{view = 'text',class = 'txt',value = 'text文字'}, {id = 'test_input',view = 'input',value = 'input输入框',style = {width = 710,height = 70,['background-color'] = '#AFAFAF'}}}}-- json字符串格式local globalStyle = [[{txt = {color = '#41b883',['font-size'] = 40,['padding-top'] = 10,['padding-bottom'] = 10}}]]-- 根据json or table创建contextlocal context = UI.createContext(rootLayout, globalStyle)-- 也可以根据xsp文件中ui/目录下的layout.json和style.json创建-- local context = UI.createContext('layout.json', 'style.json')context:show()
◆ 函数 UI.register : 设置UI模板
函数语法
void UI.register(string name, any layout)
函数说明
注册命名为name,对应组件结构为layout的新组件,用于UI组件的扩展和复用。
其中layout可以是以下类型参数:
tablestring
- Json格式字符串;
- 存放于xsp文件的ui/目录下文件路径。
使用示例
以下示例仅为展示API使用效果,其中使用到的UIView属性和样式请参阅附录E. UI模块设计和样式做进一步了解。
-- 支持UI的扩展、复用, 这里注册新组件mycellUI.register('mycell', {view = 'div',style = {['flex-direction'] = 'row',['align-items'] = 'center',['padding-left'] = 24,['padding-right'] = 24,['background-color'] = '#fff'},subviews = {{-- 扩展元素只能是slot类型view = 'slot',name = 'title'},{view = 'slot',name = 'value'}}})local rootLayout = {view = 'scroller',style = {width = 750,['background-color'] = '#ff0',['align-items'] = 'center'},subviews = {{-- 自己扩展的UI: checkboxid = 'test_checkbox',view = 'mycell',checked = false,-- 填充slotslots = {{-- slot titleview = 'text',name = 'title',value = '显示input'},{-- slot valueview = 'image',name = 'value',style = {width = 40,height = 40},src = 'https://gw.alicdn.com/tfs/TB14fp2pwMPMeJjy1XbXXcwxVXa-72-72.png'}}}}}local context = UI.createContext(rootLayout)context:show()
内置C扩展模块
注意引擎所有内置C扩展模块均需要主动require后方可使用。
文件系统操作模块 —— lfs
API参考:https://keplerproject.github.io/luafilesystem/manual.html
正则表达匹配模块 —— lpeg
API参考:http://www.inf.puc-rio.br/~roberto/lpeg/#func
JSON模块 —— cjson
API参考:https://www.kyne.com.au/~mark/software/lua-cjson-manual.html
Socket模块 —— socket
API参考:http://w3.impa.br/~diego/software/luasocket/reference.html
OpenSSL/Https模块 —— ssl
API参考:https://github.com/brunoos/luasec/wiki
大漠文字识别模块 —— dmocr
◆ 函数 dmocr.create : 创建大漠OCR
函数语法
usertypedmocr.create(tabledict)usertypedmocr.create(stringdictPath)
函数说明
根据dict或dictPath(需要放在res/目录下)指定的字库信息,创建大漠识别实例并返回。
注意字库用文件形式存放时需要使用UTF8编码。
◆ 函数 dmocr:getText : 大漠OCR识别
函数语法
stringdmocr:getText(Rectrect,tablediffs,integerfuzz,booleandetail,integerdir)tabledmocr:getText(Rectrect,tablediffs,integerfuzz,booleandetail,integerdir)
函数说明
对rect范围内图像和偏色diffs(偏色说明请参考附录D. 偏色和二值化说明)进行二值化处理,根据模糊度fuzz(范围0-100)和搜索方向dir,识别文字并返回。返回数据根据detail参数有不同返回类型。
dir取值说明:
- 0: 区域内全部搜索;
- 1: 横向搜索;
- 2: 竖向搜索。
detail取值说明:
- false: 识别结果以string形式返回,仅包含识别所得字符串;
- true: 识别结果以table形式返回,table中每项包含识别字符char和对应识别坐标位置pos。
特别说明
该函数结果受以下函数影响:
注意该函数不受 screen.setMockTransform影响。
使用示例
local dict = {'FFFFFC000000000000000000000001FFF$u$0.0.56$15','FFFFFC$l$0.0.42$21','10EE1B06608811062084108218C1FF8FF$a$0.1.77$15','FFFFFC03008030040080100200600F00F$h$0.0.71$21','0040080100200400801002FFFFFC010020040080100200400800400$王$4.2.83$21','1FE200400801002007F8000000000080601804030300E002002001001001001001$哈$0.1.118$26'}local dmocr = require('dmocr')local ocr = dmocr.create(dict)-- 或者可以加载res/dict.txt字库文件: local ocr = dmocr.create("dict.txt")-- 表示范围内全部搜索, 以字符串形式返回识别结果local result = ocr:getText(Rect(0, 0, 1135, 639), { "0x613d3b-0x202020", "0x797979-0x202020" }, 95, false, 0)printf('result: %s', result)-- 表示范围内横向搜索, 以table形式返回识别到的所有结果及其坐标local result2 = ocr:getText(Rect(0, 0, 1135, 639), { "0x613d3b-0x202020" }, 95, true, 1)for k, v in pairs(result2) doprintf('{ char = "%s", pos = %s }', v.char, v.pos)end
Tesseract文字识别模块 —— tessocr
引擎内置支持Tesseract 3.02.02和3.05.02两个版本,使用时请注意区分加载,且不同版本字库并不通用。
◆ 函数 tessocr.create : 创建Tesseract OCR
函数语法
usertype,stringtessocr.create()usertype,stringtessocr.create(tableconfig)
函数说明
载入Tesseract字库,并指定检测方式,创建成功返回tessocr实例和版本号,创建失败返回nil和错误信息。
config可以配置以下选项:
- mode: 引擎识别模式,取值说明:
- 0: 仅执行Tesseract,速度最快;
- 1: 仅进行Cube处理,较慢但准确;
- 2: 结合Tesseract和Cube处理,最准确;
- 3: 根据字库配置自动选择(默认值)
- path: 字库路径,有以下三种路径指定方式:
- 内置到xsp里的res/目录下,则填写path = 'res/';
- 使用开发助手、叉叉助手等字库扩展,则填写path = '[external]';
- 自定义路径,注意字库文件的上层目录必须命名为tessdata,例如path = '/sdcard/tessdata'。
- lang: 字库名称,可以指定一个或多个字库组合,例如lang = 'eng'或lang = 'mynum+myeng',引擎默认内置eng字库,用于识别简单的数字和英文符合。
config为nil时,默认加载lang = 'eng'内置字库文件。
使用示例
-- 可以选择3.02.02或3.05.02版本, 指定加载'tessocr_<version>'库即可local tessocr = require('tessocr_3.05.02')-- 加载默认eng字库(引擎内置)local ocr1, msg = tessocr.create()if ocr1 == nil thenUI.toast('tessocr No.1 create failed: ' .. msg)end-- 加载xsp文件中res/目录下的myeng和mynum字库local ocr2, msg = tessocr.create({path = 'res/',lang = 'myeng+mynum'})if ocr2 == nil thenUI.toast('tessocr No.2 create failed: ' .. msg)end-- 加载叉叉助手中提供的字库扩展(注意区分3.02.02和3.05.02版本)local ocr3, msg = tessocr.create({path = '[external]',lang = 'eng_ext'})if ocr3 == nil thenUI.toast('tessocr No.3 create failed: ' .. msg)end-- 加载自定义路径的任意字库(注意字库文件上层路径必须命名为'tessdata')local ocr4, msg = tessocr.create({path = '/sdcard/tessdata',lang = 'mynum'})if ocr4 == nil thenUI.toast('tessocr No.4 create failed: ' .. msg)end
◆ 函数 tessocr:setPSM : Tesseract设置PSM模式
函数语法
void tessocr:setPSM(integer psm)
函数说明
设置Tesseract的Page Segmentation Mode,可选值如下:
- 0: 仅检测方向和文本;
- 1: 自动检测方向和文本(OSD);
- 2: 自动检测,但不进行OSD或OCR处理;
- 3: 自动PSM模式(但不含OSD);
- 4: 所识别图片的字体大小不一;
- 5: 所识别图片当作整块竖向文字区域;
- 6: 所识别图片当作整块横向文字区域 (默认值);
- 7: 所识别图片当作一行文字;
- 8: 所识别图片当作单个词语;
- 9: 所识别图片当作单个圆型围绕的词语;
- 10: 所识别图片当作单个英文/数字字符;
- 11: 尽可能识别更多的字符(无顺序要求);
- 12: 分散稀疏的OSD检测。
◆ 函数 tessocr:setWhitelist : Tesseract设置白名单
函数语法
void tessocr:setWhitelist(string list)
函数说明
设置Tesseract识别白名单,设置后仅识别白名单中出现的字库。
◆ 函数 tessocr:setBlacklist : Tesseract设置黑名单
函数语法
void tessocr:setBlacklist(string list)
函数说明
设置Tesseract识别黑名单,设置后不会识别出黑名单中的字库。
◆ 函数 tessocr:getText : Tesseract OCR识别
函数语法
integer,string,tabletessocr:getText(tablerawData)integer,string,tabletessocr:getText(Rectrect,tablediffs)
函数说明
- 识别rawData(二值化后的二维数组数据),返回识别结果;
- 对rect范围内图像和偏色diffs(偏色说明请参考附录D. 偏色和二值化说明)进行二值化处理,返回识别结果。
函数返回integer类型的code错误码、string类型的content识别字符串和table类型的details详细结果。
code错误码取值说明:
- 0: 识别成功;
- 小于0: 识别失败。
content识别字符串:
- 当code == 0时,该值为tesseract实际识别的字符串结果,注意返回字符串中间可能带有多余的换行或者空格,属于正常结果,可以分行进行识别。
- 当code < 0时,该值为识别错误详细信息。
details详细结果,table数组中每项包含:
- char识别字符:
string类型,单个识别字符; - rect识别位置:
Rect类型,相对偏移,即rect.x和rect.y结果为相对于tessocr:getText传入的范围参数的偏移值,并非屏幕上的绝对坐标; - confidence识别把握度:
number类型,值范围0.0-100.0,值越大把握越足。
- char识别字符:
特别说明
该函数结果受以下函数影响:
- xmod.setConfig - xmod.SCREENCAP_POLICY
- screen.init
- screen.keep
- screen.setMockMode
- screen.setMockTransform
使用示例
local tessocr = require('tessocr_3.05.02')-- 加载xsp文件中res/目录下的num字库local ocr, msg = tessocr.create({path = 'res/',lang = 'num'})if ocr ~= nil thenlocal code, result-- 设定PSM模式为单个字符模式ocr:setPSM(10)-- 设置白名单ocr:setWhitelist('0123456789')code, result = ocr:getText({{ 0, 0, 0, 0, 1, 0, 0, 0, 0, 0, 0, 0, 0, 0 },{ 0, 0, 0, 1, 0, 1, 0, 0, 0, 0, 0, 0, 0, 0 },{ 0, 0, 0, 0, 1, 0, 0, 0, 0, 0, 0, 0, 0, 0 },{ 0, 0, 0, 1, 0, 0, 0, 0, 0, 0, 0, 0, 0, 0 },{ 0, 0, 0, 1, 0, 0, 0, 0, 0, 0, 0, 0, 0, 0 },{ 0, 0, 1, 1, 0, 0, 0, 0, 0, 0, 0, 0, 0, 0 },{ 0, 1, 0, 1, 0, 0, 0, 0, 0, 0, 0, 0, 0, 0 },{ 0, 1, 1, 1, 1, 1, 0, 1, 1, 0, 0, 0, 0, 0 },{ 1, 0, 1, 1, 0, 0, 0, 0, 1, 1, 1, 0, 0, 0 },{ 0, 1, 0, 1, 0, 0, 0, 0, 0, 0, 1, 1, 0, 0 },{ 1, 1, 1, 0, 0, 0, 0, 0, 0, 0, 1, 1, 0, 0 },{ 1, 0, 0, 0, 0, 0, 0, 0, 0, 0, 1, 0, 1, 0 },{ 1, 0, 0, 0, 0, 0, 0, 0, 0, 0, 0, 1, 1, 0 },{ 1, 0, 0, 0, 0, 0, 0, 0, 0, 0, 0, 1, 0, 1 },{ 1, 0, 0, 0, 0, 0, 0, 0, 0, 0, 0, 0, 1, 0 },{ 1, 0, 0, 0, 0, 0, 0, 0, 0, 0, 0, 1, 1, 1 },{ 1, 0, 0, 0, 0, 0, 0, 0, 0, 0, 0, 1, 0, 1 },{ 1, 1, 0, 0, 0, 0, 0, 0, 0, 0, 0, 1, 1, 0 },{ 1, 0, 1, 0, 0, 0, 0, 0, 0, 0, 1, 0, 0, 0 },{ 0, 1, 1, 1, 0, 1, 0, 0, 1, 1, 1, 0, 0, 0 },{ 0, 0, 0, 1, 1, 1, 0, 1, 1, 0, 0, 0, 0, 0 },{ 0, 0, 0, 0, 0, 0, 1, 0, 1, 0, 0, 0, 0, 0 }})if code == 0 then-- 输出结果: 'text = "6"'printf('text = "%s"', result)elseprintf('ocr:getText failed!')end-- 重置成默认PSM模式ocr:setPSM(6)-- 清空白名单设置ocr:setWhitelist('')code, result = ocr:getText(Rect(100, 100, 200, 200), { "0x613d3b-0x202020", "0x797979-0x202020" })if code == 0 thenprintf('text = "%s"', result)elseprintf('ocr:getText failed!')end-- 获取详细结果code, result, detail = ocr:getText(Rect(100, 100, 200, 200), { "0x613d3b-0x202020", "0x797979-0x202020" })if code == 0 thenprintf('text = "%s"', result)for _, v in pairs(detail) doprintf('{ text = "%s", rect = %s, confidence = %.2f }', v.char, v.rect, v.confidence)endelseprintf('ocr:getText failed!')endelseprintf('tessocr.create error: %s', msg)end
◆ 函数 tessocr:release : 释放Tesseract实例
函数语法
void tessocr:release(void)
函数说明
释放Tesseract字库识别对象,当加载字库文件较大时,建议主动控制使用。
使用示例
local tessocr = require('tessocr_3.05.02')local ocr = tessocr.create({path = 'res/',lang = 'myeng+mynum'})-- 使用ocr进行识别...-- 使用完毕, 主动释放内存ocr:release()
Http网络传输模块 —— chttp
◆ 函数 chttp.create : 构建chttp实例
函数语法
chttp chttp.create(void)
函数说明
创建chttp实例,用于后续API操作。
◆ 函数 chttp:close : 释放chttp实例
函数语法
void chttp:close(void)
函数说明
主动关闭chttp实例。
◆ 函数 chttp:setHeader : 设置http请求头字段
函数语法
void chttp:setHeader(table headers)
函数说明
自定义请求的头字段信息。
使用示例
local request = require('chttp').create()request:setHeader({Accept = 'application/json',['Content-Type'] = 'application/x-www-form-urlencoded'})
◆ 函数 chttp:setUrl : 设置http请求地址
函数语法
void chttp:setUrl(string url)
函数说明
设置请求的目标地址。
使用示例
local request = require('chttp').create()request:setUrl('http://www.httpbin.org/get')print(request:get().text)
◆ 函数 chttp:setBody : 设置http请求内容
函数语法
void chttp:setBody(string body)
函数说明
设置请求的附带内容。
使用示例
local request = require('chttp').create()request:setUrl('http://www.httpbin.org/post')request:setHeader({ ['Content-Type'] = 'text/plain' })request:setBody('This is raw POST data')print(request:post().text)
◆ 函数 chttp:setAuth : 设置http请求验证信息
函数语法
void chttp:setAuth(string username, string password)
函数说明
设置请求的用户验证账号和密码。
使用示例
local request = require('chttp').create()request:setUrl('http://www.httpbin.org/basic-auth/user/pass')request:setAuch('user', 'pass')print(request:get().text)
◆ 函数 chttp:setCookies : 设置http请求的cookies
函数语法
void chttp:setCookies(table cookies)
函数说明
设置请求的cookies信息。
使用示例
local request = require('chttp').create()request:setUrl('http://www.httpbin.org/get')request:setCookies({hello = 'world',['ice cream'] = 'is delicious'})print(request:get().text)
◆ 函数 chttp:post : 发送http POST请求
函数语法
table chttp:post(void)
函数说明
执行Post请求,返回执行结果。
返回的table数据中,包含以下参数:
- status:
integer类型,请求的状态码; - text:
string类型,请求返回结果; - url:
string类型,请求的URL; - header:
table类型,请求的头字段; - elapsed:
number类型,请求耗时; - cookies:
table类型,请求的cookies; - error:
table类型,包含以下参数:
- code:
integer类型,错误码; - message:
string类型,错误信息。
- code:
使用示例
local request = require('chttp').create()request:setUrl('http://www.httpbin.org/post')request:setPayload({key = 'value'})local ret = request:post()printf('status code = %d', ret.status)printf('return text = %s', ret.text)
◆ 函数 chttp:get : 发送http GET请求
函数语法
table chttp:get(void)
函数说明
执行Get请求,返回执行结果。
返回结果类型与chttp:get()结果一致。
◆ 函数 chttp:delete : 发送http DELETE请求
函数语法
table chttp:delete(void)
函数说明
执行Delete请求,返回执行结果。
返回结果类型与chttp:get()结果一致。
◆ 函数 chttp:head : 发送http HEAD请求
函数语法
table chttp:head(void)
函数说明
执行Head请求,返回执行结果。
返回结果类型与chttp:get()结果一致。
◆ 函数 chttp:patch : 发送http PATCH请求
函数语法
table chttp:patch(void)
函数说明
执行Patch请求,返回执行结果。
返回结果类型与chttp:get()结果一致。
◆ 函数 chttp:put : 发送http PUT请求
函数语法
table chttp:put(void)
函数说明
执行Put请求,返回执行结果。
返回结果类型与chttp:get()结果一致。
◆ 函数 chttp:options : 发送http OPTIONS请求
函数语法
table chttp:options(void)
函数说明
执行Options请求,返回执行结果。
返回结果类型与chttp:get()结果一致。
◆ 函数 chttp:setTimeout : 设置http请求超时
函数语法
void chttp:setTimeout(integer timeout)
函数说明
设置请求超时时间(单位毫秒)。
使用示例
local request = require('chttp').create()request:setUrl('http://www.httpbin.org/get')request:setTimeout(3000)print(request:get().text)
◆ 函数 chttp:setParam : 设置http请求参数
函数语法
void chttp:setParam(table params)
函数说明
设置请求的参数内容。
使用示例
local request = require('chttp').create()request:setUrl('http://www.httpbin.org/get')request:setParam({ key = 'value' })print(request:get().text)
◆ 函数 chttp:setPayload : 设置http请求内容
函数语法
void chttp:setPayload(void)
函数说明
设置请求的附带内容。
功能与chttp:setBody类似,区别在于设置的是key-value形式数据。
使用示例
local request = require('chttp').create()request:setUrl('http://www.httpbin.org/put')request:setPayload({ key = 'value' })print(request:put().text)
◆ 函数 chttp:setLowSpeed : 设置http请求最低速度和持续时间
函数语法
void chttp:setLowSpeed(integer limit, integer time)
函数说明
设置最低下载速度和持续时间。
如果在指定时间传输速率超过设置的最低值,则会自动断开该连接。
使用示例
local request = require('chttp').create()request:setUrl('http://www.httpbin.org/get')request:setParam({ key = 'value' })request:setLowSpeed(1, 1)print(request:get().text)
通用加解密/哈希算法模块 —— crypto
◆ 函数 crypto.md5 : MD5摘要算法
函数语法
string crypto.md5(string msg)
函数说明
对msg内容进行MD5算法处理,返回32位摘要。
◆ 函数 crypto.sha1 : SHA-1摘要算法
函数语法
string crypto.sha1(string msg)
函数说明
对msg内容进行sha-1算法处理,返回40位摘要。
◆ 函数 crypto.base64Encode : base64编码
函数语法
string crypto.base64Encode(string msg)
函数说明
对msg内容进行base64算法编码,可以将二进制数据转换成可视字符表示。
◆ 函数 crypto.base64Decode : base64解码
函数语法
string crypto.base64Encode(string msg)
函数说明
对msg内容进行base64算法解码,可以将base64编码的数据转换成二进制数据。
◆ 函数 crypto.hash : 32位哈希算法
函数语法
integer crypto.hash(integer key, string msg)
函数说明
根据32位整型key,对msg内容进行hash算法处理,返回32位整型摘要。
◆ 函数 crypto.hash64 : 64位哈希算法
函数语法
integer crypto.hash64(integer key, string msg)
函数说明
根据64位整型key,对msg内容进行hash64算法处理,返回64位整型摘要。
◆ 函数 crypto.rc4Encrypt : RC4加密
函数语法
string crypto.rc4Encrypt(string key, string msg)
函数说明
根据密钥key,对msg内容进行rc4算法加密,返回加密后数据。
◆ 函数 crypto.rc4Decrypt : RC4解密
函数语法
string crypto.rc4Decrypt(string key, string msg)
函数说明
根据密钥key,对msg内容进行rc4算法解密,返回解密后数据。
◆ 函数 crypto.xxteaEncrypt : XXTEA加密
函数语法
string crypto.xxteaEncrypt(string key, string msg)
函数说明
根据密钥key,对msg内容进行XXTEA算法加密,返回加密后数据。
◆ 函数 crypto.xxteaDecrypt : XXTEA解密
函数语法
string crypto.xxteaDecrypt(string key, string msg)
函数说明
根据密钥key,对msg内容进行XXTEA算法解密,返回解密后数据。
官方扩展UI库 —— wui
引擎内置的类web组件类型看似不多,但其实其他UI组件类型如checkbox、radio可通过扩展实现,WUI正是基于引擎UI框架扩展的一套UI库,额外提供了chekcbox、checkboxList、radio、tabBar、tabPage、gridSelect等常用的组件类型。
另外,WUI项目库是完全开源的,欢迎开发者随时扩充和实现自己的UI组件。使用叉叉集成开发环境(简称IDE)新建项目时,会自动导入WUI组件库源码。
你也可以在这里下载最新的WUI源码:GitHub:@xxzhushou/WUI
导入WUI库后,每一种组件均有静态和动态两种创建方式供开发者使用:
- 静态方式 —— createLayout
静态方式是通过组件的createLayout函数构建对应UI组件的table结构,然后添加到其他组件的subviews中展示。
-- require路径根据实际修改local wui = require('wui.wui')-- createLayout本质上只是构建了UI组件的table描述local layout1 = wui.Checkbox.createLayout({ title = '选项1', value = 1, hasTopBorder = true, hasBottomBorder = false })local layout2 = wui.Checkbox.createLayout({ title = '选项2', value = 2, checked = true, config = { checkedColor = '#f00', uncheckedColor = '#0f0' } })local rootLayout = {view = 'scroller',subviews = {layout1,layout2}}local context = UI.createContext(rootLayout)context:show()while true dosleep(1000)end
- 动态方式 —— createView
动态方式是指调用组件的createView函数创建对应的UIView实例进行操作,通过UIView:addSubview函数添加到其他UIView实例中。
local context = UI.createContext(rootLayout)local root = context:getRootView()-- 传递参数跟createLayout一样, 但是返回的是UIView实例local checkbox = wui.Checkbox.createView(context, { title = '选项', value = 3, checked = true, disabled = true })-- 添加到根组件末尾root:addSubview(checkbox)
wui.Button组件
◆ 函数 wui.Button.createLayout : 静态构建Button组件
函数语法
table wui.Button.createLayout(table layout)
函数说明
静态构建Button组件。
layout: table类型,有以下设置参数:
- id:
string类型,设置当前Button组件的ID; - text:
string类型, - type:
string类型,快速设置Button组件样式,可选属性值为:
- 'blue': 默认值,Button背景颜色为'#ff5000',字体颜色为'#fff';
- 'red': Button背景颜色为'#ff5000',字体颜色为'#fff';
- 'yellow': Button背景颜色为'#ffc900',字体颜色为'#fff';
- 'white': Button背景颜色为'#ffffff',字体颜色为'#3d3d3d',并带border宽度为1,颜色为'#a5a5a5'。
- size:
string类型,快速设置Button组件大小,可选属性值为:
- 'full': 默认值,Button尺寸为702 x 88,字体大小为36;
- 'big': Button尺寸为339 x 90,字体大小为32;
- 'medium': Button尺寸为218 x 60,字体大小为28;
- 'small' Button尺寸为157 x 44,字体大小为24。
- disabled:
boolean类型,设置按钮是否禁用; - btnStyle:
table类型,参数设置与附录E. UI模块设计和样式 - 样式描述的参数设置要求一致; - textStyle:
table类型,参数设置与附录E. UI模块设计和样式 - 样式描述的参数设置要求一致;
◆ 函数 wui.Button.createView : 动态构建Button组件
函数语法
UIView wui.Button.createView(UIContext context, table layout)
函数说明
动态构建Button组件。
- context:
UICotnext类型,通过UI.createContext创建获取; - layout:
table类型,wui.Button.createLayout中layout参数。
◆ 函数 wui.Button.setOnClickedCallback : 设置Button组件的回调函数
函数语法
void wui.Button.setOnClickedCallback(UIView button, function callback)
函数说明
注册button组件点击事件回调处理函数。
- button:
UIView类型,通过wui.Button创建的UIView实例; - callback:
function类型,绑定回调函数,该回调函数会传入以下参数:
- id:
string类型,事件回调Button组件的ID; - action:
integer类型,点击事件类型,可能是以下取值之一:
- UI.ACTION.CLICK: 普通点击;
- UI.ACTION.LONG_PRESS: 长按。
- id:
使用示例
local btn = wui.Button.createView(context, { id = 'btn_1', size = 'medium' })context:getRootView():addSubview(btn)wui.Button.setOnClickedCallback(context:findView('btn_1'), function (id, action)print("button setOnClickedCallback "' .. id .. '" clicked")end)
wui.Radio组件
◆ 函数 wui.Radio.createLayout : 静态构建Radio组件
函数语法
table wui.Radio.createLayout(table layout)
函数说明
静态构建Radio组件。
layout: table类型,有以下设置参数:
- id:
string类型,设置当前Radio组件的ID; - list:
table类型,设置Radio子组件列表,table数组,每项包含以下可选参数:
- title:
string类型,Radio子组件显示的标题; - value:
any类型,Radio子组件数据; - checked:
boolean类型,当前Radio子组件是否选中; - disabled:
boolean类型,当前Radio子组件是否禁用。
- title:
- config:
table类型,设置Radio样式配置,包含以下可选参数:
- checkedIcon:
string类型,Radio子选项被选中时展示的Icon图片; - uncheckedIcon:
string类型,Radio子选项未被选中时展示的Icon图片; - disabledIcon:
string类型,Radio子选项被禁用时展示的Icon图片; - checkedColor:
string类型,Radio子选项被选中时的字体颜色; - uncheckedColor:
string类型,Radio子选项未被选中时的字体颜色; - disabledColor:
string类型,Radio子选项被禁用时的字体颜色。
- checkedIcon:
◆ 函数 wui.Radio.createView : 动态构建Radio组件
函数语法
UIView wui.Radio.createView(UIContext context, table layout)
函数说明
动态构建Radio组件。
- context:
UICotnext类型,通过UI.createContext创建获取; - layout:
table类型,wui.Radio.createLayout中layout参数。
◆ 函数 wui.Radio.setOnCheckedCallback : 设置Radio组件的回调函数
函数语法
void wui.Radio.setOnCheckedCallback(UIView radio, function callback)
函数说明
注册Radio组件点击事件回调处理函数。
- radio:
UIView类型,通过wui.Radio创建的UIView实例; - callback:
function类型,绑定回调函数,该回调函数会传入以下参数:
- id:
string类型,事件回调Radio组件的ID; - title:
string类型,事件回调Radio子组件的标题; - value:
any类型,事件回调Radio子组件的数据; - index:
integer类型,事件回调Radio子组件的序号; - lastIndex:
integer类型,上次事件回调Radio子组件的序号;
- id:
使用示例
local radioList = {{ title = '选项1', value = 1 },{ title = '选项2', value = 2, checked = true },{ title = '选项3', value = 3 },{ title =' 选项4', value = 4 },{ title = '未选不可修改', value = 5, disabled = true },{ title = '已选不可修改', value = 6, disabled = true, checked = true }}local radio = wui.Radio.createView(context, { list = radioList })wui.Radio.setOnCheckedCallback(radio, function(id, title, value, index, lastIndex)print("radio id: " .. id)print("radio item title: " .. title)print("radio item value: " .. tostring(value))print("current radio item index: " .. tostring(index))print("last radio item index: " .. tostring(lastIndex))end)context:getRootView():addSubview(radio)
wui.Checkbox组件
◆ 函数 wui.Checkbox.createLayout : 静态构建Checkbox组件
函数语法
table wui.Checkbox.createLayout(table layout)
函数说明
静态构建Checkbox组件。
layout: table类型,有以下设置参数:
- id:
string类型,设置当前Checkbox组件的ID; - title:
string类型,Checkbox组件显示的标题; - value:
any类型,Checkbox组件数据; - checked:
boolean类型,当前Checkbox组件是否选中; - disabled:
boolean类型,当前Checkbox组件是否禁用; - hasTopBoarder:
boolean类型,是否展示上边框; - hasBottomBoarder:
boolean类型,是否展示下边框; - config:
table类型,设置Checkbox组件的样式配置,包含以下可选参数:
- checkedIcon:
string类型,Checkbox组件被选中时展示的Icon图片; - uncheckedIcon:
string类型,Checkbox组件未被选中时展示的Icon图片; - disabledIcon:
string类型,Checkbox组件被禁用时展示的Icon图片; - checkedColor:
string类型,Checkbox组件被选中时的字体颜色; - uncheckedColor:
string类型,Checkbox组件未被选中时的字体颜色; - disabledColor:
string类型,Checkbox组件被禁用时的字体颜色。
- checkedIcon:
◆ 函数 wui.Checkbox.createView : 动态构建Checkbox组件
函数语法
UIView wui.Checkbox.createView(UIContext context, table layout)
函数说明
动态构建Checkbox组件。
- context:
UICotnext类型,通过UI.createContext创建获取; - layout:
table类型,同wui.Checkbox.createLayout中layout参数。
◆ 函数 wui.Checkbox.setOnCheckedCallback : 设置Checkbox组件的回调函数
函数语法
void wui.Checkbox.setOnCheckedCallback(UIView checkbox, function callback)
函数说明
注册Checkbox组件点击事件回调处理函数。
- checkbox:
UIView类型,通过wui.Checkbox创建的UIView实例; - callback:
function类型,绑定回调函数,该回调函数会传入以下参数:
- id:
string类型,事件回调Checkbox组件的ID; - title:
string类型,事件回调Checkbox组件的标题; - value:
any类型,事件回调Checkbox组件的数据; - checked:
boolean类型,事件回调的Checkbox组件是否被选中。
- id:
使用示例
local layout = {title = '已选且禁用',value = 100,checked = true,disabled = true}local checkbox = wui.Checkbox.createView(context, layout)local function onChecked(id, title, value, checked)print("checkbox item id: " .. id)print("checkbox item title: " .. title)print("checkbox item value: " .. tostring(value))print("checkbox item checked: " .. tostring(checked))endwui.Checkbox.setOnCheckedCallback(checkbox, onChecked)context:getRootView():addSubview(checkbox)
wui.CheckboxList组件
◆ 函数 wui.CheckboxList.createLayout : 静态构建CheckboxList组件
函数语法
table wui.CheckboxList.createLayout(table layout)
函数说明
静态构建CheckboxList组件。
layout: table类型,有以下设置参数:
- id:
string类型,设置当前CheckboxList组件的ID; - list:
table类型,设置CheckboxList组件列表,table数组,每项包含以下可选参数:
- title:
string类型,Checkbox子组件显示的标题; - value:
any类型,Checkbox子组件数据; - checked:
boolean类型,Checkbox子组件是否选中; - disabled:
boolean类型,Checkbox子组件是否禁用; - hasTopBoarder:
boolean类型,是否展示上边框; - hasBottomBoarder:
boolean类型,是否展示下边框。
- title:
- config:
table类型,设置CheckboxList样式配置,包含以下可选参数:
- checkedIcon:
string类型,Checkbox子组件被选中时展示的Icon图片; - uncheckedIcon:
string类型,Checkbox子组件未被选中时展示的Icon图片; - disabledIcon:
string类型,Checkbox子组件被禁用时展示的Icon图片; - checkedColor:
string类型,Checkbox子组件被选中时的字体颜色; - disabledColor:
string类型,Checkbox子组件被禁用时的字体颜色。
- checkedIcon:
◆ 函数 wui.CheckboxList.createView : 动态构建CheckboxList组件
函数语法
UIView wui.CheckboxList.createView(UIContext context, table layout)
函数说明
动态构建CheckboxList组件。
- context:
UICotnext类型,通过UI.createContext创建获取; - layout:
table类型,wui.CheckboxList.createLayout中layout参数。
◆ 函数 wui.CheckboxList.setOnCheckedCallback : 设置CheckboxList组件的回调函数
函数语法
void wui.CheckboxList.setOnCheckedCallback(UIView checkboxList, function callback)
函数说明
注册CheckboxList组件点击事件回调处理函数。
- checkboxList:
UIView类型,通过wui.CheckboxList创建的UIView实例; - callback:
function类型,绑定回调函数,该回调函数会传入以下参数:
- id:
string类型,事件回调CheckboxList组件的ID; - checkedList:
table类型,事件回调CheckboxList中所有选中的子组件的集合,table数组,每项中包含以下参数:
- index:
integer类型,Checkbox子组件的序号; - title:
string类型,Checkbox子组件的标题; - value:
any类型,Checkbox子组件的数据值。
- index:
- id:
使用示例
local list = {{ title = '选项1', value = 1 },{ title = '选项2', value = 2, checked = true , disabled = true },{ title = '选项3', value = { 3, '333' } },{ title = '选项4', value = '选项4', hasBottomBorder = false }}local checkboxList = wui.CheckboxList.createView(context, { list = list })wui.CheckboxList.setOnCheckedCallback(checkboxList, function(id, checkedList)print("checkboxList id: " .. id)for i, v in ipairs(checkedList) doprintf("> checked item: index = %d, value = %s", v.index, tostring(v.value))endend)context:getRootView():addSubview(checkboxList)
wui.TabBar组件
◆ 函数 wui.TabBar.createLayout : 静态构建TabBar组件
函数语法
table wui.TabBar.createLayout(table layout)
函数说明
静态构建TabBar组件。
layout: table类型,有以下参数设置:
- id:
string类型,设置当前TabBar组件的ID; - pages:
table类型,标签页面组,table数组,每项设置与附录E. UI模块设计和样式 - 界面布局的参数设置要求一致; - config:
table类型,有以下设置参数:
- currentPage:
integer类型,设置当前选中页面序号,默认1; - pageWidth:
integer类型,设置页面宽度; - pageHeight:
integer类型,设置页面高度; - tabTitles:
table类型,设置底部tab的显示配置,table数组,每项中包含支持以下参数:
- title:
string类型,标签页显示的标题; - icon:
string类型,标签页默认的展示Icon; - activeIcon:
string类型,标签页选中时展示Icon。
- title:
- tabStyle:
table类型,设置底部tab的样式配置,支持以下设置参数:
- backgroundColor:
string类型,设置标签背景颜色,默认'#fff'; - activeBackgroundColor:
string类型,设置标签选中时背景颜色,默认'#fff'; - titleColor:
string类型,设置标签字体颜色,默认'#666666'; - activeTitleColor:
string类型,设置标签选中时字体颜色,默认'#3d3d3d'; - isActiveTitleBold:
boolean类型,设置标签页选中时字体是否粗体展示,默认true; - tabWidth:
integer类型,设置标签宽度,默认160; - tabHeight:
integer类型,设置标签高度,默认120; - iconWidth:
integer类型,设置标签Icon宽度,默认70; - iconHeight:
integer类型,设置标签Icon宽度,默认70; - fontSize:
integer类型,设置标签字体尺寸,默认24; - textPaddingLeft:
integer类型,设置标签左内边距,默认10; - textPaddingRight:
integer类型,设置标签右内边距,默认10。
- backgroundColor:
- currentPage:
◆ 函数 wui.TabBar.createView : 动态构建TabBar组件
函数语法
UIView wui.TabBar.createView(UIContext context, table layout)
函数说明
动态构建TabBar组件。
- context:
UICotnext类型,通过UI.createContext创建获取; - layout:
table类型,wui.TabBar.createLayout中layout参数。
◆ 函数 wui.TabBar.setOnSelectedCallback : 设置TabBar组件的回调函数
函数语法
void wui.TabBar.setOnSelectedCallback(UIView tabBar, function callback)
函数说明
注册tabBar组件点击事件回调处理函数。
- tabBar:
UIView类型,通过wui.TabBar创建的UIView实例; - callback:
function类型,绑定回调函数,该回调函数会传入以下参数:
- id:
string类型,事件回调TabBar组件的ID; - currentPage:
integer类型,当前选中的页面序号。
- id:
使用示例
local tabPages = {{view = 'div',style = {width = 480,['background-color'] = '#00ff00'},subviews = {{view = 'text',value = '配置1',style = {['font-size'] = 50,color = '#707070'}}}},{view = 'div',style = {width = 480,['background-color'] = '#0000ff'},subviews = {{view = 'text',value = '配置2',style = {['font-size'] = 50,color = '#707070'}}}}}local tabBarConfig = {}tabBarConfig.currentPage = 2tabBarConfig.pageWidth = 480tabBarConfig.pageHeight = 450tabBarConfig.tabTitles = {{title = '配置1',icon = 'https://gw.alicdn.com/tfs/TB1MWXdSpXXXXcmXXXXXXXXXXXX-72-72.png',activeIcon = 'https://gw.alicdn.com/tfs/TB1kCk2SXXXXXXFXFXXXXXXXXXX-72-72.png'}, {title = '配置2',icon = 'https://gw.alicdn.com/tfs/TB1Do3tSXXXXXXMaFXXXXXXXXXX-72-72.png',activeIcon = 'https://gw.alicdn.com/tfs/TB1LiNhSpXXXXaWXXXXXXXXXXXX-72-72.png',}}tabBarConfig.tabStyle = {titleColor = '#660077',activeTitleColor = '#66ff77',backgroundColor = '#660000',activeBackgroundColor = '#008800',isActiveTitleBold = true,tabWidth = 120,tabHeight = 90,iconWidth = 50,iconHeight = 50,fontSize = 20}local tabBar = wui.TabBar.createView(context, { pages = tabPages, config = tabBarConfig })wui.TabBar.setOnSelectedCallback(tabBar, function (id, currentPage)print('tabBar id: ' .. id)print('tabBar currentPage: ' .. tostring(currentPage))end)context:getRootView():addSubview(tabBar)
wui.TabPage组件
◆ 函数 wui.TabPage.createLayout : 静态构建TabPage组件
函数语法
table wui.TabPage.createLayout(table layout)
函数说明
静态构建TabPage组件。
layout: table类型,有以下参数设置:
- id:
string类型,设置当前TabPage组件的ID; - pages:
table类型,标签页面组,table数组,每项设置与附录E. UI模块设计和样式 - 界面布局的参数设置要求一致; - config:
table类型,有以下设置参数:
- currentPage:
integer类型,设置当前选中页面序号,默认1; - pageWidth:
integer类型,设置页面宽度; - pageHeight:
integer类型,设置页面高度; - tabTitles:
table类型,设置底部tab的显示配置,table数组,每项中包含支持以下参数:
- title:
string类型,标签页显示的标题; - icon:
string类型,标签页默认的展示Icon; - activeIcon:
string类型,标签页选中时展示Icon。
- title:
- tabStyle:
table类型,设置底部tab的样式配置,支持以下设置参数:
- backgroundColor:
string类型,设置标签背景颜色,默认'#fff'; - activeBackgroundColor:
string类型,设置标签选中时背景颜色,默认'#fff'; - titleColor:
string类型,设置标签字体颜色,默认'#666666'; - activeTitleColor:
string类型,设置标签选中时字体颜色,默认'#3d3d3d'; - isActiveTitleBold:
boolean类型,设置标签页选中时字体是否粗体展示,默认true; - tabWidth:
integer类型,设置标签宽度,默认160; - tabHeight:
integer类型,设置标签高度,默认120; - iconWidth:
integer类型,设置标签Icon宽度,默认70; - iconHeight:
integer类型,设置标签Icon宽度,默认70; - fontSize:
integer类型,设置标签字体尺寸,默认24; - textPaddingLeft:
integer类型,设置标签左内边距,默认10; - textPaddingRight:
integer类型,设置标签右内边距,默认10; - hasActiveBottom:
boolean类型,设标签被选中时是否显示底部高亮条; - activeBottomColor:
string类型,设置底部高亮条颜色,默认'#ffc900'; - activeBottomHeight:
string类型,设置底部高亮条高度,默认6; - activeBottomWidth:
string类型,设置底部高亮条宽度,默认120。
- backgroundColor:
- currentPage:
◆ 函数 wui.TabPage.createView : 动态构建TabPage组件
函数语法
UIView wui.TabPage.createView(UIContext context, table layout)
函数说明
动态构建TabPage组件。
- context:
UICotnext类型,通过UI.createContext创建获取; - layout:
table类型,wui.TabPage.createLayout中layout参数。
◆ 函数 wui.TabPage.setOnSelectedCallback : 设置TabPage组件的回调函数
函数语法
void wui.TabPage.setOnSelectedCallback(UIView tabPage, function callback)
函数说明
注册TabPage组件点击事件回调处理函数。
- tabPage:
UIView类型,通过wui.TabPage创建的UIView实例; - callback:
function类型,绑定回调函数,该回调函数会传入以下参数:
- id:
string类型,事件回调TabPage组件的ID; - currentPage:
integer类型,当前选中的页面序号。
- id:
使用示例
local pages = {{view = 'div',style = {width = 480,['background-color'] = '#0000ff'},subviews = {{view = 'text',value = '配置1',style = {['font-size'] = 100,color = '#707070'}}}},{view = 'div',style = {width = 480,['background-color'] = '#ee00ff'},subviews = {{view = 'text',value = '配置2',style = {['font-size'] = 100,color = '#707070'}}}}}local tabPageConfig = {}tabPageConfig.currentPage = 1tabPageConfig.pageWidth = 480tabPageConfig.pageHeight = 560tabPageConfig.tabTitles = {{title = '配置1',icon = 'https://gw.alicdn.com/tfs/TB1MWXdSpXXXXcmXXXXXXXXXXXX-72-72.png',activeIcon = 'https://gw.alicdn.com/tfs/TB1kCk2SXXXXXXFXFXXXXXXXXXX-72-72.png',},{title = '配置2',icon = 'https://gw.alicdn.com/tfs/TB1ARoKSXXXXXc9XVXXXXXXXXXX-72-72.png',activeIcon = 'https://gw.alicdn.com/tfs/TB19Z72SXXXXXamXFXXXXXXXXXX-72-72.png'}}tabPageConfig.tabStyle = {backgroundColor = '#FFFFFF',titleColor = '#666666',activeTitleColor = '#3D3D3D',activeBackgroundColor = '#FFFFFF',isActiveTitleBold = true,iconWidth = 70,iconHeight = 70,width = 160,height = 120,fontSize = 24,hasActiveBottom = true,activeBottomColor = '#FFC900',activeBottomHeight = 6,activeBottomWidth = 120,textPaddingLeft = 10,textPaddingRight = 10}local tabPage = wui.TabPage.createView(context, { pages = pages, config = tabPageConfig })wui.TabPage.setOnSelectedCallback(tabPage, function (id, currentPage)print('tabPage id: ' .. id)print('tabPage currentPage: ' .. tostring(currentPage))end)context:getRootView():addSubview(tabPage)
wui.GridSelect组件
◆ 函数 wui.GridSelect.createLayout : 静态构建GridSelect组件
函数语法
table wui.GridSelect.createLayout(table layout)
函数说明
静态构建GridSelect组件。
layout: table类型,有以下参数设置:
- id:
string类型,设置当前GridSelect组件的ID; - list:
table类型,标签页面组,table数组,每项有以下设置参数:
- title:
string类型,设置GridSelect子组件的标题; - checked:
boolean类型,当前GridSelect子组件是否选中; - disabled:
boolean类型,当前GridSelect子组件是否禁用。
- title:
- config:
table类型,设置GridSelect样式配置,包含以下可选参数:
- single:
boolean类型,设置是否单选模式,默认false; - limit:
integer类型,设置非单选模式下选择数量上限,默认9999; - totalWidth:
integer类型,设置当前GridSelect组件的总宽度; - gridStyle:
table类型,有以下设置参数:
- width:
integer类型,设置页面宽度; - height:
integer类型,设置页面高度; - icon:
string类型,设置选中状态下Icon展示图片; - lineSpacing:
integer类型,行间距; - color:
string类型,设置正常状态下文字颜色; - checkedColor:
string类型,设置选中状态下文字颜色; - disabledColor:
string类型,设置禁用状态下文字颜色; - borderColor:
string类型,设置正常状态下边框颜色; - checkedBorderColor:
string类型,设置选中状态下边框颜色; - disabledBorderColor:
string类型,设置禁用状态下边框颜色; - backgroundColor:
string类型,设置正常状态下背景颜色; - checkedBackgroundColor:
string类型,设置选中状态下背景颜色; - disabledBackgroundColor:
string类型,设置禁用状态下背景颜色。
- width:
- single:
◆ 函数 wui.GridSelect.createView : 动态构建GridSelect组件
函数语法
UIView wui.GridSelect.createView(UIContext context, table layout)
函数说明
动态构建GridSelect组件。
- context:
UICotnext类型,通过UI.createContext创建获取; - layout:
table类型,wui.GridSelect.createLayout中layout参数。
◆ 函数 wui.GridSelect.setOnSelectedCallback : 设置GridSelect组件的回调函数
函数语法
void wui.GridSelect.setOnSelectedCallback(UIView gridSelect, function selectCallback, function overLimitCallback)
函数说明
注册gridSelect组件点击事件回调处理函数。
- gridSelect:
UIView类型,通过wui.GridSelect创建的UIView实例; - selectCallback:
function类型,绑定选中事件回调函数,该回调函数会传入以下参数:
- id:
string类型,事件回调GridSelect组件的ID; - selectedIndex:
integer类型,事件回调的GridSelect子组件序号; - checked:
boolean类型,是否被选中; - checkedList:
table类型,table数组,包含选中列表,每项包含选中的序号。
- id:
- overLimitCallback:
function类型,绑定超出选择上限回调函数,该回调函数会传入以下参数:
- id:
string类型,事件回调GridSelect组件的ID; - limit:
integer类型,当前限制的选择上限。
- id:
使用示例
local gridStyle = {lineSpacing = 14,width = 110,height = 50,fontSize = 20,color = '#333333',checkedColor = '#ffffff',disabledColor = '#eeeeee',borderColor = '#666666',checkedBorderColor = '#ffb200',backgroundColor = '#ffffff',checkedBackgroundColor = '#ffb200',}local testData1 = {{ title = '上海', disabled = true },{ title = '杭州', checked = true },{ title = '北京' },{ title = '广州' },{ title = '深圳' },{ title = '南京' }}local testData2 = {{ title = '上海' },{ title = '杭州', checked = true },{ title = '北京', checked = true },{ title = '广州' },{ title = '深圳' },{ title = '南京' }}local view = wui.GridSelect.createView(context, { list = testData1, config = { single = true } })wui.GridSelect.setOnSelectedCallback(view, function (id, index, checked, checkedList)print("gridSelect selectedCallback id: " .. id)print("gridSelect selectedCallback current index: " .. tostring(index))print("gridSelect selectedCallback current checked: " .. tostring(checked))for i, v in ipairs(checkedList) doprint("> gridSelect selectedCallback selected index: " .. tostring(v))endend)context:getRootView():addSubview(view)local view2 = wui.GridSelect.createView(context, { list = testData2, config = { limit = 2, totalWidth = 650, gridStyle = gridStyle } })wui.GridSelect.setOnSelectedCallback(view2,function (id, index, checked, checkedList)print("gridSelect selectedCallback id: " .. id)print("gridSelect selectedCallback current index: " .. tostring(index))print("gridSelect selectedCallback current checked: " .. tostring(checked))for i, v in ipairs(checkedList) doprint("> gridSelect selectedCallback selected index: " .. tostring(v))endend,function (id, limit)print("gridSelect overLimitCallback id: " .. id))print("gridSelect overLimitCallback limit: " .. tostring(limit))end)context:getRootView():addSubview(view2)
XMod扩展
xsp库
库文件生成
xsp库和普通xsp脚本包导出方式一致,只需通过叉叉集成开发环境的功能菜单中的发布-导出脚本即可将代码或者图片资源打包成xsp库。
库文件导入和使用
导入xsp库时,只需要在叉叉集成开发环境中对应工程项目下的库文件目录下导入xsp库即可。也可以直接将xsp库文件拷贝到工程目录下的lib目录中。
要加载xsp库中某个代码模块,同样也是通过require函数调用。如现有以下fooLib.xsp库,包含一个名为fooModule的模块:
那么,按上述生成fooLib.xsp库文件后,部署在目标工程的库文件目录下之后,只需要在代码中调用require 'fooLib.fooModule'即可调用fooLib.xsp库中的fooModule模块:
使用xsp库中的资源文件时,需要以URI的形式来访问,资源路径为库名+资源在库内路径,同时需要添加xsp的scheme前缀,例如:
-- test_lib/src/main.lualocal rootLayout = {view = 'scroller',subviews = {{view = 'image',style = {width = 80,height = 80},src = 'xsp://fooLib/test.png'}}}
多重嵌套
xsp库是支持多重嵌套的,如fooLib库中还使用到barLib库,那么只需保证barLib库也按照上述要求导入到fooLib中即可,外部工程可以通过调用require 'fooLib.barLib.bar'来加载barLib库中的bar模块。
C/C++扩展
前言
在阅读后续内容之前,需要确认开发者具备以下的基本技能:
- 一定的C/C++开发基础;
- 交叉编译(Cross-compilation)的基本原理和工具使用:
- Android NDK的基本配置和用法;
- iOS Xcode基本使用。
如果你有移动平台原生开发相关的经验,或者在其他平台有过Lua C扩展的开发经验,那么以下内容同样也适合你。
没有以上相关经验或技能,但有兴趣并决心学习的开发者也不要气馁,学习最好的时机是昨天,其次是今天。
准备工作
相关安装及部署细节和步骤本文略过不表,请各位开发者善用搜索引擎解决问题。
Android
- 下载并解压Android NDK,最低要求r13b版本;
- 配置环境变量
ANDROID_NDK_ROOT为NDK解压路径。
iOS
- 由于苹果自身的限制,iOS编译只能在macOS系统下进行;
- 需要Xcode 9及以上版本,并安装Command Line Tools for Xcode。
API详解
XMod C/C++扩展工程可以在这里下载最新的配置文件和代码(附带例子):GitHub:@xxzhushou/CExtension
Lua虚拟机API
Lua虚拟机API定义在头文件XModLua53APIStub.h中,叉叉引擎从2.0版本开始,使用Lua v5.3运行环境,扩展支持 除以下列表外 的所有公开Lua C API接口:
- lua_dump
- lua_load
- lua_close
- lua_sethook
- luaL_newstate
- luaL_dofile
- luaL_dostring
- luaL_loadfile
- luaL_loadstring
- luaL_loadbuffer
详细Lua 5.3 C API功能介绍请参阅官方文档:Lua5.3 Reference Manual中的C API和auxiliary library部分。
Lua扩展API
Lua扩展API部分定义在头文件XModLuaExtAPIStub.h中,主要是针对XMod引擎内部的Lua扩展操作,目前有以下API:
void lua_push_xmod_point(lua_State* L, const xmod_point& val)
将
xmod_point的实例val压到当前Lua堆栈栈顶(对应Lua中Pointusertype类型)。void lua_push_xmod_size(lua_State* L, const xmod_size& val)
将
xmod_size的实例val压到当前Lua堆栈栈顶(对应Lua中Sizeusertype类型)。void lua_push_xmod_rect(lua_State* L, const xmod_rect& val)
将
xmod_rect的实例val压到当前Lua堆栈栈顶(对应Lua中Rectusertype类型)。void lua_push_xmod_color3b(lua_State* L, const xmod_color3b& val)
将
xmod_color3b的实例val压到当前Lua堆栈栈顶(对应Lua中Color3busertype类型)。void lua_push_xmod_color3f(lua_State* L, const xmod_color3f& val)
将
xmod_color3f的实例val压到当前Lua堆栈栈顶(对应Lua中Color3fusertype类型)。void lua_push_xmod_image(lua_State* L, const xmod_image& val)
将
xmod_image的实例val压到当前Lua堆栈栈顶(对应Lua中Imageusertype类型)。xmod_point lua_to_xmod_point(lua_State* L, int index)
将Lua栈对应index处位置的Lua对象(
Pointusertype类型)转换成xmod_point类型并返回。xmod_size lua_to_xmod_size(lua_State* L, int index)
将Lua栈对应index处位置的Lua对象(
Sizeusertype类型)转换成xmod_size类型并返回。xmod_rect lua_to_xmod_rect(lua_State* L, int index)
将Lua栈对应index处位置的Lua对象(
Rectusertype类型)转换成xmod_rect类型并返回。xmod_color3b lua_to_xmod_color3b(lua_State* L, int index)
将Lua栈对应index处位置的Lua对象(
Color3busertype类型)转换成xmod_color3b类型并返回。xmod_color3f lua_to_xmod_color3f(lua_State* L, int index)
将Lua栈对应index处位置的Lua对象(
Color3fusertype类型)转换成xmod_color3f类型并返回。xmod_image* lua_to_xmod_image(lua_State* L, int index)
将Lua栈对应index处位置的Lua对象(
Imageusertype类型)转换成xmod_image*类型并返回。void dispatch_in_lua_thread(const std::function& callback)
将C函数callback放到Lua主线程中执行,此函数可以在多线程环境下调用。
注意:由于Lua是基于栈进行数据交换的,除特殊说明,以上所有API均只能在Lua线程(默认触发线程)中调用,不能在其他线程调用,否则会引起不可控的报错甚至闪退。
XMod引擎API
XMod引擎API部分定义在头文件XModAPIStub.h中,主要是针对XMod引擎本身提供的一些C++接口操作,目前有以下API:
void xmod_get_platform(char** platform)
获取当前运行平台名,并写入到platform指针对应地址中,结果可能是"Android"或者"iOS"之一,需要delete[]清理返回数据。
void xmod_get_version_code(int* code)
获取XMod引擎版本号,并写入到code指针对应地址中。
void xmod_get_version_name(char** name)
获取XMod引擎版本名,并写入到name指针对应地址中,需要delete[]清理返回数据。
void xmod_get_product_code(XModProductCode* code)
获取当前运行产品代号,并写入到code指针对应地址中。
void xmod_get_process_mode(XModProcessMode* mode)
获取当前运行模式,并写入到mode指针对应地址中,结果可能是:
- kProcessStandalone:独立运行模式,脚本跟游戏分别在不同进程中运行(如开发助手的极客模式、叉叉小精灵等);
- kProcessEmbedded:内嵌运行模式,脚本跟游戏同属一个进程运行(如开发助手的通用模式、叉叉酷玩和IPA精灵等)。
void xmod_get_product_name(char** name)
获取当前产品名称,并写入到name指针对应地址中,结果可能是:
- DEV:开发助手
- XXZS:叉叉助手
- IPA:IPA精灵(iOS)
- KUWAN:叉叉酷玩(Android)
- SPIRIT:叉叉小精灵(Android)
需要delete[]清理返回数据。
void xmod_get_public_path(char** path)
获取XMod引擎的公共目录路径,并写入到path指针对应地址中,需要delete[]清理返回数据。
void xmod_get_private_path(char** path)
获取当前运行脚本的私有目录路径,并写入到path指针对应地址中,需要delete[]清理返回数据。
void xmod_get_resolved_path(const char* path, char** outpath)
将伪目录path转换成完整路径,并写入到outpath指针对应地址中,需要delete[]清理返回数据。
例如传入参数path = "[public]test.png",得到的outpath为公共目录路径下的test.png完整路径。
bool xmod_script_get_id(int* id)
获取当前脚本运行ID,并写入到id指针对应的地址中;获取成功放回true,否则返回false。
开发助手下运行获取得脚本ID固定为-1.
bool xmod_script_get_user_info(char** uid, int* membership, int* expiredTime)
获取当前用户的ID、会员标识和剩余时间,分别写入到uid、membership和expiredTime指针对应地址中;获取成功返回true,否则返回false。
会员标识取值是:
- 0: 未购买,非试用
- 1: 付费用户
- 2: 试用用户
- 3: 免费用户
需要delete[]清理返回的uid数据。
uid并非果盘账号,但能唯一对应果盘账号;
用户通过激活码激活(包括日卡)套餐后,也认定为付费用户;
开发助手下获取到的uid和expiredTime固定为"null"和3.void xmod_screen_get_size(xmod_size* size)
获取屏幕分辨率,并写入到size指针对应的对象中。
注意返回结果和脚本的
screen.init调用有关。void xmod_screen_mock_transform_rect(XModMockMode mode, const xmod_rect& in, xmod_rect* out)
指定转换模式mode,对in矩形进行转换,转换结果写入到out指针对应的对象中。
转换函数通过Lua函数
screen.setMockTransform(transform)指定,mode和in参数将会回传到Lua函数transform中,out即为transform函数的返回结果。注意:该函数涉及Lua调用,只能在Lua线程(即默认触发线程)中调用,多线程环境下调用会导致不可控的报错甚至闪退。
void xmod_screen_mock_transform_point(XModMockMode mode, const xmod_point& in, xmod_point* out)
与
xmod_screen_mock_transform_rect函数功能类似,不同的是只针对xmod_point类型进行转换。注意:该函数涉及Lua调用,只能在Lua线程(即默认触发线程)中调用,多线程环境下调用会导致不可控的报错甚至闪退。
bool xmod_xsp_get_res(const char* subpath, unsigned char** buff, size_t* size)
获取XSP文件中res/目录下的subpath文件,将文件数据和大小分别写入到buff指针和size指针对应地址;获取成功返回true,否则返回false(例如文件不存在)。
需要delete[]清理buff数据。
bool xmod_xsp_extract_res(const char* subpath, const char* destpath)
将XSP文件中res/目录下的subpath文件解压到destpath路径,解压成功返回true,否则返回false(例如文件不存在)。
xmod_image* xmod_image_from_screen()
截取当前屏幕,并返回xmod_image*类型对象。
注意创建返回的xmod_image*对象需要通过
xmod_image_release进行释放。xmod_image* xmod_image_from_screen_clip(const xmod_rect& rect)
指定rect范围截取屏幕数据,并返回xmod_image*类型对象。
注意创建返回的xmod_image*对象需要通过
xmod_image_release进行释放。xmod_image* xmod_image_from_file(const char* path)
指定path路径,加载并返回xmod_image*类型对象。
注意创建返回的xmod_image*对象需要通过
xmod_image_release进行释放。xmod_image* xmod_image_from_stream(const unsigned char* buff, ssize_t len)
指定数据源buff和大小len,构造并返回xmod_image*类型对象。
注意创建返回的xmod_image*对象需要通过
xmod_image_release进行释放。xmod_image* xmod_image_from_format(XModPixelFormat format, const xmod_size& size, const unsigned char* buff, ssize_t len)
指定像素格式format、图像尺寸size、数据源buff和大小len,构造并返回xmod_image*类型对象。
注意创建返回的xmod_image*对象需要通过
xmod_image_release进行释放。void xmod_image_release(xmod_image* image)
释放image对象。
bool xmod_image_get_size(const xmod_image* image, xmod_size* size)
获取image对象的图像尺寸,并写入到size指针对应的对象中;获取成功返回true,否则返回false。
void xmod_image_set_rotation(xmod_image* image, XModRotation rotation)
对image对象进行旋转操作。
void xmod_image_clip_with_rect(xmod_image* image, const xmod_rect& rect)
对image对象进行截取操作,截取范围为rect。
bool xmod_image_get_pixel(const xmod_image* image, const xmod_point& point, uint32_t* pixel)
获取image图像位于point处的RGB888格式像素数据,并写入到pixel指针对应的地址中;获取成功返回true,否则返回false(例如point范围越界)。
bool xmod_image_get_rgb(const xmod_image* image, const xmod_point& point, xmod_color3b* c3b)
获取image图像位于point处的RGB888格式像素数据,并写入到c3b指针对应的对象中;获取成功返回true,否则返回false(例如point范围越界)。
bool xmod_image_save_to_file(const xmod_image* image, const char* path, int quality)
将image图像保存到path指定的路径中,质量quality可选1-100范围;保存成功返回true,否则返回false(例如path路径没有操作权限)。
代码规范(重点)
头文件引入
有Lua扩展模块经验的开发者可能会留意到,XMod引擎并没有提供Lua原生的lua.h、lauxlib.h等头文件供开发者引入。
在XMod引擎扩展中,提供了XModExtSupport.h这个头文件作为整个XMod引擎扩展库的总头文件,实际上所有lua.h、lauxlib.h等Lua官方的头文件已经被合并到了XModLua53APIStub.h这个头文件中,你只能在需要用到Lua模块的地方单独include这个头文件来使用Lua的C API,而 不能 再用类似#include <lua.h>这样的写法。参见示例module/unzip模块中的lua_unzip.cpp中的头文件依赖。
需要注意的是,由于XModExtSupport.h中默认集成的头文件中依赖了C++的namespace等关键词,所以任何包含了XModExtSupport.h的源代码,都需要以cpp/cc/cxx等后缀格式结尾,不能使用c后缀格式,其他源代码文件不受影响。
模块入口函数
每个模块必须提供入口函数,也就是当Lua代码中调用require '<module_name>'时,实际触发的C++入口函数。而这个C++模块入口函数,同样也有统一的规范:
- 入口函数必须是可见和导出(export)的;
- 入口函数名必须符合
luaopen_<module_name>的格式; - 入口函数名编译后的符号必须以C命名风格,而不是C++命名风格(C++支持重载)。
看似规则复杂,实际上要同时保证上面这三点要求,只需要在入口函数上面加上LUALIB_API宏定义即可,例如lua_unzip.cpp中luaopen_unzip函数的定义是:
LUALIB_API int luaopen_unzip(lua_State *L){...}
LUALIB_API宏是在XModLua53APIStub.h中定义的,可以拆解为:
extern "C"告诉C++编译器使用C命名方式修饰该函数;__attribute__((visibility("default")))则告诉编译器这个函数符号是可见导出的。
编译和打包
以GitHub:@xxzhushou/CExtension项目中的modules/unzip工程为例。
Android动态库编译
Mac系统
- 下载和配置好Android NDK工具;
- 打开Terminal,用
cd命令切换到build目录; - 运行命令行
sh build_android.sh -m unzip,脚本会执行ndk-build编译modules/unzip工程(默认release模式,可选-d参数指定debug模式); - 编译过程如提示出错,请按错误提示进行修改,编译成功后,文件可以在
output/android/unzip目录下找到对应Android架构的so后缀的动态库文件。
Windows系统
待补充(与Mac系统类似,但需要通过cygwin编译)。
iOS动态库编译
待补充。
可以参照modules目录下的工程,创建自定义的扩展模块,也可以在LuaRock官网展示列表中寻找最新和优秀的Lua开源项目,自行编译成动态库后使用。
加载和使用
编译成功后,必须保留动态库的文件命名格式 lib<module_name>.so(Android) 或 lib<module_name>.dylib(iOS),其中<module_name>是模块名称,而且该名称不能和以下XMod官方内置的模块名称冲突:
- lfs —— 文件管理模块
- lpeg —— 正则表达匹配模块
- cjson —— JSON库模块
- ssl —— OpenSSL/HTTPS支持
- socket —— Socket通讯模块
- mime —— MIME协议模块
- crypto —— 常见通用加解密模块
- chttp —— HTTP通讯模块
- dmocr —— 大漠识别模块
- tessocr_3.02.02 —— Tesseract v3.02.02识别模块
- tessocr_3.05.02 —— Tesseract v3.05.02识别模块
使用时将编译好的库文件放到脚本工程下的lib目录,即集成开发环境中的库文件目录下。但注意Android和iOS的动态库规范有差异,因此部署也有差异。
部署Android动态库文件
XMod引擎目前支持且仅支持以下两种Android架构:
- ARM-32(armeabi-v7a)
- X86
目前普遍的真机设备是使用ARM架构,其中支持arm64的设备一般也是兼容arm的,而x86架构主要用于安卓模拟器(也有极少数的x86的真机设备)。
由于这两种架构本身互不兼容(事实上部分模拟器也可能集成了Intel的houdini模块以兼容arm在x86的运行),上述编译出来的动态库需要按照架构区分存放,具体搜索优先级是:
lib<module_name>_<arch>.solib<module_name>.so
以cmodule这个动态库为例,假设脚本运行在arm架构的Android设备上,那么当代码中使用require 'cmodule'加载cmoudle动态库,XMod加载器会按照以下优先级搜索cmodule模块:
- xsp://lib/libcmodule_armeabi-v7a.so
- xsp://lib/libcmodule.so
如果不存在这两个文件,require失败脚本报错;如果文件存在,则会尝试进行加载。
注意由于不同架构互不兼容,虽然x86架构的模拟器一般有专门的转换模块兼容arm格式的动态库,但反过来是行不通的。所以可能会出现只编译了x86架构的动态库,但没有严格按照架构进行后缀区分,那么脚本运行在arm架构设备上会被错误加载了只兼容x86的动态库,严重可能会引起引擎的崩溃。
除非你明确清楚和知道当前脚本的运行平台和环境,否则强烈建议严格按照本文的架构后缀进行区分,避免不必要的问题发生。
部署iOS动态库文件
待补充。
修改工程配置
双击左边导航栏的工程名称,打开工程属性设置,在下方C扩展配置设置面板中,点击添加然后编辑名称和入口函数(注意名称只需要填写模块名,不是完整的动态库文件名),最后确定保存后即可在代码中使用。
附录
A. 引擎目录说明
公共目录路径
- 开发助手
- Android: /sdcard/XMod/com.xxscript.idehelper/public
- 叉叉助手(二者之一)
- Android: /sdcard/XMod/com.zhushou.cc/public
- Android: /sdcard/XMod/com.xxAssistant/public
脚本私有目录路径
- 开发助手
- Android: /sdcard/XMod/com.xxscript.idehelper/private/<脚本名>
- 叉叉助手(二者之一)
- Android: /sdcard/XMod/com.zhushou.cc/private/<脚本ID>
- Android: /sdcard/XMod/com.xxAssistant/private/<脚本ID>
B. 颜色值和颜色序列规范
颜色值
引擎中所有颜色值、颜色序列的表示中,当使用integer表示时,对应的十六进制表示中采用0xRRGGBB格式来指定色值,即0xRRGGBB和Color3B(RR, GG, BB)表示同一个色值。
颜色值支持以下三种格式描述,任一均可:
integer:十六进制表示的颜色值,0xRRGGBB格式,如纯红色0xff0000;Color3B:0-255范围表示颜色值,如纯蓝色Color3B(0, 0, 255);Color3F:0.0-1.0范围表示的颜色值,如纯绿色Color3F(0, 1.0, 0).
颜色序列
颜色序列是一组或多组的颜色值、坐标。支持以下两种格式描述,任一均可:
string:"x|y|color-offset|fuzz,x|y|color-offset|fuzz,..."table:
{
{ pos =Point, color =integer, offset =integer, fuzz =integer},
{ pos =Point, color =integer, offset =integer, fuzz =integer},
...
}
其中:
- x/y:
integer类型,x/y坐标,仅用于string类型格式的颜色序列,必选项; - pos:
Point类型,x/y坐标,仅用于table类型格式的颜色序列,必选项; - color:
integer类型,颜色值,必选项; - offset:
integer类型,偏色值,可选项; - fuzz:
integer类型,模糊度,即可容忍的误差比例,取值范围0-100(取值100表示零容忍),可选项。
要进一步了解关于offset偏色值的描述,可以参阅附录D. 偏色和二值化说明-偏色处的详细说明。
最简单的找色脚本中,指定单点查找色值,例如以下代码:
local pos = screen.findColor(Rect(50, 50, 300, 300), 0x112233)if pos ~= Point.INVALID thentouch.down(1, pos)sleep(50)touch.up(1, pos)end
使用以上方法找色时,常常会因为屏幕上有大量符合指定颜色的点而不能找到需要的坐标。该函数通过在寻找到一个符合指定颜色color的坐标后,进一步确认其周边点坐标的方式,来确定准确目标。例如,现在我们在图像上找到了我们需要的一个按钮,这个按钮的样式是不变的,但是它的整体位置却会在整个屏幕上变化,现在我们想要在脚本运行时得到其坐标。
首先确定一个参照点:
颜色为 0x181F85,坐标为 (268, 802),下表序号1。
记录下来,继续寻找周边的几个参照点,以及与第一个参照点的相对坐标,分别为下表序号2-4:
现在我们找到了需要的所有参照点:
| 序号 | 颜色 | 绝对坐标 | 相对坐标 |
|---|---|---|---|
| 1 | 0x181F85 | (268, 802) | (0, 0) |
| 2 | 0x00BBFE | (297, 803) | (29, 1) |
| 3 | 0x0B6BBE | (371, 798) | (103, -4) |
| 4 | 0x150972 | (333, 811) | (65, 9) |
应用上述坐标写成多点找色,也就是颜色序列:
local pos = screen.findColor(Rect(0, 0, 639, 959),-- 颜色序列string描述"0|0|0x181F85,29|1|0x00BBFE|90,103|-4|0x0B6BBE-0x050505,65|9|0x150972")local pos2 = screen.findColor(Rect(0, 0, 639, 959),-- 颜色序列table描述{{ pos = Point(0, 0), color = 0x181F85 },{ pos = Point(29, 1), color = 0x00BBFE, fuzz = 90 },{ pos = Point(103, -4), color = 0x0B6BBE, offset = 0x050505 },{ pos = Point(65, 9), color = 0x15097 2}})
C. 坐标体系和搜索方向
坐标体系
TODO
搜索方向
引擎部分提供的找图、找色API有可选的priority设置,可选以下参数及其组合,指定查找过程中方向的优先级:
- screen.PRIORITY_DEFAULT: 默认值,等于screen.PRIORITY_LEFT_FIRST | screen.PRIORITY_UP_FIRST | screen.PRIORITY_HORIZONTAL_FIRST的组合
- screen.PRIORITY_LEFT_FIRST: 从左到右搜索
- screen.PRIORITY_RIGHT_FIRST: 从右到左搜索
- screen.PRIORITY_UP_FIRST: 从上到下搜索
- screen.PRIORITY_DOWN_FIRST: 从下到上搜索
- screen.PRIORITY_HORIZONTAL_FIRST: 优先水平方向搜索
- screen.PRIORITY_VERTICAL_FIRST: 优先垂直方向搜索
下图展示了在5x3px的搜索范围中,不同组合的搜索顺序。
图示圆圈表示像素点,圈中数字表示搜索的顺序,箭头表示像素点的查找过程。
示例:
-- 组合priority用到的二进制操作模块bit库, 引擎内置但需要主动require加载使用local bit = require('bit32')-- 指定从下到上, 从左到右, 并且垂直优先(即优先从下到上方向)的顺序进行查找local priority = bit.bor(screen.PRIORITY_LEFT_FIRST, screen.PRIORITY_DOWN_FIRST, screen.PRIORITY_VERTICAL_FIRST)-- 在Rect(100, 100, 200, 200)范围查找色值0xba3e00, 模糊度为90local pos = screen.findColor(Rect(100, 100, 200, 200), 0xba3e00, 90, priority)if pos ~= Point.INVALID thenprintf('No.1 found at %s', pos)end
D. 偏色和二值化说明
偏色
引擎中偏色使用diff = { 'C1-D1', 'C2-D2', ... }的格式来描述,其意义是:
当区域内任意一个颜色值Cxy,满足条件 max(Ci - Di, 0x000000) ≤ Cxy ≤ min(Ci + Di, 0xffffff),i = 1, 2, … 的时候,pos = Point(x, y)的颜色就是有效颜色(0xffffff),否则认为是无效颜色(0x000000)。
举个例子,{ '0x1f1f1f-0x303030', '0xacacac-0x101010' } 表示,指定区域内的所有颜色值Cxy,只要满足 max(0x1f1f1f - 0x303030, 0x000000) ≤ Cxy ≤ min(0x1f1f1f + 0x303030, 0xffffff) 或 max(0xacacac - 0x101010, 0x000000) ≤ Cxy ≤ min(0xacacac + 0x101010, 0xffffff),即Cxy范围在 [0x000000, 0x4f4f4f] 或 [0x9c9c9c, 0xbcbcbc] 区间内,那么pos = (x, y)的色值就是有效色值。
二值化
图片经过diff偏色指定的序列处理过程称为二值化,二值化后的图片只有黑和白两种颜色,可以用于提交给大漠、Tesseract等文字识别处理,提高识别精准度。
二值化后的图片(或二维数组)只有黑白两种颜色,一般默认白色为有效颜色,黑色为无效颜色。
E. UI模块设计和样式
设计理念
从2.0开始,引擎引入了一个新的UI模块,可让开发者使用近似Web开发体验来构建高性能、富交互的自定义界面。
创建一个界面,由界面布局结构、样式描述、事件响应三部分构成:
- 界面布局: 必须,可使用json布局描述文件或者lua table变量来定义界面布局,内容由具有层级结构的多个嵌套标签组成,不同的标签代表不同的组件;
- 样式描述: 可选,使用类CSS的语法来描述界面的具体展现形式;
- 事件响应: 可选,通过设定事件相关的回调函数,提供了通过事件触发动作的能力,实现即时的用户交互响应。
完整示例:
-- 界面布局local rootLayout = {view = 'scroller',-- 样式描述(内联)style = {width = 750,['background-color'] = '#ff0',['align-items'] = 'center'},subviews = {{view = 'text',class = 'txt',value = '测试'}, {view = 'image',style = {width = 40,height = 40},src = 'https://gw.alicdn.com/tfs/TB14fp2pwMPMeJjy1XbXXcwxVXa-72-72.png'}, {id = 'test_btn',view = 'div',class = 'btn',subviews = {{view = 'text',class = 'txt',value = 'ok'}}}}}-- 样式描述(全局)local globalStyle = {txt = {color = '#41b883',['font-size'] = 40,['padding-top'] = 10,['padding-bottom'] = 10},btn = {width = 710,height = 80,['align-items'] = 'center',['border-width'] = 1.5,['border-radius'] = 24,['border-color'] = '#dddddd',['background-image'] = 'linear-gradient(to top, #E3F5FB, #F9FEFF)'},['btn:active'] = {['background-image'] = 'linear-gradient(to top, #DFDFDF, #AFAFAF)'}}local context = UI.createContext(rootLayout, globalStyle)-- 事件响应context:findView('test_btn'):setActionCallback(UI.ACTION.CLICK, function (id, action)context:close()end)while true dosleep(1000)end
界面布局
和HTML中类似,不同标签代表的组件有各自的属性,其中一些组件还能有子组件。
布局的主要属性有:
- id: 定义组件的名称,便于后续索引使用(注意,根节点无法自定义id,会被固定值'_root'覆盖);
- view: 定义所使用的组件类型,详情参见附录F. UI内置基础组件库;
- class: 定义组件样式类型;
- style: 设定组件的内联样式;
- subviews: 嵌套子组件列表。
最顶层组件,我们称为根组件(root view),建议使用以下两种类型组件作为根组件:
- div: 普通根组件;
- scroller: 滚动根组件,适用于需要滑动的场景。
样式描述
使用类CSS的样式语法,可理解为CSS的一个子集,两者有一些细微的区别。
支持以下两种方式来设定样式:
- 全局样式: 通过组件的class属性来关联全局样式表中定义的特定样式,支持使用伪类来描述特殊样式效果;
- 内联样式: 直接通过内联的style属性来编写样式。
所有组件都支持以下通用样式规则。
盒模型

引擎盒模型基于CSS盒模型,每个UI组件都可视作一个盒子。我们一般在讨论设计或布局时,会提到「盒模型」这个概念。
盒模型描述了一个元素所占用的空间。每一个盒子有四条边界:外边距边界margin edge,边框边界border edge,内边距边界padding edge与内容边界content edge。这四层边界,形成一层层的盒子包裹起来,这就是盒模型大体上的含义。
- width:
number类型,默认值0 - height:
number类型,默认值0 - padding:
number类型,边距,内容和边框之间的距离。默认值0,可以细分为以下设置:
- padding-left:
number类型,默认值0 - padding-right:
number类型,默认值0 - padding-top:
number类型,默认值0 - padding-bottom:
number类型,默认值0
- padding-left:
- margin: 外边距,元素和元素之间的空白距离。值类型为 length,默认值0,可以细分为以下设置:
- margin-left:
number类型,默认值0 - margin-right:
number类型,默认值0 - margin-top:
number类型,默认值0 - margin-bottom:
number类型,默认值0
- margin-left:
- border: 设定边框,支持以下细分设置:
- border-style:
string类型,设定边框样式,可选值为'solid'、'dashed'、 'dotted',默认值'solid'。可以细分以下设置:
- border-left-style:
string类型,可选值为'solid'、'dashed'、 'dotted',默认值'solid' - border-top-style:
string类型,可选值为'solid'、'dashed'、 'dotted',默认值'solid' - border-right-style:
string类型,可选值为'solid'、'dashed'、 'dotted',默认值'solid' - border-bottom-style:
string类型,可选值为'solid'、'dashed'、 'dotted',默认值'solid'
- border-left-style:
- border-width:
number类型,设定边框宽度,非负值, 默认值0,可以细分以下设置:
- border-left-width:
number类型,非负值, 默认值0 - border-top-width:
number类型,非负值, 默认值0 - border-right-width:
number类型,非负值, 默认值0 - border-bottom-width:
number类型,非负值, 默认值0
- border-left-width:
- border-color:
string类型,设定边框颜色,默认值'#000000',可以细分以下设置:
- border-left-color:
string类型,默认值'#000000' - border-top-color:
string类型,默认值'#000000' - border-right-color:
string类型,默认值'#000000' - border-bottom-color:
string类型,默认值'#000000'
- border-left-color:
- border-radius:
number类型,设定圆角,默认值0,可以细分以下设置:
- border-bottom-left-radius:
number类型,非负值, 默认值0 - border-bottom-right-radius:
number类型,非负值, 默认值0 - border-top-left-radius:
number类型,非负值, 默认值0 - border-top-right-radius:
number类型,非负值, 默认值0
- border-bottom-left-radius:
- border-style:
注意:
引擎盒模型的box-sizing默认为border-box,即盒子的宽高包含内容、内边距和边框的宽度,不包含外边距的宽度。
目前在image组件上尚无法只定义一个或几个角的border-radius。比如你无法在这两个组件上使用border-top-left-radius。该约束只对iOS生效,Android并不受此限制。
尽管overflow = hidden在Android上是默认行为,但只有下列条件都满足时,一个父组件才会去clip它的子组件。这个限制只对Android生效,iOS 不受影响:- 父组件类型是div、a、cell、refresh或loading;
- 系统版本是Android 4.3或更高;
- 系统版本不是Andorid 7.0;
- 父组件没有background-image属性或系统版本是Android 5.0或更高。
- width:
Flexbox
引擎的UI布局模型基于CSS Flexbox,以便所有页面元素的排版能够一致可预测,同时页面布局能适应各种设备或者屏幕尺寸。
Flexbox包含flex容器和flex成员项。如果一个UI组件可以容纳其他组件,那么它就成为flex容器。
Flex容器
在引擎中,Flexbox是默认且唯一的布局模型,所以你不需要手动为元素添加类似display=flex属性。
- flex-direction: 定义了flex容器中flex成员项的排列方向。可选值为'row'、'column',默认值为'column'。
- column: 从上到下排列;
- row: 从左到右排列。
justify-content: 定义了flex容器中flex成员项在主轴方向上如何排列以处理空白部分。可选值为'flex-start'、'flex-end'、'center'、'space-between'及'space-around',默认值为'flex-start'。
- flex-start: 默认值,所有的flex成员项都排列在容器的前部;
- flex-end: 则意味着成员项排列在容器的后部;
- center: 即中间对齐,成员项排列在容器中间、两边留白;
- space-between: 表示两端对齐,空白均匀地填充到 flex 成员项之间;
- space-around: 表示所有空白都均匀填充到 flex 成员项和两端之间。

align-items: 定义了flex容器中flex成员项在纵轴方向上如何排列以处理空白部分。可选值为'stretch'、'flex-start'、'center'、'flex-end',默认值为'stretch'。
- stretch: 默认值,即拉伸高度至flex容器的大小;
- flex-start: 上对齐,所有的成员项排列在容器顶部;
- flex-end: 下对齐,所有的成员项排列在容器底部;
- center: 中间对齐,所有成员项都垂直地居中显示。

- flex-direction: 定义了flex容器中flex成员项的排列方向。可选值为'row'、'column',默认值为'column'。
Flex成员项
flex属性定义了flex成员项可以占用容器中剩余空间的大小。如果所有的成员项设置相同的值flex = 1,它们将平均分配剩余空间。如果一个成员项设置的值为flex = 2,其它的成员项设置的值为flex = 1,那么这个成员项所占用的剩余空间是其它成员项的2倍。
Position定位
引擎UI还支持 position 定位,用法与 CSS position 类似。为元素设置 position 后,可通过 top、right、bottom、left 四个属性设置元素坐标。
- position:
string类型,设置定位类型。可选值为 'relative'、'absolute'、'fixed'及'sticky',默认值为'relative':
- relative: 默认值,指的是相对定位;
- absolute: 绝对定位,以元素的容器作为参考系;
- fixed: 保证元素在页面窗口中的对应位置显示;
- sticky: 指的是仅当元素滚动到页面之外时,元素会固定在页面窗口的顶部。
- top:
integer类型,距离上方的偏移量,默认为 0。 - bottom:
integer类型,距离下方的偏移量,默认为 0。 - left:
integer类型,距离左方的偏移量,默认为 0。 - right:
integer类型,距离右方的偏移量,默认为 0。
注意:
- 引擎目前不支持 z-index 设置元素层级关系,但靠后的元素层级更高,因此,对于层级高的元素,可将其排列在后面;
- 如果定位元素超过容器边界,在 Android 下,超出部分将不可见,原因在于 Android 端元素
overflow默认值为 hidden,但目前 Android 暂不支持设置 overflow = visible。
- position:
Pseudo伪类
引擎支持四种伪类: active、focus、disabled和enabled
所有组件都支持active, 但只有input组件和textarea组件支持focus, enabled, disabled。
规则:
- 同时生效的时候,优先级高覆盖优先级低。例如:input:active:enabled和input:active同时生效,前者覆盖后者;
互联规则如下所示:
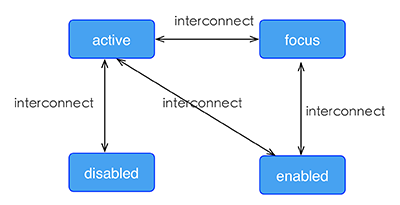
线性渐变
引擎支持线性渐变背景,具体介绍可参考W3C description of the gradient。
所有组件均支持线性渐变,例如可以通过background-image属性创建线性渐变:background-image = 'linear-gradient(to top,#a80077,#66ff00)'
引擎目前只支持两种颜色的渐变,渐变方向如下:
- to right: 从左向右渐变;
- to left: 从右向左渐变;
- to bottom: 从上到下渐变;
- to top: 从下到上渐变;
- to bottom right: 从左上角到右下角;
- to top left: 从右下角到左上角。
注意,background-image优先级高于background-color,这意味着同时设置background-image和background-color,background-color设置将会被覆盖。
目前暂不支持radial-gradient(径向渐变)。
文本样式
文本类组件共享一些通用样式, 这类组件目前包括text和input。
- color:
string类型,指定文字颜色,支持以下写法:
- RGB,例如'rgb(255, 0, 0)';
- RGBA,例如'rgba(255, 0, 0, 0.5)';
- 十六进制,例如'#ff0000';
- 精简写法的十六进制,例如'#f00';
- 色值关键字,例如'red'。
- lines:
integer类型,指定文本行数,仅在text组件中支持。默认值是0代表不限制行数; - font-size:
integer类型,文字大小; - font-style:
string类型,字体类别,可选值'normal'、'italic',默认为'normal'; font-weight:
string类型,字体粗细程度,可选值:- 100/200/300/400/500/600/700/800/900
- 'normal'(默认,等同于400)
- 'bold'(等同于700)
iOS 支持9种font-weight值;Android仅支持400和700,其他值会设为400或700;
类似'lighter'、'bolder'这样的font-weight属性值暂时不支持。text-decoration:
string类型,字体装饰,可选值'none'、'underline'、'line-through',默认值为'none';text-align:
string类型,对齐方式,可选值'left'、'center'、'right',默认值为'left';暂不支持'justify'、'justify-all'属性值设置。
font-family:
string类型,设置字体,这个设置不保证在不同平台、设备间的一致性,如所选设置在平台上不可用,将会降级到平台默认字体;- text-overflow:
string类型,设置内容超长时的省略样式,可选值'clip'、'ellipsis'。
- color:
特殊说明
引擎的UI模块采用了相对坐标体系,所有UI容器组件默认的宽度为是750px,即750px的宽度被视作为当前物理屏幕的满屏宽度,x = 375px处即为水平方向的中心位置。
事件响应
引擎提供了通过事件触发动作的能力,例如在用户点击组件时执行某些回调函数。下面列出了可被添加到引擎UI组件上以定义事件动作的属性:
click: 当组件上发生点击手势时被触发。
注意:input和switch组件目前不支持click事件。
longpress: 当用户长按组件时被触发。
注意:input和switch组件目前不支持longpress事件。
appear: 如果一个位于某个可滚动区域内的组件被绑定了appear事件,那么当这个组件的状态变为在屏幕上可见时,该事件将被触发。
disappear: 如果一个位于某个可滚动区域内的组件被绑定了disappear事件,那么当这个组件被滑出屏幕变为不可见状态时,该事件将被触发。
资源加载方式
UI模块支持以下几种资源加载模式(scheme):
- 网络资源: 例如image组件中可以指定
src = 'http://dev.xxzhushou.cn/images/logo-unlogin.png',支持http和https; - 设备资源: 例如image组件中可以指定
src = 'file:///sdcard/logo.png',指定设备本地图片文件; - 工程资源: 例如image组件中可以指定
src = 'xsp://logo.png',指定xsp中res目录下的logo.png图片;
F. UI内置基础组件库
div组件
div组件是用于包装其它组件的最基本容器。支持所有的通用样式、特性、flexbox 布局。
其类似于HTML的div容器,嵌套层级不可过深,否则容易引起性能问题,建议控制在 10 层以内。
div支持包括div本身在内的任何组件作为自己的子组件。因此在写一个组件时,推荐外层使用div作为根容器。
text组件
用来将文本按照指定的样式渲染出来,文本头尾空白会被过滤。
特有属性:
- value:
string类型,默认组件的展示内容。
image组件
image用于在界面中显示单个图片。必须指定样式中的宽度和高度,否则无法正常显示。
特有属性:
- placeholder:
stirng类型,占位图的URL,当由src表示的图片下载完成并展示后将被删除; - resize:
stirng类型,有以下三种可能取值:
- 'contain': 缩放图片以完全装入image的区域,可能背景区部分空白;
- 'cover': 缩放图片以完全覆盖image的区域,可能图片部分看不见;
- 'stretch': 默认值。按照image的区域的宽高比例缩放图片。
- src:
stirng类型,设置要显示图片的URL,该属性是image组件的强制属性,支持网络URL和XSP包内资源scheme格式,例如src = "http://foo.cn/xx.png"或者src = "xsp://xx.png"。
input组件
input组件用来创建接收用户输入字符的输入组件。input组件的工作方式因type属性的值而异。
特有属性:
- type:
stirng类型,控件的类型,类型均符合W3C标准,可能取值是:
- 'text': 默认值;
- 'date': 日期输入类型;
- 'email': email输入类型;
- 'password': 密码输入类型;
- 'tel': 电话号码输入类型;
- 'time': 时间输入类型;
- 'url': URL地址输入类型;
- 'number': 数字输入类型。
- value:
stirng类型,组件的默认显示内容; - placeholder:
stirng类型,提示用户的输入信息,提示文本不能有回车或换行; - disabled:
boolean类型,表示是否支持输入,通常click事件在disabled控件上是失效的; - autofocus :
boolean类型,表示是否在页面加载时控件自动获得输入焦点; - maxlength:
integer类型,表示可输入内容的最大长度。 - singleline:
boolean类型,控制输入内容是否只允许单行显示。
textarea组件
用于用户交互,接受用户输入数据。可以认为是自适应高度的input。
textarea组件支持text组件的所有属性,除此之外还支持以下属性:
- rows:
integer类型,指定组件的高度,默认值是2。组件的高度为rows*行高。
scroller组件
scroller是一个可以容纳多个子组件的滚动组件。如果子组件的总高度/宽度高于其本身,那么所有的子组件都可滚动。
特有属性:
- show-scrollbar:
boolean类型,默认值为 true。控制是否出现滚动条; - scroll-direction:
stirng类型,可选为'horizontal'或者'vertical',默认值为'vertical',用于定义滚动的方向。
注意scroll-direction定义了scroller的滚动方向,样式表属性flex-direction定义了scroller的布局方向(默认值是'column'),两个方向必须一致(由于这两个值均是默认值,当需要一个竖直方向的scroller时,这两个值可以不设置)。
当需要一个水平方向的scroller时,使用scroll-direction = 'horizontal'和flex-direction = 'row';
当需要一个竖直方向的scroller时,使用scroll-direction = 'vertical'和flex-direction = 'column'。
注意
scroll-direction为Attr属性,而flex-direction为Style样式设置。
web组件
用于显示由src属性指定的页面内容,必须指定web组件的width和height样式。
注意web组件不能包含任何嵌套的子组件。
特有属性:
- src:
string类型,指定加载的网页内容的URL。
