@xushengkai
2022-12-27T05:33:37.000000Z
字数 23511
阅读 2476
Nginx WEB架构实战篇--LNMP
nginx
[TOC]
一--动态网站架构
资源
资源文件识别--语言识别--框架识别
index.php--开源的php--Windows/Linux+nginx+php+mysql
index.py--开源的python--Windows/Linux+apache+python+mysql
index.jsp--商业JAVA--Windows/Linux+tomact+JDK+Oracle
index.asp--商业c#--Windows+iis+asp.net+sql-server/oracle/mogodb
二--LNMP架构原理
LNMP架构,是指在Linux平台下,由运行Nginx的web服务器,运行PHP的动态页面解析程序和运行MySQL的数据库组成的网站架构,也是当前常用的系统架构之一。
在LNMP架构中,Nginx本身只负责静态页面的处理,当需要处理动态页面时,则需要Nginx将相关.php页面转交给php-fpm来进行处理,php-fpm会将PHP页面解析成html文件,然后交给Nginx进行处理。
与LAMP架构相比,LNMP的主要区别在于对PHP的处理上,LAMP对于PHP动态资源的处理是通过Apache的libphp5.so模块进行的,该模块内嵌如Apache中,而Nginx对PHP动态资源的处理则是通过php-fpm进行的,php-fpm是一个独立的模块,因此,在搭建LNMP架构时,Nginx和php-fpm都需要进行开启。LNMP架构如下所示:

三--LNMP动态网站环境部署
Linux部署
打开一台全新的虚拟机,配置好阿里云yum仓库,关闭防火墙和selinux
[root@192 ~]# ls /etc/yum.repos.d/CentOS-Base.repo epel.repo[root@192 ~]# systemctl stop firewalld[root@192 ~]# sestatusSELinux status: disabled
Nginx部署
#安装nginx[root@192 ~]# yum -y install nginx#启动nginx,查看进程,或者打开主机浏览器访问nginx页面测试。[root@192 ~]# systemctl start nginx[root@192 ~]# ps -ef | grep nginxroot 1355 1 0 17:33 ? 00:00:00 nginx: master process /usr/sbin/nginxnginx 1356 1355 0 17:33 ? 00:00:00 nginx: worker processnginx 1357 1355 0 17:33 ? 00:00:00 nginx: worker processroot 1388 1232 0 17:35 pts/0 00:00:00 grep --color=auto nginx
php-fpm部署
安装php-fpm
#php-fpm:,连接nginx,php接收动态请求的程序#php-mysql:php连接mysql的程序#php-gd:图形库程序(GD库可以处理图片,或者生成图片)[root@192 ~]# yum -y install php-fpm php-mysql php-gd#启动php-fpm,设置开机自启动[root@192 ~]# systemctl start php-fpm[root@192 ~]# systemctl enable php-fpmCreated symlink from /etc/systemd/system/multi-user.target.wants/php-fpm.service to /usr/lib/systemd/system/php-fpm.service.#查看php-fpm端口号,默认监听9000端口[root@192 ~]# ss -anp | grep 9000tcp LISTEN 0 128 127.0.0.1:9000 *:* users:(("php-fpm",pid=1506,fd=0),("php-fpm",pid=1505,fd=0),("php-fpm",pid=1504,fd=0),("php-fpm",pid=1503,fd=0),("php-fpm",pid=1502,fd=0),("php-fpm",pid=1500,fd=6))
测试php程序
#设置php程序,创建index.php文件添加以下内容[root@192 ~]# vim /usr/share/nginx/html/index.php<?php #调用php版本信息phpinfo();?>#在nginx的主配置文件中设置默认访问页面[root@192 ~]# vim /etc/nginx/nginx.conf38 server {39 #在此行下面添加以下内容40 location ~ \.php$ {41 root /usr/share/nginx/html;42 fastcgi_pass 127.0.0.1:9000;43 fastcgi_index index.php;44 fastcgi_param SCRIPT_FILENAME $document_root$fastcgi_script_name;45 include fastcgi_params;46 }53 include /etc/nginx/default.d/*.conf;#在此行的下面添加以下内容54 location / {55 index index.php index.html;56 }重启nginx[root@192 ~]# systemctl restart nginx
打开主机浏览器访问web页面,显示内容PHP Version 5.4.16设置成功
mysql部署
1.RPM部署
#安装mysql服务器程序和客户机程序[root@192 ~]# yum -y install mariadb-server mariadb#启动mysql,设置开机自启动[root@192 ~]# systemctl start mariadb[root@192 ~]# systemctl enable mariadbCreated symlink from /etc/systemd/system/multi-user.target.wants/mariadb.service to /usr/lib/systemd/system/mariadb.service.#为MySQL数据库设置密码[root@192 ~]# mysqladmin password '123456'#创建空库MariaDB [(none)]> create database bbs;Query OK, 1 row affected (0.00 sec)#给用户phptest授权MariaDB [(none)]> grant all on bbs.* to phptest@'192.168.200.%' identified by '123456';Query OK, 0 rows affected (0.00 sec)MariaDB [(none)]> flush privileges;Query OK, 0 rows affected (0.00 sec)#利用php语言登录数据库,查看数据库能否使用[root@192 ~]# vim /usr/share/nginx/html/index.php<?php$link=mysql_connect('192.168.200.147','phptest','123456'); #mysql在哪台服务器上就写哪台服务器的IPif($link)echo "xushengkai Successfuly";elseecho "xushengkai Faile";mysql_close();?>
打开主机浏览器访问web页面,多次刷新页面,显示内容为:xushengkai Successfuly,lnmp准备工作已经完成
业务上线
购买服务器
购买域名
上传app
[root@192 ~]# wget http://cn.wordpress.org/wordpress-4.9.1-zh_CN.zip[root@192 ~]# yum -y install unzip[root@192 ~]# unzip wordpress-4.9.1-zh_CN.zip[root@192 ~]# rm -rf /usr/share/nginx/html/index.php[root@192 ~]# cp -rf /root/wordpress/* /usr/share/nginx/html/[root@192 ~]# chown -R nginx.nginx /usr/share/nginx/html/*[root@192 ~]# chmod 777 /usr/share/nginx/html/
打开主机浏览器访问web页面,页面显示:欢迎使用WordPress。在开始前,我们需要您数据库的一些信息。请准备好如下信息。
输入数据库名:bbs
用户名:phptest
密码:自己设置
数据库主机:数据库在哪个服务器就写哪个服务器的IP
表前缀:wq_
四--PHP开发深入了解
工作流程
UI:负责构图
前端:通过表单,文本框,提交按钮,页面布局
后端:php连接函数
DBA:实现后台数据库的写入
OP:业务上线
准备前台html页面
前端
#删除默认页面[root@192 ~]# cd /usr/share/nginx/html/[root@192 html]# rm -rf *#准备需要设置的页面[root@192 html]# vim index.html<html><body><img src="logo.jpg" width="600" height="600" /><form action="insert.php" method="post">Firstname: <input type="text" name="firstname" />Lastname: <input type="text" name="lastname" />Age: <input type="text" name="age" /><input type="submit" /></form></body></html>
UI
#拷贝图片到网页主目录下[root@192 html]# rz[root@192 html]# ls1.html logo.jpg
准备php中间件
后端
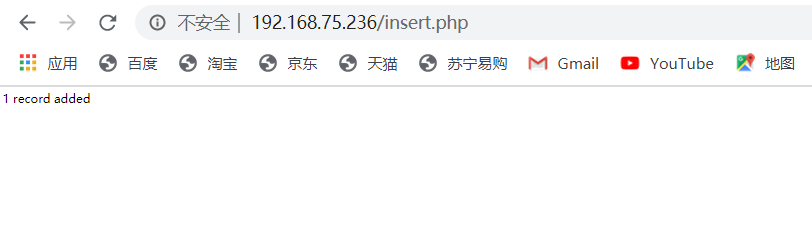
[root@192 html]# vim insert.php<?php$con = mysql_connect("192.168.200.147","root","123456");if (!$con){die('Could not connect: ' . mysql_error());}mysql_select_db("my_db", $con);$sql="INSERT INTO Persons (FirstName, LastName, Age)VALUES('$_POST[firstname]','$_POST[lastname]','$_POST[age]')";if (!mysql_query($sql,$con)){die('Error: ' . mysql_error());}echo "1 record added";mysql_close($con)?>
准备表和库
DBA
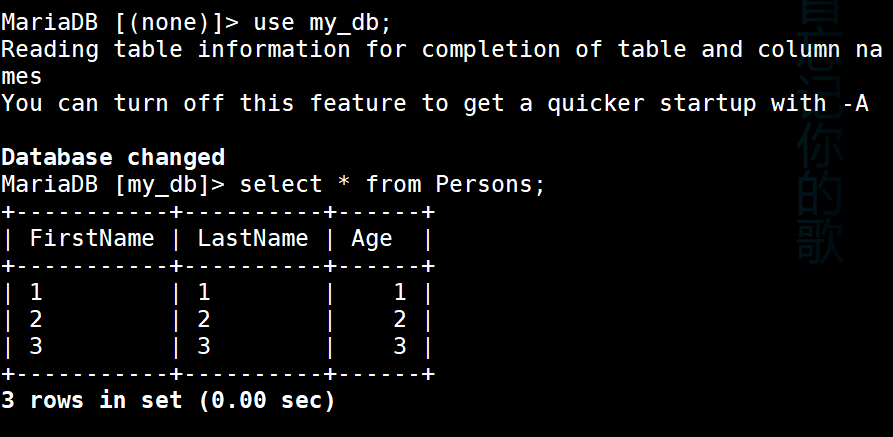
[root@192 html]# mysql -p'123456'Welcome to the MariaDB monitor. Commands end with ; or \g.Your MariaDB connection id is 2Server version: 5.5.68-MariaDB MariaDB ServerCopyright (c) 2000, 2018, Oracle, MariaDB Corporation Ab and others.Type 'help;' or '\h' for help. Type '\c' to clear the current input statement.MariaDB [(none)]> create database my_db;Query OK, 1 row affected (0.00 sec)MariaDB [(none)]> use my_db;Database changedMariaDB [my_db]> create table Persons (FirstName varchar(50), LastName varchar(50),Age int );Query OK, 0 rows affected (0.00 sec)MariaDB [my_db]> grant all on *.* to root@'192.168.200.147' identifi by '123456';Query OK, 0 rows affected (0.01 sec)MariaDB [my_db]> grant all on *.* to root@'%' identified by '123456';Query OK, 0 rows affected (0.00 sec)MariaDB [my_db]> flush privileges;Query OK, 0 rows affected (0.00 sec)
输入页面
打开主机浏览器访问页面,写入自己的信息提交,下图仅供参考
转载的原图片链接:https://blog.csdn.net/Lancelotest/article/details/108834468

跳转页面会显示下图的内容
输出页面
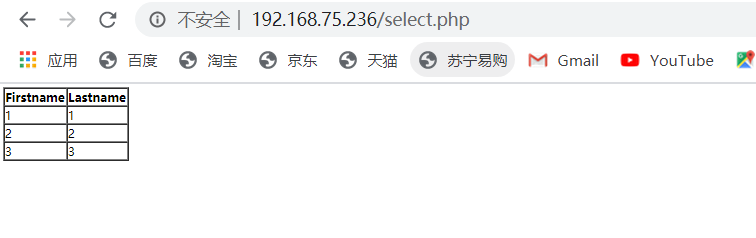
[root@192 html]# vim select.php{<?php$con = mysql_connect("localhost","root","123456");if (!$con){die('Could not connect: ' . mysql_error());}mysql_select_db("my_db", $con);$result = mysql_query("SELECT * FROM Persons");echo "<table border='1'><tr><th>Firstname</th><th>Lastname</th></tr>";while($row = mysql_fetch_array($result)){echo "<tr>";echo "<td>" . $row['FirstName'] . "</td>";echo "<td>" . $row['LastName'] . "</td>";echo "</tr>";}echo "</table>";mysql_close($con);?>
前台输出界面
打开主机访问页面目录的select.php,下图仅供参考
后台输出界面
五--fastcgi和php-fpm
1.静态网站
nginx服务器能处理的是静态元素:.html .jpg .mp4 .css
2.nginx_fastcgi_module
处理动态请求的接口
nginx通过ngx_fastcgi_module模块,链接php-fpm处理动态请求
3.PHP-FPM
PHP-FPM(PHP FastCGI Process Manager)意:PHP FastCGI 进程管理器,用于管理PHP进程池的软件,用于接受web服务器的请求。比如想后端MySQL进行查询请求后,将铲鲟结果返回给前台nginx
4.PHP-MYSQL
是php连接MySQL的接口程序
5.MySQL
存储数据
- 重点:
- 什么是fastcgi
- nginx+fastchi运行原理
- LNMP的运行原理
六--php-fpm初始化配置
php-fpmd的配置文件
1.核心配置文件
[root@192 ~]# vim /etc/php.inidate.timezone = PRC #设置PHP的时区open_basedir #设置PHP脚本允许访问的目录
2.全局配置文件
[root@192 ~]# vim /etc/php-fpm.confpid = /run/php-fpm/php-fpm.pid #pid存放的位置error_log = /var/log/php-fpm/error.log #日志文件的位置log_level = notice #日志的级别process.max = 3 #默认没有,控制子进程最大数的全局变量,后边的设置子进程数量的指令受到这个值的限制,0表示无限制daemonize = yes #将fpm转至后台运行
3.扩展配置文件
[root@192 ~]# vim /etc/php-fpm.d/www.confuser = nginx #设置用户和用户组listen.allowed_clients = 127.0.0.1 #允许访问FastCGI进程的IP,设置any为不限制IP,如果要设置其他主机的nginx也能访问这台FPM进程,listen处要设置成本地可被访问的IP。默认值是any。每个地址是用逗号分隔,如果没有设置或者为空,则允许任何服务器请求连接listen = 127.0.0.1:9000 #fpm监听端口,即nginx中php处理的地址,一般默认值即可。可用格式为: 'ip:port',如果是分离部署,nginx在哪个服务器就写哪个服务器的IPslowlog = /var/log/php-fpm/$pool-slow.log #开启慢日志pm=dynamic #动态模式进程管理开启pm.start_servers=5 #最初开启多少进程pm.min_spare_server =5 #最小的多余进程数。最少空闲。用户访问会消耗掉进程。然后为了满足后续用户随时随地开启进程保持空闲数为5。pm.max_children = 50 #最大进程数 #max_children是PHP-FPM Pool 最大的子进程数,他数值取决于你的服务器内存。 假设你打算给10G内存给当前配置的PHP-FPM Pool,一般一个PHP请求占用内存10M-40M,我们按站点每个PHP请求占用内存25M,这样max_children = 10G/25M = 409。所以,这个值可以根据情况算出来pm.max_spare_servers=10 #最大的多余进程。大规模断开后,高并发访问过后,还剩多少,空闲进程数超过10个的时候,杀掉只剩10个pm.max_requests = 500 #每个子进程能响应的请求数量,到达此数字,该PHP进程就被释放掉了。#max_requests是每个子进程重生之前处理的请求数, 默认值为unlimited(默认为1024),可以设置小一点(如500左右),这样可以避免内存泄露带来的问题
初始化php-fpm
1.初始化之前php程序的进程数是5个
[root@192 ~]# ps aux | grep phproot 944 0.0 0.8 351920 10932 ? Ss 09:34 0:00 php-fpm: master process (/etc/php-fpm.conf)apache 999 0.0 0.3 351920 4824 ? S 09:34 0:00 php-fpm: pool wwwapache 1001 0.0 0.3 351920 4824 ? S 09:34 0:00 php-fpm: pool wwwapache 1002 0.0 0.3 351920 4824 ? S 09:34 0:00 php-fpm: pool wwwapache 1003 0.0 0.3 351920 4824 ? S 09:34 0:00 php-fpm: pool wwwapache 1004 0.0 0.3 351920 4824 ? S 09:34 0:00 php-fpm: pool wwwroot 2070 0.0 0.0 112724 984 pts/0 S+ 10:25 0:00 grep --color=auto php
2.设置生产环境下常用数值
[root@192 ~]# vim /etc/php-fpm.d/www.confpm = dynamic #启动动态管理模式pm.start_servers = 32 #初始启动32个进程pm.max_children = 512 #最大进程数(子进程会在最大和最小范围中变化)512个进程数是在大于16G内存的前提下。pm.min_spare_servers = 32 #随着用户访问的增加,保持32个空闲进程。pm.max_spare_servers = 64 #随着用户离去。杀死大量空闲进程来节约资源。pm.max_requests = 1500 #是每个子进程重生之前处理的请求数,默认值为unlimited(为1024)#重启php[root@192 ~]# systemctl restart php-fpm
3.初始化以后
#一共32个进程,多两个一个是父进程,一个是grep。[root@192 ~]# ps aux | grep php | wc -l34
启动php动态监控页面
1.启动测试页面功能
[root@192 ~]# vim /etc/php-fpm.d/www.conf#这里写什么就访问什么,把前面的分号去掉,在php语言中,分号是注释的意思。pm.status_path = /php_status
2.nginx配置页面转发
[root@192 ~]# vim /etc/nginx/nginx.conf#在server{ 下面写上以下内容server {location = /php_status {fastcgi_pass 127.0.0.1:9000;fastcgi_param SCRIPT_FILENAME $fastcgi_script_name;include fastcgi_params;}#这个配置的意思是 在浏览器中访问的.php文件,实际读取的是 fastcgi_param SCRIPT_FILENAME $fastcgi_script_name;$document_root(网站根目录)下的.php文件 -- 也就是说 当访127.0.0.1/index.php的时候,需要读取网站根目录下面的index.php文件,如果没有配置这一配置项时,nginx不回去网站根目录下访问.php文件,所以返回空白#include fastcgi_params是常用变量所在的文件名。#重启nginx和php[root@192 ~]# systemctl restart nginx[root@192 ~]# systemctl restart php-fpm
3.访问测试页面
打开浏览器访问/php_status
pool: www #池子名称,大多数为wwwprocess manager: dynamic #进程管理方式,值:static, dynamic or ondemand. dynamicstart time: 11/Dec/2022:11:00:53 +0800 #启动日期,如果reload了php-fpm,时间会更新start since: 4 # 运行时长accepted conn: 1 #当前池子接受的请求数listen queue: 0 #请求等待队列,如果这个值不为0,那么要增加FPM的进程数量max listen queue: 0 #请求等待队列最高的数量listen queue len: 128 #socket等待队列长度idle processes: 31 #空闲进程数量active processes: 1 #活跃进程数量total processes: 32 #总进程数量max active processes: 1 #最大的活跃进程数量(FPM启动开始算)max children reached: 0 #进程最大数量限制的次数,如果这个数量不为0,那说明你的最大进程数量太小了,请改大一点。slow requests: 0 #启用了php-fpm slow-log,缓慢请求的数量
七--Nginx-location
前言
通常网站的部分页面,需要特殊设置。
比如,/1.html 页面,需要用户访问控制(如allow all)
location = /1.html {
allow all;
}
那部分页面该如何表达呢?
答案:就是位置 Location URL { module }. 其中URL的表达方式中使用的正则表达式,常会有冲突的情况,请通过下面的实验,了解常见的冲突符号,并掌握其中的优先级。
语法
location [=|~|~*|!~|!~*|^~] /uri/ {module;module;}
- = 表示精确匹配,优先级也是最高的
- ~ 区分大小写的正则匹配
- ~* 不区分大小写的正则匹配
- / 通用匹配,任何请求都会匹配到
- ^~ 以某些字符串开头
- !~ 非(区分大小写匹配的正则)
- !~* 非(不区分大小写匹配的正则)
优先级
= 优先于 ^~ 优先于 ~| ~* | !~ | !~* 优先于 /
精确匹配>字符开头>正则匹配>通配
八--Nginx rewrite
nginx rewrite又叫nginx URL重写
什么是nginx URL重写
1.什么是rewrite
- URL Rewrite最常见的应用是URL伪静态化,是将动态页面显示为静态页面方式的一种技术。比如http://www.123.com/news/index.php?id=123 使用URLRewrite 转换后可以显示为 http://www.123
.com/news/123.html对于追求完美主义的网站设计师,就算是网页的地址也希望看起来尽量简洁明快。
理论上,搜索引擎更喜欢静态页面形式的网页,搜索引擎对静态页面的评分一般要高于动态页面。所
以,UrlRewrite可以让我们网站的网页更容易被搜索引擎所收录。- 从安全角度上讲,如果在URL中暴露太多的参数,无疑会造成一定量的信息泄漏,可能会被一些黑客
利用,对你的系统造成一定的破坏,所以静态化的URL地址可以给我们带来更高的安全性。- 实现网站地址跳转,例如用户访问360buy.com,将其跳转到jd.com。
rewrite相关指令
重定向
rewrite将用户的访问(url),更换成指定的文件。
if 语句
应用位置:server,location语法:if (condition) { … }
条件判断
| 符号 | 含义 |
|---|---|
| ~* | 正则匹配 (不区分大小写) |
| !~ | 非正则匹配 (区分大小写) |
| !~* | 非正则 匹配 (不区分大小写) |
| -f 和!-f | 用来判断是否存在文件 |
| -d 和!-d | 用来判断是否存在目录 |
| -e 和!-e | 用来判断是否存在文件或目录 |
| -x 和!-x | 用来判断文件是否可执行 |
全局变量
| 变量 | 含义 |
|---|---|
| $document_root | 针对当前请求的根路径设置值 |
| $remote_addr | 客户端地址 |
| $request_filename | 当前请求的文件路径名(带网站的主目录/usr/local/nginx/html/images/a.jpg) |
| $request_uri | 当前请求的文件路径名(不带网站的主目录/images/a.jpg) |
| $scheme | 用的协议,比如http或者是https |
| $server_name | 请求到达的服务器名 |
| $args | 请求中的参数 |
| $host | 请求信息中的"Host",如果请求中没有Host行,则等于设置的服务器名 |
| $limit_rate | 对连接速率的限制 |
| $request_method | 请求的方法,比如"GET"、"POST"等 |
| $remote_port | 客户端端口号 |
| $remote_user | 客户端用户名,认证用 |
| $query_string | 与$args相同 |
| $server_protocol | 请求的协议版本,"HTTP/1.0"或"HTTP/1.1" |
| $server_addr | 服务器地址,如果没有用listen指明服务器地址,使用这个变量将发起一次系统调用以取得地址(造成资源浪费) |
| $document_uri | 与$uri一样,URI地址 |
| $server_port | 请求到达的服务器端口号 |
rewrite flag
每行rewrite指令最后跟一个flag标记,支持的flag标记有:
last #停止处理当前ngx_http_rewrite_module,从指令之后的一个新的位置改变URI匹配搜索;break #本条规则匹配完成后,终止匹配,不再匹配后面的规则redirect #返回302临时重定向,浏览器地址会显示跳转后的URL地址redirect url permanent #返回301永久重定向,浏览器地址会显示跳转后URL地址
redirect 和 permanent区别则是返回的不同方式的重定向,对于客户端来说一般状态下是没有区别的。而对于搜索引擎,相对来说301的重定向更加友好
如果我们把一个地址采用301跳转方式跳转的话,搜索引擎会把老地址的相关信息带到新地址,同时在搜索引擎索引库中彻底废弃掉原先的老地址。使用302重定向时,搜索引擎(特别是google)有时会查看跳转前后哪个网址更直观,然后决定显示哪个,如果它觉的跳转前的URL更好的话,也许地址栏不会更改,那么很有可能出现URL劫持的现像。
rewrite匹配参考示例
案例1
目的:站内跳转,当用户访问http://192.168.100.10/abc/a/1.html 地址时,
通过redirect 重定向至http://192.168.100.10/ccc/bbb/2.html
注意:
192.168.100.10/abc/a/1.html是否存在已经不重要了
192.168.100.10/ccc/bbb/2.html页面必须存在
1.还还原默认站点,把之前实验的环境都还原
#卸载nginx,这样快一点[root@192 ~]# yum remove -y nginx#重新安装nginx[root@192 ~]# yum -y install nginx#清除网页主目录[root@192 ~]# rm -rf /usr/share/nginx/html/*#只设置一个主页文件[root@192 ~]# vim /usr/share/nginx/html/index.html写上下行内容,可以随便写/usr/share/nginx/html/index.html#重启nginx[root@192 ~]# systemctl restart nginx#访问页面,设置默认主页成功[root@192 ~]# curl 192.168.200.147/usr/share/nginx/html/index.html
2.配置地址重写
#创建abc/a/1.html和ccc/bbb/2.html并添加内容[root@192 ~]# cd /usr/share/nginx/html/[root@192 html]# mkdir -p abc/a[root@192 html]# echo "abc/a/1.html" > abc/a/1.html[root@192 html]# mkdir -p ccc/bbb[root@192 html]# echo "ccc/bbb/2.html" >ccc/bbb/2.html[root@192 html]# cat abc/a/1.html ccc/bbb/2.htmlabc/a/1.htmlccc/bbb/2.html
2.在nginx配置文件里配置rewrite
[root@192 ~]# vim /etc/nginx/nginx.confserver {#找到server在下面写上以下内容,固定格式。location /abc {rewrite .* /ccc/bbb/2.html permanent; #匹配请求中的“abc”字段将请求中的url换成新的url}#重启nginx[root@192 ~]# systemctl restart nginx
3.访问旧页面进行测试,就是访问/abc/a/1.html
[root@192 ~]# curl 192.168.200.147/abc/a/1.htmlccc/bbb/2.html#访问的是1.html,显示的是2.html重定向成功,实验完毕
4.关于permanent
permanent会将地址显示为新的URL地址(也就是重定向之后的URL),一般都要添加
不添加permanent的结果,URL还是老的,服务器内部转换请求,服务器内部转换URL,内部转换URL

添加permanent的结果,URL被替换,生成两次请求,服务器只转换了URL,客户端重新申请

5.请思考表达式问题1
加个=,精确匹配
[root@192 ~]# vim /etc/nginx/nginx.conflocation = /abc { #加个=,精确匹配#访问结果,不会被重定向,不可行[root@192 ~]# curl 192.168.200.147/abc/a/1.htmlabc/a/1.html
加个~,通过htpp://192.168.200.147/abc/a/1.html访问服务器,结果会重定向,可行
加个^~,通过htpp://192.168.200.147/abc/a/1.html访问服务器,结果会重定向,可行
6.请思考表达式问题2
设置location ~ /abc
用户访问http://192.168.200.147/cde/abc/a/1.html,结果会重定向,因为只要含有abc就行
如何阻止这样的URL重定向
设置location ~ ^/abc,只要是abc开头就可以
示例2
利用正则中的()和\1,替换URL中一部分的内容,将http://192.168.200.147/2016/a/b/c/1.html,换成http://192.168.200.147/2017/a/b/c/1.html
方法:location /2016 {rewrite ^/2016/(.*)$1 permanent;}
1.注释掉上个实验的重定向部分,避免实验出现交叉影响
[root@192 ~]# vim /etc/nginx/nginx.confserver {#location ~ ^/abc {#rewrite .* /ccc/bbb/2.html permanent;#}
2.配置地址重写
#准备目标目录[root@192 ~]# mkdir /usr/share/nginx/html/2017/a/b/c -p#准备目标页面[root@192 ~]# echo "2017/a/b/c/1.html" > /usr/share/nginx/html/2017/a/b/c/1.html#修改配置文件[root@192 ~]# vim /etc/nginx/nginx.confserver {#添加以下内容location /2016 {rewrite ^/2016/(.*)$ /2017/$1;}#location ~ ^/abc {#rewrite .* /ccc/bbb/2.html permanent;#}#重启nginx[root@192 ~]# systemctl restart nginx
3.访问旧页面进行测试,没加permanent
[root@192 ~]# curl 192.168.200.147/2016/a/b/c/1.html2017/a/b/c/1.html
示例3
目的:了解判断在重定向中的使用方法
location{rewrite}只能替换URL中的目录路径,使用if (){rewrite}可以替换协议主机目录全部内容。将http://www.xushengkai.com换成http://jd.com
1.注释掉上个实验中添加的部分
[root@192 ~]# vim /etc/nginx/nginx.confserver {#location /2016 {#rewrite ^/2016/(.*)$ /2017/$1;#}
2.配置地址重写
[root@192 ~]# vim /etc/nginx/nginx.confserver {#$host调用主机地址,如果像是xushengkai.com的时候(不区分大小写),那么进行重写,都去访问www.jd.comif ( $host ~* xushengkai.com ) {rewrite .* http://jd.com permanent;}#重启nginx[root@192 ~]# systemctl restart nginx#在主机上设置域名解析127.0.0.1 localhost localhost.localdomain localhost4 localhost4.localdomain4::1 localhost localhost.localdomain localhost6 localhost6.localdomain6192.168.200.147 www.xushengkai.com
3.访问旧页面
打开浏览器,输入www.xushengkai.com,回车以后跳转到京东的页面,实验成功
示例4
前言:上一个实验中,不论输入的URL中内容是什么:http://xushengkai.com/1.html或者http://xushengkai/2.html,其结果都是把主机地址由xushengkai.com换成jd.com,$request全部都重定向至http://jd.com/1.html和http://jd.com/2.html
目的:如果希望替换掉域名中的主机,保留后端url路径,可以使用nginx内置变量调用老的URL路径
示例:将http://xushengkai.com/ccc/bbb/2.html换成http://cloud.com/ccc/bbb/2.html
也就是只替换主机地址,跟上一个实验很相似
1.延续上一个实验
#准备一个新的网站[root@192 ~]# vim /etc/nginx/conf.d/cloud.confserver {listen 80;server_name cloud.com;location / {root /cloud;index index.html;}}#重启nginx[root@192 ~]# systemctl restart nginx#准备新页面[root@192 ~]# mkdir /cloud[root@192 ~]# vim /cloud/index.htmlcloud.com #页面内容[root@192 ~]# mkdir /cloud/ccc/bbb -p[root@192 ~]# vim /cloud/ccc/bbb/2.html/cloud/ccc/bbb/2.html #页面内容#设置域名解析[root@192 ~]# vim /etc/hosts127.0.0.1 localhost localhost.localdomain localhost4 localhost4.localdomain4::1 localhost localhost.localdomain localhost6 localhost6.localdomain6192.168.200.147 xushengkai.com cloud.com
2.配置地址重写
#将上个实验jd的内容注释掉,添加以下内容[root@192 ~]# vim /etc/nginx/nginx.confserver {if ( $host ~* xushengkai.com ) {rewrite .* http://cloud.com$request_uri permanent;} #用户只要访问xushengkai.com不管是哪个内容,域名重写为 http://cloud.com,请求的地址还是用户之前输入的地址#if ( $host ~* xushengkai.com ) {#rewrite .* http://jd.com;#}#重启nginx[root@192 ~]# systemctl restart nginx
3.访问旧的页面测试
[root@192 ~]# curl xushengkai.com/ccc/bbb/2.html/cloud/ccc/bbb/2.html
示例5
目的:在访问URL是目录时,在URL自动添加一个“/”,如果不是目录,则不添加“/”。但是先做个判断,是目录才需要添加,不是目录就不添加
本示例是一个美化的例子
1.输入的URL是目录时,自动添加“/”http://wwwbaidu.com/abc2.输入的URL是文件时,不添加“/”http:://www.baidu.com/abc/index.html3.输入的URL是目录,但已经添加“/”时,不自动添加“/”http://www.baidu.com/abc/
语法
if ( -d $request_filename ) {rewrite ^(.*)([^/])$ http:://$host$1$2/ permanent;}
1.注释掉上个实验的内容
[root@xushengkai ~]# vim /etc/nginx/nginx.confserver {#if ( $host ~* xushengkai.com ) {#rewrite .* http://cloud.com$request_uri permanent;#}#把之前的实验的配置文件删除,不然后面会报错[root@xushengkai html]# rm -rf /etc/nginx/conf.d/cloud.conf
2.配置地址重写
[root@xushengkai ~]# vim /etc/nginx/nginx.confserver {if ( -d $request_filename ) {rewrite ^(.*)([^/])$ http://$host$1$2/ permanent;} # [^/]排除的意思listen 80;listen [::]:80;server_name xushengkai.com; #将默认网站改为xushengkai.comroot /usr/share/nginx/html;# Load configuration files for the default server block.include /etc/nginx/default.d/*.conf;location / {index index.html;} #设置默认页面#设置主页索引文件,如果主页不设置索引文件,会报错403[root@xushengkai ~]# vim /usr/share/nginx/html/ccc/bbb/index.htmlccc/bbb/index.html#重启nginx[root@xushengkai ~]# systemctl restart nginx
3.访问页面进行测试
打开浏览器输入http://www.xushengkai.com/ccc/bbb,浏览器会将后面加“/”,输入http://www.xushengkai.com/index.html,浏览器不会添加“/”。只要是目录就加,后面加了“/”,浏览器不会帮我们加“/”
示例6(了解)
目的:将旧的URL的字段,引入重定向后新的URL中
http://www.xushengkai/login/haha.html
转为http://www.xushengkai/reg/login.php?user=haha
语法:location /login {rewrite ^/login/(.*)\.html$ /reg/login.php?user=$1} #以login开头,中间任意()方便后面调用,以.html结尾 替换成/reg/login.php?user=$1
因需要动态站点环境,理解概念即可
示例7
目的:目录的表达形式发生了变化。原先的“-”分割,变成了“/”目录层次
将http://www.xushengkai/aa/11-22-33/1.html
转换为将http://www.xushengkai/aa/11/22/33/1.html
语法:location /aa {rewrite ^/aa/([0-9]+)-([0-9]+)-([0-9]+)(.*)$ /aa/$1/$2/$3$4 permanent;}
1.将上个实验的配置内容注释掉
[root@xushengkai ~]# vim /etc/nginx/nginx.conf#if ( -d $request_filename ) {#rewrite ^(.*)([^/])$ http://$host$1$2/;#}
2.配置地址重定向
[root@xushengkai ~]# vim /etc/nginx/nginx.confserver {location /aa {rewrite ^/aa/([0-9]+)-([0-9]+)-([0-9]+)(.*)$ /aa/$1/$2/$3$4 permanent;root /usr/share/nginx/html;}#准备aa/11/22/33目录[root@xushengkai ~]# mkdir -p /usr/share/nginx/html/aa/11/22/33[root@xushengkai ~]# echo "/usr/share/nginx/html/aa/11/22/33/1.html" >/usr/share/nginx/html/aa/11/22/33/1.html#重启nginx[root@xushengkai ~]# systemctl restart nginx
3.访问页面进行测试
打开浏览器访问http://xushengkai.com/aa/11-22-33/1.html,显示内容/usr/share/nginx/html/aa/11/22/33/1.html,设置成功
示例8
目的:引用原URL中的信息,重定向至目标的URL
语法:if ( $host ~* "^www.xushengkai.com$" ) {break;}if ($host ~*\.xushengkai.com$) {set $user $1;rewrite .* http://www.xushengkai.com/$user permanent;}
1.注释掉上个实验的配置内容
[root@xushengkai ~]# vim /etc/nginx/nginx.confserver {#location /aa {#rewrite ^/aa/([0-9]+)-([0-9]+)-([0-9]+)(.*) /aa/$1/$2/$3$4 permanent;#root /usr/share/nginx/html;#}
2.配置地址重写
[root@xushengkai ~]# vim /etc/nginx/nginx.confserver {if ( $host ~* "^www.xushengkai.com$" ) {break;}#参数解释:如果请示的主机像是以www.xushengkai.com结尾的,停止匹配if ( $host ~* "(.*)\.xushengkai\.com$" ){set $user $1;rewrite .* http://www.xushengkai.com/$user permanent;}#参数解释:如果请求的地址$host像是xushengkai.com,那就进行rewrite,#重启nginx[root@xushengkai ~]# systemctl restart nginx#在网站的主目录中创建两个新目录[root@xushengkai ~]# mkdir /usr/share/nginx/html/{jack,alice}#jcak的主页[root@xushengkai ~]# echo "is jack" > /usr/share/nginx/html/jack/index.html#alice的主页[root@xushengkai ~]# echo "is alice" > /usr/share/nginx/html/alice/index.html#在主机上设置域名解析192.168.200.147 www.xushengkai.com jack.xushengkai.com alice.xushengkai.com
3.访问页面进行测试
打开浏览浏览器访问alice.xushengkai.com
打开浏览器访问jack.xushengkai.com
示例9
目的:如果服务器中的特殊文件,如.sh结尾的文件,则返回403操作拒绝
1.在网页主目录下创建.sh结尾的文件,在网页中测试
[root@xushengkai ~]# cd /usr/share/nginx/html/[root@xushengkai html]# echo 111 > 1.sh#打开浏览器访问http://192.168.200.147/1.sh
2.在配置文件中设置不可访问
[root@xushengkai ~]# vim /etc/nginx/nginx.confserver {location ~* \.sh$ {return 403;}#重启nginx[root@xushengkai ~]# systemctl restart nginx
3.再次访问页面,权限拒绝
示例10
目的:last标记
1.准备3个页面
[root@xushengkai html]# mkdir test[root@xushengkai html]# echo "break" > test/break.html[root@xushengkai html]# echo "last" > test/last.html[root@xushengkai html]# echo "test" > test/test.html
2.打开网站的主配置文件,填写测试语句
[root@xushengkai ~]# vim /etc/nginx/nginx.confserver {location /break {rewrite .* /test/break.html break;}#用户的此次访问被重定向之后,将停止所有的匹配location /last {rewrite .* /test/last.html last;}#last在匹配成功后,不会进行立刻显示,显示下一个location /test {rewrite .* /test/test.html break;}#test测试页面#重启nginx[root@xushengkai ~]# systemctl restart nginx
3.测试页面
访问http://192.168.200.147/last,会显示test页面内容
九--CA&HTTPS
私有CA
前言
CA 证书颁发机构(CA, Certificate Authority)
基于https的协议工作的一中虚拟主机,要构建这样的网站需要mod_ssl模块的支持。且需要提供两个文件:证书文件和私钥文件,证书文件是标识这个网站服务器身份的,私钥文件主要用来实现在服务器端对数据进行加密,然后在网站中传输的。证书在生产生活中需要到对应的机构去申请,在实验环境中本应该搭建一台证书服务器.
生成证书及秘钥文件
1.准备存放证书和秘钥文件
[root@xushengkai ~]# mkdir /etc/nginx/ssl
2.生成私钥,使用openssl生成基于rsa数学算法长度为1024bit的秘钥,文件必须以key结尾
[root@xushengkai ~]# openssl genrsa 1024 > /etc/nginx/ssl/server.keyGenerating RSA private key, 1024 bit long modulus.......................................++++++.....++++++e is 65537 (0x10001)
3.使用秘钥文件生成证书-申请书
[root@xushengkai ~]# openssl genrsa 1024 > /etc/nginx/ssl/server.keyGenerating RSA private key, 1024 bit long modulus.......................................++++++.....++++++e is 65537 (0x10001)[root@xushengkai ~]# openssl req -new -key /etc/nginx/ssl/server.key >/etc/nginx/ssl/server.csrYou are about to be asked to enter information that will be incorporatedinto your certificate request.What you are about to enter is what is called a Distinguished Name or a DN.There are quite a few fields but you can leave some blankFor some fields there will be a default value,If you enter '.', the field will be left blank.-----Country Name (2 letter code) [XX]:cnState or Province Name (full name) []:BJLocality Name (eg, city) [Default City]:BJOrganization Name (eg, company) [Default Company Ltd]:SKOrganizational Unit Name (eg, section) []:CLOUDCommon Name (eg, your name or your server's hostname) []:LNMPEmail Address []:111.1Please enter the following 'extra' attributesto be sent with your certificate requestA challenge password []:An optional company name []:#查看证书[root@xushengkai ~]# ls /etc/nginx/ssl/server.csr server.key
4.同意申请,生成证书
[root@xushengkai ~]# openssl req -x509 -days 365 -key /etc/nginx/ssl/server.key -in /etc/nginx/ssl/server.csr > /etc/nginx/ssl/server.crt#参数解释:-x 509:证书的格式。固定的-days :证书的有效期,固定的-key:指定秘钥文件-in:指定证书申请文件#查看证书[root@xushengkai ~]# ls /etc/nginx/ssl/server.crt server.csr server.key
私有CA的https部署实战
1.创建网页目录
[root@xushengkai ~]# mkdir /bj[root@xushengkai ~]# echo "bj id ssl web" > /bj/index.html[root@xushengkai ~]# vim /etc/nginx/conf.d/bj.confserver {listen 80;server_name www.bj.com;location / {root /bj;index index.html;}}#重启nginx[root@xushengkai ~]# systemctl restart nginx
2.在主机上设置域名解析,访问页面,此时还不是加密访问
192.168.200.147 www.bj.com
3.修改bj页面的配置文件,设置端口,加密文件的位置
[root@xushengkai ~]# vim /etc/nginx/conf.d/bj.confserver {listen 443 ssl;server_name www.bj.com;ssl_certificate /etc/nginx/ssl/server.crt;ssl_certificate_key /etc/nginx/ssl/server.key;location / {root /bj;index index.html;}}#重启nginx[root@xushengkai ~]# systemctl restart nginx#查看443端口[root@xushengkai ~]# ss -anp | grep 443tcp LISTEN 0 128 *:443 *:* users:(("nginx",pid=7451,fd=6),("nginx",pid=7450,fd=6),("nginx",pid=7449,fd=6))
4.测试访问https://www.bj.com
继续访问
公网CA构建阿里云服务器https服务
在阿里云上操作
十--Nginx的平滑升级
前言
随着 Nginx 越来越流行,并且 Nginx 的优势也越来越明显,Nginx 的版本迭代也开起了加速模式。新版本也带来了新的功能,例如 stream 四层代理功能等,伴随着 Nginx 的广泛应用,版本升级必然越来越快。一般有两种情况下需要升级 Nginx:一种是确实要升级 Nginx 的版本,另一种是要为 Nginx 添加新的模块。
原理
- 在不停掉老进程的情况下,启动新进程。
- 老进程负责处理仍然没有处理完的请求,但不再接受处理请求。
- 新进程接受新请求。
- 老进程处理完所有请求,关闭所有连接后,停止。
