@Heath
2015-10-22T14:14:56.000000Z
字数 4290
阅读 1645
实验一 基本 UI 界面设计
安卓实验报告
【实验目的】
- 熟悉 Android Studio 开发工具操作
- 熟悉 Android 基本 UI 开发,并进行 UI 基本设计
【实验内容】
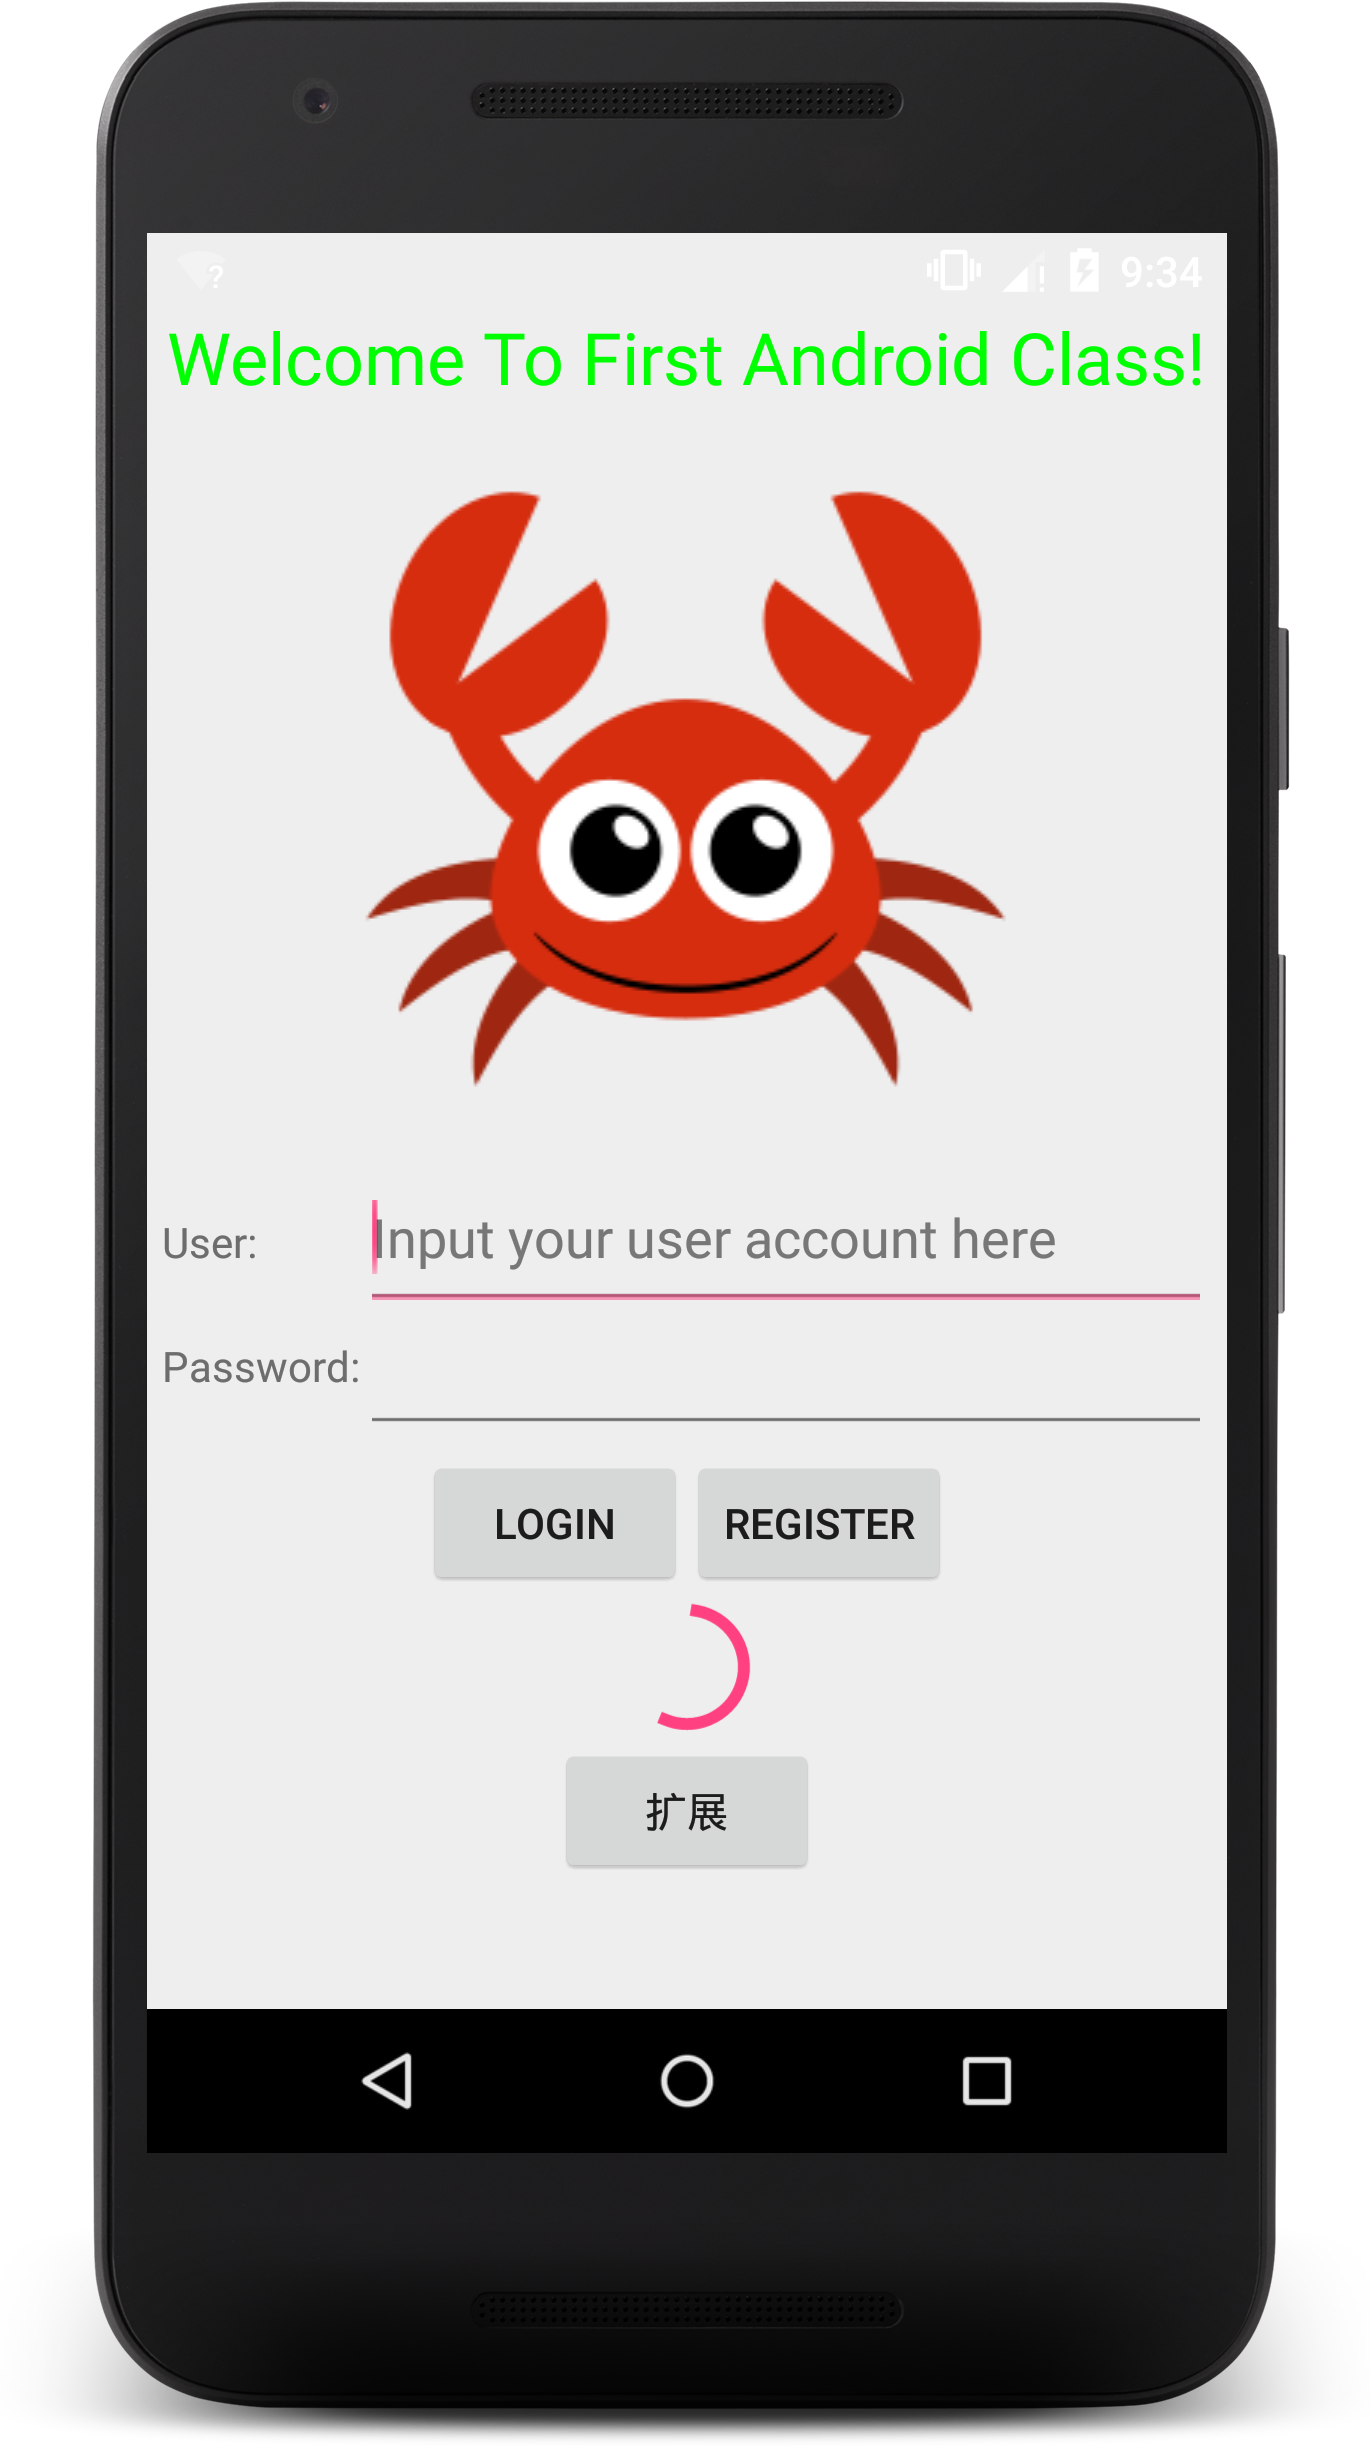
实现如图 Android应用,实现如下显示效果(暂不要求控件点击事件效果)
界面分析:
整体界面布局为LinearLayout<LinearLayout xmlns:android="http://schemas.android.com/apk/res/android"android:orientation="vertical"android:layout_width="match_parent"android:layout_height="match_parent"></LinearLayout>
界面最顶部是一个
TextView<TextViewandroid:layout_width="wrap_content"android:layout_height="wrap_content"android:text="Welcome To First Android Class!"android:layout_gravity="center"android:textColor="#00ff00"android:textSize="24sp"/>
下面是一张图片,由
ImagView实现<ImageViewandroid:layout_width="wrap_content"android:layout_height="wrap_content"android:src="@drawable/crab"android:layout_gravity="center"/>
用户名、密码部分可以用
TableView来完成,密码输入框设置android:inputType="textPassword",<TableLayoutandroid:layout_width="match_parent"android:layout_height="wrap_content"android:layout_margin="5dp"><TableRow><TextViewandroid:layout_width="wrap_content"android:layout_height="wrap_content"android:text="User:"/><EditTextandroid:layout_width="0dp"android:layout_height="wrap_content"android:layout_weight="1"android:hint="Input your user account here"/></TableRow><TableRow><TextViewandroid:layout_width="wrap_content"android:layout_height="wrap_content"android:text="Password:"/><EditTextandroid:layout_width="0dp"android:layout_height="wrap_content"android:layout_weight="1"android:inputType="textPassword"/></TableRow></TableLayout>
为了下面两个按钮居中,用
LinearLayout进行包裹,嵌套在根布局中<LinearLayoutandroid:layout_width="wrap_content"android:layout_height="wrap_content"android:layout_gravity="center"><Buttonandroid:layout_width="wrap_content"android:layout_height="wrap_content"android:text="Login"/><Buttonandroid:layout_width="wrap_content"android:layout_height="wrap_content"android:text="Register"/></LinearLayout>
最下方的进度条由
ProcessBar实现,注意设置style<ProgressBarandroid:layout_width="wrap_content"android:layout_height="wrap_content"android:max="100"style="?android:attr/progressBarStyle"android:layout_gravity="center"/>
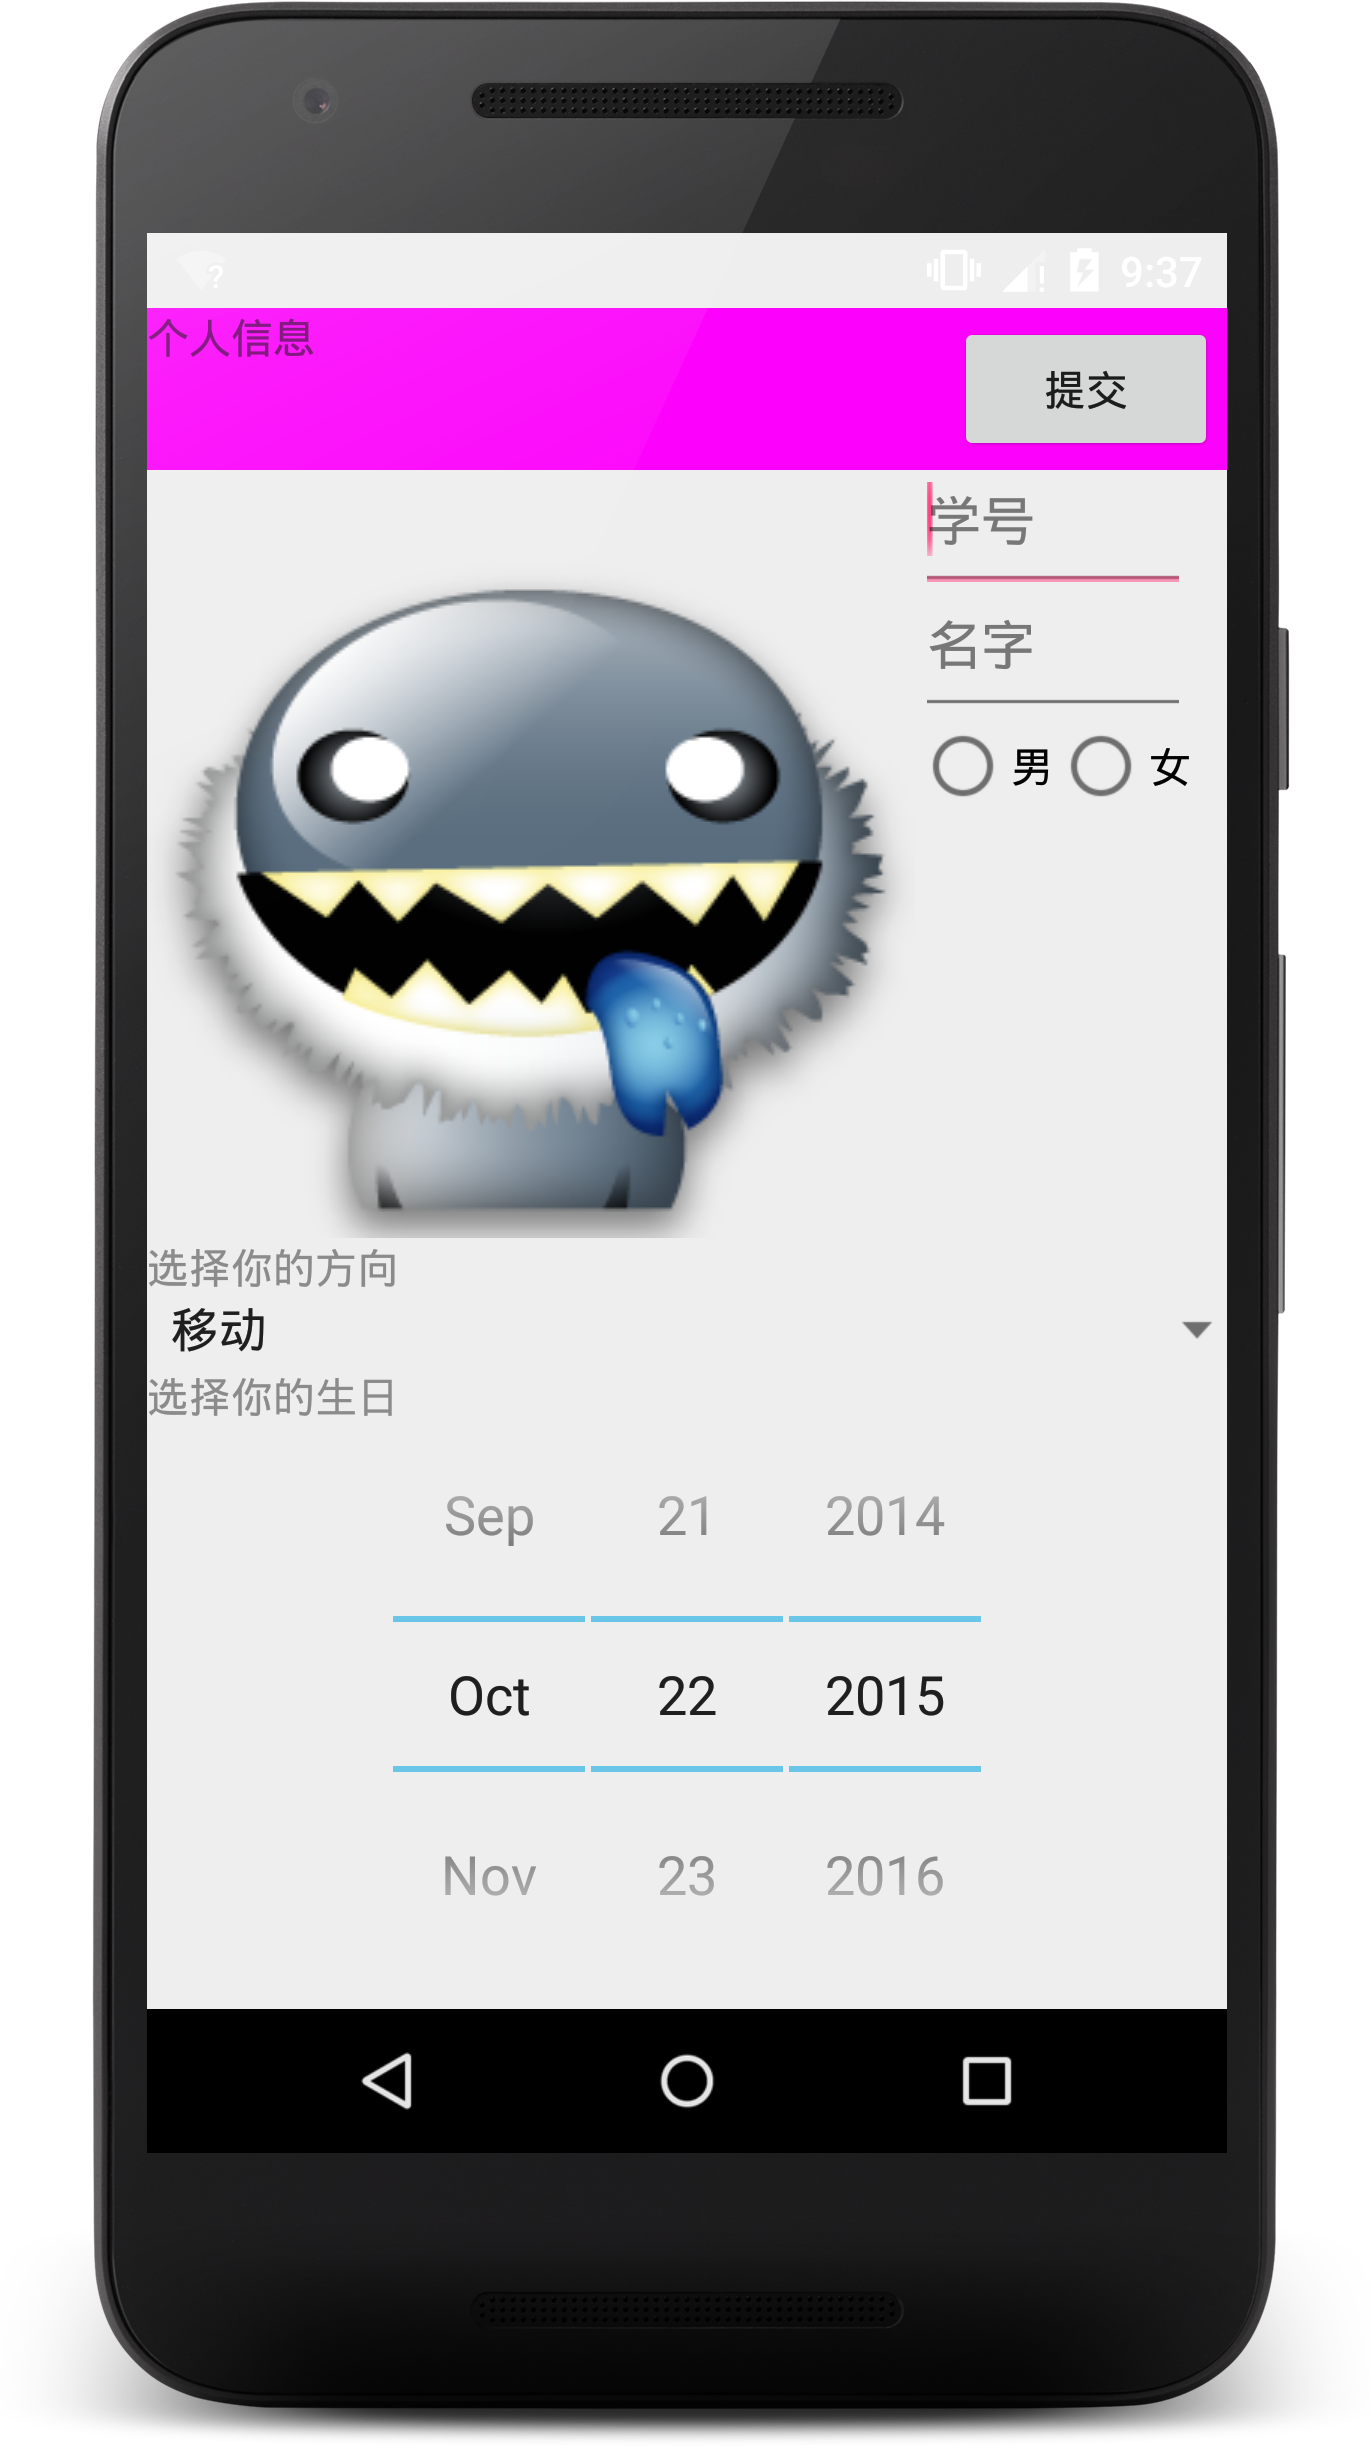
扩展部分
界面分析:
整体还是采用LinearLayout<LinearLayout xmlns:android="http://schemas.android.com/apk/res/android"android:orientation="vertical"android:layout_width="match_parent"android:layout_height="match_parent"></LinearLayout>
顶部的文字和按钮用
RelativeLayout来布局,设置背景颜色android:background="#fc01fb",按钮设置布局android:layout_alignParentRight="true"<RelativeLayoutandroid:layout_width="wrap_content"android:layout_height="wrap_content"android:background="#fc01fb"><TextViewandroid:layout_width="wrap_content"android:layout_height="wrap_content"android:text="个人信息"android:layout_alignParentLeft="true"/><Buttonandroid:layout_width="wrap_content"android:layout_height="wrap_content"android:text="提交"android:layout_alignParentRight="true"android:layout_margin="3dp"android:id="@+id/submit_button"/></RelativeLayout>
图片和右侧表格、单选按钮使用
LinearLayout嵌套TableLayout实现,单选按钮组件为RadioButton<LinearLayoutandroid:layout_width="wrap_content"android:layout_height="wrap_content"><ImageViewandroid:layout_width="wrap_content"android:layout_height="wrap_content"android:src="@drawable/avatar"/><TableLayoutandroid:layout_width="wrap_content"android:layout_height="wrap_content"android:orientation="vertical"><TableRow><EditTextandroid:layout_width="wrap_content"android:layout_height="wrap_content"android:hint="学号"/></TableRow><TableRow><EditTextandroid:layout_width="wrap_content"android:layout_height="wrap_content"android:hint="名字"/></TableRow><TableRow><RadioGroupandroid:layout_width="wrap_content"android:layout_height="wrap_content"android:orientation="horizontal"><RadioButtonandroid:layout_width="wrap_content"android:layout_height="wrap_content"android:text="男"/><RadioButtonandroid:layout_width="wrap_content"android:layout_height="wrap_content"android:text="女"/></RadioGroup></TableRow></TableLayout></LinearLayout>
列表选项为
Spinner,数据项在arrays.xml文件中定义<Spinnerandroid:layout_width="match_parent"android:layout_height="wrap_content"android:entries="@array/info"/>
<?xml version="1.0" encoding="utf-8"?><resources><string-array name="info"><item>移动</item><item>软院</item><item>管理</item><item>政务</item><item>环境</item></string-array></resources>
日期选取由
DatePicker实现、<DatePickerandroid:layout_width="match_parent"android:layout_height="wrap_content"style="@android:style/Widget.DatePicker"></DatePicker>
【实验结果】
单击扩展按钮可跳转到扩展界面,在扩展界面单击提交可返回原界面


【实验参考】
《第一行代码:Android》第三章 郭霖
