@boothsun
2017-11-19T05:06:39.000000Z
字数 4789
阅读 2289
sharding-JDBC 实现读写分离
中间件
需求
- 一主两从,做读写分离。
- 多个从库之间实现负载均衡。
- 可手动强制部分读请求到主库上。(因为主从同步有延迟,对实时性要求高的系统,可以将部分读请求也走主库)
本次不讨论 MySQL如何配置主从同步相关问题
库表SQL
-- 主库CREATE DATABASE `master`;CREATE TABLE `t_order` (`order_id` int(11) NOT NULL,`user_id` int(11) NOT NULL,`business_id` int(4) DEFAULT NULL,PRIMARY KEY (`order_id`)) ENGINE=InnoDB DEFAULT CHARSET=utf8;INSERT INTO `t_order` VALUES (1,1,112);-- 从库1CREATE DATABASE `slave1` ;CREATE TABLE `t_order` (`order_id` int(11) NOT NULL,`user_id` int(11) NOT NULL,`business_id` int(4) DEFAULT NULL,PRIMARY KEY (`order_id`)) ENGINE=InnoDB DEFAULT CHARSET=utf8 ;INSERT INTO `t_order` VALUES (2,2,112);-- 从库2CREATE DATABASE `slave2` ;CREATE TABLE `t_order` (`order_id` int(11) NOT NULL,`user_id` int(11) NOT NULL,`business_id` int(4) DEFAULT NULL,PRIMARY KEY (`order_id`)) ENGINE=InnoDB DEFAULT CHARSET=utf8;INSERT INTO `t_order` VALUES (3,3,112);
pom.xml
<!-- https://mvnrepository.com/artifact/io.shardingjdbc/sharding-jdbc-core --><dependency><groupId>io.shardingjdbc</groupId><artifactId>sharding-jdbc-core</artifactId><version>2.0.0.M2</version></dependency><dependency><groupId>io.shardingjdbc</groupId><artifactId>sharding-jdbc-spring-namespace</artifactId><version>2.0.0.M2</version></dependency>
spring配置文件
<bean id="master" class="com.alibaba.druid.pool.DruidDataSource" init-method="init"destroy-method="close"><property name="driverClassName" value="com.mysql.jdbc.Driver"/><property name="url" value="${jdbc.url.master}"></property><property name="username" value="${jdbc.username.master}"></property><property name="password" value="${jdbc.password.master}"></property><property name="maxActive" value="100"/><property name="initialSize" value="10"/><property name="maxWait" value="60000"/><property name="minIdle" value="5"/></bean><bean id="slave1" class="com.alibaba.druid.pool.DruidDataSource" init-method="init"destroy-method="close"><property name="driverClassName" value="com.mysql.jdbc.Driver"/><property name="url" value="${jdbc.url.slave1}"></property><property name="username" value="${jdbc.username.slave1}"></property><property name="password" value="${jdbc.password.slave1}"></property><property name="maxActive" value="100"/><property name="initialSize" value="10"/><property name="maxWait" value="60000"/><property name="minIdle" value="5"/></bean><bean id="slave2" class="com.alibaba.druid.pool.DruidDataSource" init-method="init"destroy-method="close"><property name="driverClassName" value="com.mysql.jdbc.Driver"/><property name="url" value="${jdbc.url.slave2}"></property><property name="username" value="${jdbc.username.slave2}"></property><property name="password" value="${jdbc.password.slave2}"></property><property name="maxActive" value="100"/><property name="initialSize" value="10"/><property name="maxWait" value="60000"/><property name="minIdle" value="5"/></bean><bean id="randomStrategy" class="io.shardingjdbc.core.api.algorithm.masterslave.RandomMasterSlaveLoadBalanceAlgorithm" /><master-slave:data-source id="shardingDataSource" master-data-source-name="master" slave-data-source-names="slave1,slave2" strategy-ref="randomStrategy" />
单测
写:
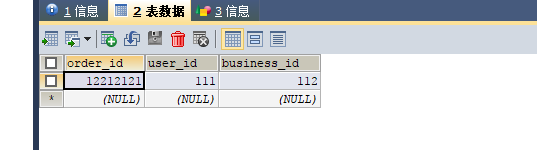
@Testpublic void insert() throws Exception {Order record = new Order();record.setBusinessId(112);record.setUserId(111);record.setOrderId(12212121);int result = orderMapper.insertSelective(record) ;System.out.println( result > 0 ? "插入成功" : "插入失败");}
运行结果:
查:
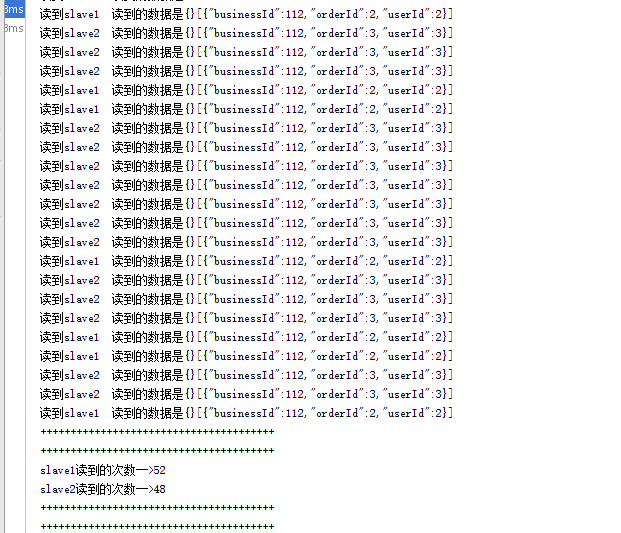
slave1 只有1条数据,主键order_id = 2 ; slave2 也只有1条数据,主键order_id = 3 。所以,如果查询到的结果orderId等于1就说明读请求进入到slave1,同理,如果查询出来的orderId等于0 就说明读请求进入到slave2。
public void selectByExample3() throws Exception {final int[] slave1 = {0};final int[] slave2 = {0};for (int i = 0; i < 100; i++) {((Runnable) () -> {OrderExample example = new OrderExample();example.createCriteria().andBusinessIdEqualTo(112);List<Order> orderList = orderMapper.selectByExample(example);if (orderList.get(0).getOrderId() == 2) {System.out.printf("读到slave1 读到的数据是{}", JSONObject.toJSONString(orderList.get(0)));slave1[0]++;} else if (orderList.get(0).getOrderId() == 3) {System.out.printf("读到slave2 读到的数据是{}", JSONObject.toJSONString(orderList.get(0)));slave2[0]++;}System.out.println(JSONObject.toJSONString(orderList));}).run();}System.out.println("+++++++++++++++++++++++++++++++++++++++");System.out.println("+++++++++++++++++++++++++++++++++++++++");System.out.println("slave1读到的次数-->" + slave1[0]);System.out.println("slave2读到的次数-->" + slave2[0]);System.out.println("+++++++++++++++++++++++++++++++++++++++");System.out.println("+++++++++++++++++++++++++++++++++++++++");}
运行截图:
强制路由
通常做读写分离,都会遇到的一个问题就是主从同步延迟。有时,为了简单解决主从同步问题,我们会想强制部分读请求到主库上,而非从库上。
HintManager 分片键值管理器
官方文档的解释:
基于暗示(Hint)的分片键值管理器
但是对于读写分离这种形式的强制路由 , 其实官方文档说的几个方法都不适用. 我们可使用hintManager.setMasterRouteOnly() .
单测
@Testpublic void HintManagerTest() {HintManager hintManager = HintManager.getInstance() ;hintManager.setMasterRouteOnly();OrderExample example = new OrderExample();example.createCriteria().andBusinessIdEqualTo(112);List<Order> orderList = orderMapper.selectByExample(example);System.out.println(JSONObject.toJSONString(orderList));hintManager.close();}
