@gzm1997
2017-12-05T06:53:53.000000Z
字数 2019
阅读 1263
数字媒体技术作业2
树媒技术基础作业
郭柱明 15331094
实验环境
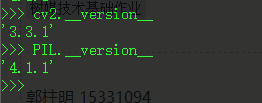
opencv版本为3.3.1,PIL版本为4.1.1
实验步骤
import相关模块opencv
import cv2from PIL import Image
读取图片为rgb数组,用作第一次轮廓检测
im = cv2.imread('patch.jpg')
转为灰度矩阵,用以二值化
imgray = cv2.cvtColor(im, cv2.COLOR_BGR2GRAY)
进行二值化
ret, thresh = cv2.threshold(imgray, 169, 255, 0)
使用进行了二值化的矩阵进行轮廓检测
im2, contours, hierarchy = cv2.findContours(thresh, cv2.RETR_TREE, cv2.CHAIN_APPROX_SIMPLE)
在原图中画出轮廓,画迹宽度为3
cv2.drawContours(im, contours, -1, (0,255,0), 3)
对画出了轮廓了的图像矩阵进行第二次轮廓检测(这样检测出来的轮廓才是连续的)
转为灰度矩阵
imgray = cv2.cvtColor(im, cv2.COLOR_BGR2GRAY)
第二次二值化
ret, thresh = cv2.threshold(imgray, 169, 255, 0)
第二次轮廓检测,此时获得的轮廓才是连续的,第一次获得的是断断续续的
im2, contours, hierarchy = cv2.findContours(thresh, cv2.RETR_TREE, cv2.CHAIN_APPROX_SIMPLE)
去掉第一个轮廓,那时整张A4纸的边框
contours = contours[1:]
新打开一次原图用作圈出轮廓
img = cv2.imread("patch.jpg")
对每个轮廓
index = 0for c in contours:#获取每个轮廓被包围的矩形的横纵坐标和宽高x, y, w, h = cv2.boundingRect(c)#画出包围每个轮廓的矩形cv2.rectangle(img, (x, y), (x + w, y + h), (0, 255, 0), 2)#展示每个被圈住的轮廓Image.fromarray(img[y:y+h,x:x+w,:]).save(str(index) + ".png")index += 1
展示画出包围轮廓的矩形的图像
cv2.imshow("Contours", img)cv2.waitKey(0)cv2.destroyAllWindows()
运行结果


完整代码
import cv2from PIL import Image#读取图片为rgb数组,用作第一次轮廓检测im = cv2.imread('patch.jpg')#转为灰度矩阵,用以二值化imgray = cv2.cvtColor(im, cv2.COLOR_BGR2GRAY)#进行二值化ret, thresh = cv2.threshold(imgray, 169, 255, 0)#使用进行了二值化的矩阵进行轮廓检测im2, contours, hierarchy = cv2.findContours(thresh, cv2.RETR_TREE, cv2.CHAIN_APPROX_SIMPLE)#在原图中画出轮廓,画迹宽度为3cv2.drawContours(im, contours, -1, (0,255,0), 3)#对画出了轮廓了的图像矩阵进行第二次轮廓检测(这样检测出来的轮廓才是连续的)#转为灰度矩阵imgray = cv2.cvtColor(im, cv2.COLOR_BGR2GRAY)#第二次二值化ret, thresh = cv2.threshold(imgray, 169, 255, 0)#第二次轮廓检测,此时获得的轮廓才是连续的,第一次获得的是断断续续的im2, contours, hierarchy = cv2.findContours(thresh, cv2.RETR_TREE, cv2.CHAIN_APPROX_SIMPLE)#去掉第一个轮廓,那时整张A4纸的边框contours = contours[1:]#新打开一次原图用作圈出轮廓img = cv2.imread("patch.jpg")#对每个轮廓index = 0for c in contours:#获取每个轮廓被包围的矩形的横纵坐标和宽高x, y, w, h = cv2.boundingRect(c)#画出包围每个轮廓的矩形cv2.rectangle(img, (x, y), (x + w, y + h), (0, 255, 0), 2)#展示每个被圈住的轮廓Image.fromarray(img[y:y+h,x:x+w,:]).save(str(index) + ".png")index += 1#展示画出包围轮廓的矩形的图像cv2.imshow("Contours", img)# 等待键盘输入cv2.waitKey(0)#关闭展示窗口cv2.destroyAllWindows()
