@linux1s1s
2019-02-14T09:44:34.000000Z
字数 6461
阅读 2735
Android 控件开发初步
AndroidWidget 2015-05
了解Android组件开发之前需要先对Android View有个大体的了解,建议看一下博客: Android View 分析(上)、Android View 分析(中)Android View 分析(下),这三篇博客对View从头到尾分析了一遍,虽然没有涉及更深的层次,但是应付组件开发应该够了,这篇博客是组件开发的起步,我们先来说一下比较简单的组件开发。
手动绘制 onDraw + invalidate
我们知道在Android View 分析(下)中,如果调用invalidate方法会引起重绘,也就是invalidate(...) --> onDraw(...), 而如果想手动绘制控件,那么只需要在合适的时机调用invalidate(...)方法引起重绘,然后在onDraw(...)方法中绘制你定制的内容即可,看下面的Demo
public class CounterView extends View implements OnClickListener {private Paint mPaint;private Rect mBounds;private int mCount;public CounterView(Context context, AttributeSet attrs) {super(context, attrs);//直接在构造器中获取画笔mPaint = new Paint(Paint.ANTI_ALIAS_FLAG);mBounds = new Rect();setOnClickListener(this);}@Overrideprotected void onDraw(Canvas canvas) {super.onDraw(canvas); //重写onDraw方法mPaint.setColor(Color.BLUE); //设置画笔颜色canvas.drawRect(0, 0, getWidth(), getHeight(), mPaint); //画一个长方形mPaint.setColor(Color.YELLOW); //重设画笔颜色mPaint.setTextSize(30); //设置文本字体大小String text = String.valueOf(mCount);mPaint.getTextBounds(text, 0, text.length(), mBounds);float textWidth = mBounds.width();float textHeight = mBounds.height(); //获取字体高宽canvas.drawText(text, getWidth() / 2 - textWidth / 2, getHeight() / 2 + textHeight / 2, mPaint); //画文本,注意这个文本的位置。}@Overridepublic void onClick(View v) {mCount++;invalidate(); //在合适的时机调用invalidate()引发重绘}}
接下来看看XML文件
<RelativeLayout xmlns:android="http://schemas.android.com/apk/res/android"android:layout_width="match_parent"android:layout_height="match_parent" ><com.example.customview.CounterViewandroid:layout_width="100dp"android:layout_height="100dp"android:layout_centerInParent="true" /></RelativeLayout>
看一下运行结果:
需要每次点击一下View才能更新计数,当然这里可以自己写一个线程不停的更新计数。
组合控件
这一种方式的自定义最没有技术含量,如果仅仅是将通用的View控件组合在一起的话,当然如果App中这样的组件出现的比较频繁,可以组合这样一种组件,以供App使用,同时也方便维护。
考虑到App中出现比较多这样的组件
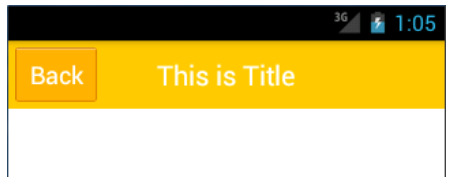
那么可以将这个组件封装一下,暂且取个名字TitleView,接下来让我们来完成这个TitileView
<?xml version="1.0" encoding="utf-8"?><RelativeLayout xmlns:android="http://schemas.android.com/apk/res/android"android:layout_width="match_parent"android:layout_height="50dp"android:background="#ffcb05" ><Buttonandroid:id="@+id/button_left"android:layout_width="60dp"android:layout_height="40dp"android:layout_centerVertical="true"android:layout_marginLeft="5dp"android:background="@drawable/back_button"android:text="Back"android:textColor="#fff" /><TextViewandroid:id="@+id/title_text"android:layout_width="wrap_content"android:layout_height="wrap_content"android:layout_centerInParent="true"android:text="This is Title"android:textColor="#fff"android:textSize="20sp" /></RelativeLayout>
public class TitleView extends FrameLayout {private Button leftButton;private TextView titleText;public TitleView(Context context, AttributeSet attrs) {super(context, attrs);LayoutInflater.from(context).inflate(R.layout.title, this);titleText = (TextView) findViewById(R.id.title_text);leftButton = (Button) findViewById(R.id.button_left);leftButton.setOnClickListener(new OnClickListener() {@Overridepublic void onClick(View v) {((Activity) getContext()).finish();}});}public void setTitleText(String text) {titleText.setText(text);}public void setLeftButtonText(String text) {leftButton.setText(text);}public void setLeftButtonListener(OnClickListener l) {leftButton.setOnClickListener(l);}}
下面我们来看看如何使用上面定义好的TitleView
<RelativeLayout xmlns:android="http://schemas.android.com/apk/res/android"xmlns:tools="http://schemas.android.com/tools"android:layout_width="match_parent"android:layout_height="match_parent" ><com.example.customview.TitleViewandroid:id="@+id/title_view"android:layout_width="match_parent"android:layout_height="wrap_content" ></com.example.customview.TitleView></RelativeLayout>
扩展控件
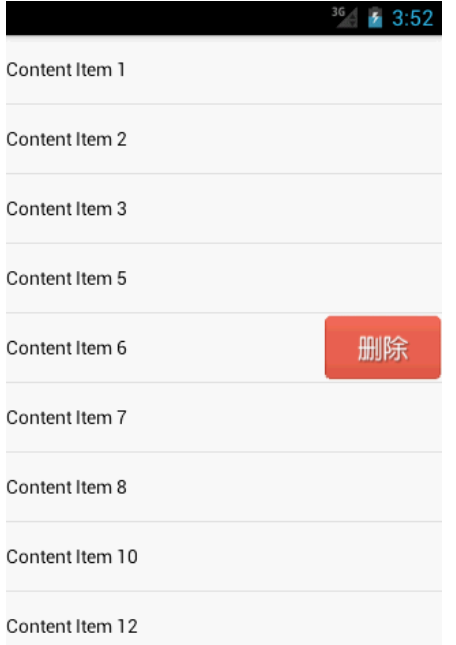
这里主要是对现有的控件进行扩展,比如现在有个需求,对现有的ListView进行扩展,增加单个Item滑动提供删除功能。
我们打算手动加载删除Button,当然也可以在Item的XML中直接添加这个Button,然后检测手势。然后决定是否显示还是隐藏删除Button。这个检测手势的操作如下
//首先生成一个GestureDetector的实例gestureDetector = new GestureDetector(getContext(), this);//然后判断X轴的偏移量是不是大于Y轴的偏移量,如果条件满足表示左右滑动,否则表示上下滑动if (Math.abs(velocityX) > Math.abs(velocityY)){...}
<?xml version="1.0" encoding="utf-8"?><Button xmlns:android="http://schemas.android.com/apk/res/android"android:id="@+id/delete_button"android:layout_width="wrap_content"android:layout_height="wrap_content"android:background="@drawable/delete_button" ></Button>
public class MyListView extends ListView implements OnTouchListener,OnGestureListener {private GestureDetector gestureDetector;private OnDeleteListener listener;private View deleteButton;private ViewGroup itemLayout;private int selectedItem;private boolean isDeleteShown;public MyListView(Context context, AttributeSet attrs) {super(context, attrs);gestureDetector = new GestureDetector(getContext(), this);setOnTouchListener(this);}public void setOnDeleteListener(OnDeleteListener l) {listener = l;}@Overridepublic boolean onTouch(View v, MotionEvent event) {if (isDeleteShown) {itemLayout.removeView(deleteButton);deleteButton = null;isDeleteShown = false;return false;} else {return gestureDetector.onTouchEvent(event);}}@Overridepublic boolean onDown(MotionEvent e) {if (!isDeleteShown) {selectedItem = pointToPosition((int) e.getX(), (int) e.getY());}return false;}@Overridepublic boolean onFling(MotionEvent e1, MotionEvent e2, float velocityX,float velocityY) {if (!isDeleteShown && Math.abs(velocityX) > Math.abs(velocityY)) {deleteButton = LayoutInflater.from(getContext()).inflate(R.layout.delete_button, null);deleteButton.setOnClickListener(new OnClickListener() {@Overridepublic void onClick(View v) {itemLayout.removeView(deleteButton);deleteButton = null;isDeleteShown = false;listener.onDelete(selectedItem);}});itemLayout = (ViewGroup) getChildAt(selectedItem- getFirstVisiblePosition());RelativeLayout.LayoutParams params = new RelativeLayout.LayoutParams(LayoutParams.WRAP_CONTENT, LayoutParams.WRAP_CONTENT);params.addRule(RelativeLayout.ALIGN_PARENT_RIGHT);params.addRule(RelativeLayout.CENTER_VERTICAL);itemLayout.addView(deleteButton, params);isDeleteShown = true;}return false;}@Overridepublic boolean onSingleTapUp(MotionEvent e) {return false;}@Overridepublic void onShowPress(MotionEvent e) {}@Overridepublic boolean onScroll(MotionEvent e1, MotionEvent e2, float distanceX,float distanceY) {return false;}@Overridepublic void onLongPress(MotionEvent e) {}public interface OnDeleteListener {void onDelete(int index);}}
这里在MyListView的构造方法中创建了一个GestureDetector的实例用于监听手势,然后给MyListView注册了touch监听事件。然后在onTouch()方法中进行判断,如果删除按钮已经显示了,就将它移除掉,如果删除按钮没有显示,就使用GestureDetector来处理当前手势。
当手指按下时,会调用OnGestureListener的onDown()方法,在这里通过pointToPosition()方法来判断出当前选中的是ListView的哪一行。当手指快速滑动时,会调用onFling()方法,在这里会去加载delete_button.xml这个布局,然后将删除按钮添加到当前选中的那一行item上。注意,我们还给删除按钮添加了一个点击事件,当点击了删除按钮时就会回调onDeleteListener的onDelete()方法,在回调方法中应该去处理具体的删除操作。
最后看一下运行结果:
本文转载并做了适当修改:http://blog.csdn.net/guolin_blog/article/details/17357967
