@hadoopMan
2017-05-18T09:22:48.000000Z
字数 10242
阅读 1382
spark安装部署
spark
想学习spark,hadoop,kafka等大数据框架,请加群459898801,满了之后请加2群224209501。后续文章会陆续公开
1,spark环境的安装
创建四个目录
sudo mkdir /opt/modulessudo mkdir /opt/softwaressudo mkdir /opt/toolssudo mkdir /opt/datassudo chmod 777 -R /opt/
1,安装jdk1.7
先卸载自带的jdk
rpm –qa | grep javasudo rpm -e --nodeps (自带java包)
安装jdk1.7
export JAVA_HOME=/opt/modules/jdk1.7.0_67export PATH=$PATH:$JAVA_HOME/bin
2,spark编译
安装mvn
export MAVEN_HOME=/usr/local/apache-maven-3.0.5export PATH=$PATH:$MAVEN_HOME/bin
3,安装scala
export SCALA_HOME=/opt/modules/scala-2.10.4export PATH=$PATH:$SCALA_HOME/bin
4,修改mvn镜像源
编译之前先配置镜像及域名服务器,来提高下载速度,进而提高编译速度,用nodepad++打开/opt/compileHadoop/apache-maven-3.0.5/conf/setting.xml。(nodepad已经通过sftp链接到了机器)
<mirror><id>nexus-spring</id><mirrorOf>cdh.repo</mirrorOf><name>spring</name><url>http://repo.spring.io/repo/</url></mirror><mirror><id>nexus-spring2</id><mirrorOf>cdh.releases.repo</mirrorOf><name>spring2</name><url>http://repo.spring.io/repo/</url></mirror>
5,配置域名解析服务器
sudo vi /etc/resolv.conf添加内容:nameserver 8.8.8.8nameserver 8.8.4.4
6,编译spark
为了提高编译速度,修改如下内容
VERSION=1.3.0SPARK_HADOOP_VERSION=2.6.0-cdh5.4.0SPARK_HIVE=1#VERSION=$("$MVN" help:evaluate -Dexpression=project.version 2>/dev/null | grep -v "INFO" | tail -n 1)#SPARK_HADOOP_VERSION=$("$MVN" help:evaluate -Dexpression=hadoop.version $@ 2>/dev/null\# | grep -v "INFO"\# | tail -n 1)#SPARK_HIVE=$("$MVN" help:evaluate -Dexpression=project.activeProfiles -pl sql/hive $@ 2>/dev/null\# | grep -v "INFO"\# | fgrep --count "<id>hive</id>";\# # Reset exit status to 0, otherwise the script stops here if the last grep finds nothing\# # because we use "set -o pipefail"# echo -n)
执行编译指令:
./make-distribution.sh --tgz -Pyarn -Phadoop-2.4 -Dhadoop.version=2.6.0-cdh5.4.0 -Phive-0.13.1 -Phive-thriftserver去掉下面编译会很快,即使编译失败也不会每次都清除-DskipTests clean package

4 安装hadoop2.6
1,添加java主目录位置
hadoop-env.shmapred-env.shyarn-env.sh添加如下:export JAVA_HOME=/opt/modules/jdk1.7.0_67
2,core-site.xml配置
<property><name>hadoop.tmp.dir</name><value>/opt/modules/hadoop-2.5.0/data/tmp</value></property><property><name>fs.defaultFS</name><value>hdfs://spark.learn.com:8020</value></property>
3,hdfs-site.xml配置
<property><name>dfs.replication</name><value>1</value></property>
4,mapred-site.xml配置
<property><name>mapreduce.framework.name</name><value>yarn</value></property>
5,yarn-site.xml配置
<property><name>yarn.resourcemanager.hostname</name><value>miaodonghua.host</value></property><property><name>yarn.nodemanager.aux-services</name><value>mapreduce_shuffle</value></property>
6,slaves配置
miaodonghua.host//主机名:nodemanager和datanode地址
7,格式化namenode
bin/hdfs namenode -format
3,spark几种模式的安装部署
1 spark本地模式的安装
本地模式基础语法测试
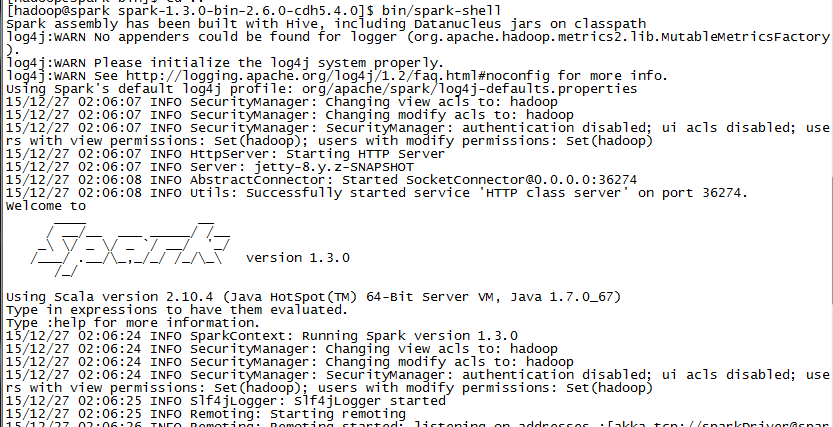
1,直接运行
bin/spark-shell
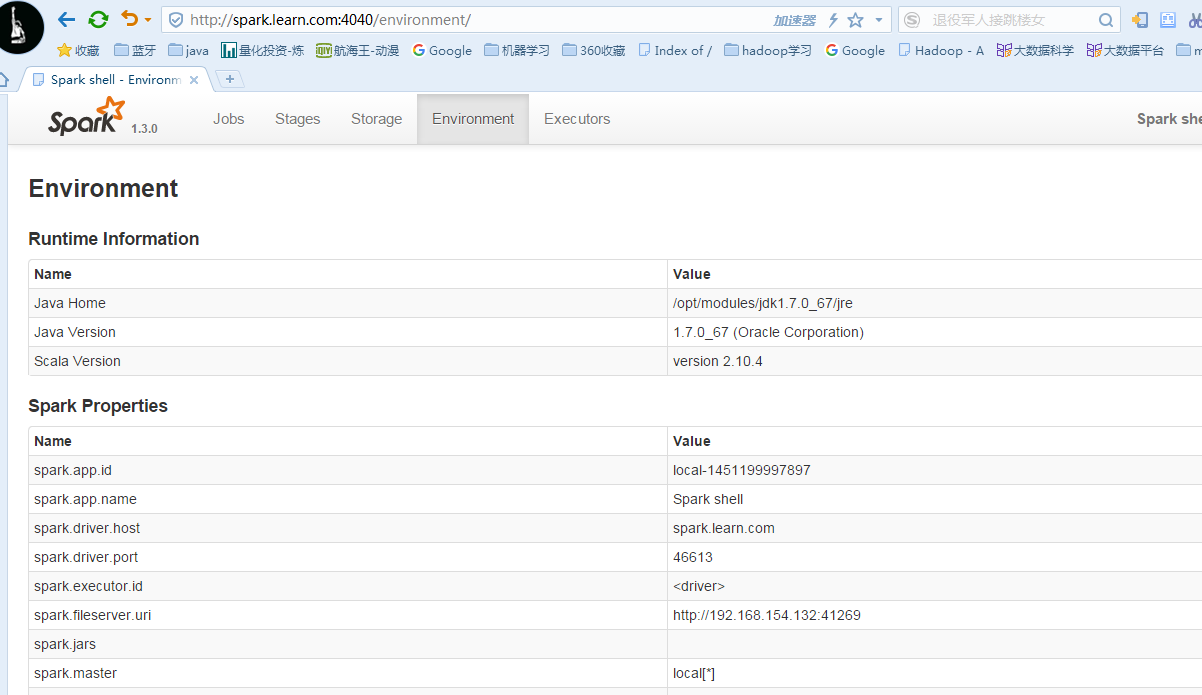
2,spark的webAPP
http://spark.learn.com:4040
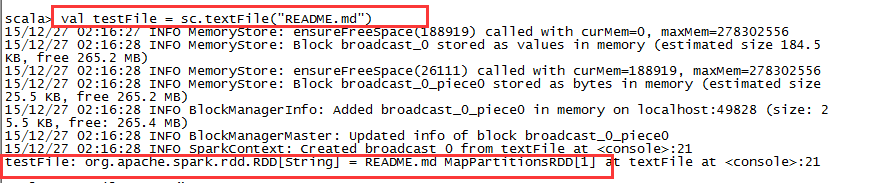
3,读取readme.cm
val textFile = sc.textFile("README.md")
4,count
testFile.count()

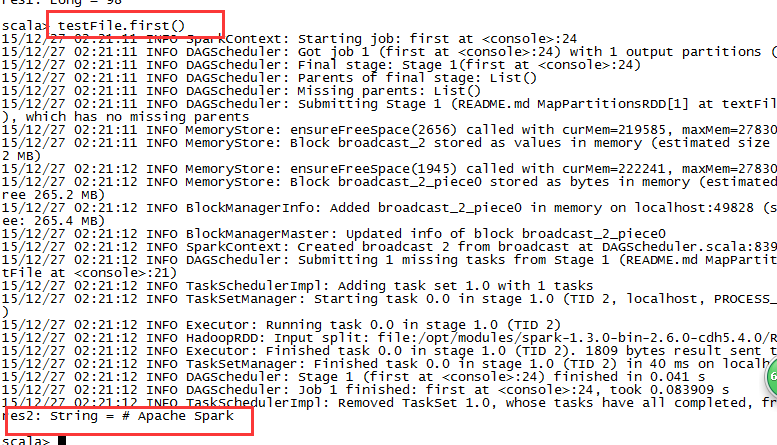
5,first
testFile.first()
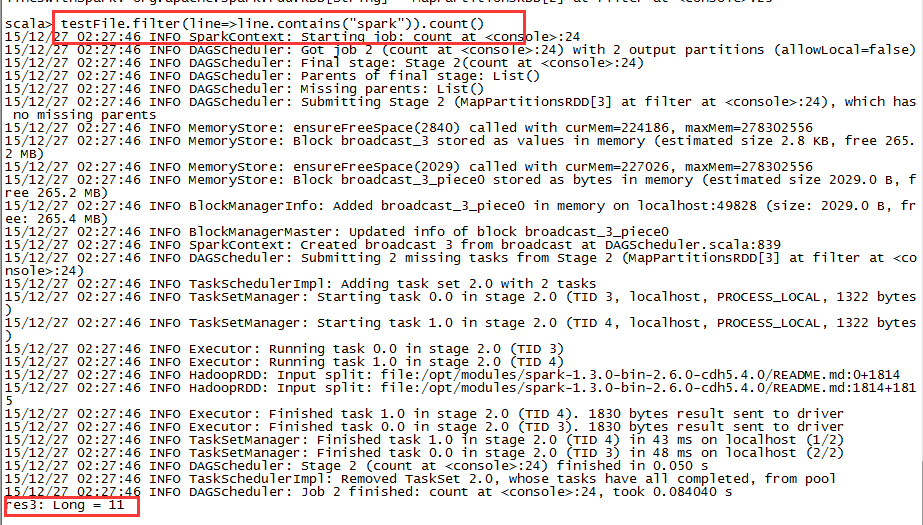
6,filter
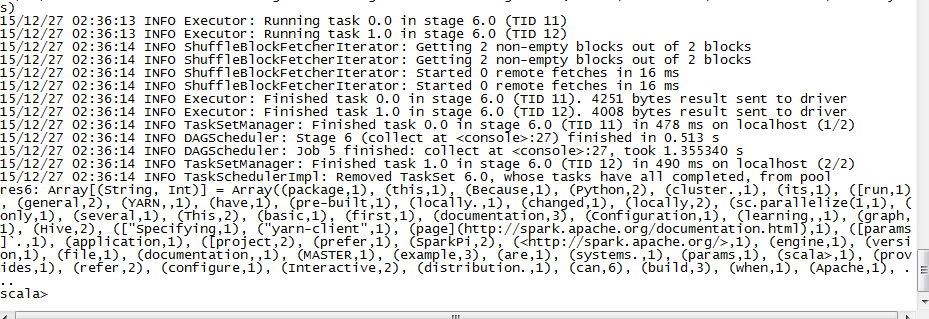
val linesWithSpark = testFile.filter(line => line.contains("Spark"))

testFile.filter(line => line.contains("Spark")).count()
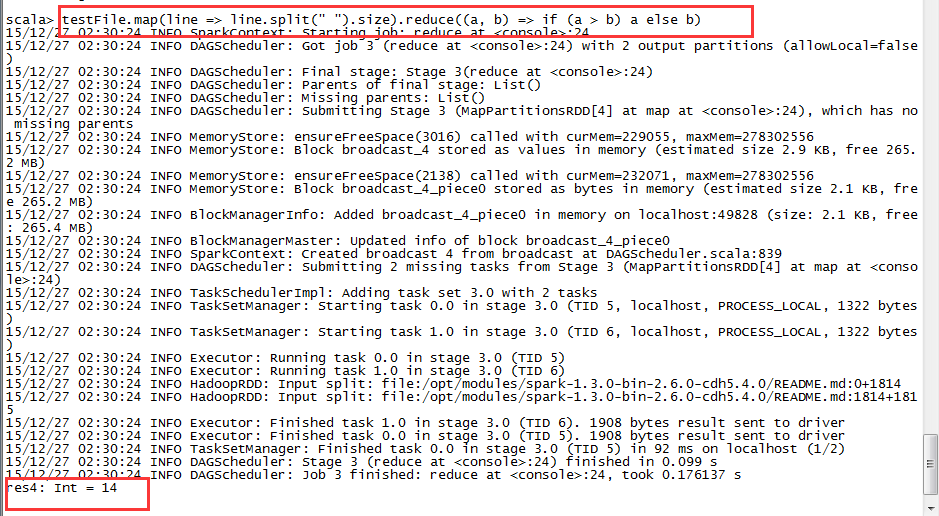
相对复杂计算 complex computations
testFile.map(line => line.split(" ").size).reduce((a, b) => if (a > b) a else b)
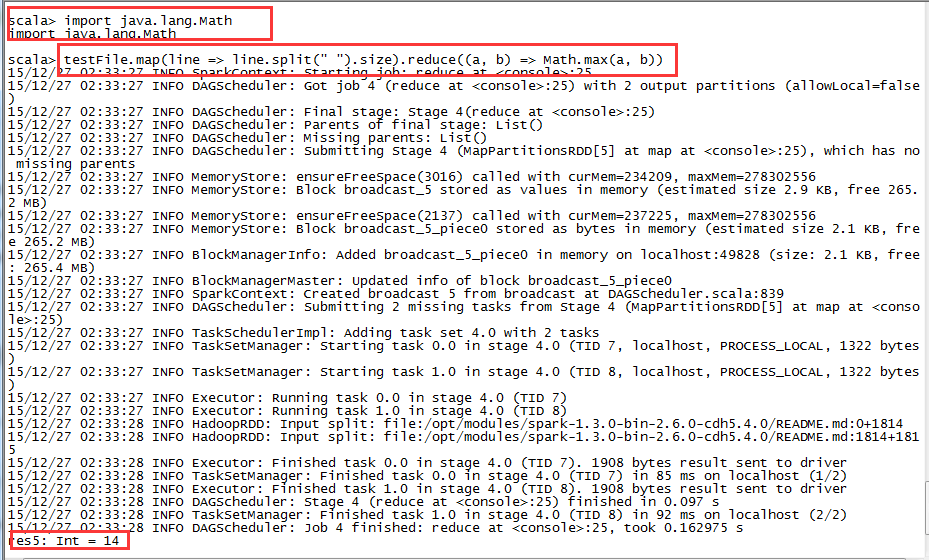
import java.lang.MathtestFile.map(line => line.split(" ").size).reduce((a, b) => Math.max(a, b))
val wordCounts = testFile.flatMap(line => line.split(" ")).map(word => (word, 1)).reduceByKey((a, b) => a + b)

wordCounts.collect()
cache
scala> linesWithSpark.cache()
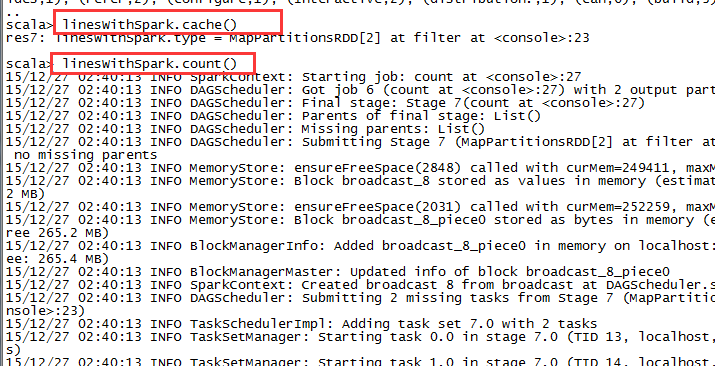
scala> linesWithSpark.count()

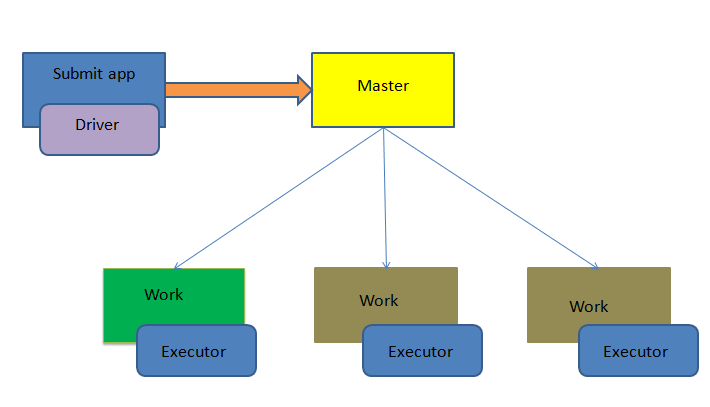
2 spark standalone模式的安装
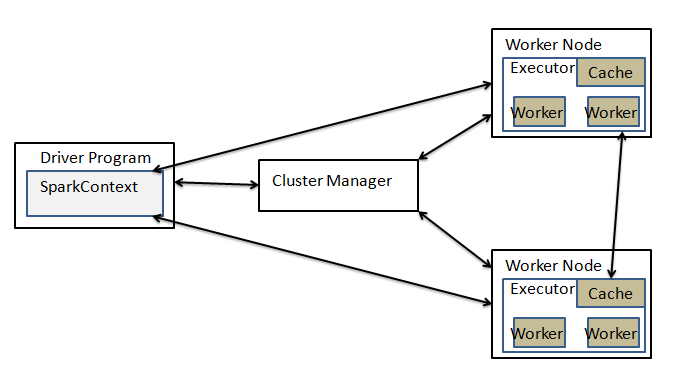
1,配置spark-env.sh
HADOOP_CONF_DIR=/opt/modules/hadoop-2.6.0-cdh5.4.0/etc/hadoopJAVA_HOME=/opt/modules/jdk1.7.0_67SCALA_HOME=/opt/modules/scala-2.10.4SPARK_MASTER_IP=spark.learn.comSPARK_MASTER_PORT=7077SPARK_MASTER_WEBUI_PORT=8080SPARK_WORKER_CORES=1SPARK_WORKER_MEMORY=1000mSPARK_WORKER_PORT=7078SPARK_WORKER_WEBUI_PORT=8081SPARK_WORKER_INSTANCES=1
2,配置spark-defaults.conf
spark.master spark://hadoop-spark.com:7077
3,配置slaves
spark.learn.com
4,启动spark
sbin/start-master.shsbin/start-slaves.sh
5,命令测试
读取本地的需要注释掉
HADOOP_CONF_DIR=/opt/modules/hadoop-2.6.0-cdh5.4.0/etc/hadoop
val textFile = sc.textFile("hdfs://spark.learn.com:8020/user/hadoop/spark")

val wordcount = textFile.flatMap(x=>x.split(" ")).map(x=>(x,1)).reduceByKey((a,b)=>a+b).collect()

val wordcount = textFile.flatMap(x=>x.split(" ")).map(x=>(x,1)).reduceByKey((a,b)=>a+b).sortByKey(true).collect()

val wordcount = textFile.flatMap(x=>x.split(" ")).map(x=>(x,1)).reduceByKey((a,b)=>a+b).map(x=>(x._2,x._1)).sortByKey(false).collect()

sc.textFile("hdfs://spark.learn.com:8020/user/cyhp/spark/wc.input").flatMap(_.split(" ")).map((_,1)).reduceByKey(_ + _).collect
3 spark on yarn
查看spark-submit参数
[hadoop@spark spark-1.3.0-bin-2.6.0-cdh5.4.0]$ bin/spark-submit --help
Spark assembly has been built with Hive, including Datanucleus jars on classpathUsage: spark-submit [options] <app jar | python file> [app arguments]Usage: spark-submit --kill [submission ID] --master [spark://...]Usage: spark-submit --status [submission ID] --master [spark://...]Options:--master MASTER_URL spark://host:port, mesos://host:port, yarn, or local.--deploy-mode DEPLOY_MODE Whether to launch the driver program locally ("client") oron one of the worker machines inside the cluster ("cluster")(Default: client).--class CLASS_NAME Your application's main class (for Java / Scala apps).--name NAME A name of your application.--jars JARS Comma-separated list of local jars to include on the driverand executor classpaths.--packages Comma-separated list of maven coordinates of jars to includeon the driver and executor classpaths. Will search the localmaven repo, then maven central and any additional remoterepositories given by --repositories. The format for thecoordinates should be groupId:artifactId:version.--repositories Comma-separated list of additional remote repositories tosearch for the maven coordinates given with --packages.--py-files PY_FILES Comma-separated list of .zip, .egg, or .py files to placeon the PYTHONPATH for Python apps.--files FILES Comma-separated list of files to be placed in the workingdirectory of each executor.--conf PROP=VALUE Arbitrary Spark configuration property.--properties-file FILE Path to a file from which to load extra properties. If notspecified, this will look for conf/spark-defaults.conf.--driver-memory MEM Memory for driver (e.g. 1000M, 2G) (Default: 512M).--driver-java-options Extra Java options to pass to the driver.--driver-library-path Extra library path entries to pass to the driver.--driver-class-path Extra class path entries to pass to the driver. Note thatjars added with --jars are automatically included in theclasspath.--executor-memory MEM Memory per executor (e.g. 1000M, 2G) (Default: 1G).--proxy-user NAME User to impersonate when submitting the application.--help, -h Show this help message and exit--verbose, -v Print additional debug output--version, Print the version of current SparkSpark standalone with cluster deploy mode only:--driver-cores NUM Cores for driver (Default: 1).--supervise If given, restarts the driver on failure.--kill SUBMISSION_ID If given, kills the driver specified.--status SUBMISSION_ID If given, requests the status of the driver specified.Spark standalone and Mesos only:--total-executor-cores NUM Total cores for all executors.YARN-only:--driver-cores NUM Number of cores used by the driver, only in cluster mode(Default: 1).--executor-cores NUM Number of cores per executor (Default: 1).--queue QUEUE_NAME The YARN queue to submit to (Default: "default").--num-executors NUM Number of executors to launch (Default: 2).--archives ARCHIVES Comma separated list of archives to be extracted into theworking directory of each executor.
1,submit本地模式
bin/spark-submit \--class org.apache.spark.examples.SparkPi \lib/spark-examples-1.3.0-hadoop2.6.0-cdh5.4.0.jar \10

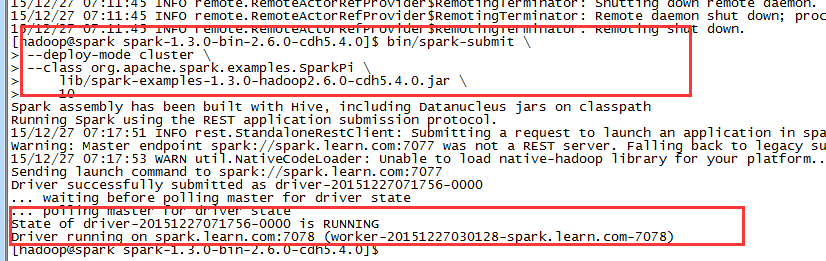
2,submit运行于standalone模式
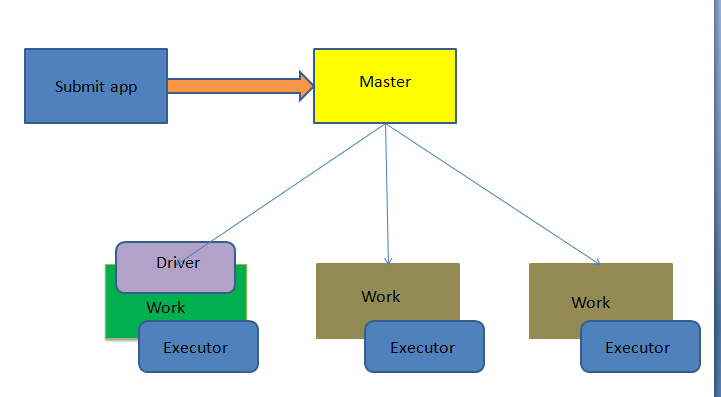
bin/spark-submit \--deploy-mode cluster \--class org.apache.spark.examples.SparkPi \lib/spark-examples-1.3.0-hadoop2.6.0-cdh5.4.0.jar \10
3,submit提交到yarn上
yarn Cluster mode
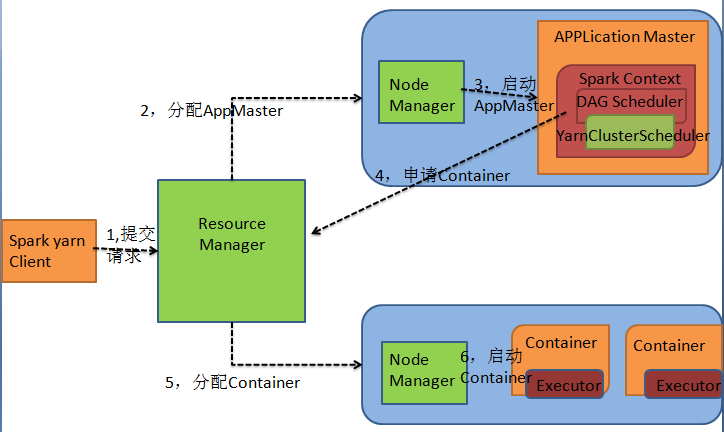
yarn Client mode

bin/spark-submit \--master yarn \--class org.apache.spark.examples.SparkPi \lib/spark-examples-1.3.0-hadoop2.6.0-cdh5.4.0.jar \10
4,spark监控界面
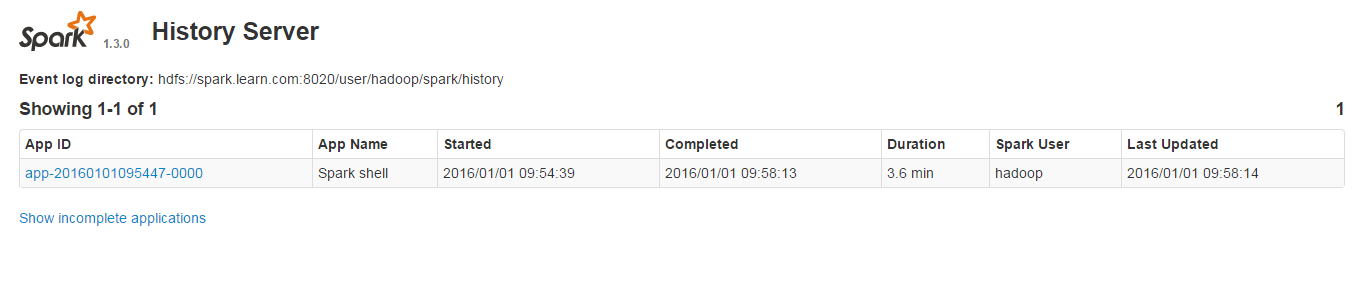
1,启动spark监控服务
执行下面指令启动spark historyserver
./sbin/start-history-server.sh
查看方式
http://<server-url>:18080
2,spark监控的配置项介绍
1,整体配置项
我们可以对historyserver进行如下配置:
| Environment Variable | Meaning |
|---|---|
| SPARK_DAEMON_MEMORY | Memory to allocate to the history server (default: 512m). |
| SPARK_DAEMON_JAVA_OPTS | JVM options for the history server (default: none). |
| SPARK_PUBLIC_DNS | The public address for the history server. If this is not set, links to application history may use the internal address of the server, resulting in broken links (default: none). |
| SPARK_HISTORY_OPTS | spark.history.* configuration options for the history server (default: none). |
2,SPARK_HISTORY_OPTS配置
| Property Name | Default | Meaning |
|---|---|---|
| spark.history.provider | org.apache.spark.deploy.history.FsHistoryProvider | Name of the class implementing the application history backend. Currently there is only one implementation, provided by Spark, which looks for application logs stored in the file system. |
| spark.history.fs.logDirectory | file:/tmp/spark-events | Directory that contains application event logs to be loaded by the history server |
| spark.history.fs.updateInterval | 10 | The period, in seconds, at which information displayed by this history server is updated. Each update checks for any changes made to the event logs in persisted storage. |
| spark.history.retainedApplications | 50 | The number of application UIs to retain. If this cap is exceeded, then the oldest applications will be removed. |
| spark.history.ui.port | 18080 | |
| spark.history.kerberos.enabled | false | Indicates whether the history server should use kerberos to login. This is useful if the history server is accessing HDFS files on a secure Hadoop cluster. If this is true, it uses the configs spark.history.kerberos.principal and spark.history.kerberos.keytab. |
| spark.history.kerberos.principal | (none) | Kerberos principal name for the History Server. |
| spark.history.kerberos.keytab | (none) | Location of the kerberos keytab file for the History Server. |
| spark.history.ui.acls.enable | false | Specifies whether acls should be checked to authorize users viewing the applications. If enabled, access control checks are made regardless of what the individual application had set for spark.ui.acls.enable when the application was run. The application owner will always have authorization to view their own application and any users specified via spark.ui.view.acls when the application was run will also have authorization to view that application. If disabled, no access control checks are made. |
3,标记一个任务是否完成
要注意的是historyserver仅仅显示完成了的spark任务。标记任务完成的一种方式是直接调用sc.stop()。
4,spark-defaults.conf中的配置
| Property Name | Default Meaning |
|---|---|
| spark.eventLog.compress | false |
| spark.eventLog.dir | file:///tmp/spark-events |
| spark.eventLog.enabled | false |
2,具体配置
1,在spark-env.sh
SPARK_HISTORY_OPTS="-Dspark.history.fs.logDirectory=hdfs://spark.learn.com:8020/user/hadoop/spark/history"
2,在spark-defaults.conf
spark.eventLog.enabled truespark.eventLog.dir hdfs://spark.learn.com:8020/user/hadoop/spark/historyspark.eventLog.compress true
3,测试
启动相关服务
sbin/start-master.shsbin/start-slaves.shsbin/start-history-server.shbin/spark-shell
执行spark应用
val textFile = sc.textFile("hdfs://spark.learn.com:8020/user/hadoop/spark/input/")textFile.countsc.stop