@hadoopMan
2017-03-04T14:30:21.000000Z
字数 9254
阅读 1638
hbase表的设计和管理
hbase
想学习spark,hadoop,kafka等大数据框架,请加群459898801,满了之后请加2群224209501。后续文章会陆续公开
1,指定属性及多列簇
创建命名空间
Group name: namespaceCommands: alter_namespace, create_namespace, describe_namespace, drop_namespace, list_namespace, list_namespace_tablescreate_namespace trackcreate 'track:bf_log', 'track_info'create 'track:bf_log2', {NAME => 'f1', VERSIONS => 3}create 't1', {NAME => 'f1',CONFIGURATION => {'hbase.hstore.blockingStoreFiles' => '10'}}
创建表
每个列簇一个括号里面设置属性。
't1',{NAME => 'cf', ## 列簇名称DATA_BLOCK_ENCODING => 'NONE',BLOOMFILTER => 'ROW',REPLICATION_SCOPE => '0',VERSIONS => '1', ## 版本COMPRESSION => 'NONE', ## 压缩MIN_VERSIONS => '0', ## 最小版本TTL => 'FOREVER', ## 生命周期KEEP_DELETED_CELLS => 'false',BLOCKSIZE => '65536',IN_MEMORY => 'false', ##BLOCKCACHE => 'true' ##}create 'ub',{NAME => 'b',DATA_BLOCK_ENCODING => 'NONE',BLOOMFILTER => 'ROW',REPLICATION_SCOPE => '0',VERSIONS => '1',COMPRESSION => 'snappy',MIN_VERSIONS => '0',TTL => '2592000',KEEP_DELETED_CELLS => 'false',BLOCKSIZE => '65536',IN_MEMORY => 'false',BLOCKCACHE => 'true',SPLITS => ['001', '004', '007', '010','013','016','019','022','025','028','029','032','035','038','041','044','047','050','053','056','059','062','065','068','072','075','078','081','084','087','090','093','096','099','102','105','108','111','114','117','120','123','126','129','132','135','138','141','144','147','150','153',156','159','162','165','168','171','174','177','180','183','186','189','192','195','198','201','204','207','210','213','216','219','222','225','228','231','234','237','240','243','246','249','252']}
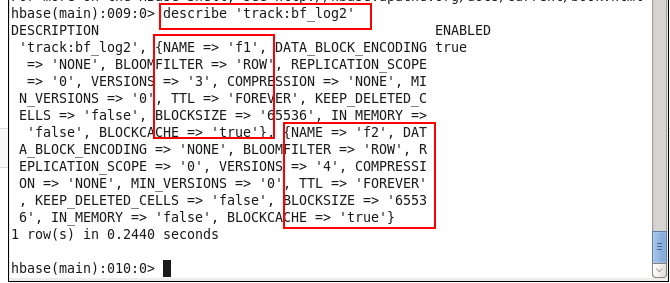
创建一个表,指定列簇信息
create_namespace 'track'create 'track:bf_log2', {NAME => 'f1', VERSIONS => 3},{NAME => 'f2', VERSIONS => 4}
create 't1', {NAME => 'f1',CONFIGURATION => {'hbase.hstore.blockingStoreFiles' => '10'}}
修改列簇信息
alter 'ub' ,NAME=>'b',TTL=>'3600'alter 'ub' ,COMPRESSION => 'SNAPPY'
在hbase的shell中输入
help create
Create a table with namespace=ns1 and table qualifier=t1hbase> create 'ns1:t1', {NAME => 'f1', VERSIONS => 5}Create a table with namespace=default and table qualifier=t1hbase> create 't1', {NAME => 'f1'}, {NAME => 'f2'}, {NAME => 'f3'}hbase> # The above in shorthand would be the following:hbase> create 't1', 'f1', 'f2', 'f3'hbase> create 't1', {NAME => 'f1', VERSIONS => 1, TTL => 2592000, BLOCKCACHE => true}hbase> create 't1', {NAME => 'f1', CONFIGURATION => {'hbase.hstore.blockingStoreFiles' => '10'}}Table configuration options can be put at the end.Examples:hbase> create 'ns1:t1', 'f1', SPLITS => ['10', '20', '30', '40']hbase> create 't1', 'f1', SPLITS => ['10', '20', '30', '40']hbase> create 't1', 'f1', SPLITS_FILE => 'splits.txt', OWNER => 'johndoe'hbase> create 't1', {NAME => 'f1', VERSIONS => 5}, METADATA => { 'mykey' => 'myvalue' }hbase> # Optionally pre-split the table into NUMREGIONS, usinghbase> # SPLITALGO ("HexStringSplit", "UniformSplit" or classname)hbase> create 't1', 'f1', {NUMREGIONS => 15, SPLITALGO => 'HexStringSplit'}hbase> create 't1', 'f1', {NUMREGIONS => 15, SPLITALGO => 'HexStringSplit', CONFIGURATION => {'hbase.hregion.scan.loadColumnFamiliesOnDemand' => 'true'}}You can also keep around a reference to the created table:hbase> t1 = create 't1', 'f1'Which gives you a reference to the table named 't1', on which you can thencall methods.
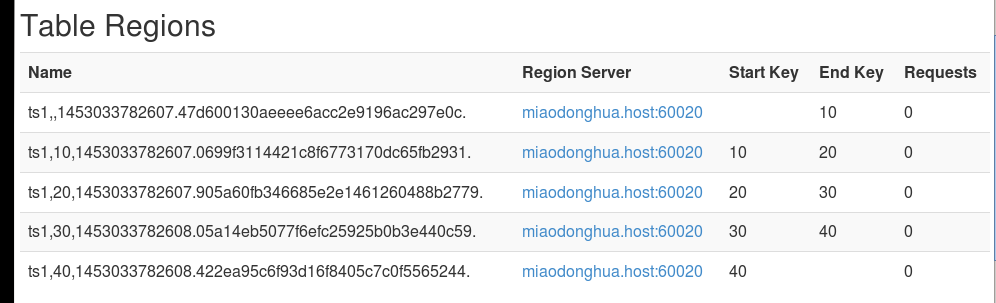
创建表并指定分区
'10', '20', '30', '40'Name [startkey stopkey)Region-00Region-01 10Region-02 10 20Region-03 20 30Region-04 30 40Region-05 40
创建表预分区方式一:
create 'ts1', 'cf1', SPLITS => ['10', '20', '30', '40']
创建表预分区方式二:
create 'ub', 'b', SPLITS_FILE => '/opt/datas/splits.txt'splits.txt的内容如下---10203040---![创建表并指定分区方式二.png-43.7kB][3]
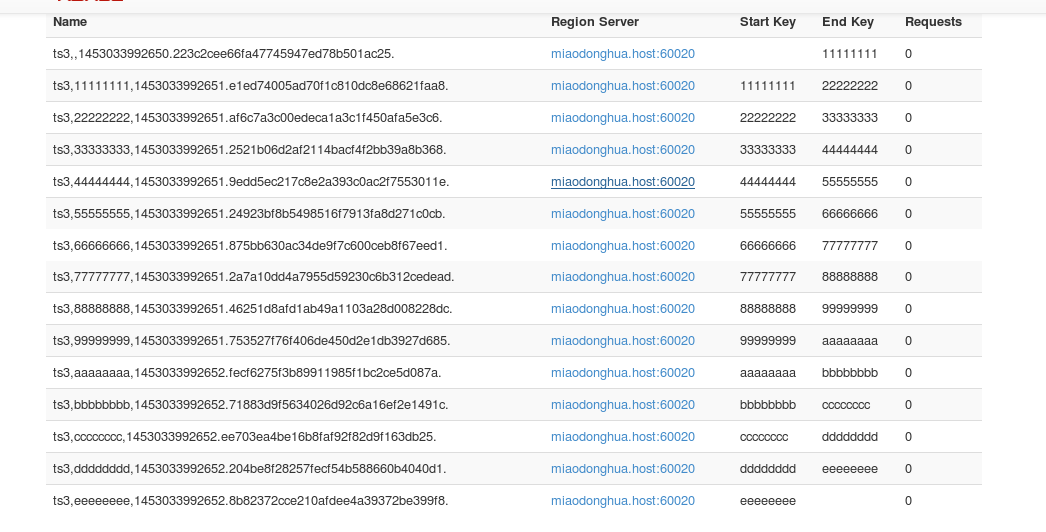
创建表预分区方式三:
rowkey是十六进制的方式。
create 'ts3', 'cf1', {NUMREGIONS => 15, SPLITALGO => 'HexStringSplit'}
2,ROWKEY及索引表的设计
查询:telphone + datetime查询具体需求:18234560987 + 20151201000000 - startkey18234560987 + 20160101000000 - stopkeyHBase 中,表的查询前缀匹配唯一性话单表的设计:(主表)ROWKEY:telphone_ordertime表的设计(TELPHONE_ORDER)telphone_orderinfo预分区telphoneordertime12003459876_2015100100000013003459876_2015100700450014003459876
需求:统计每天的通话记录针对每天通话记录进行分析查询:datetimeeg:2015100100000020151002000000索引表:(TELPHONE_ORDER_INDEX_ORDERTIME)ROWKEY: info:rwordertime_telphone telphone_ordertime (GET)20151001000000_20151002000000_
衍生问题:
主表 与 索引表 数据同步
MapReduce进行数据同步(不要再向主表插入数据)
    map:主表读取数据
    reduce:插入数据到索引表
3,hbase中压缩的配置
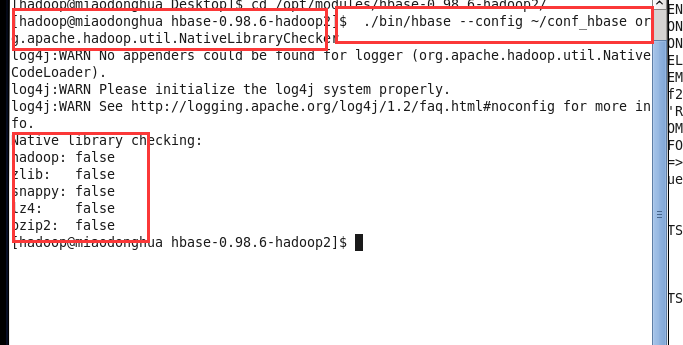
查看看压缩支持情况
./bin/hbase --config ~/conf_hbase org.apache.hadoop.util.NativeLibraryChecker
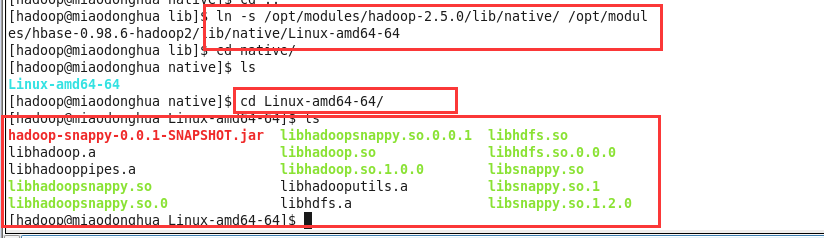
创建软连接
$ cd $HBASE_HOME$ mkdir lib/nativeln -s /opt/modules/hadoop-2.5.0/lib/native/ /opt/modules/hbase-0.98.6-hadoop2/lib/native/Linux-amd64-64
拷贝压缩文件
cp /opt/modules/hadoop-2.5.0/lib/hadoop-snappy-0.0.1-SNAPSHOT.jar /opt/modules/hbase-0.98.6-hadoop2/lib/
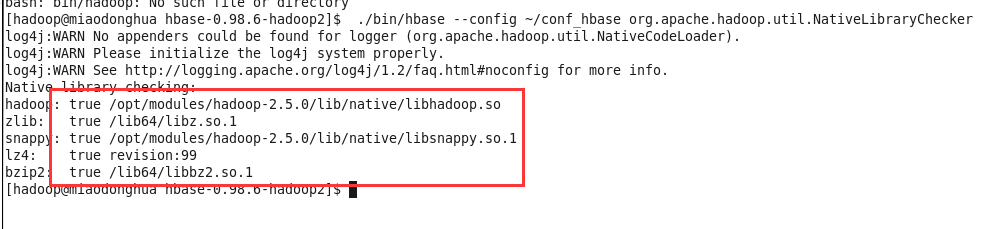
成功配置后
./bin/hbase --config ~/conf_hbase org.apache.hadoop.util.NativeLibraryChecker
使用压缩
create 't2' , {NAME => 'cf', COMPRESSION => 'SNAPPY'}

插入一条数据
put 't2','1001','cf:name','lisi'put 't2','1001','cf:age','18'flush 't2'scan 't2'
插入数据成功

测试
bin/hbase org.apache.hadoop.hbase.util.CompressionTest hdfs://miaodonghua.host:8020/hbase snappy

4,compaction,内存,cacheBlock机制
1,HBase Admin compaction
随着memstore中的数据不断刷写到磁盘中,会产生越来越多的HFile文件,HBase内部有一个解决这个问题的管家,即用合并将多个文件合并成一个较大的文件。合并有两种类型:minor合并(minor compaction)和major压缩合并(major compaction)。minor合并将多个小文件重写为数量较少的大文件,减少存储文件的数量,这个过程实际上是个多路归并的过程。因为HFile的每个文件都是经过归类,所以合并速度很快,直接受到磁盘IO性能的影响。
major合并讲一个region中一个列簇的若干个HFile重写为一个新的HFile,与minor合并相比,还有更为独特的功能:major合并能扫描所有的键值对,顺序重写全部的数据,重写数据的过程中会略过做了删除标记的数据。断言删除此时生效,例如,对于那些超过版本号限制的数据以及生存时间到期的数据,在重写数据时不再写入磁盘了。
HRegion Server的storefile文件是被后台线程监控的,一确保这些文件保持在可控状态。磁盘上的storefile的数量会随着越来越多的memstore被刷新而变得等于越来越多--每次刷新都会生存一个storefile文件,当storefile数量满足一定条件时(可通过配置参数类进行调整),会触发文件合并操作---minor compaction,将多个比较小的storefile合并成一个大的storefile文件,知道合并的文件大到超过单个文件陪孩子允许的最大值时会触发一次region的自动分割,即region split操作,将一个region平分成2个。
1,minor compaction,轻量级
将符合条件的最早生成的几个storefile合并成一个大的storefile文件,它不会删除被标记为删除的数据和以及过期的数据,并且执行过一次minor合并操作后还会有多个storefile文件。
2,major compaction,重量级
把所有的storefile合并成一个单一的storefile文件,将文件合并期间系统会删除标记为删除标记的数据和过期失效的数据,同时会block所有客户端对该操作所属的region的请求知道合并完毕,最后删除已合并的storefile文件。
2,memstore&blockCache
1,hbase上regionserver的内存分为两个部分,一部分为memstore,主要用来写;另一部分作为blockCache,主要用于读。
2,写请求会先写入memstore,regionserver会给每个region提供一个memstore,当memsore满64M后,会启动flush刷新到磁盘。当memstore的总大小超过限制时(heapsize *hbase.regionserver.global.memstore.upperLimit*0.9),会强行启动flush进程,从最大的menstore开始flush只到低于限制。
3,请求先到memstore中查数据,查不到就到blockCache中查,再查不到就会到磁盘上读,并把读的结果放入blockCache。由于blockCache采用的是LRU淘汰策略,因此blockCache达到上限(heapsize *hfile.block.cache.size*0.85)后,会启动淘汰机制,淘汰掉最老的一批数据。
4,在注重读响应的应用场景下,可以将blockCache设置大一些,memstore设置小些,以加大缓存命中率。
| 属性 | 值 | 说明 |
|---|---|---|
| regionserver中所有的memstore的最大大小hbase.regionserver.global.memstore.upperLimit | 0.4(默认值) | 阻止更新和强迫刷新前,regionserver中所有memstore的最大大小。 |
| memstore刷新的低水位线 | 0.38默认值 | 当memstore被迫刷新所以节省内存时,请一直刷新直到达到此数量。如此数量等于hbase.regionserver.global.memstore.upperLimit,则由于memstore限制阻止更新时,可能会最低限度地进行刷新 |
| hbase memstore刷新大小 hbase.hregion.memstore.flush.size | 128兆字节,默认值 | 如果memstore大小超过此值(字节数),memstore将舒心到磁盘。通过运行由hbase.server.thread.wakefrequency指定的频率的线程检查此值 |
| hfile块缓存大小 hfile.block.cache.size | 0.4默认值 | 用于阻止hfile/storefile使用的缓存所分配的最大堆(-Xmx)的百分比。要禁用,请将此值设置为0 |
3,blockCache
1,将cache分级思想的好处在于:
- 首先,通过inMemory类型Cache,可以有选择地将in-memory的column families放到RegionServer内存中,例如Meta元数据信息;
- 通过分区single和multi类型cache,可以防止Scan操作带来的cache频繁颠簸,将最少使用的block加入到淘汰算法中。
2,默认配置下,对于整个BlockCache的内存,又按照以下百分比分配给Single,multi,inMemory使用:0.25,0.5,0.25.
其中InMemory队列用于保存Hbase meta表元数据信息,因此如果将数据量很大的用户表设置为InMemory的话,可能导致Meta缓存失效,进而整个集群性能产生影响。
5,hbase常见管理集群和表的工具
1,hive集成
添加配置文件
export HBASE_HOME=/opt/modules/hbase-0.98.6-hadoop2export HIVE_HOME=/opt/modules/hive-0.13.1/libln -s $HBASE_HOME/lib/hbase-server-0.98.6-hadoop2.jar $HIVE_HOME/hbase-server-0.98.6-hadoop2.jarln -s $HBASE_HOME/lib/hbase-client-0.98.6-hadoop2.jar $HIVE_HOME/hbase-client-0.98.6-hadoop2.jarln -s $HBASE_HOME/lib/hbase-protocol-0.98.6-hadoop2.jar $HIVE_HOME/hbase-protocol-0.98.6-hadoop2.jarln -s $HBASE_HOME/lib/hbase-it-0.98.6-hadoop2.jar $HIVE_HOME/hbase-it-0.98.6-hadoop2.jarln -s $HBASE_HOME/lib/htrace-core-2.04.jar $HIVE_HOME/htrace-core-2.04.jarln -s $HBASE_HOME/lib/hbase-hadoop2-compat-0.98.6-hadoop2.jar $HIVE_HOME/hbase-hadoop2-compat-0.98.6-hadoop2.jarln -s $HBASE_HOME/lib/hbase-hadoop-compat-0.98.6-hadoop2.jar $HIVE_HOME/hbase-hadoop-compat-0.98.6-hadoop2.jarln -s $HBASE_HOME/lib/high-scale-lib-1.1.1.jar $HIVE_HOME/high-scale-lib-1.1.1.jarln -s $HBASE_HOME/lib/hbase-common-0.98.6-hadoop2.jar $HIVE_HOME/hbase-common-0.98.6-hadoop2.jar
创建hive表并插入数据
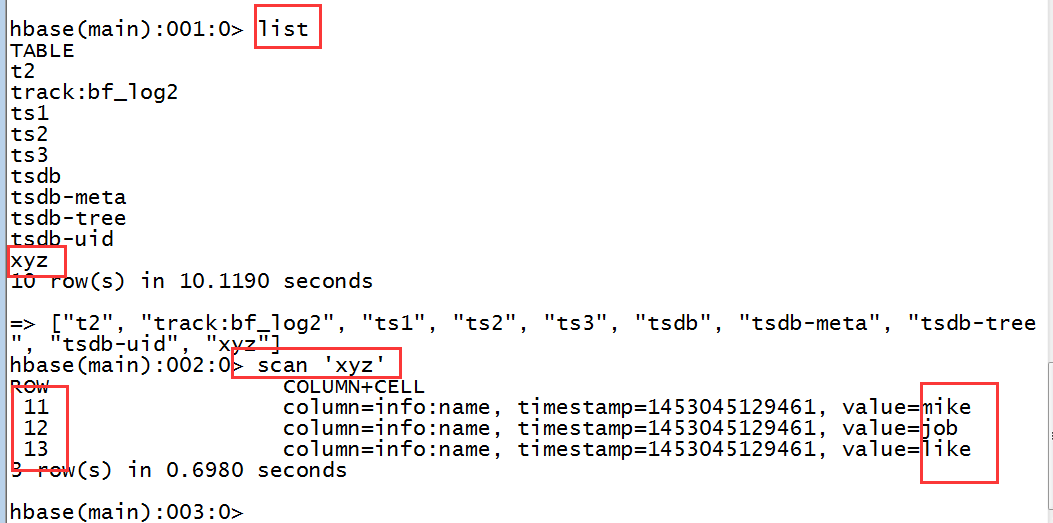
CREATE TABLE default.hbase_table_1(id int,name string)STORED BY 'org.apache.hadoop.hive.hbase.HBaseStorageHandler'WITH SERDEPROPERTIES ("hbase.columns.mapping" = ":key,info:name")TBLPROPERTIES ("hbase.table.name" = "xyz");INSERT OVERWRITE TABLE default.hbase_table_1SELECT id, name FROM db_hive.student;
数据插入成功
外部表,hive通过hbase上一张已存在的表创建一张表
方法一:
CREATE EXTERNAL TABLE hbase_table_2(uuid int,username string)STORED BY 'org.apache.hadoop.hive.hbase.HBaseStorageHandler'WITH SERDEPROPERTIES ("hbase.columns.mapping" = "info:name")TBLPROPERTIES("hbase.table.name" = "xyz");
方法二:
CREATE EXTERNAL TABLE hbase_table_3(uuid int,username string)STORED BY 'org.apache.hadoop.hive.hbase.HBaseStorageHandler'WITH SERDEPROPERTIES ("hbase.columns.mapping" = ":key,info:name")TBLPROPERTIES("hbase.table.name" = "xyz");

2,sqoop导入数据
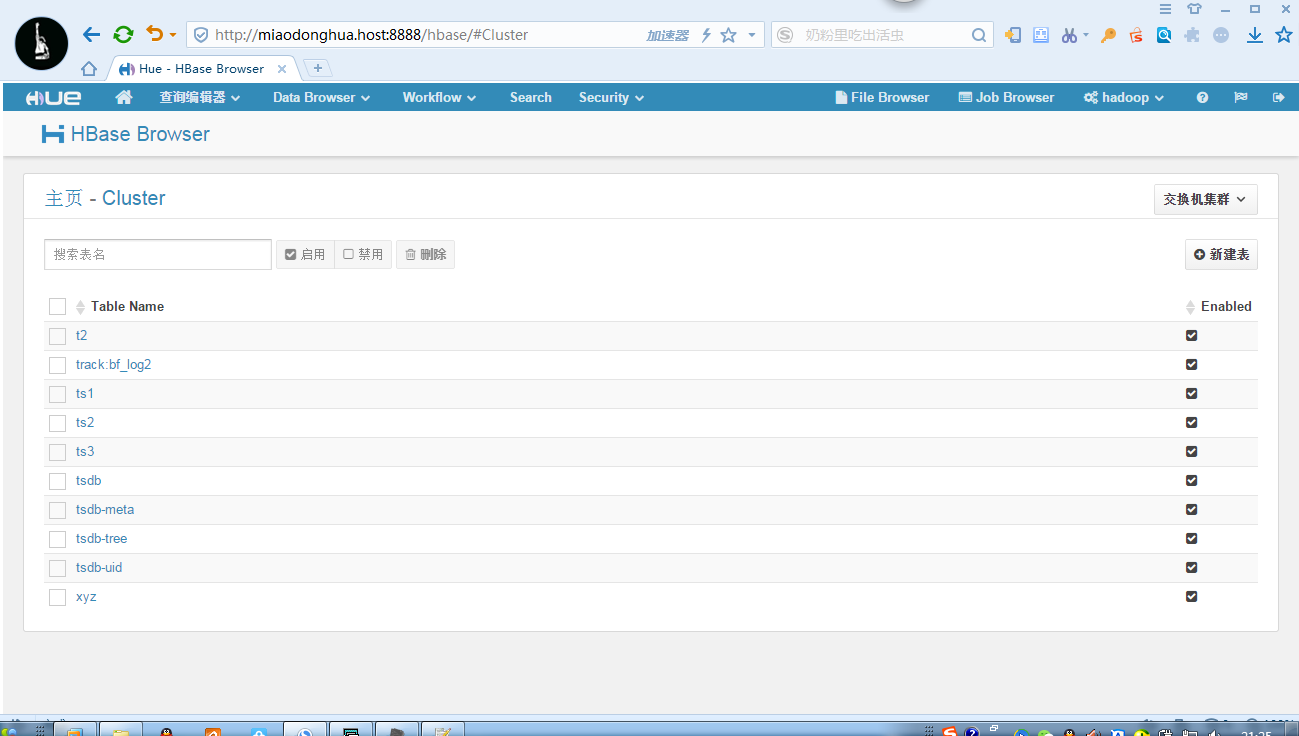
3,hue集成habase
配置hue.ini
[hbase]# Comma-separated list of HBase Thrift servers for clusters in the format of '(name|host:port)'.# Use full hostname with security.hbase_clusters=(Cluster|miaodonghua.host:9090)# HBase configuration directory, where hbase-site.xml is located.hbase_conf_dir=/opt/modules/hbase-0.98.6-hadoop2/conf/# Hard limit of rows or columns per row fetched before truncating.## truncate_limit = 500# 'buffered' is the default of the HBase Thrift Server and supports security.# 'framed' can be used to chunk up responses,# which is useful when used in conjunction with the nonblocking server in Thrift.## thrift_transport=buffered
启动thrift服务器
bin/hbase-daemon.sh start thrift
启动hue
build/env/bin/supervisor
在浏览器端输入
miaodonghua.host:8888