@yanglt7
2018-12-09T12:22:48.000000Z
字数 8082
阅读 1590
Pygame03_transform 模块
Pygame
3.1 显示模式
通过 display 模块的 set_mode() 方法来指定界面大小,并返回一个 Surface 对象。
set_mode() 方法:
set_mode(resolution = (0, 0), flags = 0, depth = 0) - > Surface
- 第一个参数 resolution 用于指定界面的大小。一般会指定一个具体的尺寸,默认是 (0, 0),Pygame 会根据当前的屏幕分辨率创建一个窗口。
- 第二个参数 flags 用于指定扩展选项。同时指定多个选项可以用管道操作符 (|) 隔开。
- 第三个参数 depth 用于指定颜色位数。一般这个值不推荐设置,因为 Pygame 会自动根据当前操作系统设置最合适的颜色位数。
3.2 设置全屏
开启全屏模式只需设置第二个参数为 FULLSCREEN 即可,同时可以加上硬件加速 HWSURFACE:
screen = pygame.display.set_mode((640, 480), FULLSCREEN | HWSURFACE)
还需添加一个快捷键使得全屏模式得到控制:
...fullscreen = False...# 全屏(F11)if event.key == K_F11:fullscreen = not fullscreenif fullscreen:screen = pygame.display.set_mode((1920, 1080), FULLSCREEN | HWSURFACE)else:screen = pygame.display.set_mode(size)...
为了确保可以正常关闭程序,使用 F11 作为切换全屏模式到窗口模式的快捷键,这里已知显示器的当前分辨率是 1920 * 1080 像素,所以设置全屏后的尺寸为显示器的尺寸。由于不同机器的显示器分辨率不完全相同,所以应获取当前显示器支持的分辨率。可以用 list_modes 方法实现:

3.3 使窗口尺寸可变
Pygame 的窗口默认是不可通过拖动边框来修改尺寸的。可以通过设置 RESIZABLE 选项实现窗口尺寸可变:
例 3
...# 用户调整窗口尺寸if event.type == VIDEORESIZE:size = event.sizewidth, height = sizeprint(size)screen = pygame.display.set_mode(size, RESIZABLE)...

开启了窗口尺寸可修改选项后,一旦用户调整窗口尺寸,Pygame 就会发送一条带有最新尺寸的 VIDEORESIZE 事件到事件序列中。程序随即做出响应,重新设置 width 和 height 的值并重建一个新尺寸的窗口。
3.4 图像的变换
Pygame 的 transform 模块可以对图像(即 Surface 对象)做各种变换动作,并返回变换后的 Surface 对象。

其实 transform 模块的这些方法都是像素转换,原理是通过使用一定的算法对图片进行像素位置修改。大多数方法在变换后难免会有一些精度的损失(flip() 方法不会),因此不建议对变换后的 Surface 对象进行再次变换。
在前面的例子中,就是采用 flip() 方法让小乌龟可以在撞墙后自动“掉头”。
例 4 实现小乌龟的缩放。
...# 设置放大缩小的比例ratio = 1.0oturtle = pygame.image.load("turtle.png")turtle = oturtleoturtle_rect = oturtle.get_rect()position = turtle_rect = oturtle_rect...# 放大、缩小小乌龟(=\-),空格键恢复原始尺寸if event.key == K_EQUALS or event.key == K_MINUS or event.key == K_SPACE:# 最大只能放大一倍,缩小50%if event.key == K_EQUALS and ratio < 2:ratio += 0.1if event.key == K_MINUS and ratio > 0.5:ratio -= 0.1if event.key == K_SPACE:ratio = 1.0turtle = pygame.transform.smoothscale(oturtle, \(int(oturtle_rect.width * ratio), \int(oturtle_rect.height * ratio)))# 相应修改龟头两个朝向的 Surface 对象,否则一单击移动就打回原形l_head = turtler_head = pygame.transform.flip(turtle, True, False)# 获得小乌龟缩放后的新尺寸turtle_rect = turtle.get_rect()position.width, position.height = turtle_rect.width, turtle_rect.height...
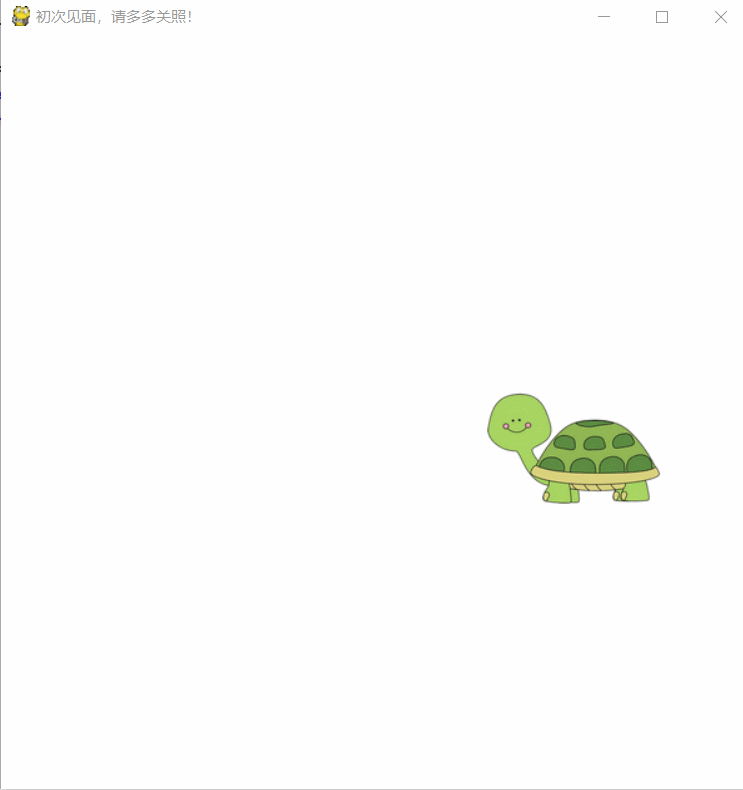
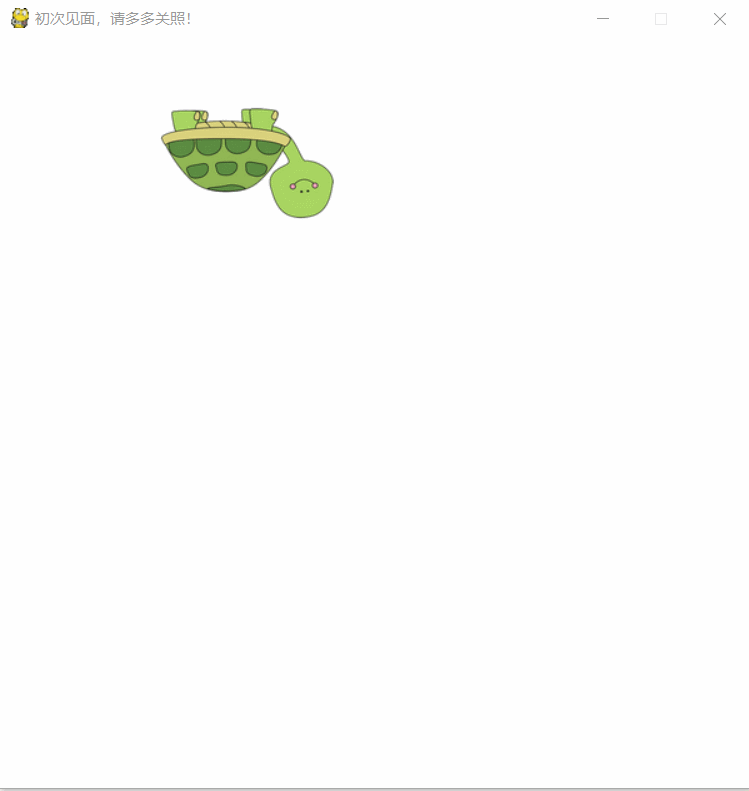
例 5 通过 rotate() 方法让小乌龟实现贴边行走。
rotate(Surface, angle) 方法的第二个参数 angle 指定旋转的角度,是按逆时针方向旋转的。
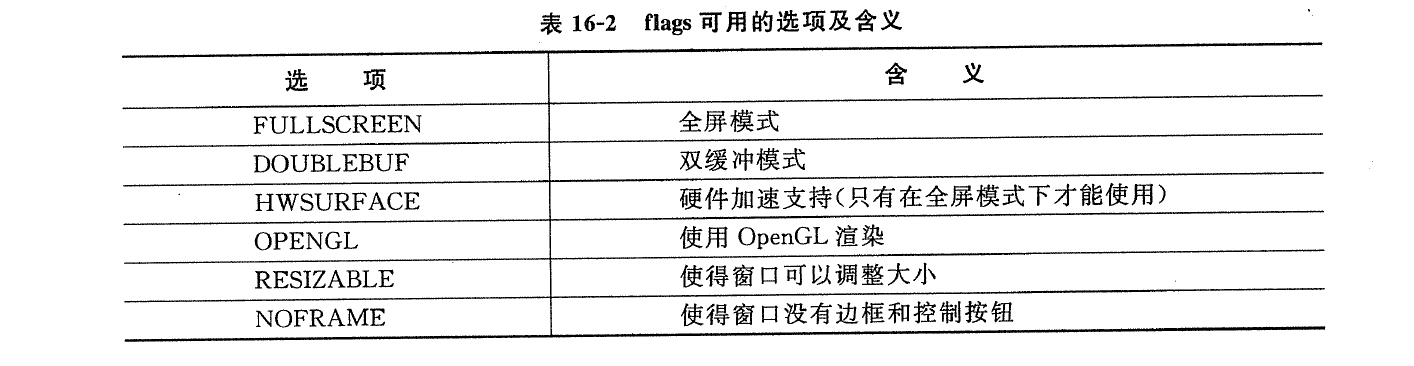
import pygameimport sysfrom pygame.locals import *pygame.init()size = width, height = 800, 800bg = (255, 255, 255)clock = pygame.time.Clock()screen = pygame.display.set_mode(size)pygame.display.set_caption("初次见面,请多多关照!")turtle = pygame.image.load("turtle.png")position = turtle_rect = turtle.get_rect()# 小乌龟顺时针行走speed = [5, 0]turtle_right = pygame.transform.rotate(turtle, 90)turtle_top = pygame.transform.rotate(turtle, 180)turtle_left = pygame.transform.rotate(turtle, 270)turtle_bottom = turtle# 刚开始走顶部turtle = turtle_topl_head = turtler_head = pygame.transform.flip(turtle, True, False)while True:for event in pygame.event.get():if event.type == pygame.QUIT:sys.exit()position = position.move(speed)if position.right > width:turtle = turtle_right# 变换后矩形的尺寸发生改变position = turtle_rect = turtle.get_rect()# 矩形尺寸的改变导致位置也有变化position.left = width - turtle_rect.widthspeed = [0, 5]if position.bottom > height:turtle = turtle_bottomposition = turtle_rect = turtle.get_rect()position.left = width - turtle_rect.widthposition.top = height - turtle_rect.heightspeed = [-5, 0]if position.left < 0:turtle = turtle_leftpositon = turtle_rect = turtle.get_rect()position.top = height - turtle_rect.heightspeed = [0, -5]if position.top < 0:turtle = turtle_topposition = turtle_rect = turtle.get_rect()speed = [5, 0]screen.fill(bg)screen.blit(turtle, position)pygame.display.flip()clock.tick(30)
3.5 裁剪图像
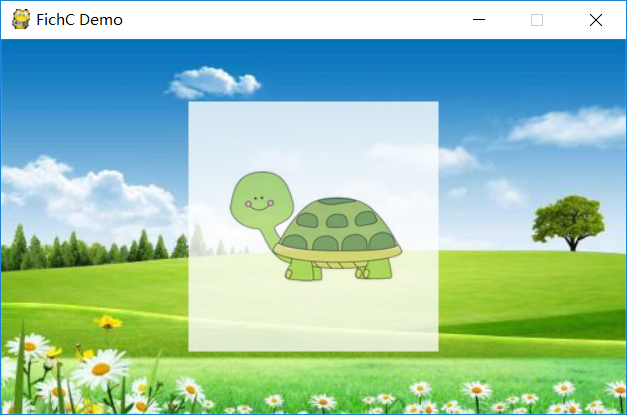
第一次拖动鼠标左键确定裁剪的范围,如下图所示:

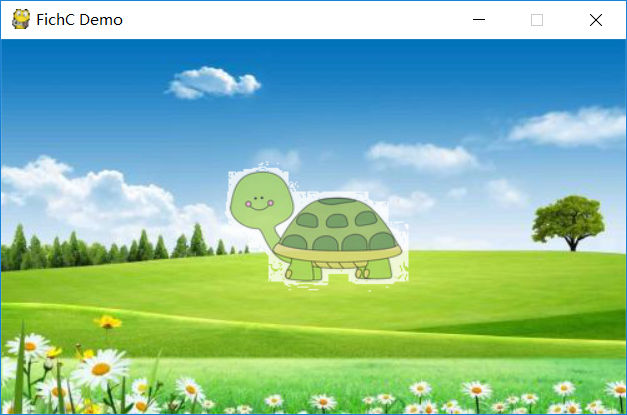
第二次拖动鼠标左键裁剪范围内的图像,如下图所示:
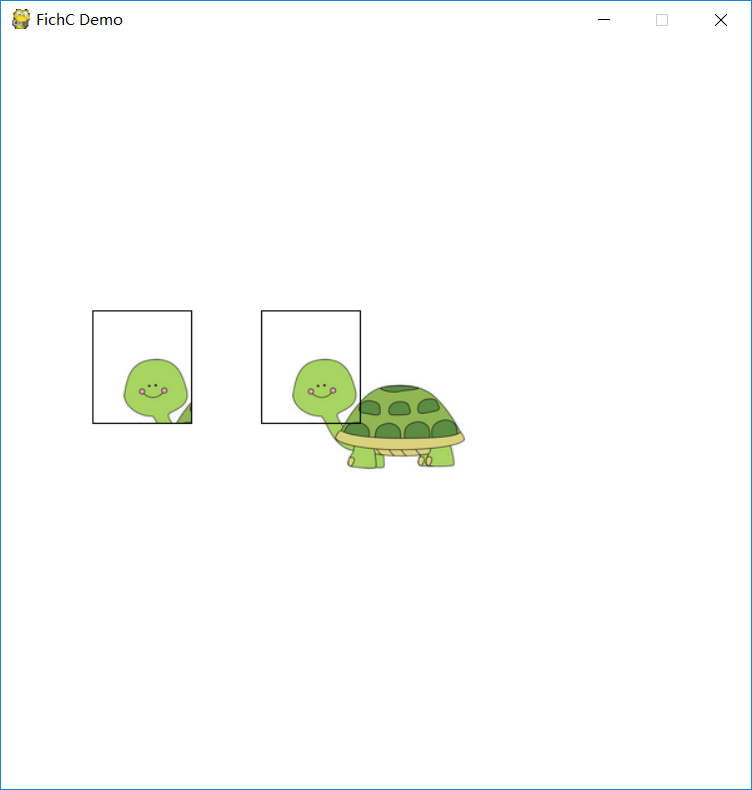
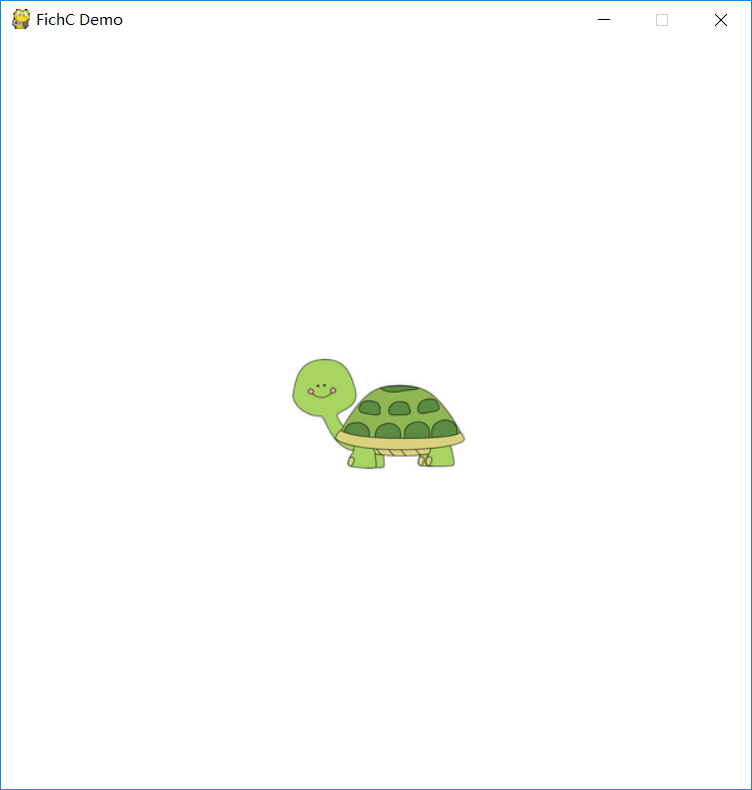
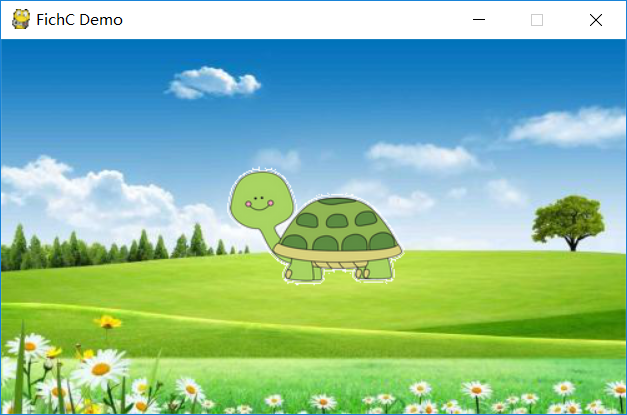
第三次单击则表示重新开始,如下图所示:
使用 draw.rect() 来绘制矩形:
rect(Surface, color, Rect, width = 0) -> Rect
- 第一个参数指定矩形将绘制在哪个 Surface 对象上;
- 第二个参数指定颜色;
- 第三个参数指定矩形的范围 (left, top, width, height);
- 第四个参数指定矩形边框的大小(0 表示填充矩形)
裁剪操作可以利用 subsurface() 方法来获得指定位置的子图像,然后 copy() 出来:
capture = screen.subsurface(select_rect).copy()
例 6
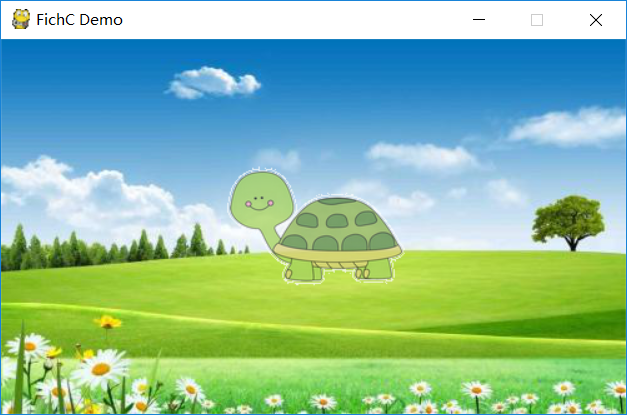
import pygameimport sysfrom pygame.locals import *pygame.init()size = width, height = 600, 600bg = (255, 255, 255)clock = pygame.time.Clock()screen = pygame.display.set_mode(size)pygame.display.set_caption("FichC Demo")turtle = pygame.image.load("turtle.png")# 0 -> 未选择,1 -> 选择中, 2 -> 完成选择select = 0select_rect = pygame.Rect(0, 0, 0, 0)# 0 -> 未拖拽,1 -> 拖拽中, 2 -> 完成拖拽drag = 0position = turtle.get_rect()position.center = width // 2, height // 2while True:for event in pygame.event.get():if event.type == pygame.QUIT:sys.exit()elif event.type == MOUSEBUTTONDOWN:if event.button == 1:# 第一次点击,选择范围if select == 0 and drag == 0:pos_start = event.posselect = 1# 第二次点击,拖拽图像elif select == 2 and drag == 0:capture = screen.subsurface(select_rect).copy()cap_rect = capture.get_rect()drag = 1# 第三次点击,初始化elif select == 2 and drag == 2:select = 0drag = 0elif event.type == MOUSEBUTTONUP:if event.button == 1:# 第一次释放,结束选择if select == 1 and drag == 0:pos_stop = event.posselect = 2# 第二次释放,结束拖拽if select == 2 and drag == 1:drag = 2screen.fill(bg)screen.blit(turtle, position)# 实时绘制选择框if select:mouse_pos = pygame.mouse.get_pos()if select == 1:pos_stop = mouse_posselect_rect.left, select_rect.top = pos_startselect_rect.width, select_rect.height = pos_stop[0] - pos_start[0], pos_stop[1] - pos_start[1]pygame.draw.rect(screen, (0, 0, 0), select_rect, 1)# 拖拽裁剪的图像if drag:if drag == 1:cap_rect.center = mouse_posscreen.blit(capture, cap_rect)pygame.display.flip()clock.tick(30)
3.6 转换图片
图像是特定像素的组合,而 Surface 对象是 Pygame 对图像的描述。
image.load() 载入图片后将返回一个 Surface 对象,如果直接用,没有对其进行转换,效率相对较低。如果希望 Pygame 尽可能高效地处理图片,那么应该在载入图片后调用 convert() 方法进行转换:
background = pygame.image.load("background.jpg").convert()
这里转换的是“像素格式”,image.load() 返回的 Surface 对象中保留了原图像的像素格式。在调用 blit() 方法的时候,如果两个 Surface 对象的像素格式不同,那么 Pygame 会实时地进行转换,这是相当费时的操作。
一般情况下用 RGB 来描述一个颜色,而在游戏开发中常常用 RGBA 来描述。这个 A 是指 Alpha 通道,用于表示透明度,它的值也是 0~255,0 表示完全透明,255 表示完全不透明。 image.load() 支持多种格式的图片导入,对于包含 alpha 通道的图片,使用 convert_alpha() 转换格式,否则使用 convert():
turtle = pygame.image.load("turtle.png").convert_alpha()
3.7 透明度分析
Pygame 支持三种类型的透明度设置:colorkeys, surface alphas 和 pixel alphas。
- 设置 colorkeys 是指定一种颜色,使其变为透明。
- surface alphas 是整体设置一个图片的透明度。
- pixel alphas 是为每个像素增加一个 alpha 通道,也就是允许设置每个像素的透明度。
colorkeys 和 surface alphas 可以混合使用,而 pixel alphas 不能和其他类型混合。
简单来说,由 convert() 方法转换来的 Surface 对象支持 colorkeys 和 surface alphas 设置透明度并且可以混合设置。而 convert_alpha() 方法转换后是支持 pixel alphas,也就是这个图片本身每个像素都带有 alpha 通道(所以载入一个带 alpha 通道的 png 图片,可以看到该图片部分位置是透明的)。
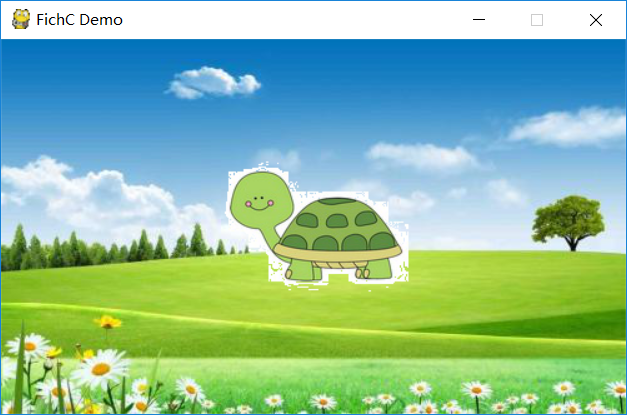
例 7-1 载入 turtle.jpg,使用 set_colorkeys()方法视图将白色的背景透明化。
import pygameimport sysfrom pygame.locals import *pygame.init()size = width, height = 500, 300bg = (255, 255, 255)clock = pygame.time.Clock()screen = pygame.display.set_mode(size)pygame.display.set_caption("FichC Demo")turtle = pygame.image.load("turtle.jpg").convert()background = pygame.image.load("background.jpg").convert()position = turtle.get_rect()position.center = width // 2, height // 2turtle.set_colorkey((255, 255, 255))while True:for event in pygame.event.get():if event.type == pygame.QUIT:sys.exit()screen.blit(background, (0, 0))screen.blit(turtle, position)pygame.display.flip()clock.tick(30)
例 7-2 使用 set_alpha() 方法调节整个图片的透明度。
...turtle.set_alpha(200)...
例 7-3 set_colorkey() 和 set_alpha() 混合使用。
...turtle.set_colorkey((255, 255, 255))turtle.set_alpha(200)...
例 7-4 turtle1.png 是带有 alpha 通道的,并且背景被设置成透明,可直接载入
...turtle = pygame.image.load("turtle1.png").convert_alpha()...
如果希望调整小乌龟自身的透明度,可以用 get_at() 获取单个像素的颜色,并用 set_at() 来修改。get_at() 和 set_at() 使用的是 RGBA 颜色,也就是带 Alpha 通道的 RGB 颜色:
例 7-5
...print(turtle.get_at(position.center))...
例 7-6 逐个像素修改透明度,将整个小乌龟的透明度调整为 200。
...for i in range(position.width):for j in range(position.height):temp = turtle.get_at((i, j))if temp[3] != 0:temp[3] = 200turtle.set_at((i, j), temp)...
例 7-7
1)首先创造一个不带 alpha 通道的小乌龟;
2)然后将小乌龟所在位置的背景覆盖上去;
3)此刻 temp 得到的是一个跟小乌龟尺寸一样大小、上边绘制着背景的 Surface 对象;
4)将带 alpha 通道的小乌龟覆盖上去;
5)由于 temp 是不带 alpha 通道的 Surface 对象,因此使用 set_alpha() 方法设置整个图片的透明度;
6)最后将设置好透明度的 temp “贴” 到指定位置上,完成任务。
import pygameimport sysfrom pygame.locals import *pygame.init()size = width, height = 500, 300bg = (255, 255, 255)clock = pygame.time.Clock()screen = pygame.display.set_mode(size)pygame.display.set_caption("FichC Demo")turtle = pygame.image.load("turtle1.png").convert_alpha()background = pygame.image.load("background.jpg").convert()position = turtle.get_rect()position.center = width // 2, height // 2def blit_alpha(target, source, location, opacity):x = location[0]y = location[1]temp = pygame.Surface((source.get_width(), source.get_height())).convert()temp.blit(target, (-x, -y))temp.blit(source, (0 ,0))temp.set_alpha(opacity)target.blit(temp, location)while True:for event in pygame.event.get():if event.type == pygame.QUIT:sys.exit()screen.blit(background, (0, 0))blit_alpha(screen, turtle, position, 200)pygame.display.flip()clock.tick(30)

摘自《零基础入门学习Python》
