@yanglt7
2019-01-02T06:05:37.000000Z
字数 3451
阅读 898
部署 nodejs 服务至 vCenter 集群并实现端口转发及隐藏端口
网管
虚拟机安装
由于集群需内网登录,为了方便起见,先在本机安装虚拟机测试功能,之后再部署至集群。
参考文章:
在 VMware Workstation Pro 上安装虚拟机 CentOS 7.X
CentOS 7.x 系统安装后的基本配置及调优
安装 nodejs
安装 nodejs 至 /Software/
cd /Software/wget https://nodejs.org/dist/v9.9.0/node-v9.9.0-linux-x64.tar.xztar -xvf node-v9.9.0-linux-x64.tar.xzmv node-v9.9.0-linux-x64 nodejsln -s /Software/nodejs/bin/node /usr/local/bin/ln -s /Software/nodejs/bin/npm /usr/local/bin/
将项目文件放至 /Data/HopeLibrarySystem-master/ 目录下
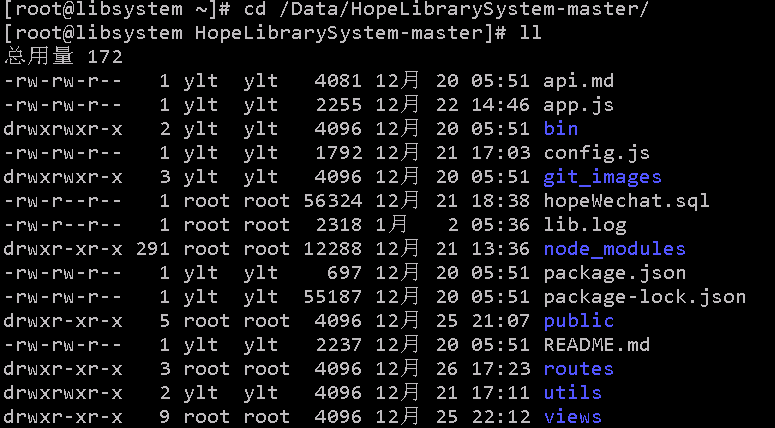
若该项目文件之前在 Windows 下运行过 npm install 命令,需将 node_modules 文件夹删除。
进入项目文件所在目录,cd /Data/HopeLibrarySystem-master/
运行 npm install,安装依赖包。
安装 mysql
顺便记录上传本机文件至虚拟机的方法:
法一:
filezalla 客户端,选择 SFTP 协议
ip 用户名 密码 端口
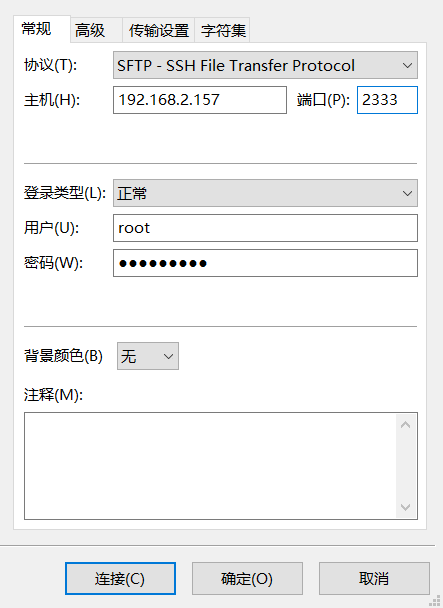
root 用户登录及端口设置可在 /etc/ssh/sshd_config 文件中修改,具体参见参考文章 CentOS 7.x 系统安装后的基本配置及调优
法二:
sftp
打开命令行,直接输入 sftp -o port=2333 ylt@192.168.2.156
通过 filezalla 将 mysql 安装包放至 /Software/ 目录下
groupadd mysqluseradd -s /sbin/nologin -g mysql -M mysqltar -xvf mysql-5.5.62-linux-glibc2.12-x86_64.tar.gzmv mysql-5.5.62-linux-glibc2.12-x86_64 mysqlll support-files/*.cnf/bin/cp support-files/my-small.cnf /etc/my.cnfmkdir /Data/mysql_data/Software/mysql/scripts/mysql_install_db --basedir=/Software/mysql --datadir=/Software/mysql/data --user=mysqlcp support-files/mysql.server /etc/init.d/mysqldchmod +x /etc/init.d/mysqldsed -i 's#/usr/local/mysql#/Software/mysql#g' /Software/mysql/bin/mysqld_safe /etc/init.d/mysqld/etc/init.d/mysqld startnetstat -lntup|grep mysqlchkconfig --add mysqldchkconfig mysqld onecho 'export PATH=/Software/mysql/bin:$PATH' >>/etc/profilesource /etc/profileecho $PATHmysqladmin -u root password '***'
具体查看参考文章 MySQL 的安装与配置
导入数据库文件
source /Data/HopeLibrarySystem-master/hopeWechat.sql
数据库文件可能乱码解决:
vim /etc/locale.conf,改中文编码LANG="zh_CN.UTF-8"vim /etc/my.cnf ,设置mysql服务器端的编码character_set_server= utf8
将本机 vmx 上传到集群
先将 vmx 文件转换成 ovf:
cd C:\Program Files (x86)\VMware\VMware Workstation\OVFToolovftool D:\HopeLibrarySystem\HopeLibrarySystem.vmx D:\HopeLibrarySystem.ovf
VCenter 部署 ovf 模板即可。
端口转发
先设置网络,将网关设置成端口转发机的内网IP
cd /etc/sysconfig/network-scripts/cp ifcfg-lo ifcfg-lo.bakmv ifcfg-lo ifcfg-ens33vim ifcfg-ens33DEVICE=ens33IPADDR=10.99.1.6GATEWAY=端口转发机的内网IPBOOTPROTO=staticNETMASK=255.255.255.0TYPE=EthernetNM_CONTROLLED=yesIPV6INIT=no#NETWORK=127.0.0.0# If you're having problems with gated making 127.0.0.0/8 a martian,# you can change this to something else (255.255.255.255, for example)#BROADCAST=127.255.255.255ONBOOT=yes#NAME=loopbackPROXY_METHOD=noneBROWSER_ONLY=noPREFIX=24DEFROUTE=yesIPV4_FAILURE_FATAL=noNAME="System ens33"UUID=c96bc909-188e-ec64-3a96-6a90982b08adZONE=trusted
在端口转发机添加防火墙规则:
vim /etc/sysconfig/iptablesiptables -t nat -A PREROUTING -d 公网IP/32 -p tcp -m tcp --dport 3000 -j DNAT --to-destination 10.99.1.6:3000service iptables saveservice iptables reload
IP+端口隐藏
新建一台 Linux 主机,配置 Nginx,实现基于 location 的转发。
Nginx 安装参考文章 Nginx 安装与虚拟主机配置
修改端口转发机的防火墙规则:
iptables -t nat -A PREROUTING -d 外网IP/32 -p tcp -m tcp --dport 80 -j DNAT --to-destination Nginx主机IP:80
修改 Nginx 配置文件:
#user nobody;#2018.12.22worker_processes 1;events {worker_connections 1024;}http {include mime.types;default_type application/octet-stream;sendfile on;keepalive_timeout 65;log_format main '$remote_addr - $remote_user [$time_local] ': '"$request" $status $body_bytes_sent ': '"$http_referer" "$http_user_agent" "$http_x_forwarded_for"';server {listen 80;access_log logs/access.log;server_name 202.116.83.77;location / {proxy_pass http://10.99.1.13;}location /hopelibrary/ {rewrite ^/hopelibrary/(.*)$ /$1 break;proxy_pass http://10.99.1.6:3000/;}}}
使用 pm2 使 nodejs 后台永久运行
npm install -g pm2pm2 start bin/www --name hopelibrarypm2 savepm2 startup
参考文章 PM2来部署nodejs服务器永久开启
